
Category Archives: Photography
Everything photo-related from my point of view.
Photohraphy is my cup of tea
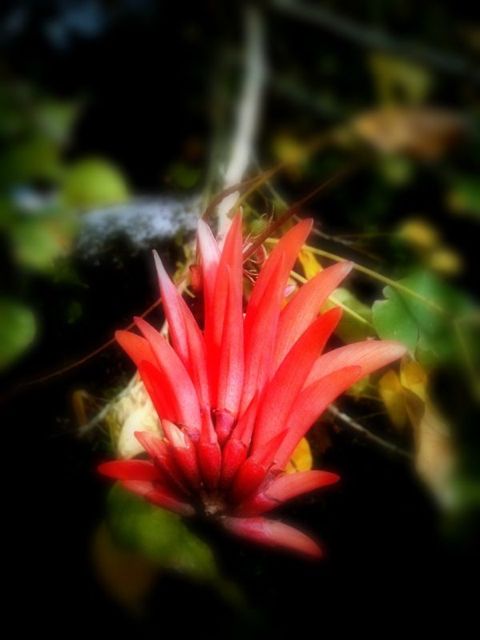
Simply Red
Amateur vs. Professional
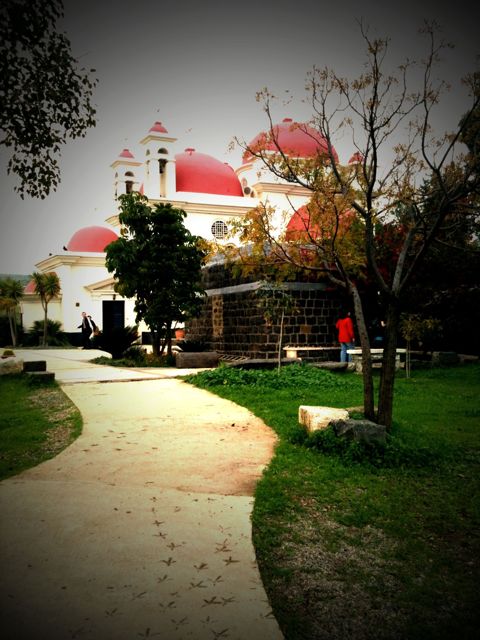
Greek Church and Being Creative
I think that one of the most important aspects of photography is about joy of creation, expressing yourself and enjoying every minute of it. I always try to be creative, and though I don’t always get the desired results from my experiments I just continue trying. For me there is no other way. I try to put my heart and soul into my work mixed with feeling and emotions.
Today I’d like to share with you one of my attempts at creativity. It was a nice autumn weekend in Israel when me and Ira went to the Upper Galilee region to do a walking track near the Sea of Galilee. On our way back we stopped to visit the Greek Church of the 12 Apostles. This church always attracted me when I was driving by with its’ red roofs but I never had the chance to actually get inside.
This time we had about an hour, so we decided to finally give this church a closer look. I was so tired from our trip that I left my Canon DSLR in the car. I just didn’t have any mental mood for photography. But the closer we got to the church the stronger grew my desire to photograph it. Eventually I decided to photograph it with my iPhone.
This Greek church is very beautiful and is also located in a beautiful place. When we returned to our car I was surprised to find out that I took about fifty photographs of the church and its surroundings from variety of different sides and angles.
Another important aspect of photography (again, in my opinion) is to know how to choose your best photos, and to be brave enough to delete most of the rest. Otherwise you’ll end up with tons of photographs, which are very similar to each other (a tiny difference in a crop here, and in viewing angle there).
Thus on our way back (Ira drove the car) I went over all the photos of the Greek church that I took and deleted about 90% leaving only the ones I though were most successful. After that I started thinking – what would be the best way to present these photos in a way that would show the Greek Church of the 12 Apostles in all its beauty and also reveal some of the architectural details.
Eventually I decided to create a photo-collage of all the best photos. During the following months I was busy with other projects (including trip to Prague) and only recently got the time to put the idea of a photo-collage to test. It took me quite some time to do that as I had to change sizes, crops and other things in order to create what I had in mind.
Here is the collage of the Greek Church of the 12 Apostles. Remember that all the photos here were taken with my iPhone, and don’t judge the quality too harsh 🙂
And as always feel free to leave comments!
Cheers,
Greg.
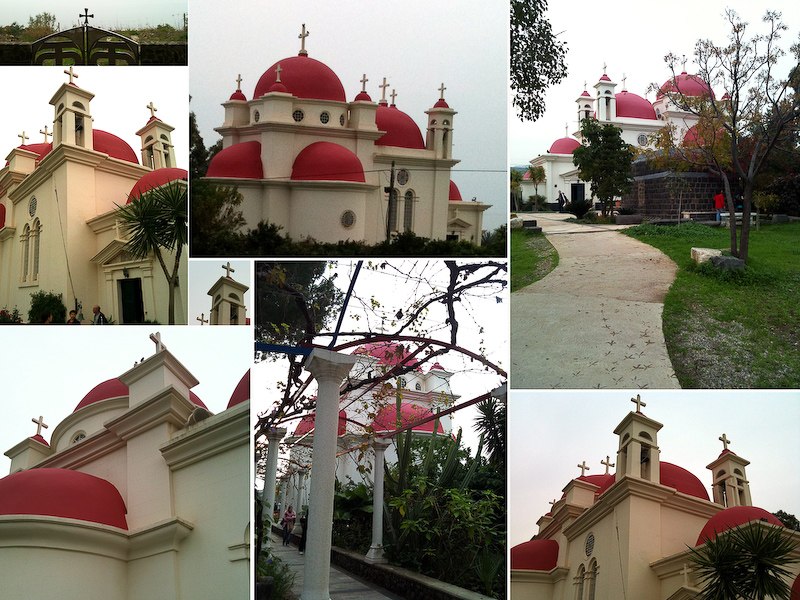
Greek Church of the 12 Apostles. Photograph by Greg Brave. Click on the photo to enlarge.
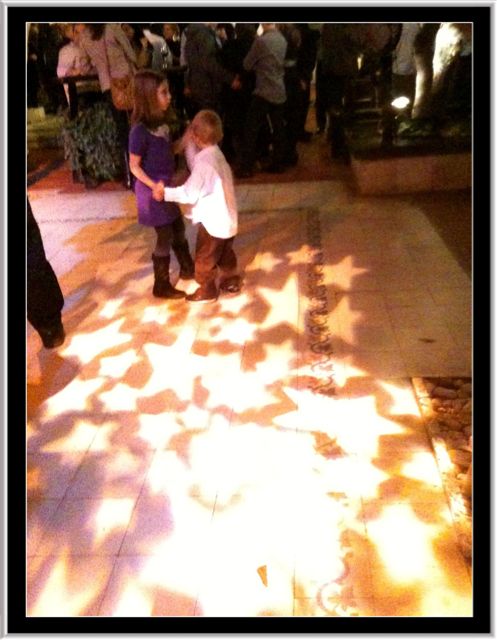
Dancing Kids
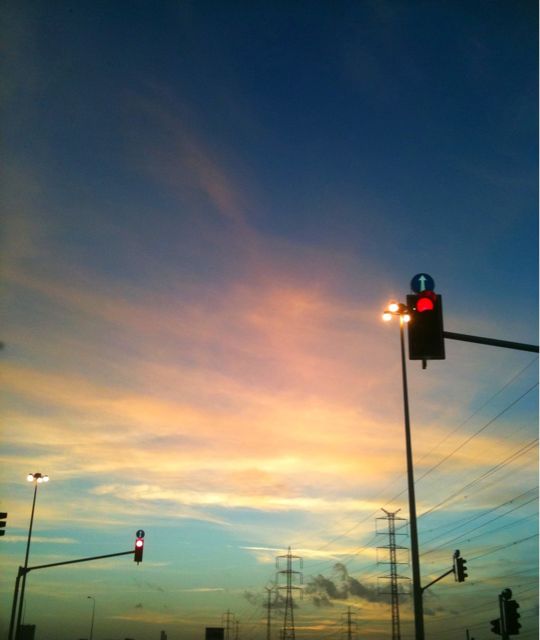
Today’s Sunset
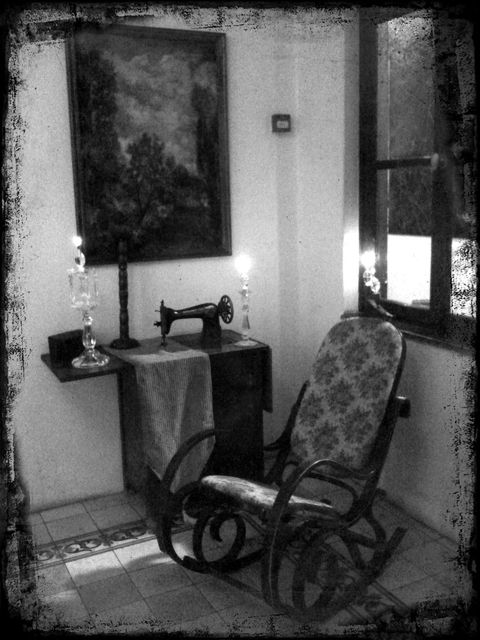
Old Style
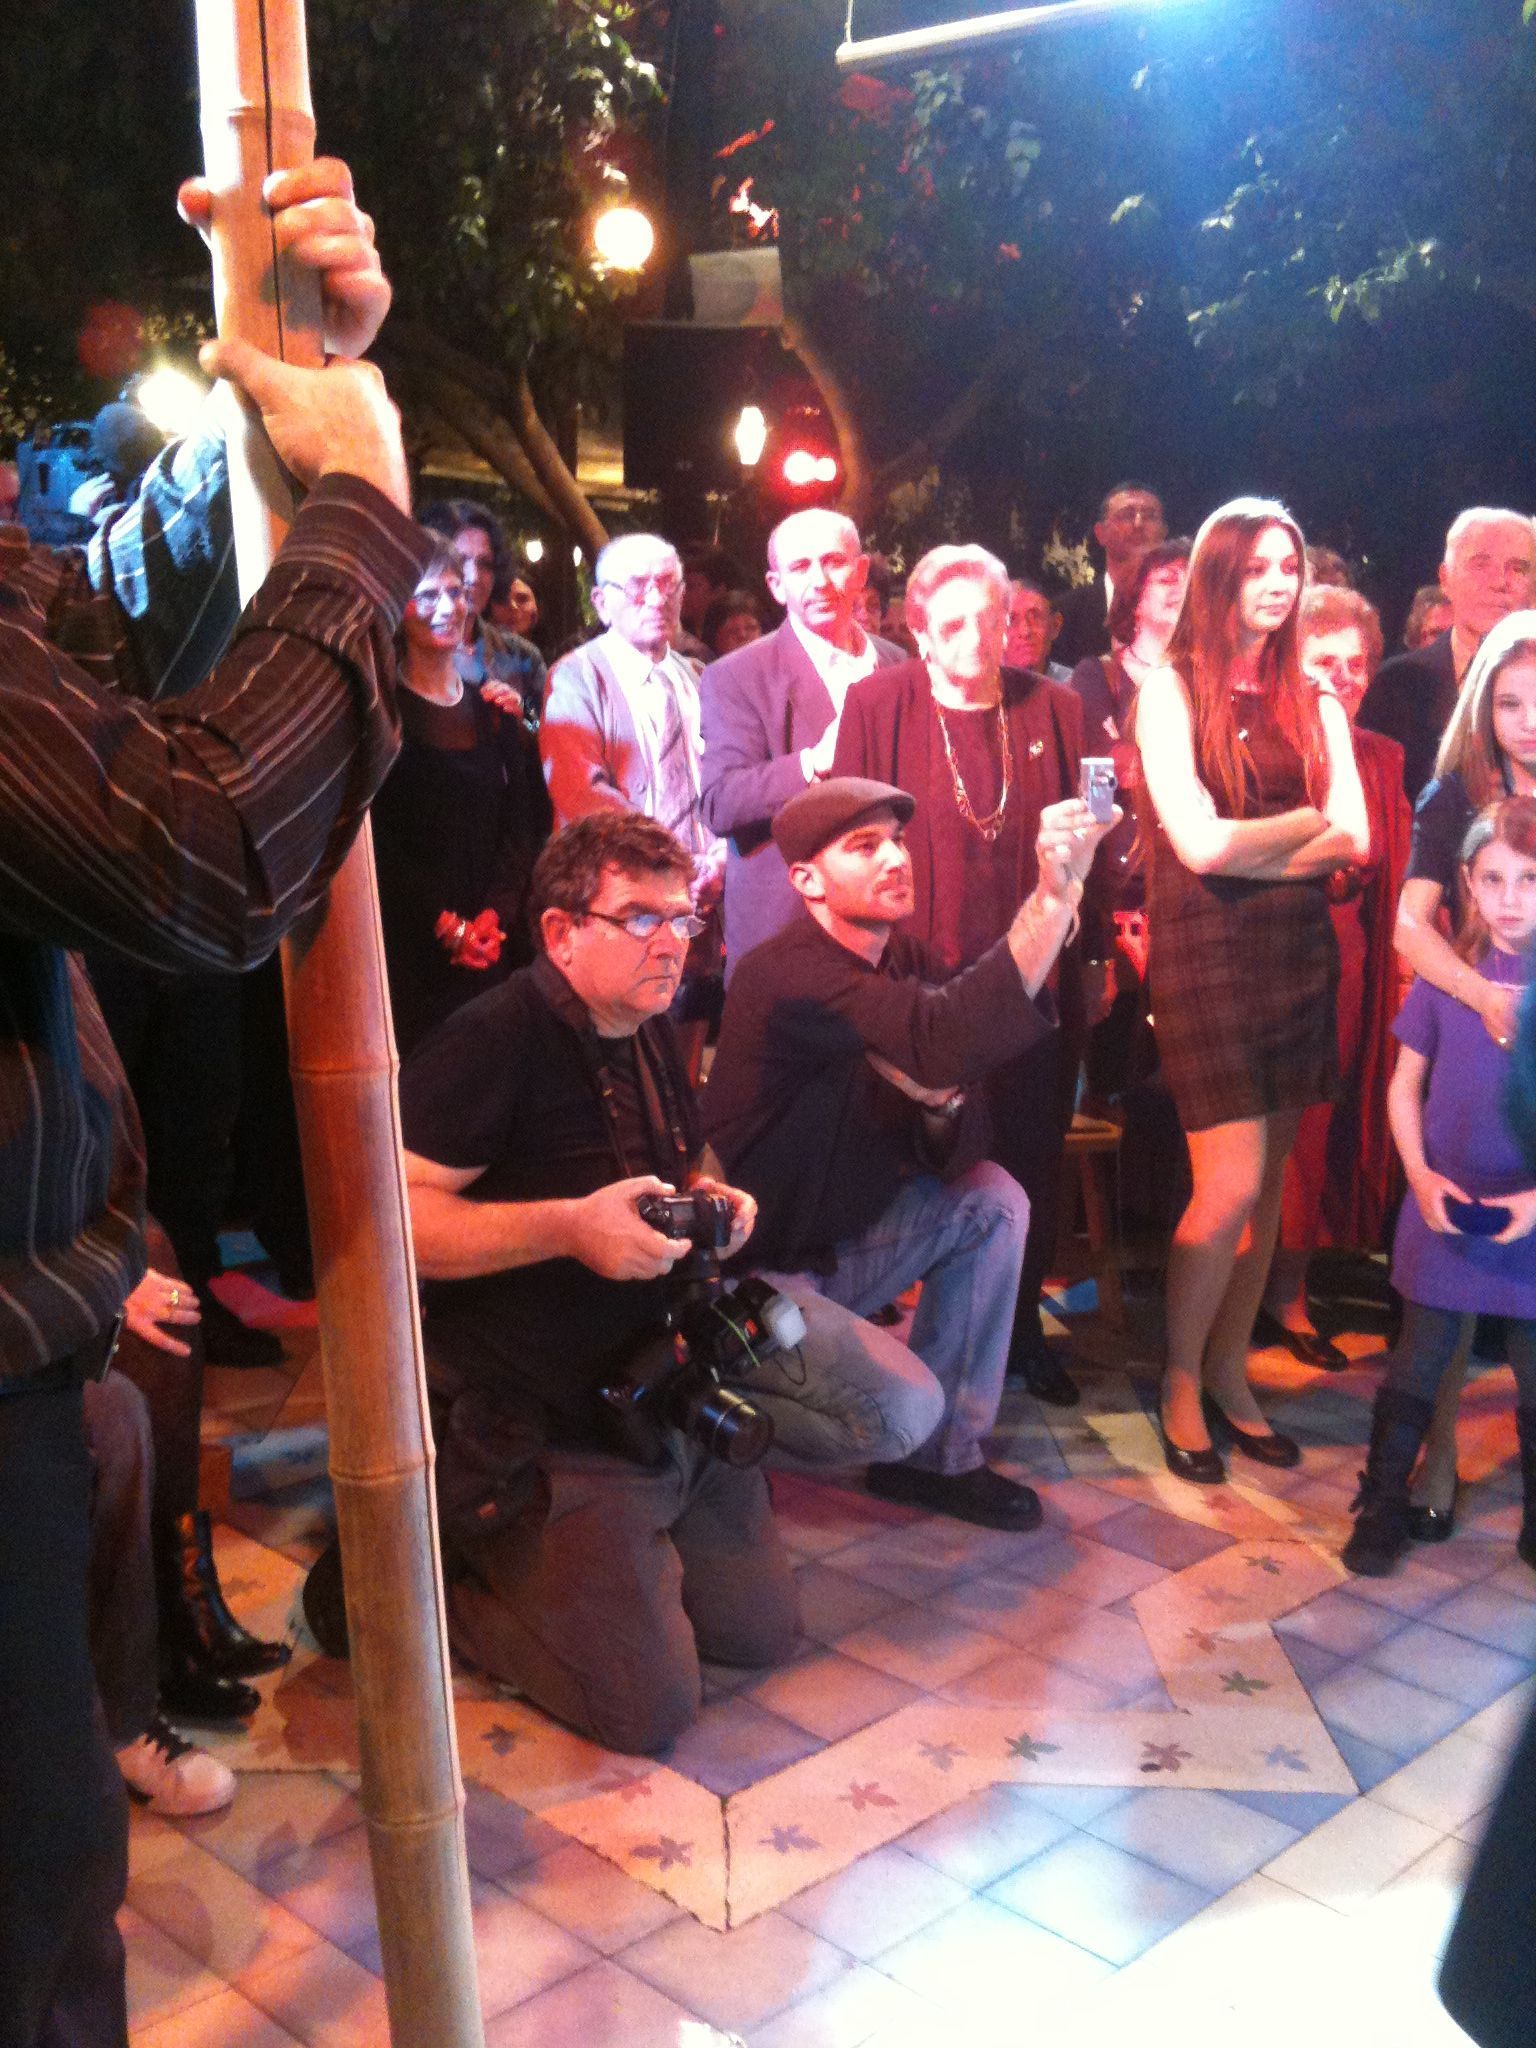
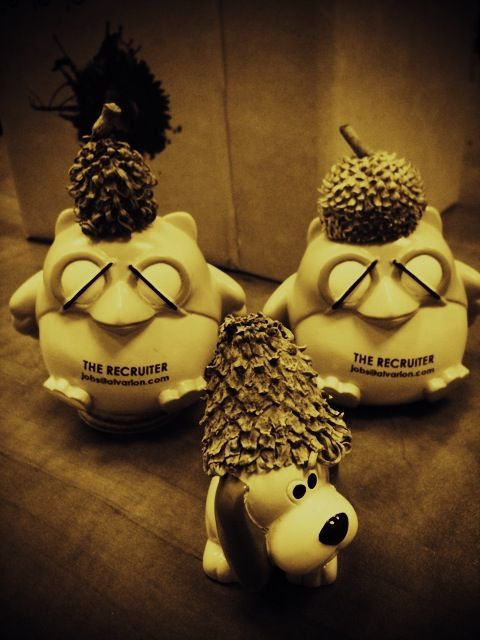
The Recruiter
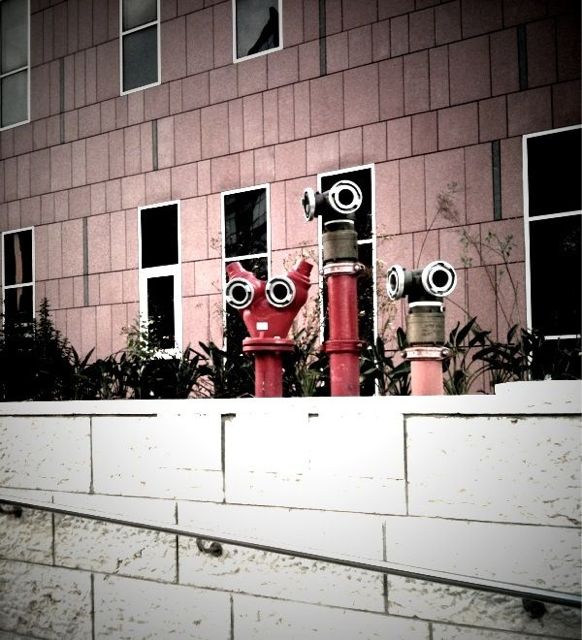
Aliens Are Here!
Shooting Panoramas with iPhone
At first this thought might sound crazy to you as it sure sounded to me, but then I thought that I could at least try to do that. Since my iPhone is always with me and my camera isn’t (due to circumstances beyond my control of course! ) it had already been more than a few occasions on which I really wanted to make a panoramic image but couldn’t.
So I decided to see if there are any apps for iPhone that can help me create panoramas. During my research I found several applications that were created for this purpose. But after trying to use them I found out that most applications don’t do a good enough job – either the whole process was too time-consuming and difficult or the result wasn’t satisfying. And then I found application named AutoStitch.
First of all I want to say that I am not affiliated with makers of this application in anyway, and I don’t receive any benefits if you decide to buy this application after reading this article. I am writing this only because I loved this app and want more people to enjoy it.
AutoStitch really did the job so well that I was truly amazed at the results! And the process is also very simple. All you need to do is to take photos for panorama with your usual iPhone camera application. Just make sure that each photo overlaps with the next one at about 30 percent. Then you open the AutoStitch application, simply choose the photos that you want to create panorama from, and let the application to do all the work.
After AutoStitch finished, you will see the final image and also will be able to crop it as you wish. Then you can save it to your photos. There are several great things about AutoStitch that I liked very much:
1. The panorama creation process is pretty fast and simple.
2. The result is very impressive – photos are stitched perfectly together, and if you made each shot correctly, the final result is just great!
3. The final panorama can be saved at the maximal resolution of the iPhone, what I mean is take for example 5 photos with your iPhone, stitch them together in AutoStitch, and the final resolution that you’ll get will be 5 times bigger than single photo resolution.
4.You don’t have to use tripod or to be extreeemely careful! Just try to maintain the initial angle of shooting, and make sure that your photos overlap with each other. AutoStitch will do the rest.
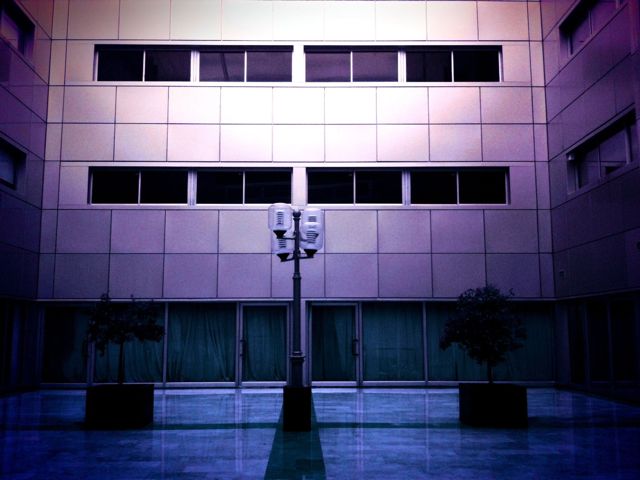
I’d like to show you two of the panoramas that I created using AutoStitch. Please note that I reduced the resolution of these images in order to fit them here.

High Tech District in Tel Aviv. Photograph by Greg Brave. Click on the photo to enlarge.

Alonei Itzhak Nature Reserve. Photograph by Greg Brave. Click on the photo to enlarge.
And now here is what welcome screen of AutoStitch looks like, when you open the app in the iPhone:
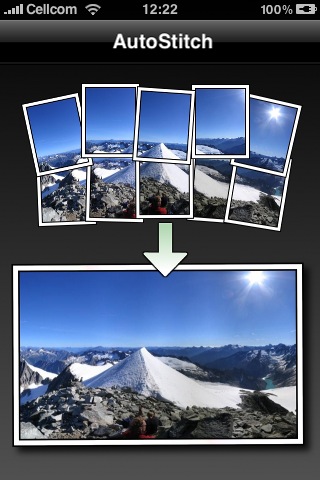
In conclusion – AutoStitch is a great application for creating panoramas in your iPhone. It is cheap, simple to use, and delivers great results.
If this article was helpful to you, or you have additional thoughts on creating panoramic photos in iPhone, you are welcome to leave comments to this article or drop me an email to greg at photopathway dot com.
Nature Photography
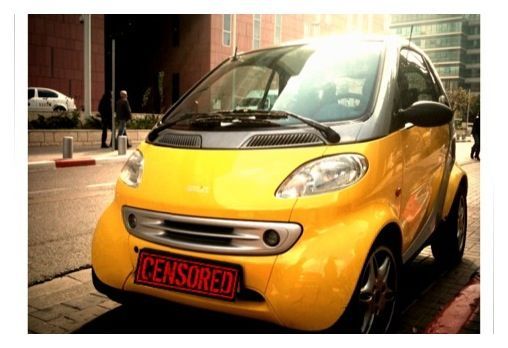
Smart
Almost Abstract

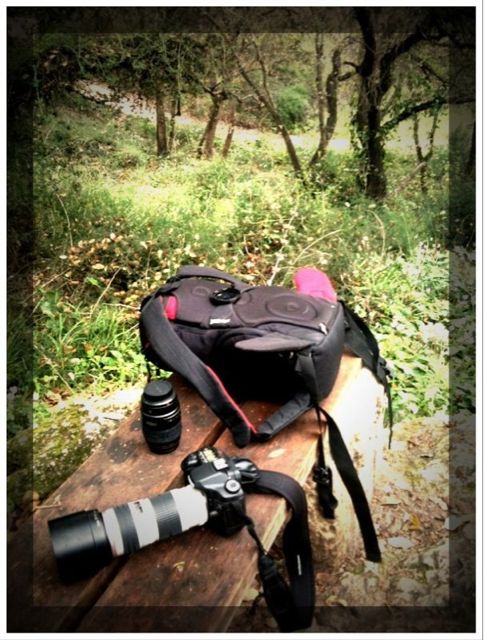
Canon 70-200 f4 L short review and more experiences
My friend had a trip to the US, and I used this opportunity to get me this great Canon lens, which I have been dreaming about for quite some time!
As you might have already guessed this is a Canon 70-200 f4 L-series lens. This is the cheapest one from this line of Canon lenses, f4, without image stabilizer. I bought it at B&H for about 630USD and had it shipped to the address my friend was staying at.
The telephoto lens I used before was Canon 75-300 f4-5.6 III USM, given to me as a present. I have enjoyed that lens for about two years, but eventually its lack of sharpness and overall image quality comparing to my other lenses started to bother me a great deal. After doing a little research, I came up with this Canon 70-200 f4 L lens. After reading tons of reviews and watching photos made with this lens I was convinced that it had very good sharpness and image quality, and though I was loosing a 200 to 300 mm range compared to my old lens, I decided to go for it.
There are also much more expensive variations of this lens – f4 with image stabilizer, which goes at B&H at about 1200USD (!!!) and there is also Canon 70-200 f2.8 IS L (1800USD). All these models are far beyond my financial capability, but I have to say that even if I could afford them, I am not sure at all that I would buy them.
This is something that has to be explained. When you look for a lens, first of all you ask yourself what are you going to shoot with it? In my case it is landscapes, portraits, and studio photography.
- When I shoot landscapes I mostly use a tripod anyway, so I don’t need that additional f-stop for quicker shutter speeds. In addition when shooting landscapes smaller apertures are used anyway.
- When I shoot portraits and studio, I either do it in daylight, which is bright enough for f4, or I use flashes, and their power and position can also be adjusted for working with f4 and smaller apertures.
- The more expensive Canon 70-200 models have also one disadvantage – weight: the f2.8 IS model weights about one 1.5 kilos (!) and the f4 IS model weights 760 gr, while f4 without image stabilizer (the one that I bought) weights 700 gr. The weight is very important when you are hiking with your photo gear, and also when you are holding camera in your hand for a long time.
As you can see currently I have no real need for the more expensive models, but what is important that Canon 70-200 f4 L – is an L-series lens, which means that it has L-series optical components, and the image quality it produces is the same (if not better due to its simpler build) as its more expensive modifications.
You might ask “but who does need those expensive models?”. Well I can think of a few reasons – for example birds photographers really need that lens-speed, or indoor sports photographers – there are many occasions in which they can’t use flashes, but have to shoot quickly moving subjects.
Enough about my choices. What about the lens itself? I will not write a full review here, at least not just yet, but I will share my first impression with you.
I am very happy with it. The build quality is superb, the lens sits good in my hand and the focus ring is very comfortable. The image quality is top-notch. The sharpness is the best I had so far, and the colors are stunning. This lens looks heavier and bulkier than it actually is, and it comes with its own original lens hood. The focusing process is almost silent and pretty quick. One disadvantage of this lens is that its filter size is 67mm and not 77mm like most of the L-series lenses, so I will have to buy an additional polarizing filter for it.
Enough words for this post, here are a couple of photos I made using the Canon 70-200 f4 L lens, and as always comments and critiques are welcome!
Ahula Reserve . Photograph by Greg Brave. Click on the photo to enlarge.
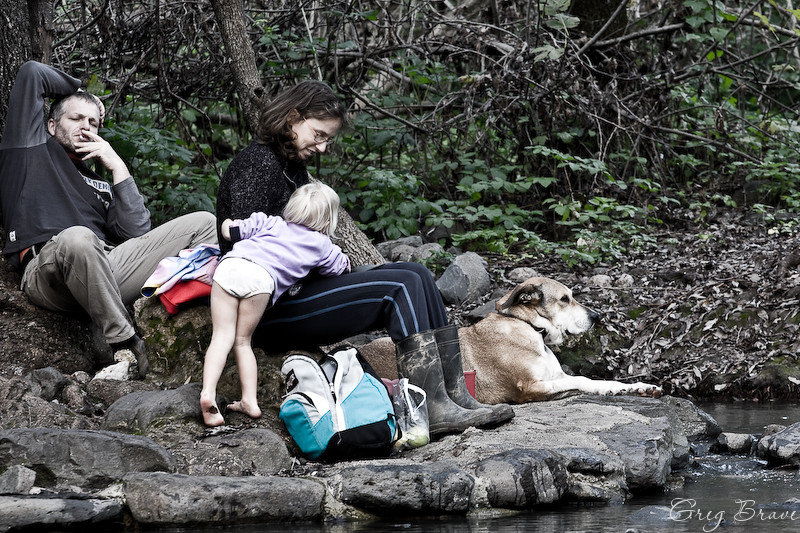
Family Vacation. Photograph by Greg Brave. Click on the photo to enlarge.

Watch Your Step… Photograph by Greg Brave. Click on the photo to enlarge.
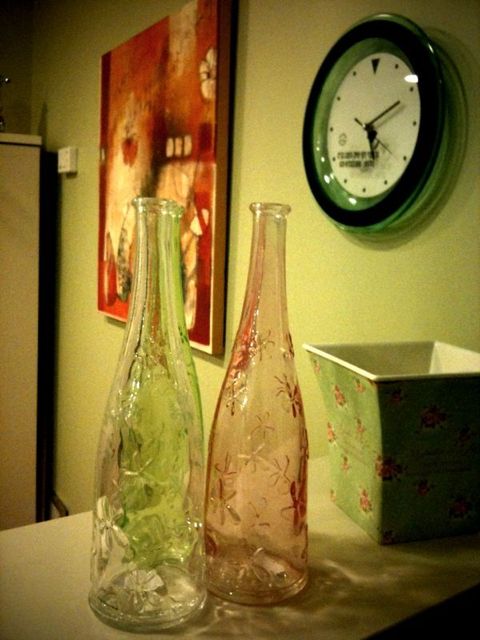
Simple Colors
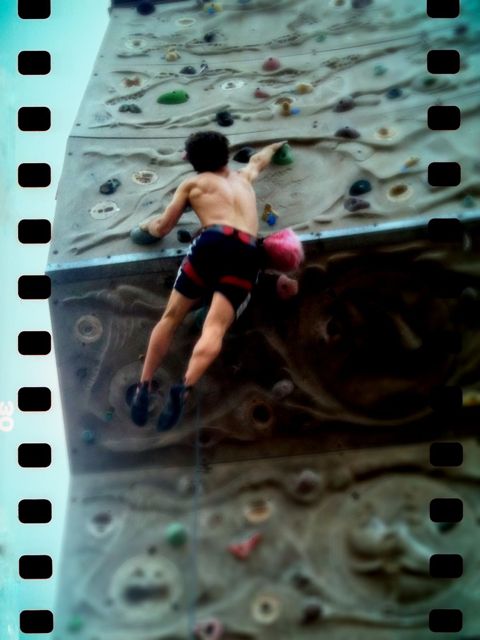
Difficult Move

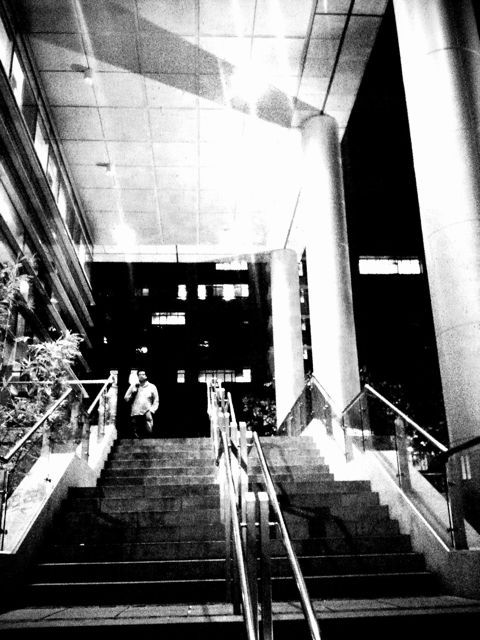
UpStairs
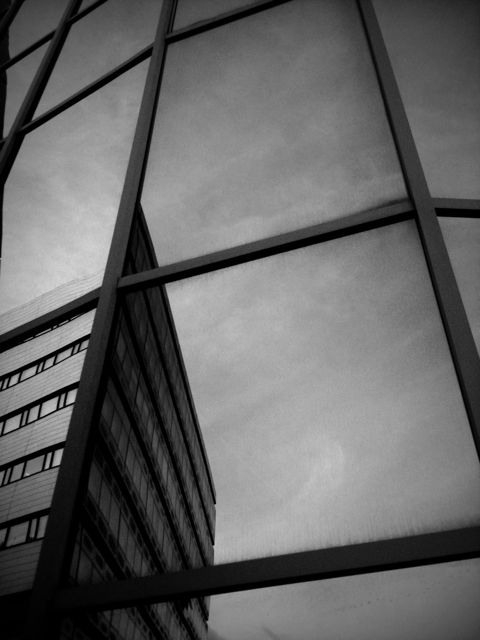
Architecture… again!
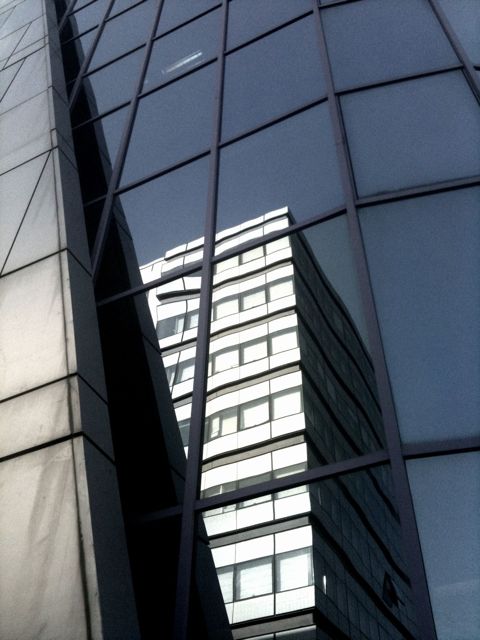
Place For Two

Prague Photographic Trip Report – Continued
During our vacation in Prague me and Ira also visited a small town near Prague named Kutná Hora. At first I didn’t think of writing second chapter about my trip, but when I finally had time to browse through my photos from that town, I saw that I had a few very nice photos from there (if I won’t compliment myself on my photographs, then who will ? 🙂 ), so I decided to write a short post on our day in that sweet little town.
Kutna Hora is about an hour train ride from Prague, and if you, like me, don’t like organized trips, you can just buy a train ticket in Prague and visit it by yourself. The old town centre is about 20 minutes walk from the train station, and I think there is even a bus going from the station to town. Anyway we didn’t use any kind of transportation but our feet.
Alley leading to St. Barbara Church. Photograph by Greg Brave. Click on the photo to enlarge.
There are quite a few tourist attractions in Kutna Hora, such as St. Barbara Church, which is one of the most famous Gothic churches in central Europe. It is also a UNESCO world heritage site. By the way St. Barbara is the patron saint of miners, and this town was mostly based on silver mines in the past. Another attraction of the town is the Sedlec Ossuary. It is a small Roman Catholic chapel. Its’ main feature is that inside it is artistically “decorated” by many real human bones. It is estimated to contain the skeletons of between 40,000 to 70,000 people.
In addition it is pure pleasure just to walk the streets of the old town centre in Kutna Hora. This is what we did the most – just walking on the narrow streets between old buildings and taking photos, of course! When we got there it was rainy-misty weather. It was pretty dark for photographing, but I had my tripod with me, and all the photos that you see here were shot from tripod. Yes, even the dog in the last photograph!

St. Barbara Church Photograph by Greg Brave. Click on the photo to enlarge.
Actually I was surprised that I could use my tripod just about anywhere. Nobody told me that I couldn’t, which was strange because I am used from other places in Europe (Greece for example) that in most touristy places they don’t let you use the tripod. Shooting in mist I tried to convey this darkish and melancholic atmosphere. But it was not the case with these rose hips. Here I aimed at showing the “freshness” of the branch and the “coolness” of the air. I was captivated by the color of the hips!
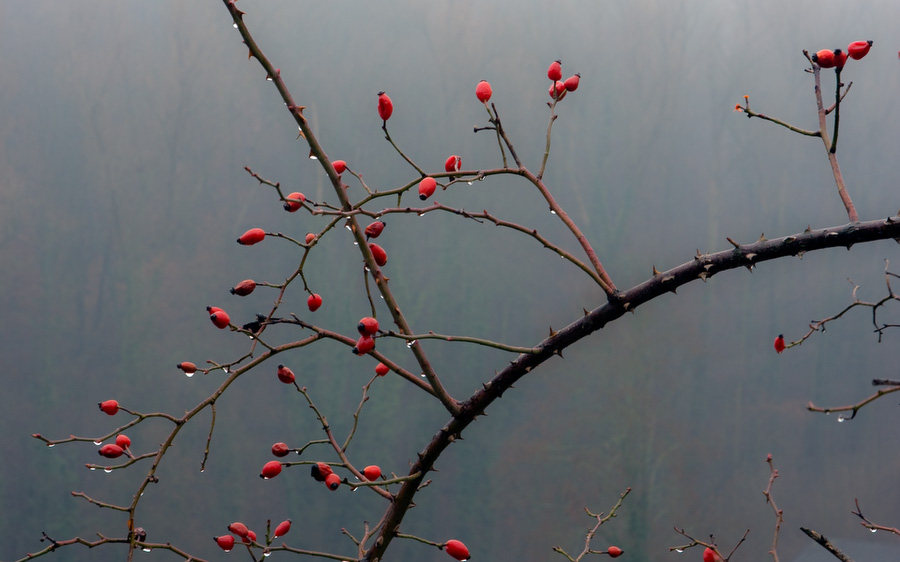
Rose hips in the rain. Photograph by Greg Brave. Click on the photo to enlarge.
When photographing tourist attractions such as Sedlec Ossuary (which you can see below), I wanted my photos to be different from what most tourist were shooting (which is just straight-forward showing of what eye sees). So I tried to include elements that would add mood, which in my opinion was appropriate. In case of the Ossuary I went around it several times until I found this spot where the tree branches looked like they were reaching towards the building and blending nicely into the seamless gray sky.
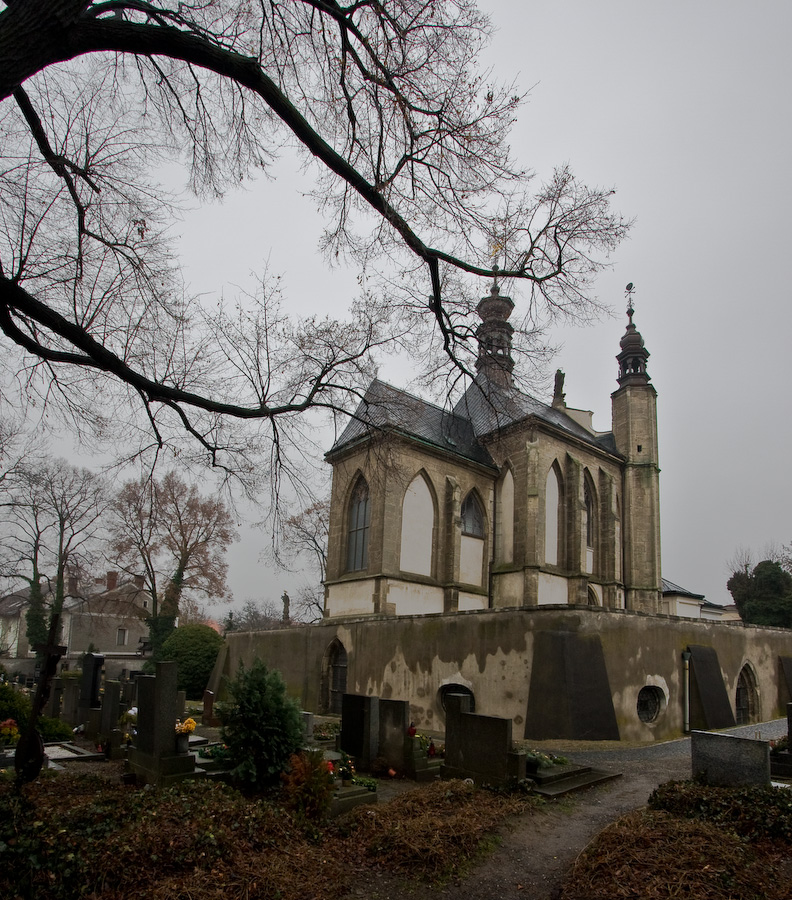
Sedlec Ossuary. Photograph by Greg Brave. Click on the photo to enlarge.
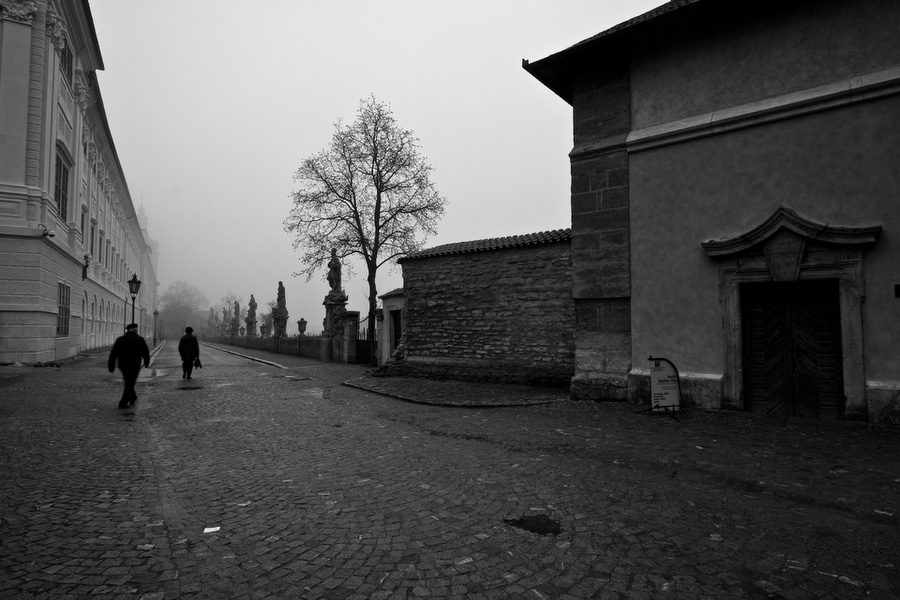
During our visit, there were not many people on the streets. Here and there we met tourists, but I was looking for local people to “put” in my frame, to make my photos more authentic. In the left photo below I succeeded, while in the right one I waited and waited for someone to pass by, but with no luck, and finally shot the scene without anyone. It is a shame, I would really like to have there a person or two.

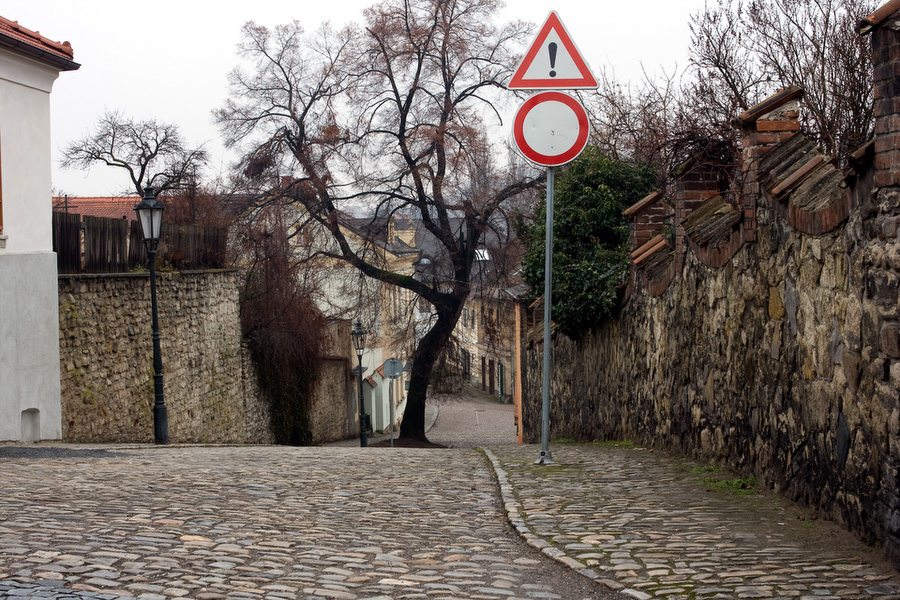
Kutna Hora old town streets. Photographs by Greg Brave. Click on the photo to enlarge.
On our way back to the train station, we were walking on a narrow sidewalk when I spotted this dog watching us from behind a window. Even though we had little time left till the train I couldn’t just pass by this photo opportunity. The thing is that it was getting dark already, and even high ISO wouldn’t help me out here. So even for this shot I had to take out my tripod. The doggy was watching intensely all my actions and at some point I thought, that’s it now it will start barking… but everything was just fine – I took a few shots and we took off to catch our train.
I hope you liked the photographs, and as always – comments and critiques are welcome!
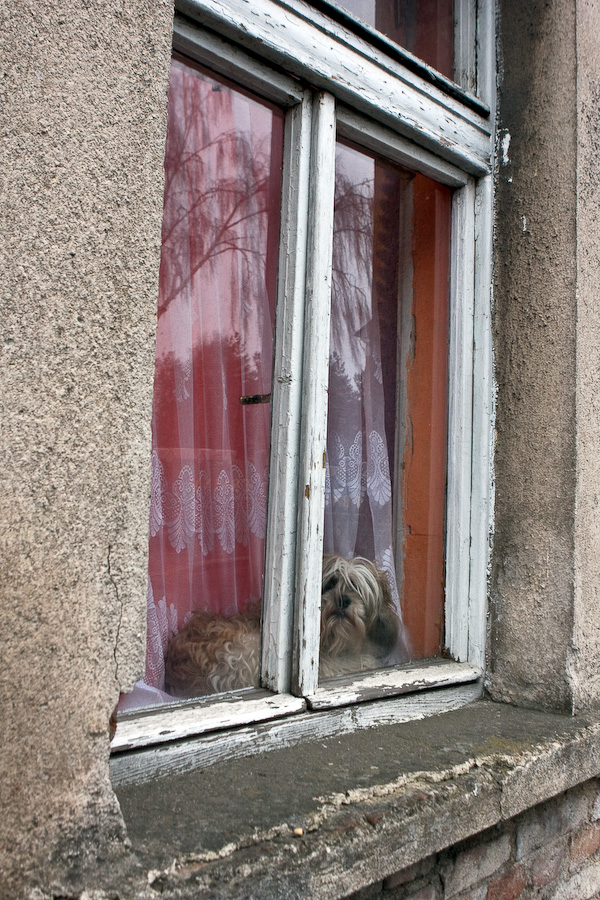
The Doggy 🙂 . Photograph by Greg Brave. Click on the photo to enlarge.
Leaf on photograph…

Hot Ice
Arcitectural Simplicity
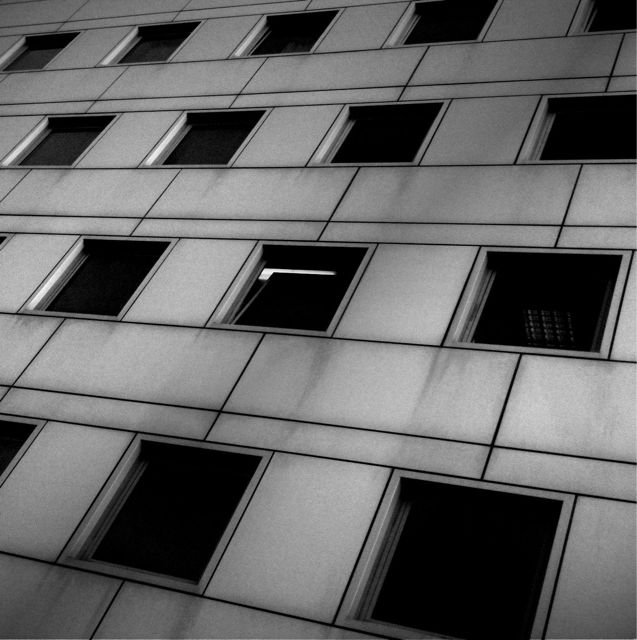
Simple Geometry
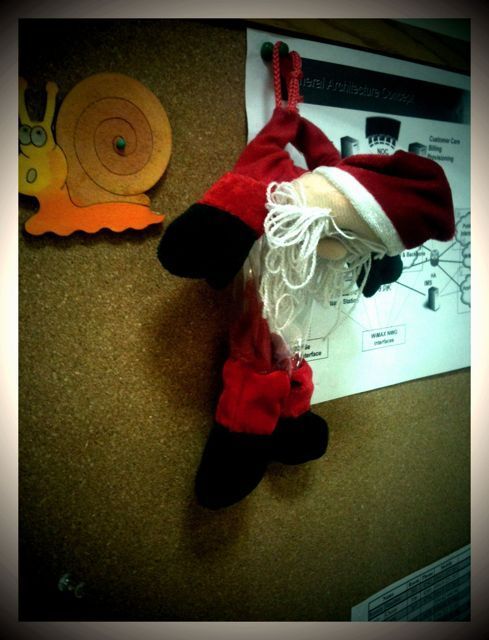
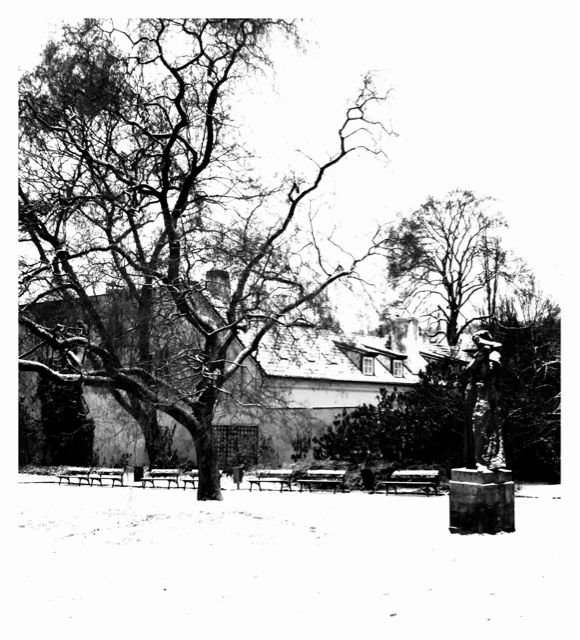
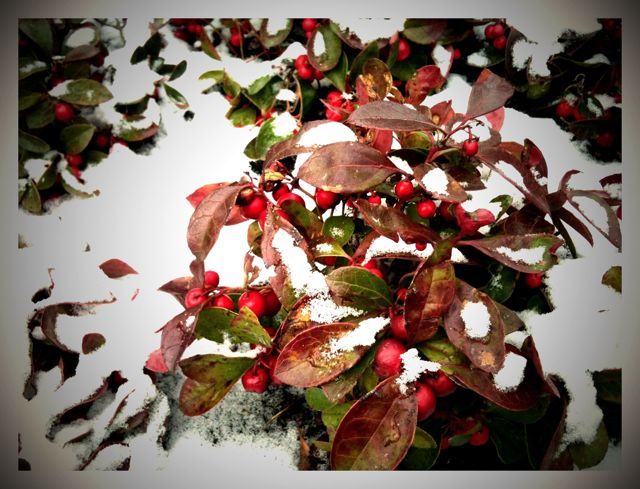
What is left from Christmas
Prague Photographic Trip Report
Good day everyone!
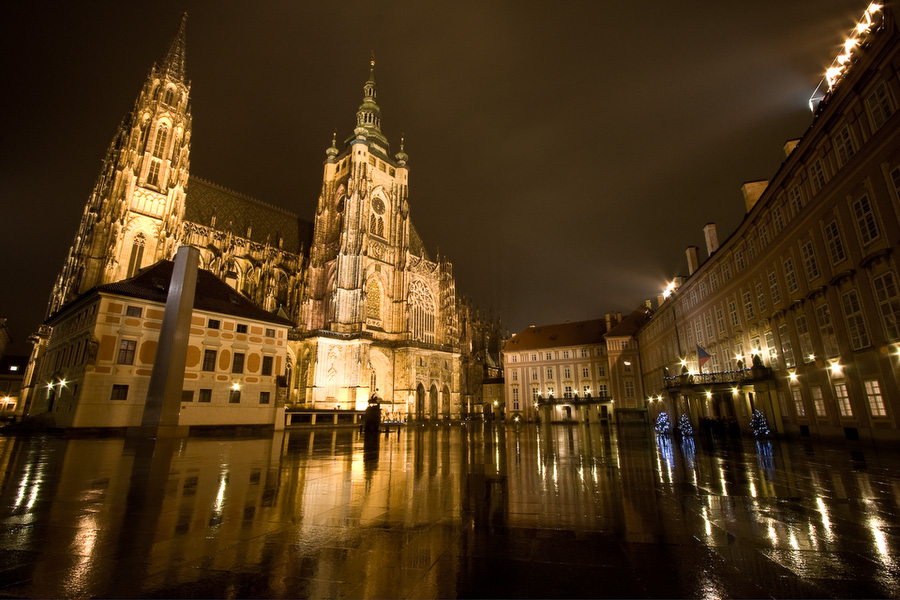
So, here I am, a week after that me and Ira got back from our vacation in Prague. We had a great time there. All the holidays mood, and the celebration of the new year really lifted our spirits. But in addition to sight-seeing I also photographed quite a lot. I brought tripod because I knew that I wanted to get night and early morning shots of Prague, and especially the Vltava, the big river flowing through the city. It turned out that tripod helped me a lot on different occasions since the weather in Prague during our visit wasn’t sunny, and sometimes, even during daytime when I wanted to shoot with small apertures (f8 – f16) I really needed it. I got to shoot landscapes both in rain and in snow, and during that weather Ira had to work hard and hold an umbrella above me, my camera and tripod while I was having fun composing and shooting pictures.
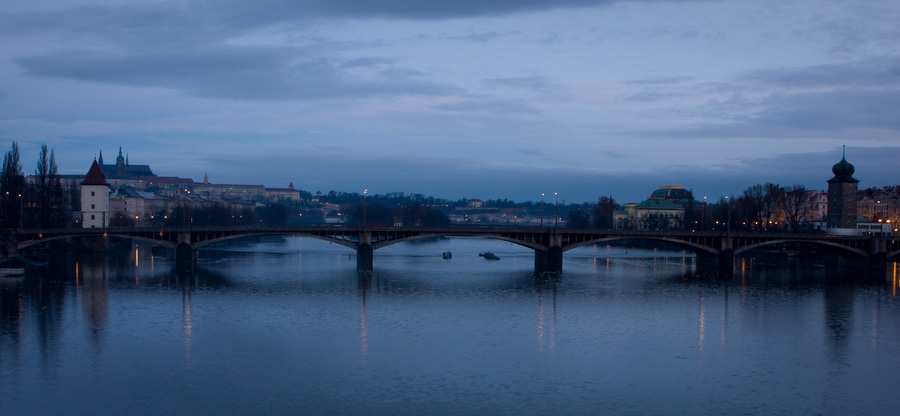
Thanks to the rain, I got the luck to shoot St. Vitt Cathedral with a real wet-floor effect! I mean that the whole area in front of the cathedral was wet and cathedral reflected beautifully. Of course without a tripod such shots would be practically impossible. We also got up pretty early (not too early, since the sunrise was at about eight o’clock) and went shooting on Vltava. It was a great experience for me as I tried to shoot panoramas, encountered some problems, and solved them. I probably will talk about it in another post.
For those of you who never had the chance to shoot in cold weather, my best advice is – wear gloves! You know, the gloves that cover your fingers halfway so you can still operate the camera.
A few words about the equipment that I took with me. I didn’t have a good telephoto lens, so I took only two lenses – Canon 10-22mm and Canon 24-70mm f2.8, which are my best lenses. I wish I had a good telephoto lens such as canon 70-200 f4L, but I didn’t, therefore in my photos you won’t see many closeups. And, of course I took my camera, Canon 40D. By the way I also had polarizing filters, but since most of the time the weather was really cloudy I didn’t use them even once. It is a good thing that I took spare batteries. If you didn’t know, in live-view mode batteries get eaten very quickly, and I mean VERY quickly! And I use live-view mode pretty often, especially when I shoot from awkward angles that make it difficult to look through the viewfinder.
And finally if you would like to see more of my trip results photography-wise, you can see it in the slide-show that I made. Here is how I suggest to watch this slide-show:
Click on the link below to go to the slide-show, then click on the lower right button in the slideshow to go to full screen mode, then turn on your speakers, and finally click on the play button. The whole slideshow takes about seven minutes (depending on your internet connection speed).
I really hope that it worth your time, and feel free to comment on the photos!
Prague Slideshow by Greg Brave
Morning Walk
Snow in Prague
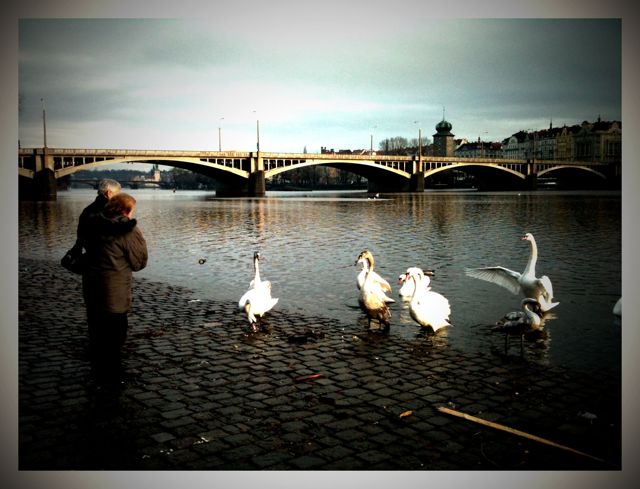
Feeding Swans on Vltava
Snow in the morning
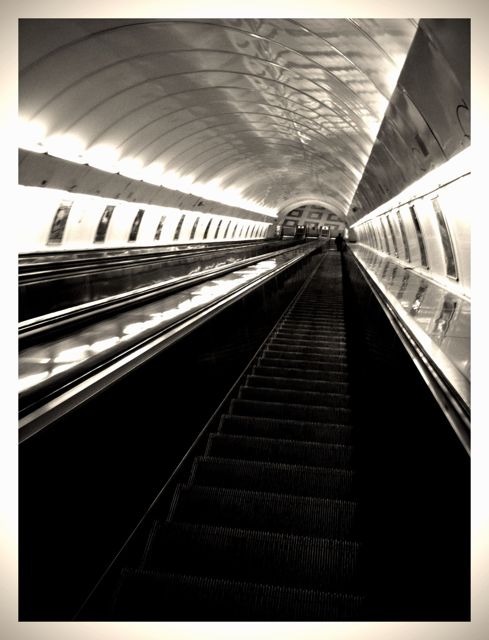
Down to Prague Metro
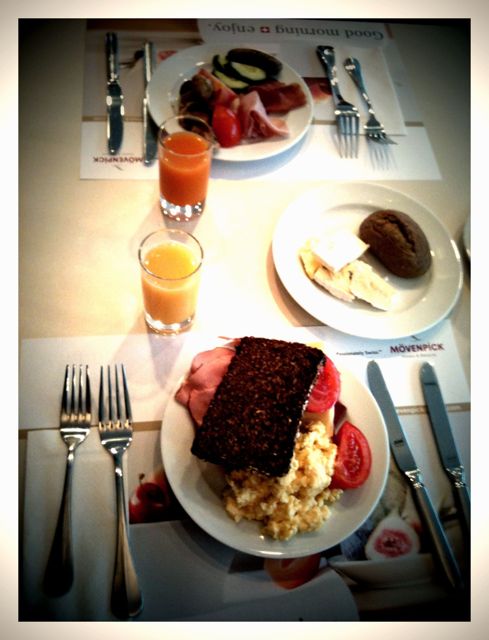
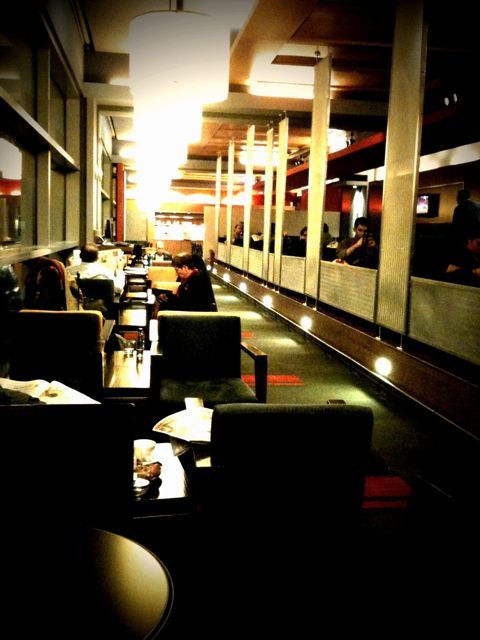
Breakfast in Movenpick Hotel, Prague
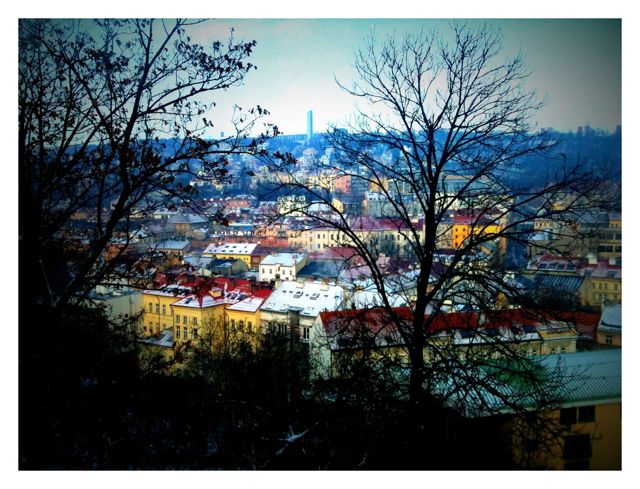
My first photo of Prague view
This is a view of Prague as I saw it from the Movenpick hotel.
Flying to Prague for Silvester
Me and Ira are flying to Prague to celebrate Silvester, and of course I am taking my camera with me. So hopefully I will have some nice photos to show here in a few days. Now We are sitting in the Dan lounge of Ben Gurion airport and here is a photo of what the airport looks like from our viewing window.
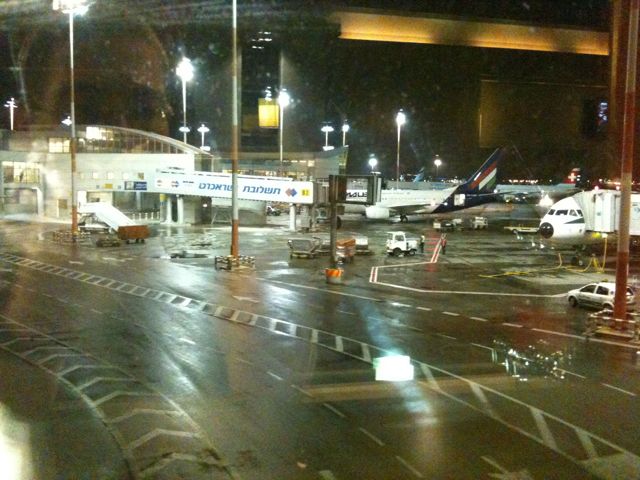
Dan Lounge at Ben Gurion Airport
On our way to Prague. We are celebrating Silvester there!
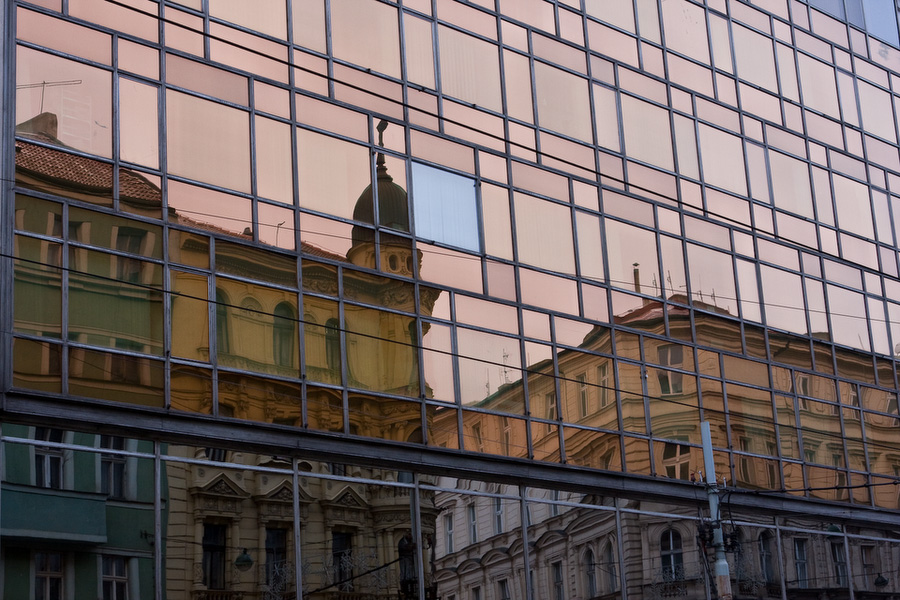
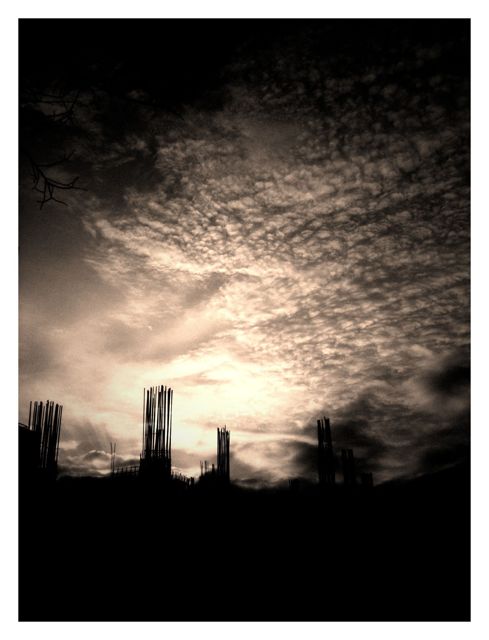
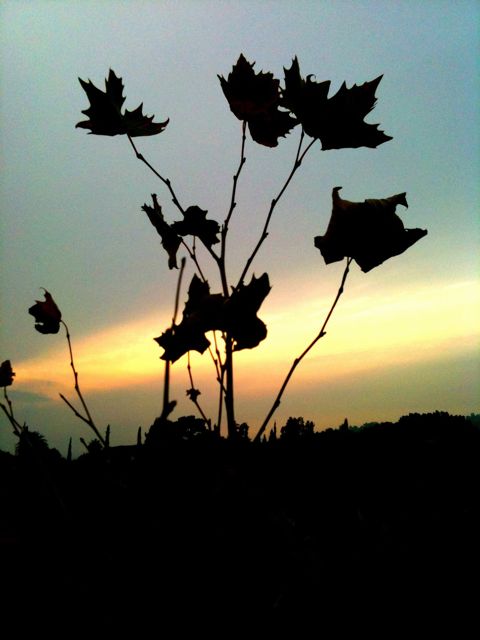
Urban Sunrise
Autumn Leaves
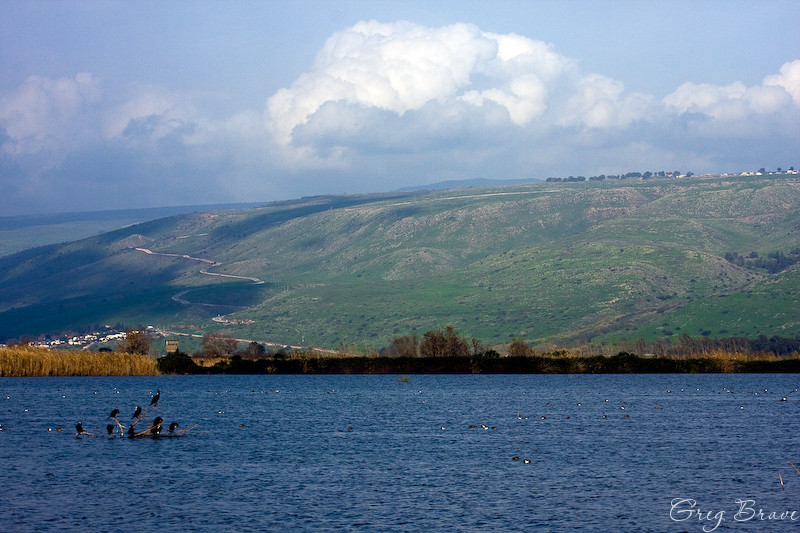
Sacred Place
This Greek church is situated on the shore of the sea of Gallilee.
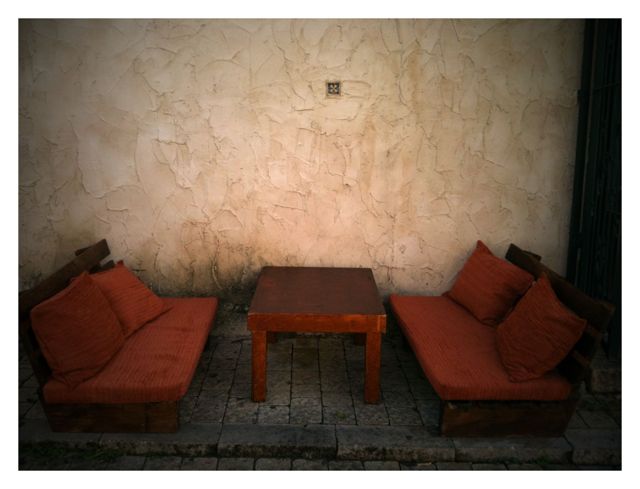
Place to Relax
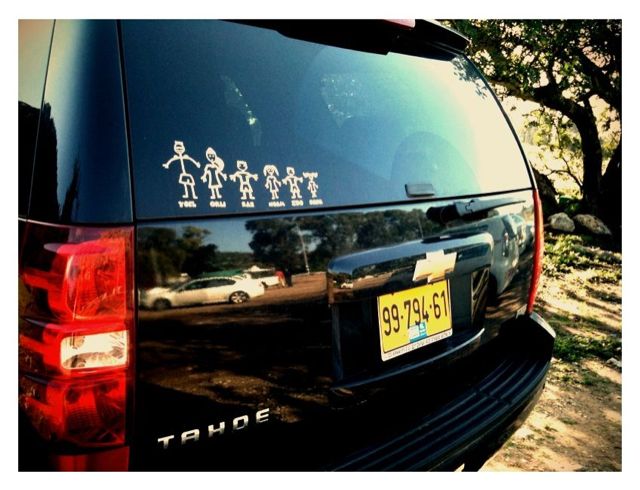
Family Car
Autumn Rainy Day Photoshoot
The Autumn is finally here. Even though it is warmer than I’d like it to bee, I definitely can feel the end of this year coming… You might say that December is a winter month, but not here, not in Israel! We barely have an Autumn and then it is Spring and Summer all over again. This is why this time of the year is very precious to me, I won’t be able to smell the wet earth and get this melancholic Autumn feeling for much longer… a couple of months, that’s all I’ve got.
Last Friday it was heavily raining all morning, but in the afternoon rain stopped and me and my life partner Ira went out for a walk in the park, and of course, I took my camera with me. It turned out to be a nice photo session. I would like to share some of the photos that I liked, and since I am learning photography, I will also discuss some “photographic” aspects of the photos. So here we go:
I like this photograph probably the most. The lines on the floor lead the eye towards the first subject – Ira, and then continue to lead towards the second subject – the tree. I like this tree so much, its branches curve so beautifully.
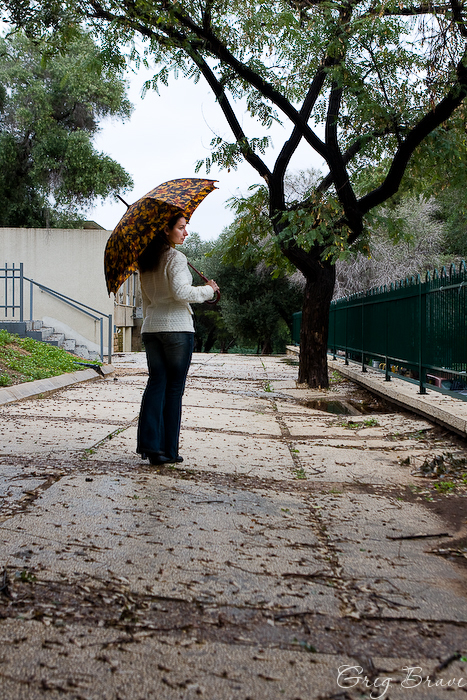
Photograph by Greg Brave. Click on the photo to enlarge.
This image could be pretty casual but, in my opinion, the red flower on the wooden fence adds a lot to it. There are also some disturbing elements in this photo that I’d like not to be there – the whole left part of the photo, in front of Ira. I wish it was simpler… much less cluttered. I also like the lower part of the fence, which is made of stone.
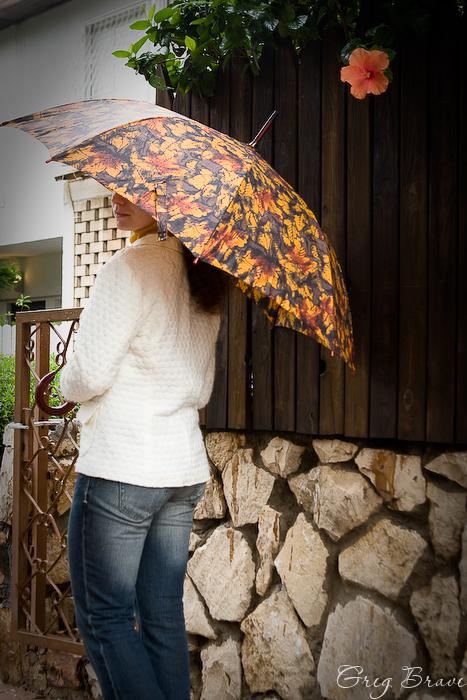
Photograph by Greg Brave. Click on the photo to enlarge.
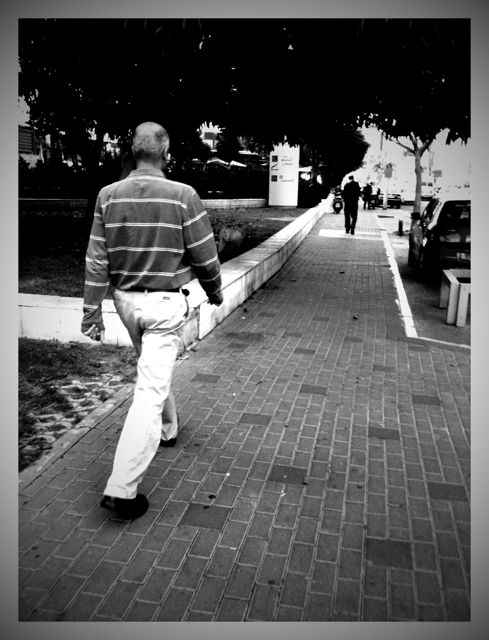
Here I found a nice brick wall for the background, and we experimented with different poses for a while, but nothing worked. Then I just asked Irina to walk from me towards the wall and at some point called her name. She turned around and I made this shot! So I guess it was somewhat spontaneous.
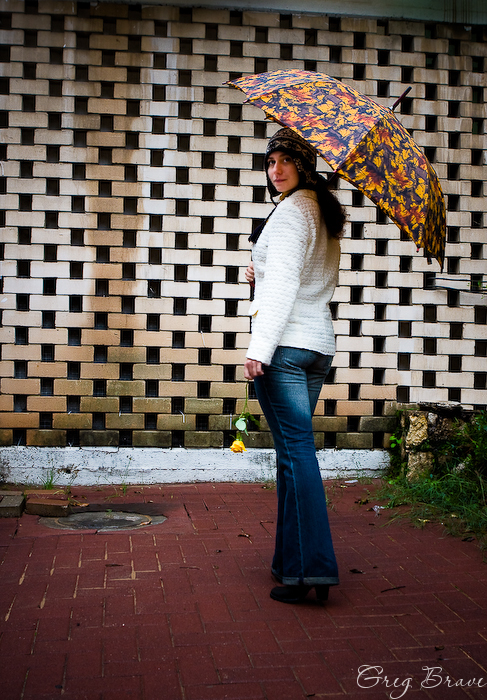
Photograph by Greg Brave. Click on the photo to enlarge.
This next photo is a bit disappointing for me. I found this great fence for the background, but after seeing the final image, I realized that I didn’t use its full potential. I could at least made this photo horizontal, to emphasize the horizontal lines of the fence. I can see this picture in my mind now – Ira standing on the right side of the horizontal photograph, and the horizontal lines of the fence lead the eye from her to the interesting statue that stood there a few meters to the left. I wonder now how I didn’t see this at the time of the shoot? Well, I guess this is how you learn stuff 🙂
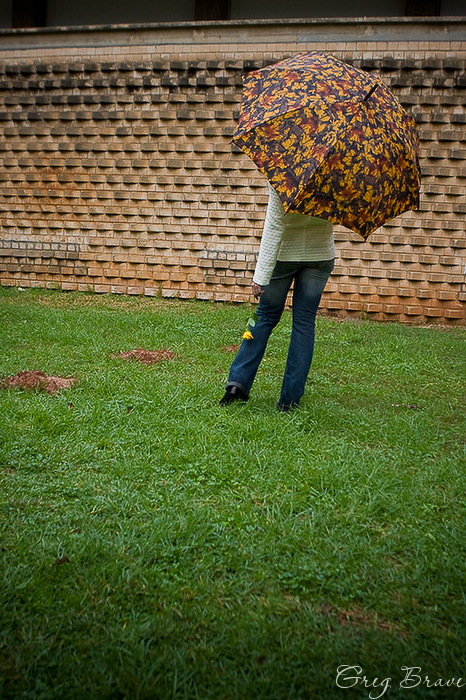
Photograph by Greg Brave. Click on the photo to enlarge.
I absolutely love this photograph! Almost as much as the first one. As we were walking in the park I saw some garden tables and decided to take a closer look at them. When we came near we saw that one of the tables was painted with graffiti, the main colors being vivid yellow and red. I looked at these colors, then I looked at the yellow rose that Ira was holding, then at the umbrella handle, and then I saw this picture in my mind. It took me about ten attempts to get it just the way I wanted though…
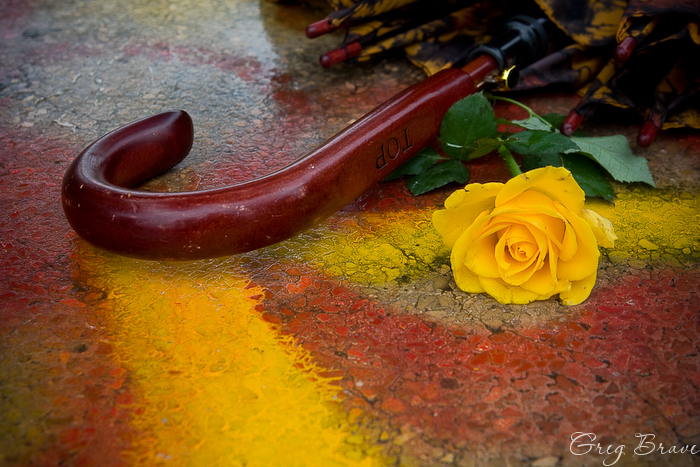
Photograph by Greg Brave. Click on the photo to enlarge.
Everybody makes reflection shots, and I am not an exception. But I always look to create something different, something with my personal touch. Usually you can see either the full scene together with its reflection, or only the reflection, but here I included just a little bit of the scene to complement the reflection. I find this shot a little bit unbalanced due to the placement of the rose, but still I like it a lot.

Photograph by Greg Brave. Click on the photo to enlarge.
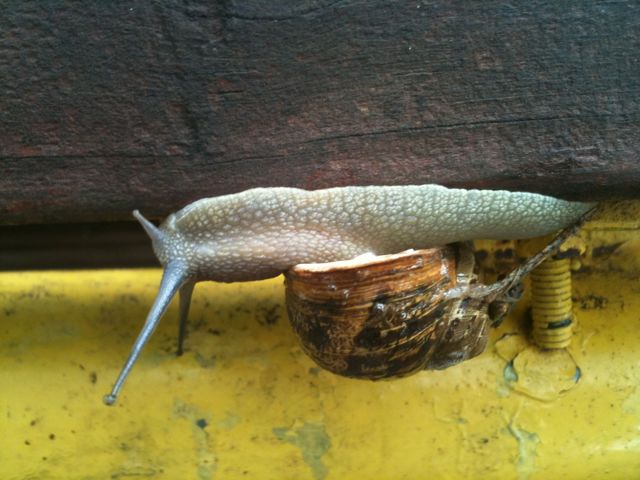
The following images were a nice and unexpected bonus. While we were walking in the park we were amazed to see this – after the rain dozens of snails came out of nowhere and occupied a lonely wooden bench. There were maybe a hundred snails or more. They were crawling one on top of the other and pretty much… mingling 🙂 I can’t find a better word to describe what was happening there. I was lucky to have my macro lens with me, and I was even luckier to have an external flash with remote trigger! So I asked Ira to hold it for me and made a couple of shots. Here you can see an example of the shots I got.
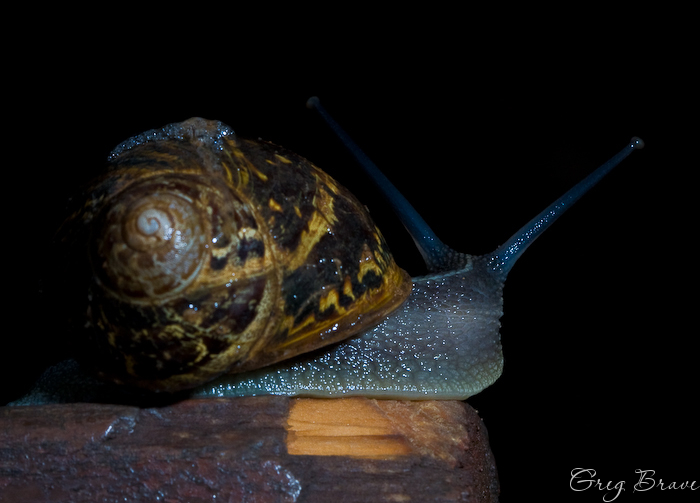
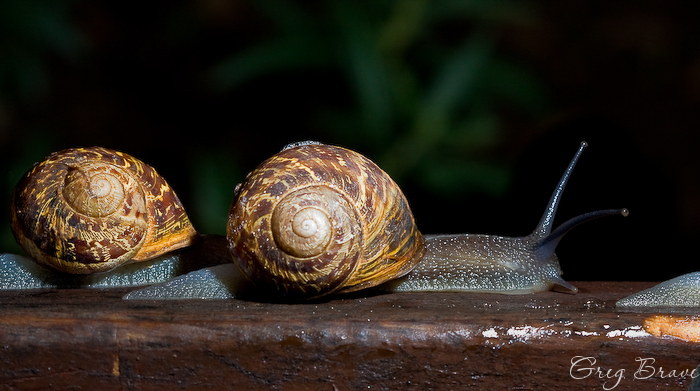
Photographs by Greg Brave. Click on the photo to enlarge.
That’s it for today. I hope you liked my photos. Any comments or suggestions, technical, artistic, or other are always welcome!
Till the next time, take care.
Greg.
Van Gogh

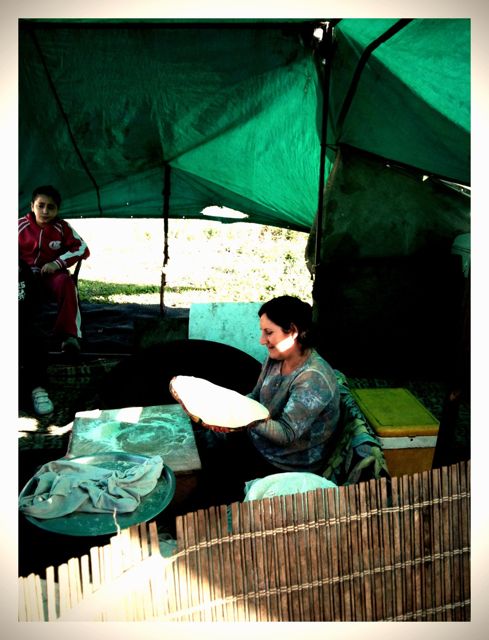
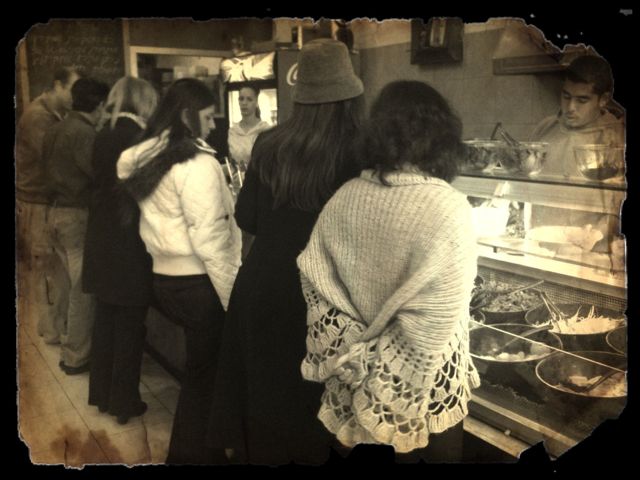
Druze pita in the making
After the rain
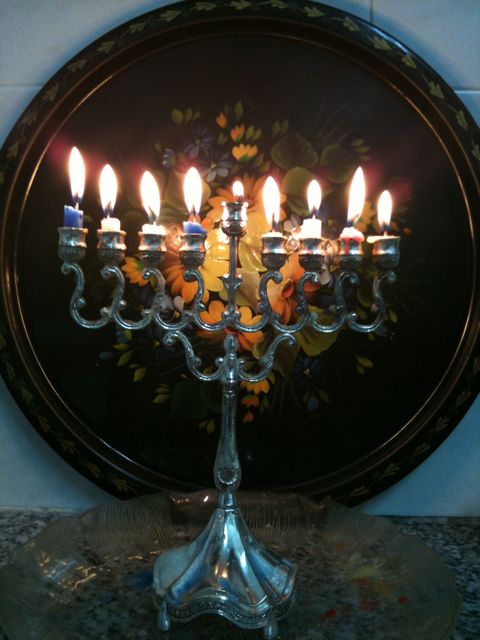
The Last Day Of Hanukkah
Symmetry
Candy

The Hat
Still Life first Attempts
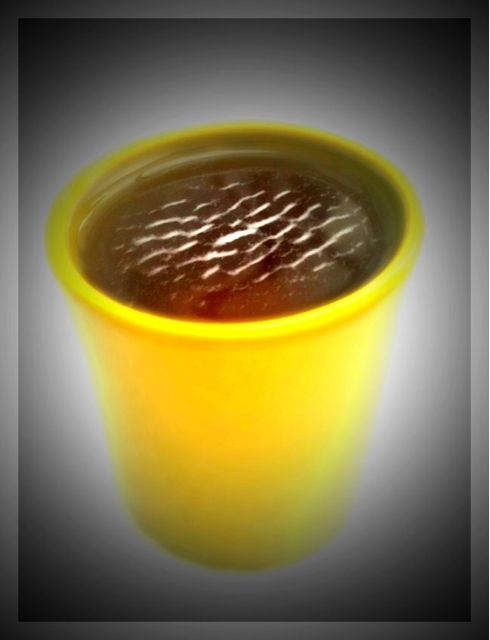
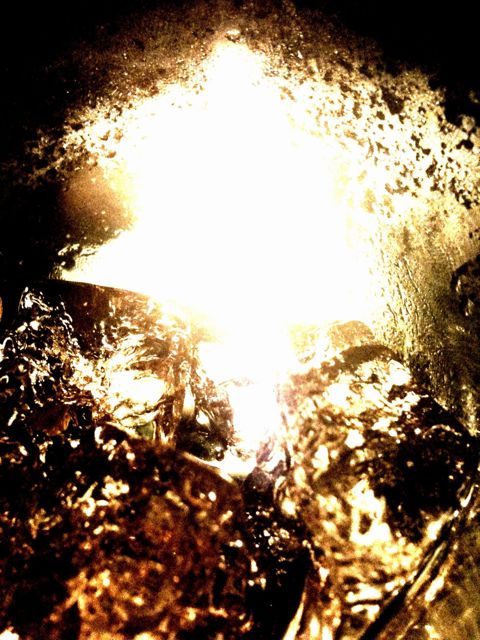
Recently I was learning a lot about lighting and together with that I am now slowly making my way into the still life photography. I made me my own little studio. Well not really a studio, but a table and some accessories so that I can try and photograph still life. For one of my sessions I decided to shoot a glass with liquid in it. It turned out to be not a simple task as glass reflects absolutely everything! So that particular session wasn’t successful at all, but I didn’t give up, and after working on it for a few weeks, I finally got my lighting straight and about a week ago I made the following image:

Photograph by Greg Brave. Click on the photo to enlarge.
It looked pretty darn good to me, so I posted it on PhotoSig to try and get some critiques. To tell you the truth I was hoping to receive more compliments than critiques. I actually received some compliments, but there were two critiques that simply opened my eyes to still life photography, and I would like to present here several tips from those critiques. But first take a good look at the photo above and try to see what is wrong with it.
… ok, now, when you have your own opinion on my photo lets see what improvements I could have made to that shot.
- The highlight on the glass seems stronger than the highlight on the pepper, and therefore takes away more attention – reduce the highlight on the glass.
- The pepper that was chosen is not flawless, but it is also not an old one so that little imperfections that it has don’t emphasize its age, and only disturb the eye of the viewer.
- Pepper has a darker are due to my lighting imperfection. I should have put a reflector near the pepper to light better that area.
- There is a reddish area at the foreground that should be fixed.
- The definition of the foreground (the contrast) could also be better.
- The glass is poorly separated from the background. In order to better separate it, two black cards can be placed at two sides of the image (outside the composition). They would throw a black reflections on the glass contours, making it better separated from the background.
- The background darkens towards the top of the photo. A reflector or soft box could be placed on the top to fix that.
Now I also received additional and very useful tips that I sure will use in my still life photography (when appropriate of course!). Here are some of them:
- Always dilute the liquid to make it less dark
- When possible slightly crumple some foil small enough that it can’t be seen and place it behind the drink, so that it will add sparkle to the liquid.
- If you want to add bubbles to the liquid, then add glycerin and use straw to make a bubble.
Thank you Steve Chong and Randy for your helpful critiques!
I hope that these tips will help you too, and if you find them useful or have something to add, please comment!