Compurover from Lowepro Review
As I promised in the article about my trip to Switzerland, I am writing a detailed review on a photo backpack, which I took with me on that trip. It is a “Compurover” from Lowepro. When I was looking for a photo backpack on the net, I had trouble to find good reviews made by people who were actually using the product rather than just going over its features. I also had trouble finding detailed photographs of products. On the manufacturer’s sites there is usually only one or two photos of each product, which is absolutely wasn’t enough for me to get an idea about them.
So I had to actually go to various shops and check out different backpacks and spend quite a lot of time on it. Now, after finding the product that was the closest match to my demands, and using it for a while I decided to write a detailed review of this photo backpack including my own insights and conclusions based on real experience and heavy duty use.
I will start with what were my demands from a photo backpack.
We both – me and my life partner Ira like to hike. We love nature and try to spend as much time as we can outdoors. And obviously I love photography so taking my photo gear with me is never a question. The only question is what gear I am going to take with me and how I will be carrying it. Along these lines my demands from a photo backpack were the following:
1. It has to have enough padded space for all the photo gear I am taking with me outdoors.
2. It has to have an additional compartment for other hiking related gear (clothes, food, etc.).
3. It has to have a good carrying system, to sit comfortably on my back and waist, and wisely distribute the weight across my body.
4. It has to have a tripod holder.
5. It has to have a place for hydration system.
6. It has to have small, and preferably external pockets for all the little things (filters, cleaning cloth etc.).
7. It has to have a rain cover (very important).
Pretty big list huh? I worked hard to find a bag to fulfill all this, and I can’t say that I found a perfect backpack, but I came close.
The biggest problem that I encountered was that most of the professional photo backpacks don’t have enough room for other than photo gear. So I found many great backpacks, with good carrying system, but with no place for other stuff. It still puzzles me – if photographer goes out on a long day of shooting, with tons of gear, doesn’t he need to carry also some personal stuff? I need.
And now to the actual review.
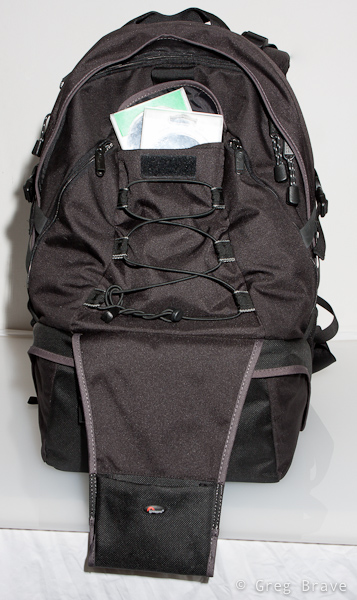
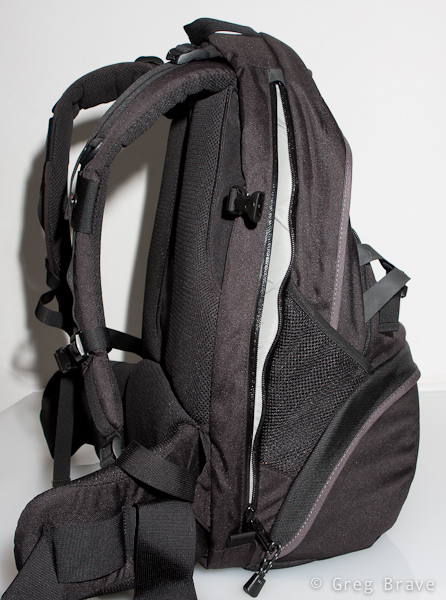
In the two photos below you can see the “Compurover” front and back. It is pretty big backpack, made from top quality materials. It has a comfortable (at least for me) carrying system. During my trip I was walking for about 10 hours (!) a day with it on my back and feeling very comfortable. The waist belt is great – it is wide and well padded, so are shoulder straps. You can also remove the waist belt for drying/cleaning purposes.

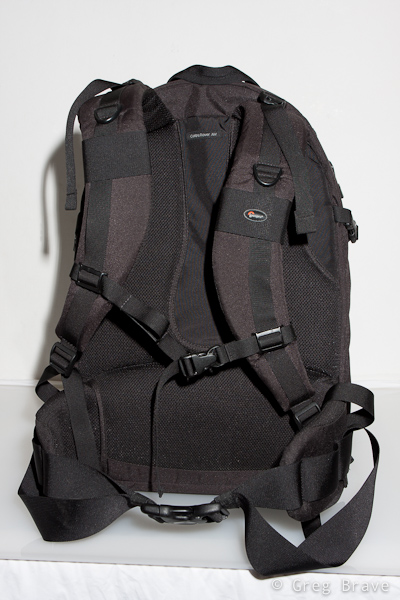
Photographs by Greg Brave. Click on the photo to enlarge.
The bottom compartment is for photo gear. It is padded like any other photo bag, and you can also change its configuration to match your photo equipment. It was big enough for me. In this compartment I could carry the following equipment:
Body: Canon 40D
Lenses: Canon 24-70mm f2.8L, Canon 70-200mm f4L, Canon 100mm macro f2.8L, Canon EF-S 10-22mm f3.5-4.6
Flash: Canon 430EX
And there was still room left for one additional small lens such as Canon 28-105 f3.5-4.5
This compartment closes with a zipper and a security lock. When you open it, it slides out in an angle giving you a comfortable access to the equipment. One thing to notice – zipper is somewhat hard to zip/unzip at the corners.
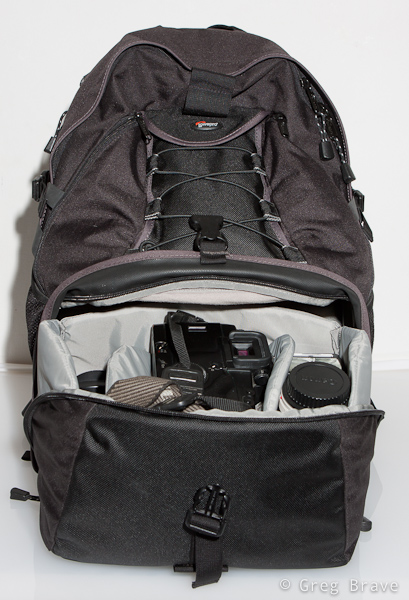


Photographs by Greg Brave. Click on the photo to enlarge.
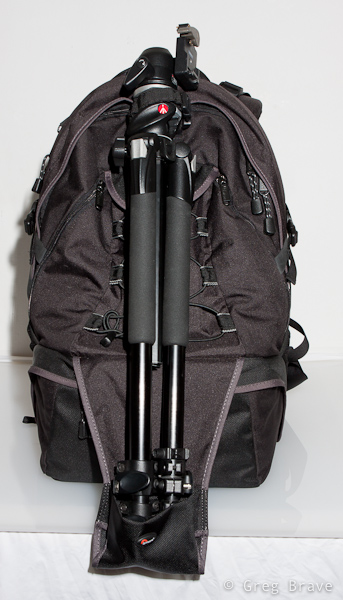
The tripod holder. When not in use it is folded upward (you can see it on the front view of the backpack above). When needed you unfold it downwards, and put a tripod in it as shown below. Lowepro’s original idea was that you put your tripod under the bungee mesh and use two additional bungee cords (which come with the bag) to secure the tripod at the top and bottom. I found that to be too inconvenient, so what I did was to remove the two bungee cords from top and bottom ( you can’t see them on any of my photos) and only on the top I put a Velcro strap. I put the tripod in the tripod holder without putting it under the bungee mesh, and secure it on the top with a Velcro strap. For me it was enough to securely carry my large tripod.
By the way if you have a small tripod, you can carry it on the side of the backpack putting its legs in the side mesh pocket and securing it with the side strap.
There is also a pretty spacious pocket, which I use to carry my polarizers as you can see on the photo below.
The downside to this tripod holder is that in order to access your photo gear you have to remove the tripod first.
Photographs by Greg Brave. Click on the photo to enlarge.
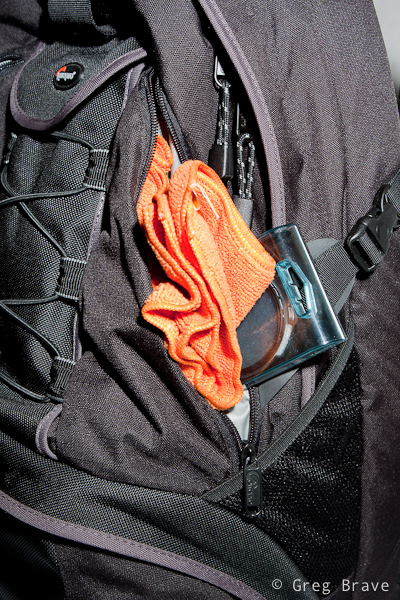
Additional pockets. “Compurover” has two small zipped pockets on the front, which I use to carry cleaning stuff, micro leatherman, and filters. Pretty convenient. It also has mesh pockets on both sides.
Laptop compartment. The access to the laptop compartment is from the side, so that you won’t have to take out all your gear before getting to the laptop, which is especially convenient when you are passing airport security. But as you probably noticed, in my demands there was no need to carry a laptop. Actually the last thing I want with me on the outdoor hike is an additional 2-3 kilos of dead weight. Do you?
But here is my big breakthrough! I found this compartment to be very useful. Almost indispensable. I use it for my 3 liter hydration system! I put it inside, close the zipper almost all the way up and pull the hose from the top to the shoulder strap.
Photographs by Greg Brave. Click on the photo to enlarge.
Top compartment for other stuff. You can see it on the left photo below. Actually it is pretty spacious. Unfortunately I didn’t show it in this photo. I could put quite a lot of stuff in this compartment such as rain coat, sandwiches, utility knife, and more. As you can see, inside the top compartment there is a zipped pocket and another divider. There is also a memory card holder there. You can see it in more detail in the photo on the right.

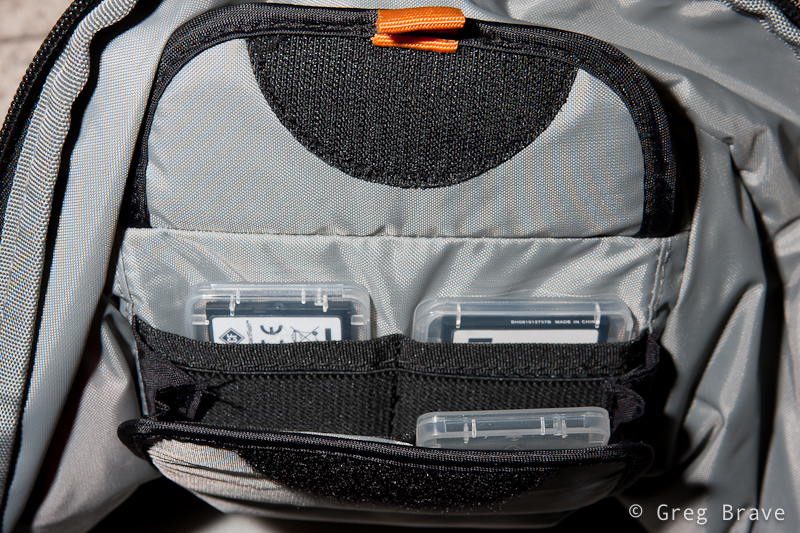
Photographs by Greg Brave. Click on the photo to enlarge.
In addition, with the bag comes this small pouch, which I found very convenient to carry spare batteries, cables and stuff.
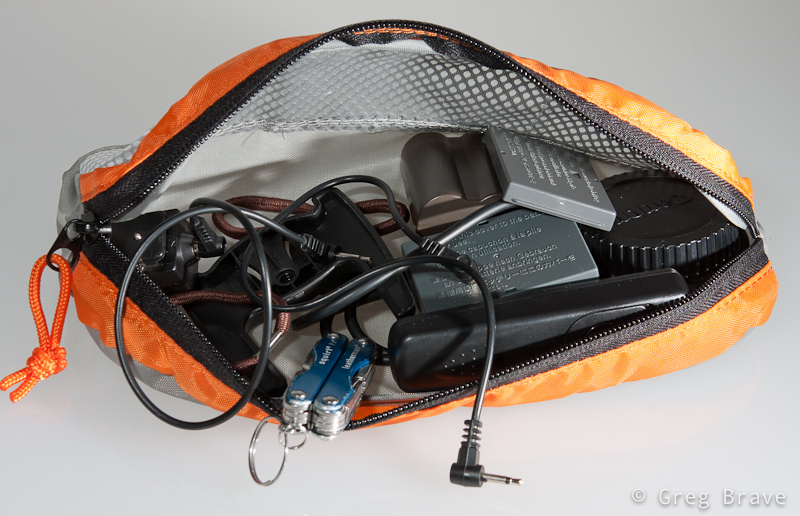
Photograph by Greg Brave. Click on the photo to enlarge.
The one thing that I didn’t show in the photographs is the rain cover. It has its own pocket at the bottom of the bag.
Additional important little thing is that on the shoulder straps there are two plastic rings (one on each side). If I want to hike with my hands free (for trekking poles for example), but I also want my camera to be ready any minute, I hang it on these two plastic rings instead of hanging it on my neck. And when your camera is as heavy as mine it is very important.
Summary
| Pros
Lowepro’s “Compurover” is a good hiking photo backpack with good carrying system (wide and padded shoulder straps and waist belt). It has enough room for my photo equipment and it also has spacious compartment for other stuff. It has a tripod holder, and I can also carry about 2.5 liters of water in my hydration system in laptop compartment. This is especially good because I have all the top compartment for additional stuff. This backpack also has a sufficient amount of little pockets, and it has a rain cover. Cons The photo-gear compartment is a little difficult to open because zipper gets stuck a little bit on the corners. There is no quick access to the camera as I saw in other backpacks, so in order to get it out you will have to put down the backpack and open the photo-gear compartment. It is a big backpack, so if you want to go for a stroll in the park taking only your camera with one lens on it, this would be an overkill. If you carry a tripod then you would have to take it off the bag before being able to access your photo gear. |
Conclusion
I am happy with this backpack, and most of the cons are not an issue for me. The only thing for me that is left to see is whether this backpack will hold through the years.
Comments are welcome as always, and if you find this review useful I would also like to hear about it.
Till the next time,
Take care!
Greg.
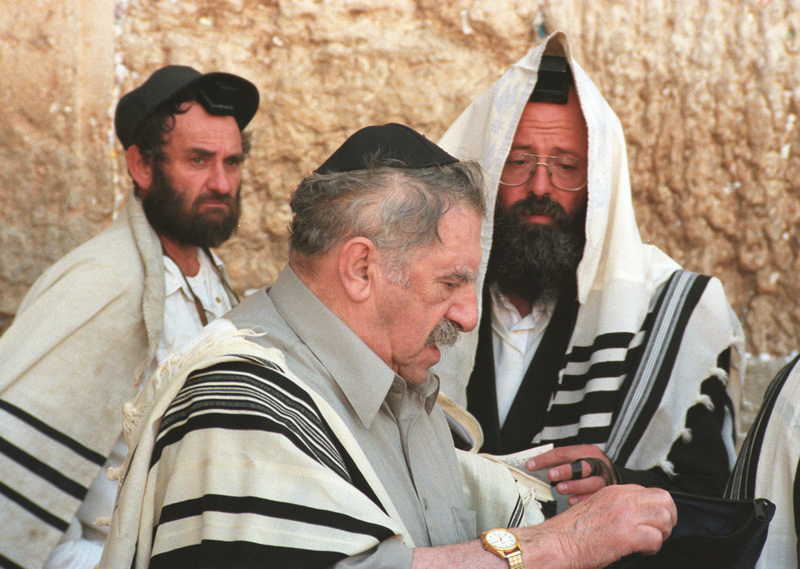
Exotic
Vacation
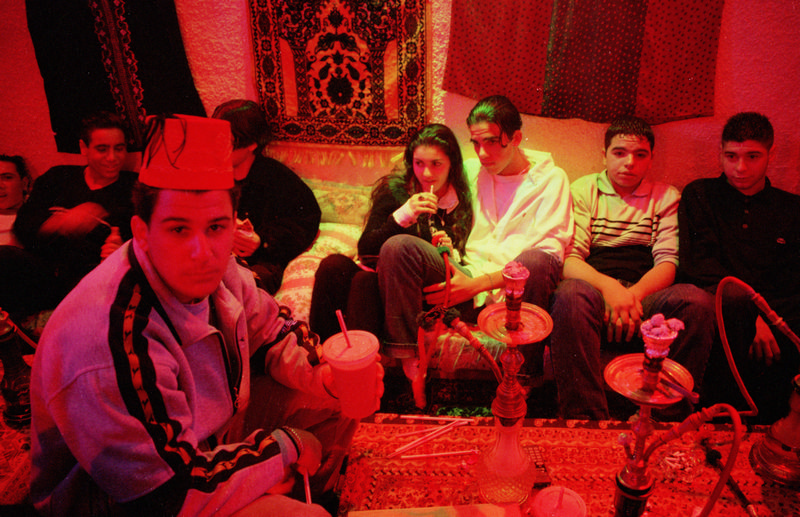
What’s For Dinner?

Simple Architecture
Trip to Switzerland with stop in Prague
Good day everybody! It has been a while since my last post. I had some pretty cardinal changes in my personal life, and was so caught up that couldn’t free my mind to write anything. But I continued to take photos and have some new stuff to share.
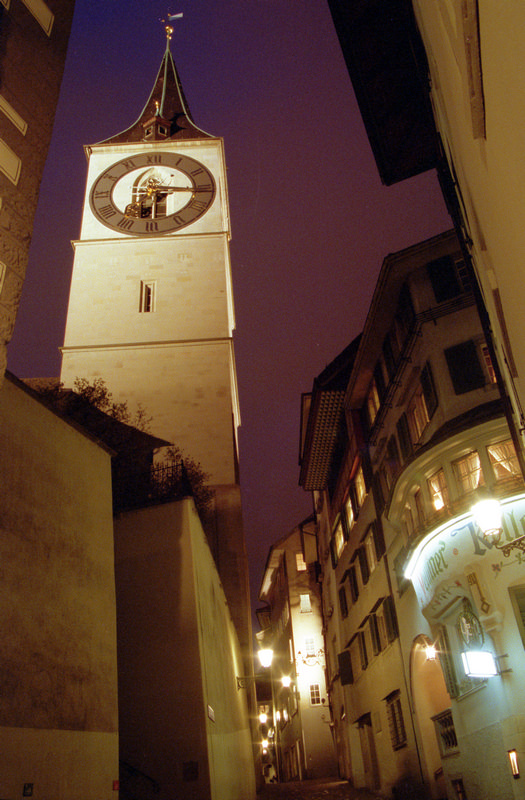
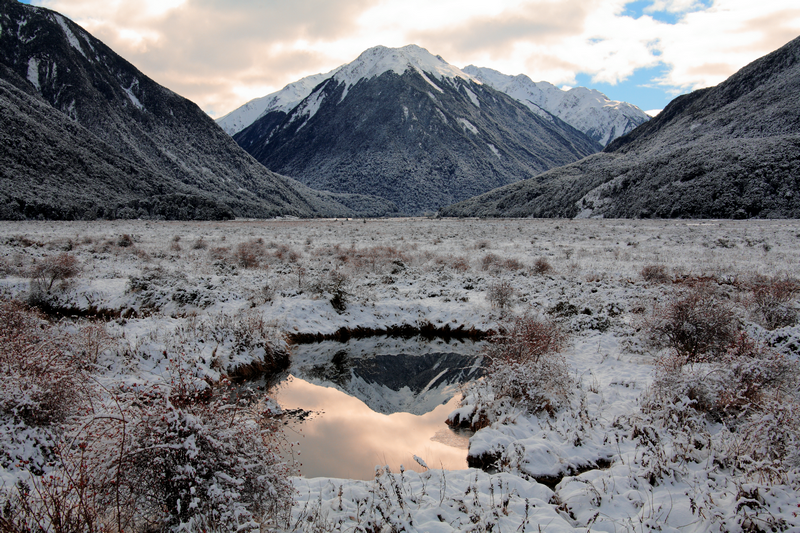
In addition to the changes, during this time me and Ira also went on an 8 day trip mainly to Switzerland but with short, 2 day stop in Prague. Actually one out of these two days we weren’t in Prague but in a small village named Černošice. It is located about 20 minutes by train from Prague, and it is so beautiful!
Černošice lies on the Berounka river, so we stepped off the train and went to the river right away. There is a nice walking trail along the river, and in the photos below you can see some of the views that we saw while walking there.
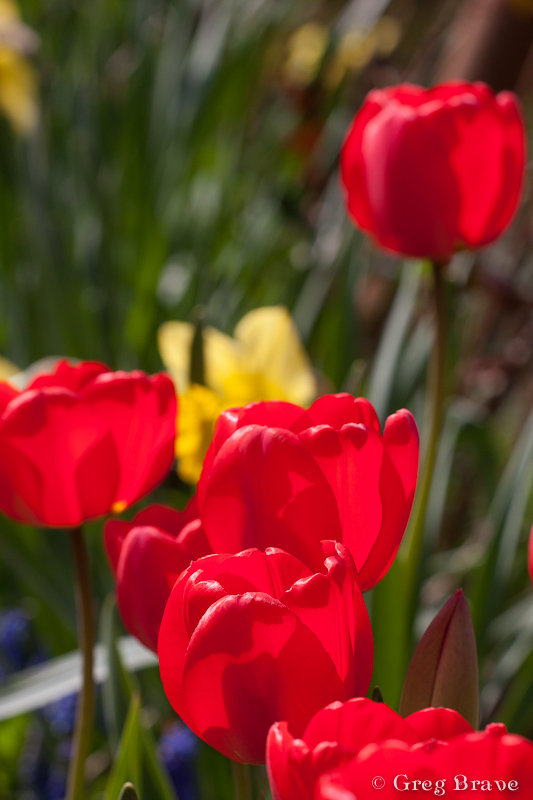
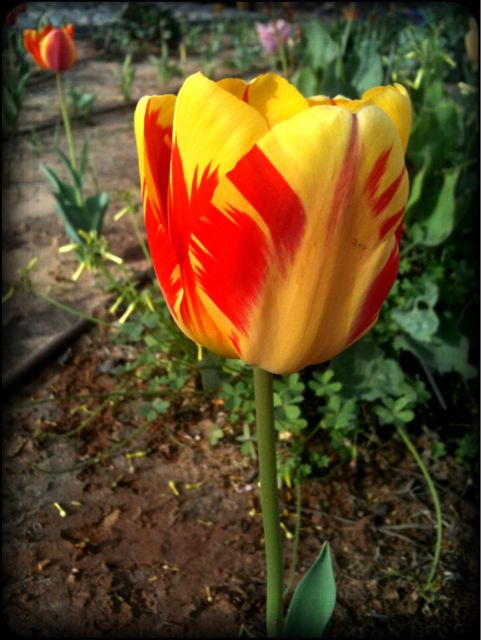
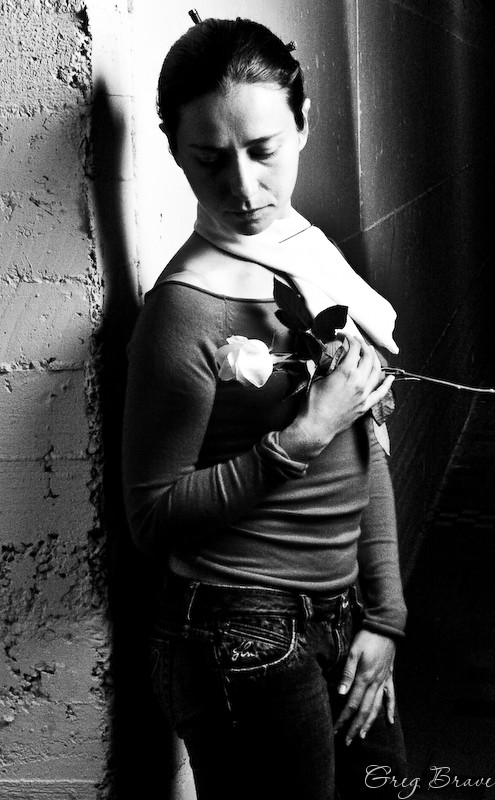
I saw these naked trees on the shore and their beautiful reflections in the water. I wanted to photograph them but thought that only the trees with their reflections were not enough to make interesting photograph, so I was looking for an additional element for my photograph. These red tulips were it.
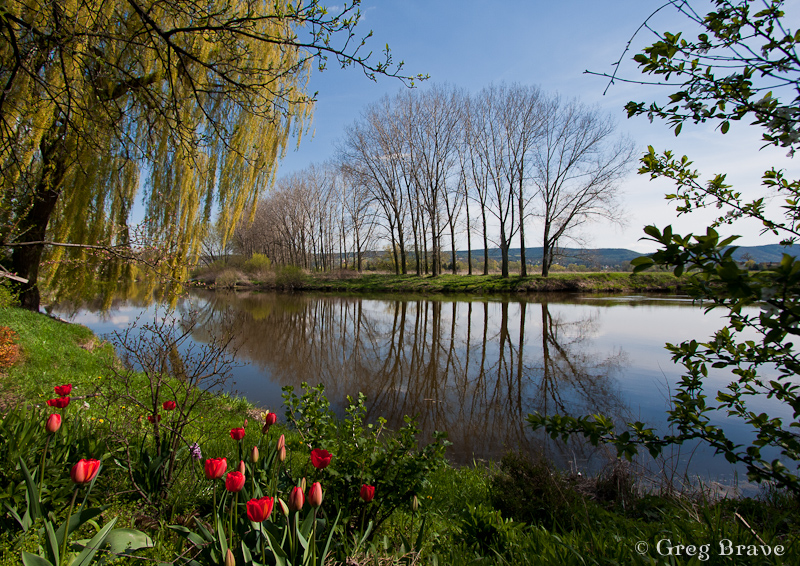
Photograph by Greg Brave. Click on the photo to enlarge.
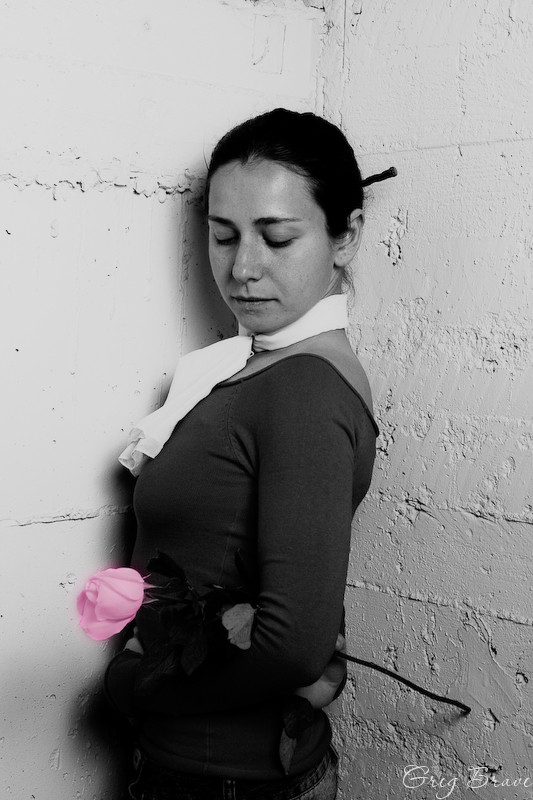
The photograph above was not enough for me and I was looking for additional ways to photograph these trees and their reflections and as a result I got the photo below. The additional element was the tree branch from the left. As you can assume I have much more photos of these trees in my collection, but I chose these two to show here because I think they are most successful composition-wise.
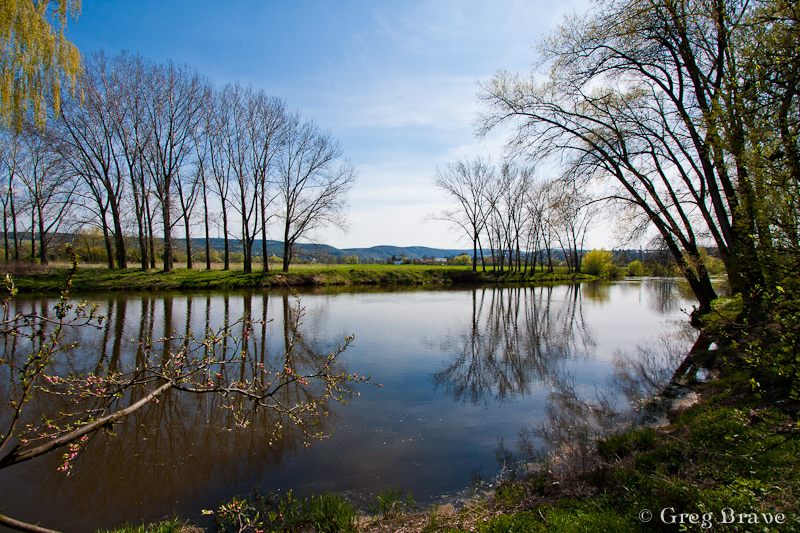
Photograph by Greg Brave. Click on the photo to enlarge.
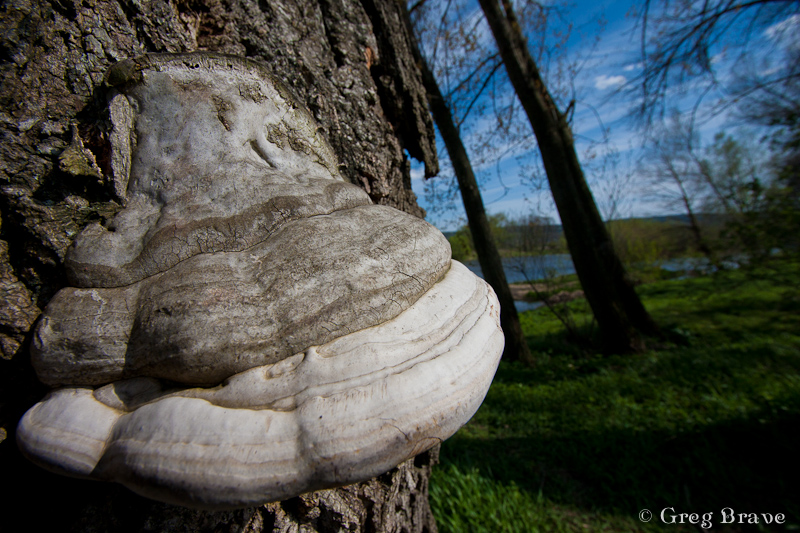
While walking, I saw this horse’s hoof fungus. Well, it is not an unusual sight, at least not in Europe, but I just got this idea to photograph it, but as always I looked for somewhat different way of doing it. I decided to use a wide angle lens to emphasize its form and at the same time to hint about where it grows.
Photograph by Greg Brave. Click on the photo to enlarge.
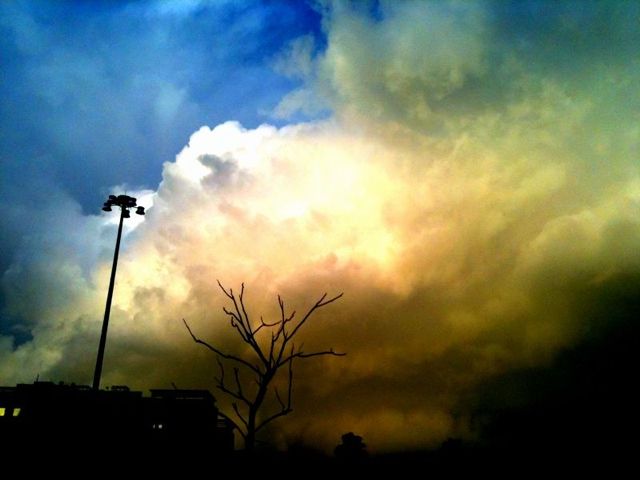
When I took the photo below I was almost certain that it won’t be something I’d share. The sun was harsh creating a very high contrast between the sky and the earth, but the clouds looked so interesting that I couldn’t resist giving it a try. And I am glad I did! I like this photo because it is pretty simple, but at the same time it conveys movement and a feel of space.
Actually this photo didn’t look exactly like this when I opened it in Lightroom. The lower half of it was almost completely dark. But here comes the magic of shooting raw – using the “fill light” slider I was able to recover many details. In general, I use the “fill light” adjustment slider when I am forced to shoot in harsh afternoon light, and there are some strong shadows. The fill light adjustment helps make these shadows much less disturbing.

Photograph by Greg Brave. Click on the photo to enlarge.
Next photo is pretty ordinary, I mean there are many photos like it out there, but I still liked it for being so bright, happy, and colorful, and couldn’t resist sharing it.
Photograph by Greg Brave. Click on the photo to enlarge.
I am not presenting here photos I made in Prague, since not long ago I had a more substantial trip to Prague and already posted photos from it. You can find my articles about Prague here and here.
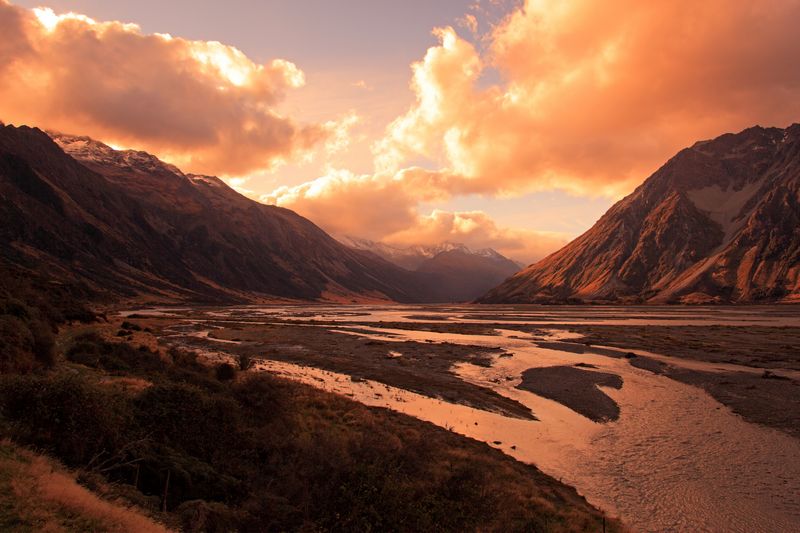
After short stop in Prague we continued to our main destination – Switzerland. I always wanted to see whether this country is as beautiful as photographs show. Believe me – it is!
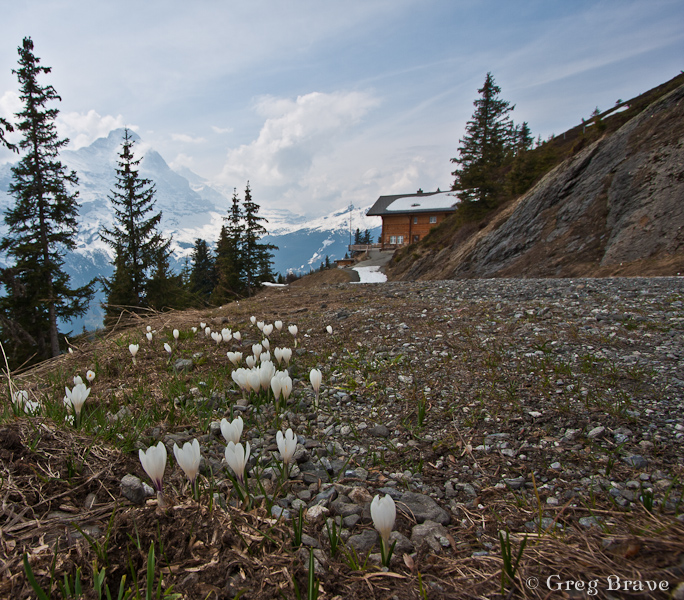
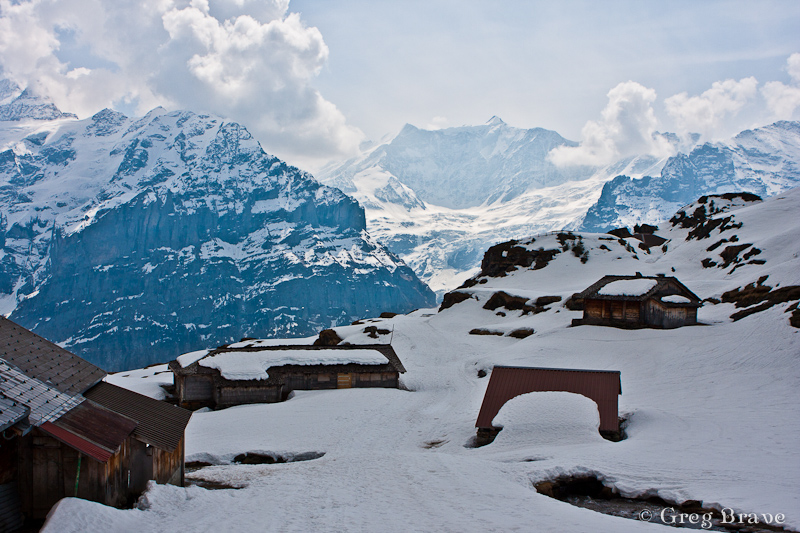
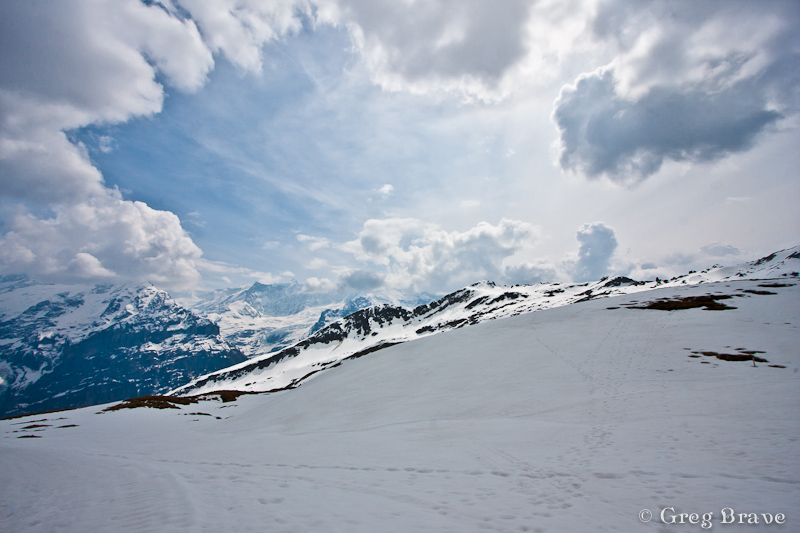
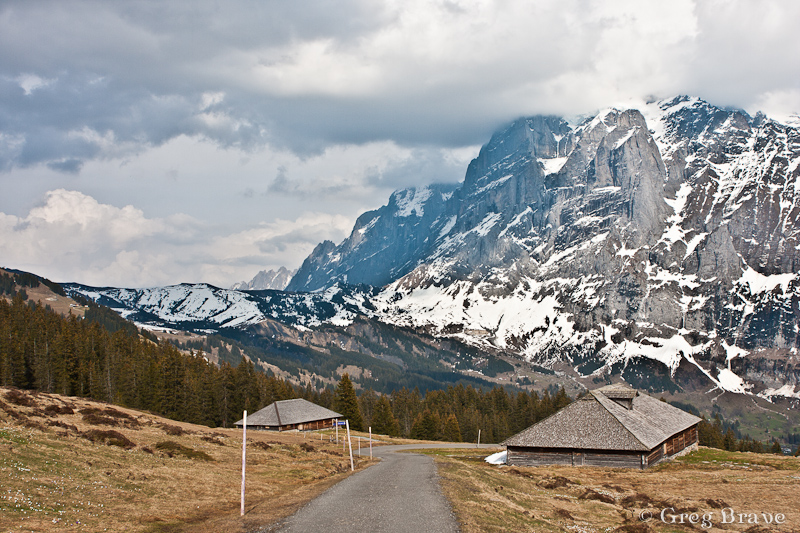
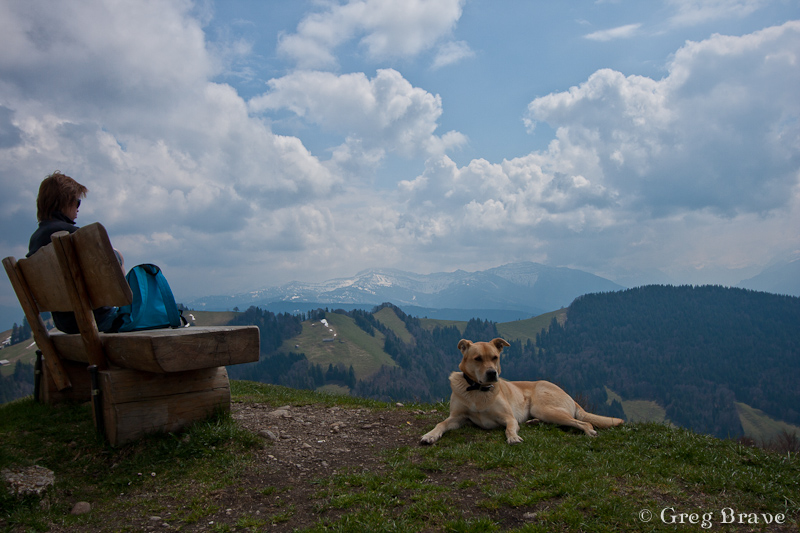
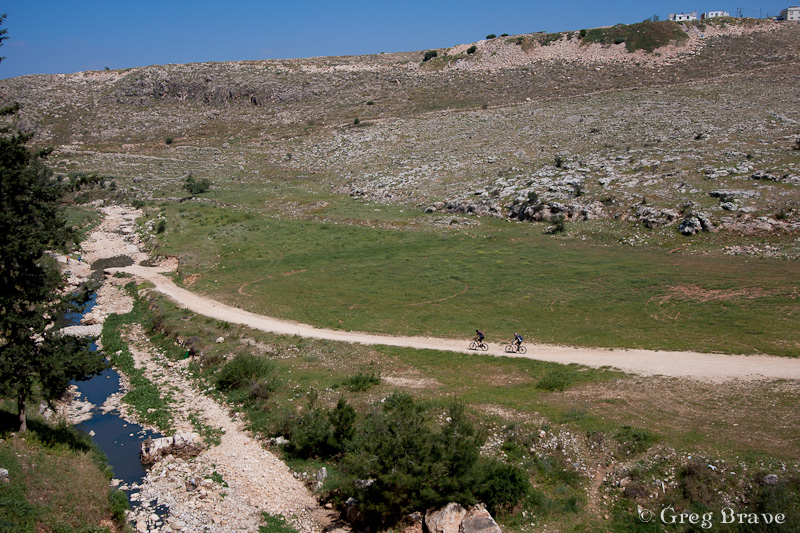
Our first destination was small town named Grindelwald. It is located in a very beautiful and mountainous area, which was exactly what we wanted. We camped in Grindelwald and went for a long hikes up the mountains from there. Since late April is still pretty cold, there weren’t much tourists (the ski season was over, and the summer hiking season didn’t begin yet), and we mostly hiked alone.
In the photographs below I will show some of the stunning views we saw on our hikes.

Photographs by Greg Brave. Click on the photo to enlarge.
I was looking for interesting shapes, patterns and angles to create interesting photographs, that would stand out. Whether I succeeded or not is for you to decide.
On one of our hikes we went so high up the mountains that we reached areas where snow didn’t melt yet and the wooden houses, which are restaurants and resorts in the summer, were completely covered with snow! There is one catch in photographing snow under bright sunlight (just in case that you are not familiar with it) – because the snow is so white it reflects the light very good, and the light meter in the camera perceives the scene to be very bright thus underexposing the photograph. So you have to set your exposure compensation to about +1 stop. It is not an exact science so just try and see for yourself.
Photographs by Greg Brave. Click on the photo to enlarge.
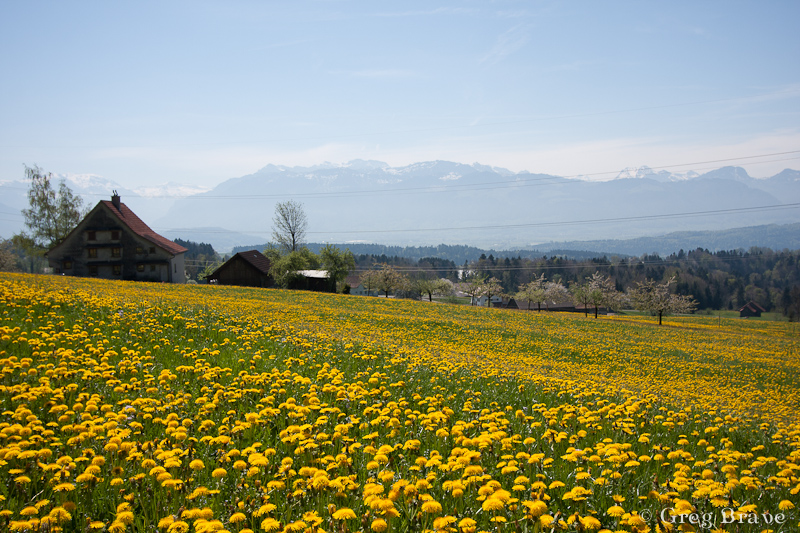
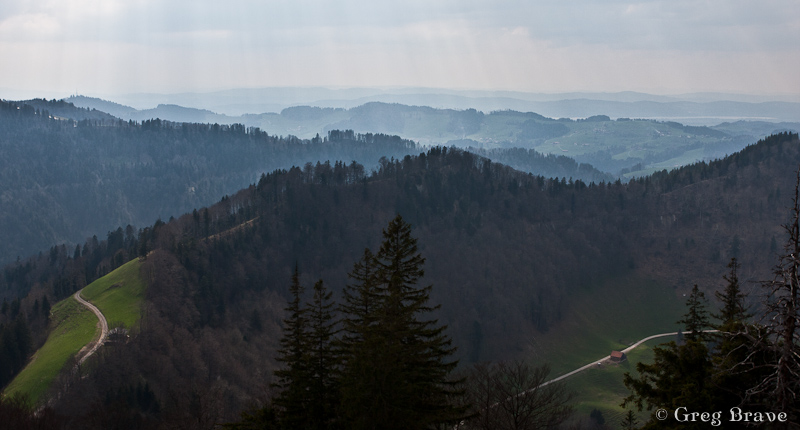
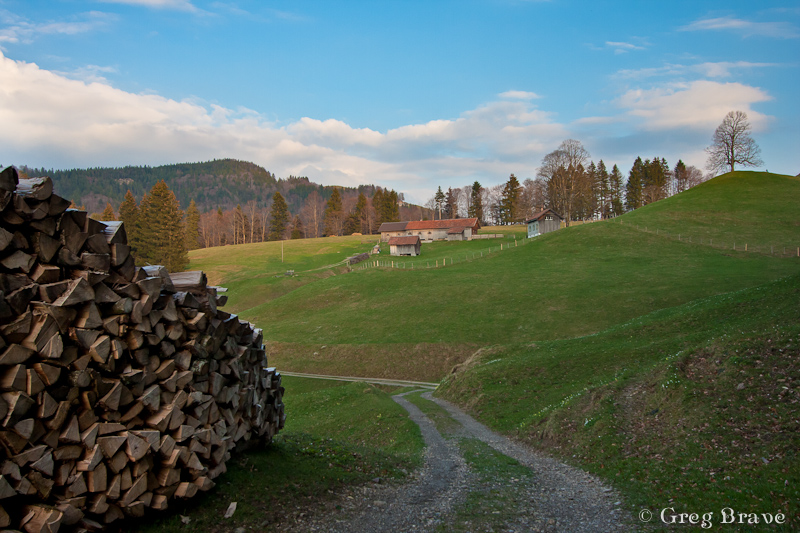
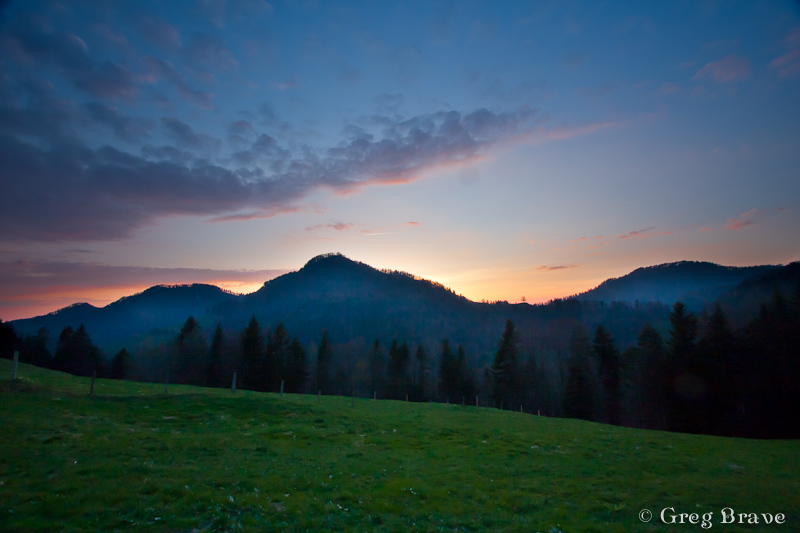
After two days in Grindelwald area we went to another area near town named Hintergoldingen, also with mountains but they were lower so there was almost no snow there. The next photo is from that area. The wast green fields are breathtaking! At the end of this article I will put some more photos from here.
Photograph by Greg Brave. Click on the photo to enlarge.
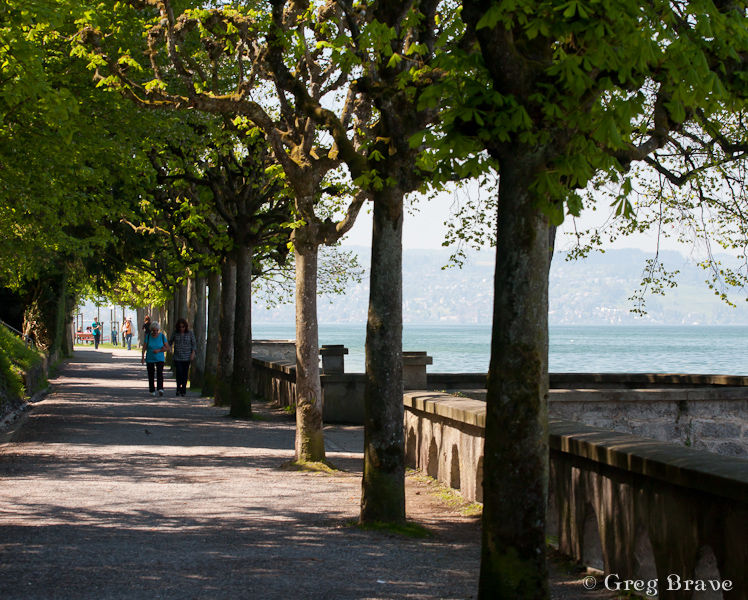
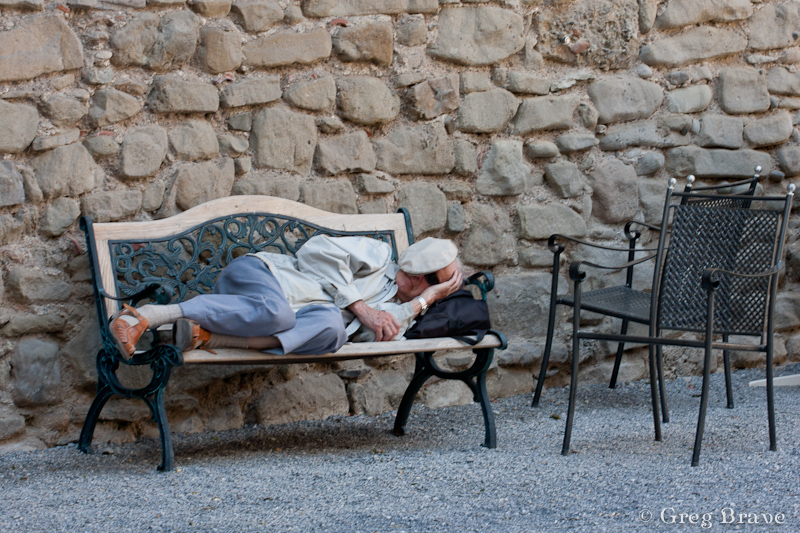
And finally on our last day, on the way to the Zurich airport, we stopped in Rapperswill – a small town located near Zurich lake. This tree caught my attention as light was hitting its leaves making them shine beautifully.

Photograph by Greg Brave. Click on the photo to enlarge.
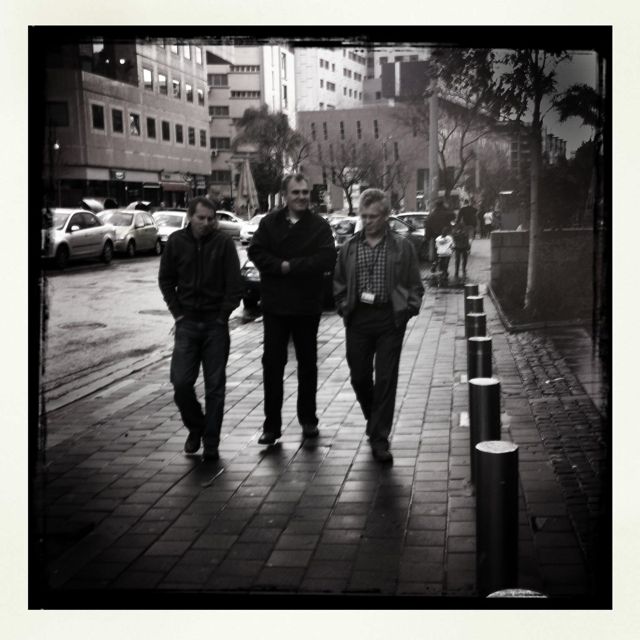
I also tried to capture the slow pace of this place, where locals and tourists relax and don’t hurry anywhere.
Photographs by Greg Brave. Click on the photo to enlarge.
Photographs by Greg Brave. Click on the photo to enlarge.
We had a great time on our trip and I hope I succeeded in showing it in my photographs. I bought a backpack for my photographic equipment especially for this trip, it was a “CompuRover” from Lowepro. I was very satisfied with it and I am planning to write a detailed review on it in the near future, so stay tuned if you are interested!
This is it for now, and until next time take care!
Greg.
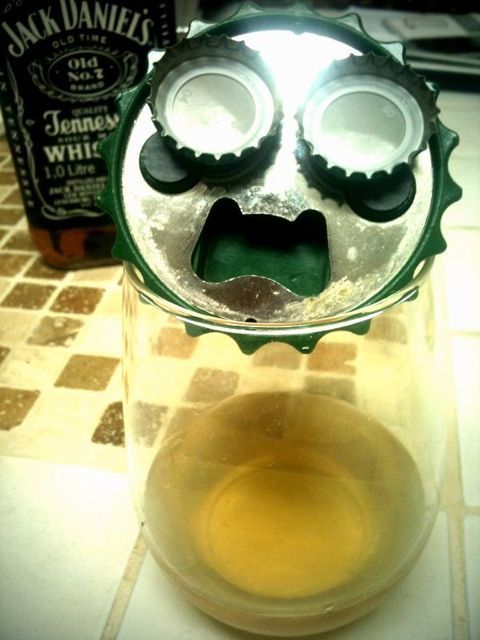
Beer vs Whisky
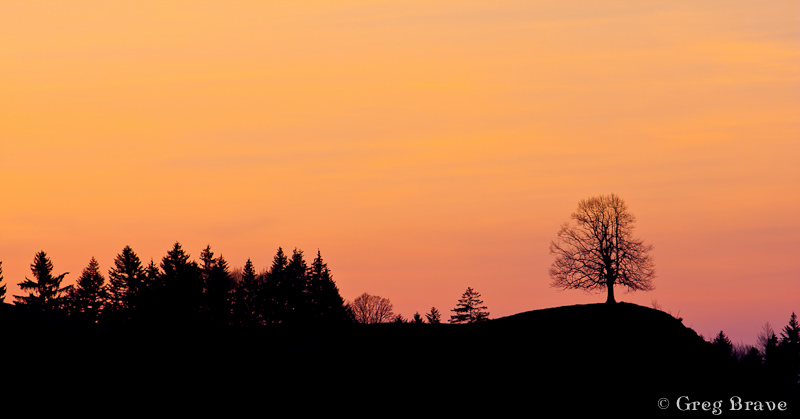
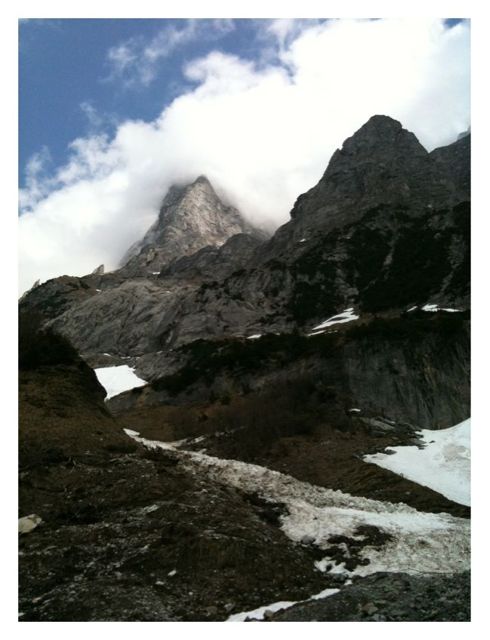
Near Grindelwald, Switzerland
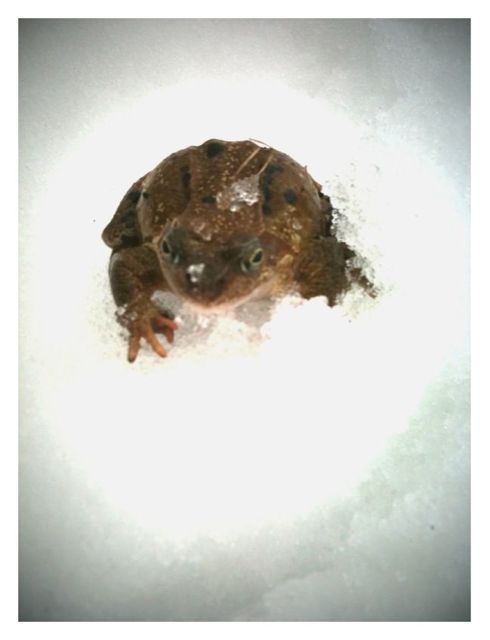
Did you know that frogs can live on the snow?
Spring Afternoon
I was featured on DigitalRev
This is a big day for me! Actually it happened a little while ago – I got featured on DigitalRev.com!
DigitalRev is a very nice site. It is mostly a photography gear shop, but if you look closer, and I suggest that, you’ll find some hidden gems there.
Let me point out some of them:
- They have the section named “News & Reviews”, and under it they have “Featured Photographers” section. Browsing through this section, I found many interesting interviews with great photographers. learned a lot from there, and I am very proud to be a part of this section!
- They also have nice section named “DigitalRev TV“. In this section you’ll find video reviews of different photo and photo-related gear. These video reviews are pretty straight forward, and if you are a pro, you might not find them very useful, but to me, the great thing about them was that I got to see (in video and not in photos) the photo gear that I can only dream about, and what it can do.
Take for example this review of the new Canon 70-200 f2.8L IS Mark II lens.
- And finally they have a blog. If you want to keep up with all the news in the world of photography, this blog would be a big help, as it is constantly updated with articles about new stuff that comes out.
The whole site is written in a very friendly manner, which makes it fun and easy to read (and watch the videos), so if you would like to rest a little away from these fifty-pages detailed in-depth reviews of DPreview, DigitalRev just may be a good choice.
I will be visiting this site quite often to look for new blog posts, photographers, and reviews, and I’ll share my findings with you from time to time.
Shaped Clouds
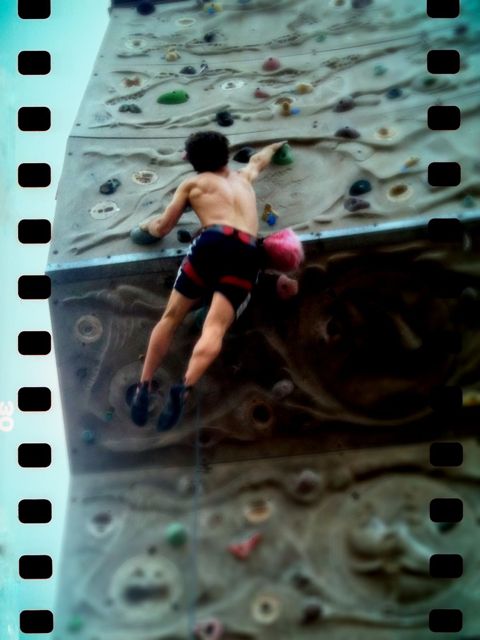
Combining two hobbies together
In addition to my passion for photography I also like to climb. Climb as in rock climbing. Up until now I didn’t mix these two things, and when I went out climbing I didn’t take my DSLR with me, because I was afraid that it would “get hurt”, and I also wanted to concentrate on climbing. Actually I was climbing long before I got into photography, so at first there was no issue here. But since I started photographing it always bugged me that I don’t have my camera with me.

Photograph by Greg Brave. Click on the photo to enlarge.
Recently it started bugging me so much that I couldn’t resist it anymore, and took my camera and three lenses with me when we went to climb. I decided first to climb a few routes, and then to take photos of my friends climbing. It worked out just great.
In my photos, I wanted to achieve several goals:
1. To show the surroundings in which we climbed.
Photograph by Greg Brave. Click on the photo to enlarge.
2. To show the climber and the belayer in such a way that viewer would understand what is going on, and also to make the height of the climb “visible”, so the viewer would feel that the climber is high above the ground.
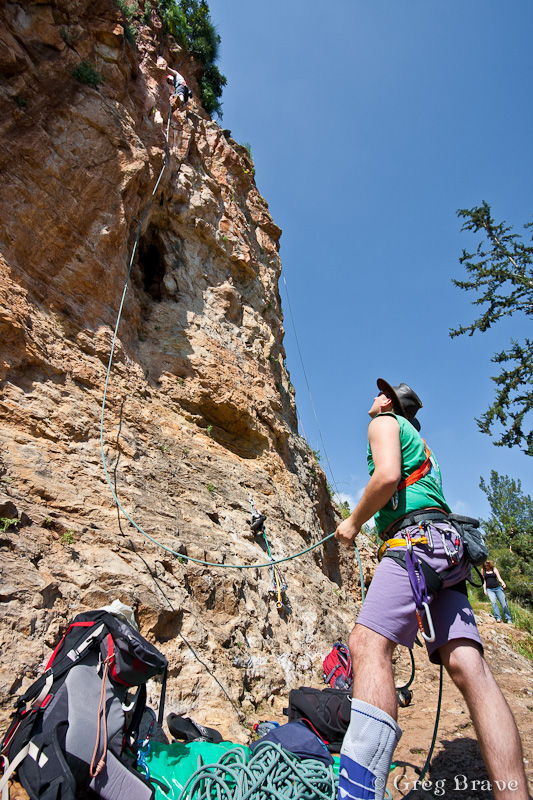
Photograph by Greg Brave. Click on the photo to enlarge.
3. To show the dynamics of climber when he climbs the route.
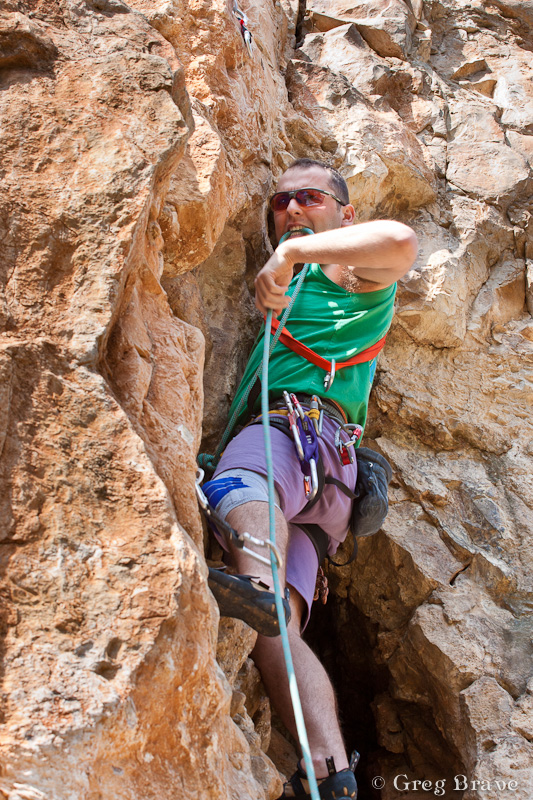

Photographs by Greg Brave. Click on the photo to enlarge.
4. To create rather artistic than documentary photos.
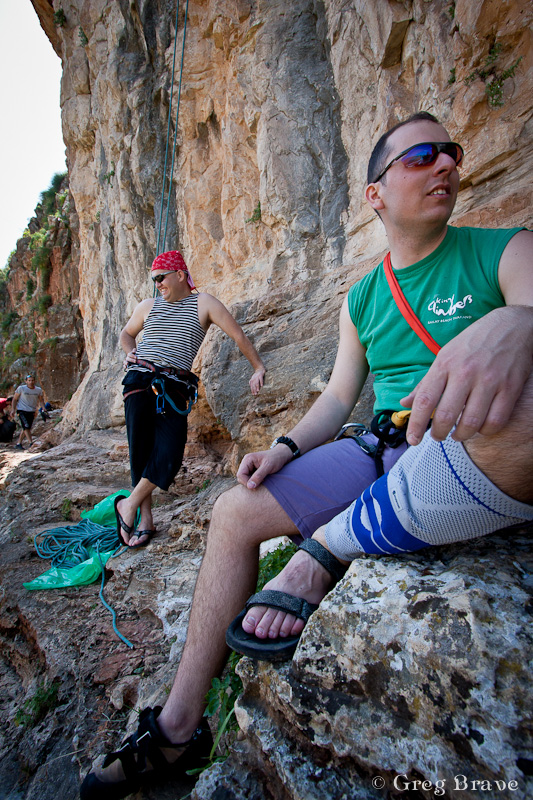
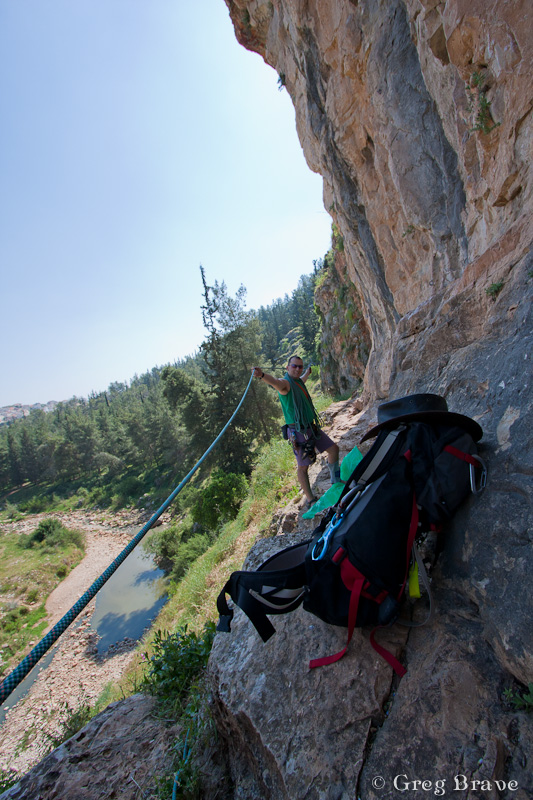
Photographs by Greg Brave. Click on the photo to enlarge.
You can judge for yourself to what extent I succeeded in achieving these goals.
One very important thing that I couldn’t control was the harsh sunlight, which made the contrast between the shadows and highlights very strong. When I go to photograph alone, I can time my visit to early morning or late afternoon, but in this case there were factors beyond my control. Partial solution to the harsh sunlight was shooting in RAW, and then in post processing playing with the “fill light” and “contrast” sliders to make the deep shadows brighter.
Any comments, suggestions, or opinions are always welcome.
Till the next time, take care!
Greg.
Lunch Circles
Lunch Break
Contemporary Art
Interview with Michael Lidski
Before reading this interview I suggest reading my Introduction to Interviews with Photographers.
Michael Lidski is a professional photographer currently living in New Zealand. He has lived in several places around the world and traveled in many more. Michael kindly agreed to give me this interview, in which he reveals parts of his life story and also shares his professional opinions on photographic equipment that he uses, all this together with many examples of his beautiful photographs.
Ladies and Gentlemen, I am proud to present you – Michael Lidski !
Self portrait by Michael Lidski. Click on the photo to enlarge.
Tell a little about yourself. Where are you from?
I am from USSR (remember, once upon a time there used to be a USSR?) – and left it when it was still called a USSR, albeit falling to pieces.

Photo by Michael Lidski. Click on the photo to enlarge.
I was born and grew up in the city of Kiev – the Mother of Russian cities, today it is the capital of Ukraine, which is trying to be an independent country.

Photo by Michael Lidski. Click on the photo to enlarge.
I am Russian by language and culture. It always was a bit of a love-hate relationship, because on one hand Russian culture, especially Russian literature is great and I’m proud of it, but on the other hand, while living in USSR, I always wanted to leave it, because I considered it a totalitarian police state inhabited by a rather barbarian people.
Photo by Michael Lidski. Click on the photo to enlarge.
Doctor Zhivago’s self-sacrifice always seemed wrong to me, because the people whom it was supposed to be for were unworthy of it. One of my favorite jokes about Soviet Union is about a young guy who appears in court for killing an old woman in the street at night to rob her.
The judge says:
– Young man, how possibly could you have killed a poor old lady – and for what?! For just one rouble you found in her purse?!
The defendant replies:
– Well, your honour, look at it from my perspective: 5 old ladies buys a bottle of vodka, ey!
Unfortunately, it seems that the only thing that changed over there since then is the price of vodka.

Photo by Michael Lidski. Click on the photo to enlarge.
This is the miners wives’ strike – their husbands didn’t get paid for several years. Translation of their banner: “Independent Ukraine has everything but God, Truth and Honor”.
Having been forcibly stripped off my Soviet citizenship (and having had to pay for that, too) – no great loss, by the way – I immigrated to Israel when I was 29 and spent the next 15 years there…
Photos by Michael Lidski. Click on the photo to enlarge.
…unsuccessfully trying to become part of the great Zionist idea for the first 10 years and then for the next 5 years trying to figure out where to go to have a normal life. I traveled quite a bit in the meantime…
Photos by Michael Lidski. Click on the photo to enlarge.
…gaining some ideas about how different can life be in different societies. Maybe, like Bulgakov’s Master, I haven’t earned the Light, but have earned my Rest – New Zealand became my Eternal Refuge, and here I am today…


Photos by Michael Lidski. Click on the photo to enlarge.
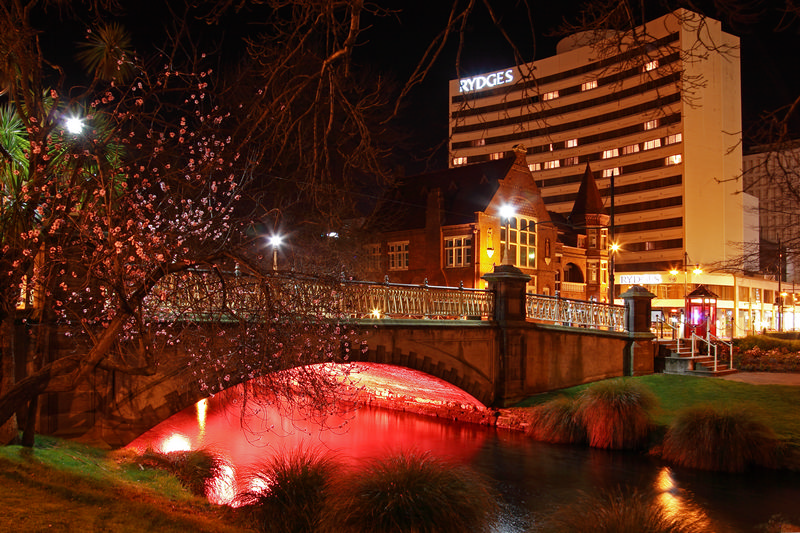
…living in a place probably as close to paradise as one can find on Earth, in the city of Christchurch:
Photo by Michael Lidski. Click on the photo to enlarge.
The following image has nothing to do with me, it is a humorous portrayal of New Zealand by an artist whom I would like to thank for using his work:
Click on the photo to enlarge.
How did you get involved in photography and how long have you been into photography?
I became interested in photography quite early, my first works were published 25 years ago, when I was studying to become a biologist. By 1990 I became a pro photographer instead, working at the ‘Radyans’ka Ukrayina’ state publishing house (department of artistic postcards, calendars and photo albums).
By now I have more than 3.000 images & 500 articles published in various books, magazines, newspapers, calendars, postcards, etc. Artworks in private collections in Christchurch, London, San-Francisco, Tel-Aviv, Jerusalem and Kiev.
What was your first camera?
I got my first camera as a birthday present when I was 7 years old, it was an ‘Etude’:
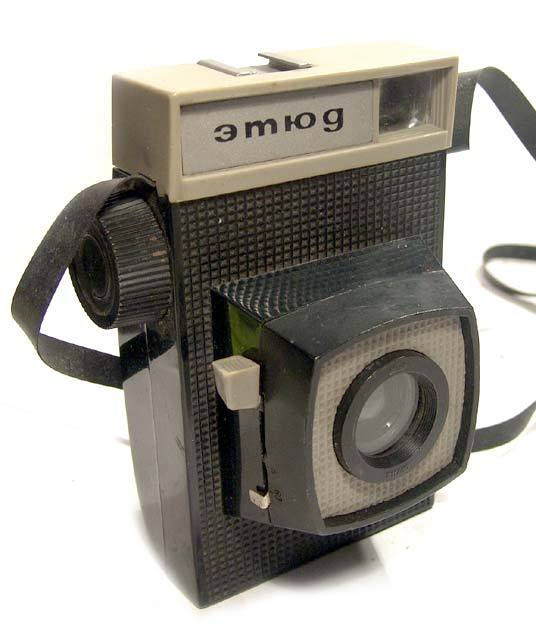
Click on the photo to enlarge.
and it was the worst camera ever made as far as I can tell, no way it could take photos!
What projects are you involved in nowadays?
I am currently doing several different things in terms of photography:
1) Private customer orders, like portraits, events, technical photography, etc. Those are mostly rewarding in terms of $$$.
Photo by Michael Lidski. Click on the photo to enlarge.
here you can see more examples
2) Digital art based on photography:
Photo by Michael Lidski. Click on the photo to enlarge.
My canvases exhibited (and occasionally even sold) in art galleries; here you can see more examples of my digital art.
3) Nature photography: Critters, Landscapes, Nature, and I love doing it. I also love shooting Cities
4) Last but not least – studio photography (it’s a fairly recent thing for me and I’m enjoying it!):

Photos by Michael Lidski. Click on the photo to enlarge.
What gives you inspiration in photography and how do you keep creative and improve?
Difficult question. First and foremost I would like to say that my beautiful wife is my inspiration – I couldn’t live without her! Second – I would say that the most important thing in photography for me is not to register the reality, but rather to express myself through portraying it. Like an artist expresses himself in his paintings, like a composer expresses himself in his music, like a poet expresses himself in his poems. Only sometimes I think that ‘inspiration’ is more like a transmission of a divine ‘radio’ signal, for which an artist simply serves as a receiver. I am like a camera obscura, a pinhole through which the divine light passes into this world…
Photo by Michael Lidski. Click on the photo to enlarge.
…creating images for people to admire. At least I hope I am…
What do you like to shoot the most?
I am always concentrating on what I’m shooting and processing now. My most recent shoots were a young couple double portrait session done in the studio and outdoors, a shoot of rare birds from a boat in the ocean, and a landscape session in a remote location which was difficult to access.
What equipment do you use?
Canon 5D, Canon 5D Mark II, Canon 1Ds Mark III, Canon 15mm fisheye:
Photo by Michael Lidski. Click on the photo to enlarge.
Canon 17mm TS-E L:

Photo by Michael Lidski. Click on the photo to enlarge.
Canon 85mm F1.2 Mark II L:

Photo by Michael Lidski. Click on the photo to enlarge.
Canon 28-300mm IS L:

Photo by Michael Lidski. Click on the photo to enlarge.
Canon 200mm F1.8 L:
Photo by Michael Lidski. Click on the photo to enlarge.
Canon 2x TC:
Photo by Michael Lidski. Click on the photo to enlarge.
Kenko automatic extension tubes:
Photo by Michael Lidski. Click on the photo to enlarge.
My additional equipment includes:
Canon Speedlite 580EX Mark II flash, UNI-LOC tripod MA2300, 3 ancient Broncolor studio lights, ring flash diffuser for macro, a small and a large (14 inch) beauty dishes, flash remote cable, Manfrotto flash bracket, LowePro SuperTrekker back pack.
Now, that’s rather dry – what should I add? From my perspective, there is no ideal camera as of today. We are talking strictly Canon here, and should probably start with why. Wide format gives better image quality, but is rather limited in it’s use due to available focal lengths of lenses and the absence of higher ISO, not to mention the prices and weight/size.
Nikon D3x is not a bad camera, but I would never switch because of the lenses Nikon doesn’t have (2 of which I own and enjoy). Cropped (castrated) sensor cameras have image quality visibly inferior to full frame. Of course, it would be nice to use different formats, cameras and systems for different purposes, like, wide format only in the studio, etc., but that’s just too expensive. So that limits us to the cameras listed, right? Of those I’m not happy with either one, because 5D is ancient (no highlight tone priority, no usable ISO 6400, slow AF), 5D Mark II has issues (noise and banding at base ISO visible in post-processing, red/inky blotch colour issue, slow AF), and 1Ds Mark III is in respects inferior to 5D Mark II (monitor, higher ISO) – so I’m anxiously waiting for Canon 1Ds Mark IV, which I’ll buy as soon as it comes out.
I hope I won’t have to wait much longer. Well, bodies come and go but lenses stay, as they say, so about the lenses: my fisheye is a very sharp lens, but not an L lens due to inferior build quality (went to warranty repair and back recently), disgusting chromatic aberration and – oh, I wouldn’t mind if it could focus closer, but there is no alternative. Of course, there is a comparable Sigma, but it is not better than Canon…
17mm TS-E is an awesome lens, very sharp, easily usable handheld with liveview in spite of no AF, the one and only wideangle.
28-300 is surprisingly good optically for its zoom range and very versatile.
85/1.2 is bloody awesome, same as the 200/1.8 – unique bokeh, creamy, beautiful – and razor-sharp where the focus is:
In this thread on dpreview forum you can read (and see examples) about my Holy Grail – Canon 200/f1.8 L series lens
And finally, if you had only two tips to give to a beginner photographer what would they be?
A) Choose a different profession which would guarantee you a well-paid, reliable regular job and let photography be your hobby.
B) Have fun while you are young!
Thank you Michael for this wonderful interview. Personally I enjoyed it very much, and I am sure that all my readers will!
Good luck to you in your present and future projects!
Cheers,
Greg.
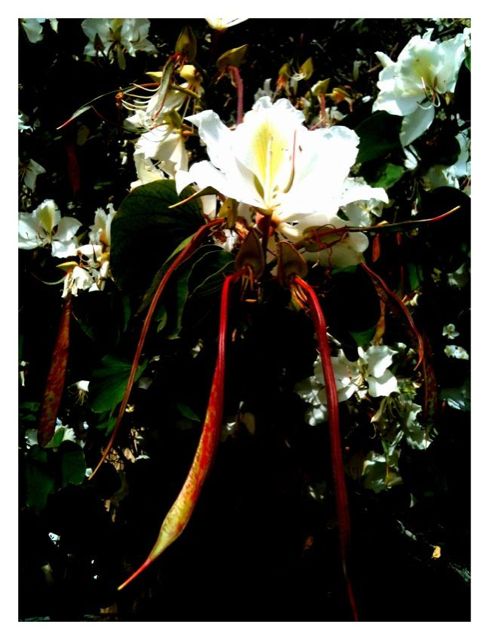
Flowers… Again
Fields…
Spring Blossom
Phone Conversation
Rage
Smoke and Bubbles
In every photographer’s evolution process comes a time when he tries to photograph smoke. As a result you can see many photos of smoke on the internet. Now my time has come!
As always I wanted to do something different with smoke, so that my photos will differ from most of what can be seen online. Common practice with photographing smoke is to photograph it with plain white flash and then add color to it in photoshop. But I decided to do it a little bit different – I used flashes with colored gels on them, so I received the colored smoke “in-camera”. That was not enough for me and I tried to use two flashes with different color gels pointing at different parts of smoke, and here you can see what came out of it:
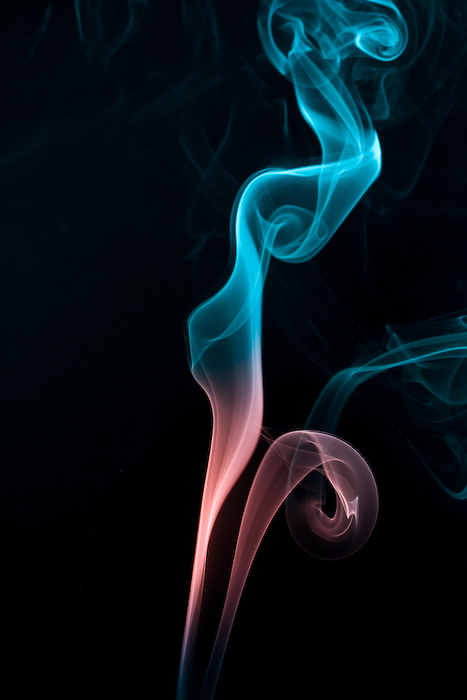
Photo by Greg Brave. Click on the photo to enlarge.
The red flash had a gobo so that the light wouldn’t spill on the top blue part, and it was also stronger than blue flash so it would overpower the blue light spilling from above. Of course I didn’t get the result that you see in the photo above right away. It took me couple dozens of shots to achieve it.
My next move was the following one – I thought that most of the beautiful smoke I saw online wasn’t “attached” to anything, so I tried to add a “source” to the smoke as you can see in the photo below.
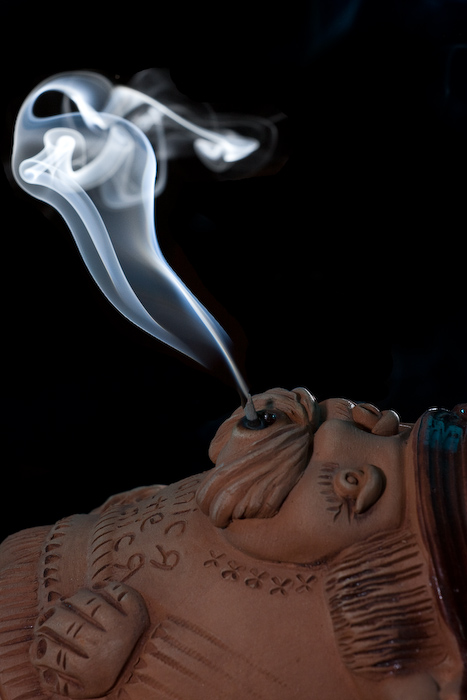
Photo by Greg Brave. Click on the photo to enlarge.
In this photo I faced a technical issue – the flash power that I needed to properly light the smoke was too much for the “smoker” and resulted in overexposed lower part of the photo. I solved this issue by using again two flashes. The flash that was lighting the smoke was placed behind and to the right of the “smoker” and set to “high” power. Then I used a second flash to light the smoker, and placed it in front of the smoker and a little bit to the left. This flash was set to a much lower power and was directed in such a way that the light from it wouldn’t spill on the background (because I wanted a black background).
Here is another attempt of adding a source to the smoke.
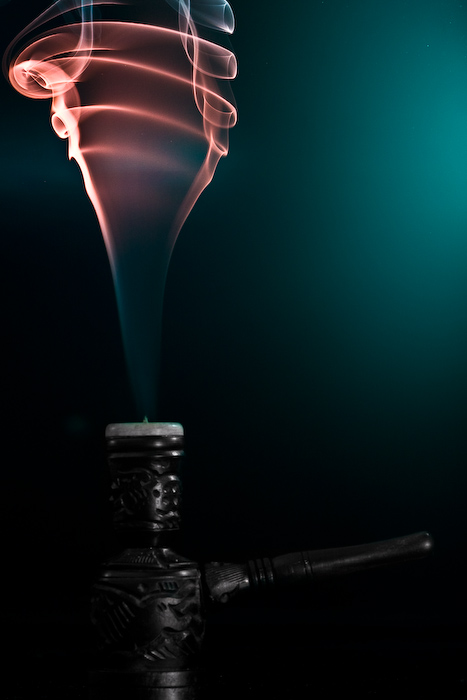
Photo by Greg Brave. Click on the photo to enlarge.
For this shot I also used two flashes – one with dark-green and another with red gel on it. The red flash was placed from the left and pointed high up to light the upper part of the smoke, while the green flash was placed to the right of the composition and pointed to the lower part. In this photo I had a glossy background and you can see the greenish reflection of the flash in it. I tried to shoot this scene also with matte background but I liked this version more because it adds nice color touch to the overall dark image.
Continuing my experiments I placed two smoke sources and tried to blow on the smoke to create different shapes while I am taking shots of it. I got many interesting photos this way, and this is the one photo I chose to present here:

Photo by Greg Brave. Click on the photo to enlarge.
Strangely it reminds me of two opposite sex persons having a conversation. In this shot and two of the following shots I used two flashes with blue and red gels on them, placed from the sides of the frame pointed up at the smoke and away from the background.
This is pretty important – if you want your background to remain dark, you have to point your flashes towards the camera and away from the background. When I say “towards the camera” it doesn’t mean that flashes have to point straight into the lens, they just need to be pointed in the direction of the camera and, again, away from the background. This way, since the light travels in straight lines it won’t hit the background (unless it reflects off something, so make sure it doesn’t) leaving it black.
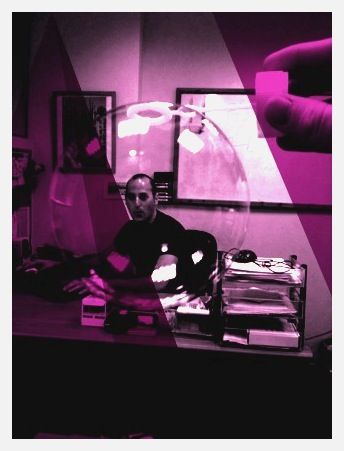
During the time that I was experimenting with smoke I was constantly thinking what more can I do to make my photos stand out. And one day, at work, my friend brought this childish toy to make soap bubbles. We had so much fun playing with it and remembering the days that we were kids… and then it hit me – I can combine smoke with bubbles to create beautiful images. At this point I started to visualize what can be done with smoke and bubbles, and the idea that I liked the most was to create image of a soap bubble resting on top of smoke pillar.
This was not an easy task to do, as I didn’t have anyone to help me shoot this. So here is what I did: I placed my camera on a tripod, and pointed it exactly at the area where I intended to “place” a bubble on top of the smoke pillar. I focused the lens on the plane of the smoke and changed to manual focus. Then I connected a remote shutter release cable so that I could stand away from the camera. Then I just made a soap bubble and tried to place it where I wanted, shooting in continuous mode during this whole process. Then bubble would pop, and after checking the LCD and seeing that I didn’t get any satisfactory results I would repeat the process.
Eventually, after way too many failures 🙂 here is what I’ve got:
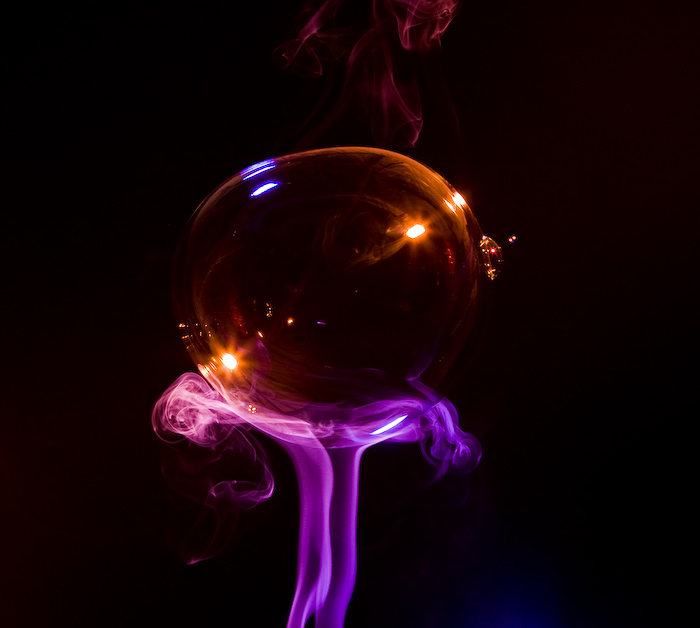
Photo by Greg Brave. Click on the photo to enlarge.
This is pretty much what I had in mind. But in the process I also got the following image, and I like it much more than the image above. It looks like a planet in deep space…
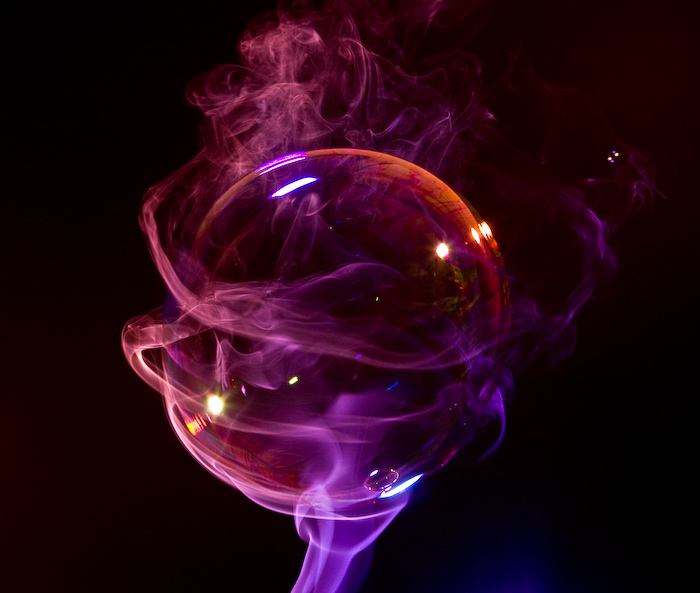
Photo by Greg Brave. Click on the photo to enlarge.
One more tip if you decide to try this yourself – bubbles reflect everything, and I mean EVERYTHING around them. So after seeing myself being reflected in the bubbles, I had to wear black sweater and a black hat to eliminate my reflection as much as possible. I also turned off any additional lights in the room.
In the next, and last photo I tried a little different approach – I used only one flash but I shot it through umbrella in order to make my light source bigger. In the result below you can see that umbrella can be recognized in the reflection, but I still like this photo. I call it “Aliens!” 🙂
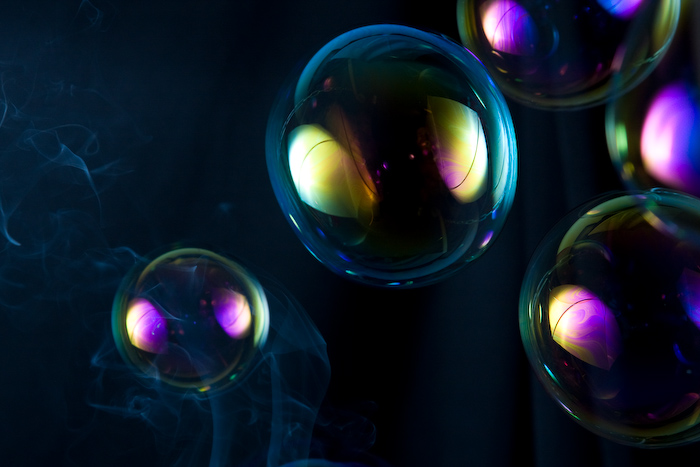
Photo by Greg Brave. Click on the photo to enlarge.
I hope that you learned something new from my experience with smoke and bubbles and it inspired you to try this yourself.
Comments, suggestions and critiques are welcome as always, and if you have any questions, technical or other, you can leave a comment or drop me an email to greg at photopathway dot com
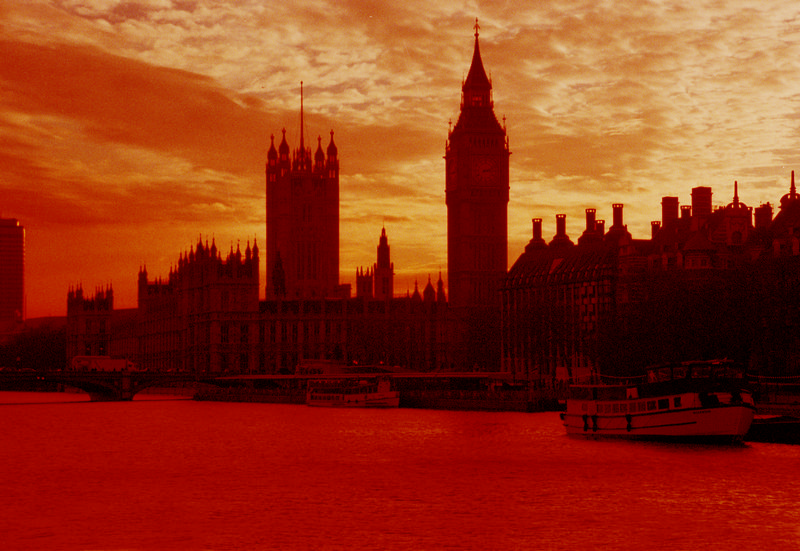
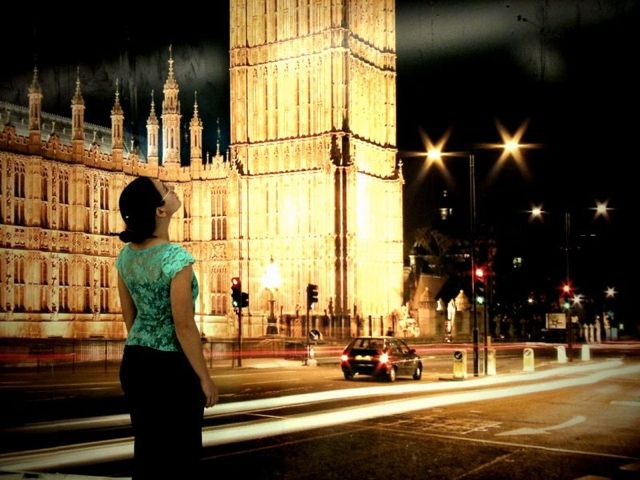
London, baby!
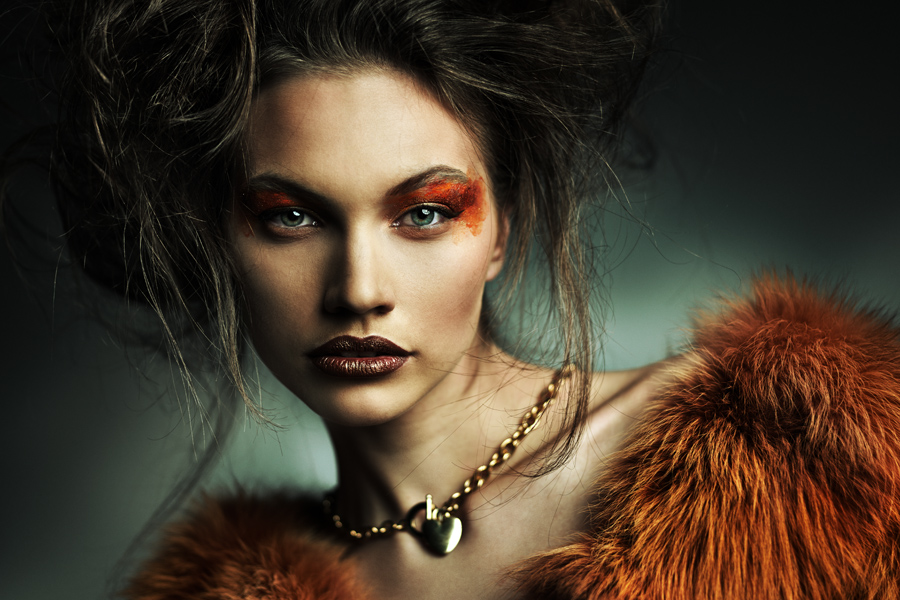
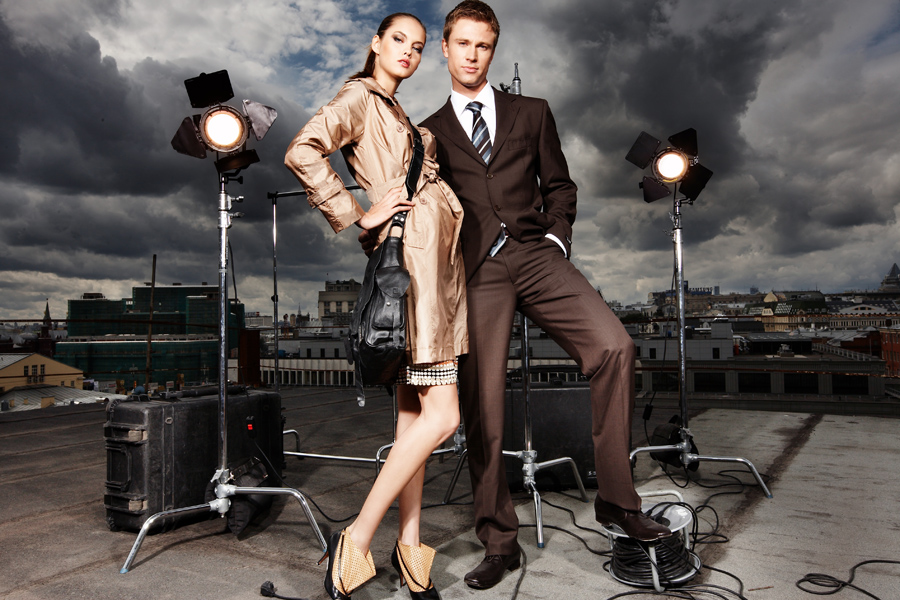
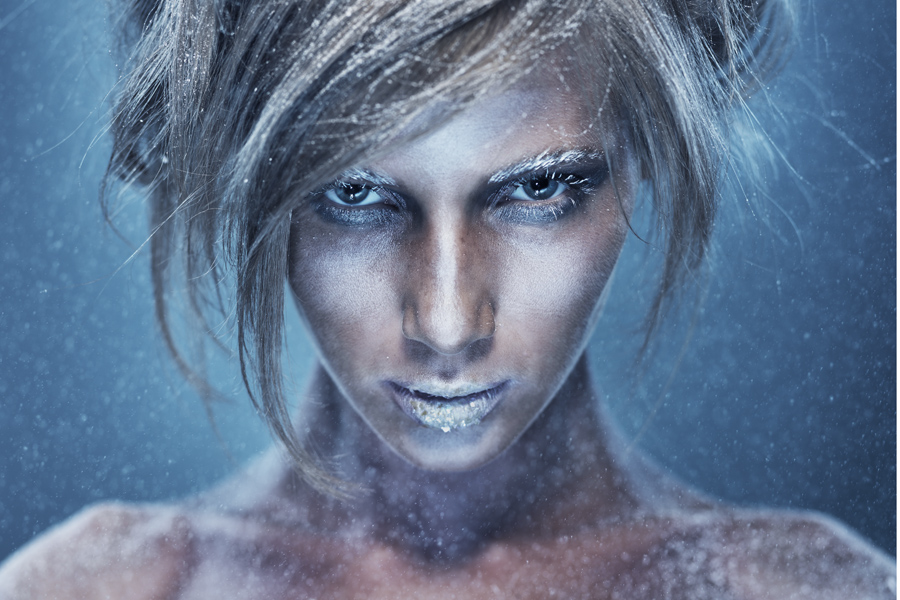
Interview with fashion photographer Oleg Igorin
Oleg Igorin is a fashion photographer currently working in New York. He has a pretty busy schedule but he was able to make time for this rather short interview. In compensation I get to show here quite a lot of his magnificent work!
Oleg Igorin. Click on the photo to enlarge.
First of all a little about you.
5 years ago, in Moscow, I bough a compact digital camera and started photographing. My first models were my friends. In time I got many clients, and it allowed me to set up my own large studio Moscow that gradually turned to my own rental business. Half a year ago I decided to move to New York, which is the capital of world’s commercial photography, and now I am working on creating my own studio and making connections with people in fashion industry
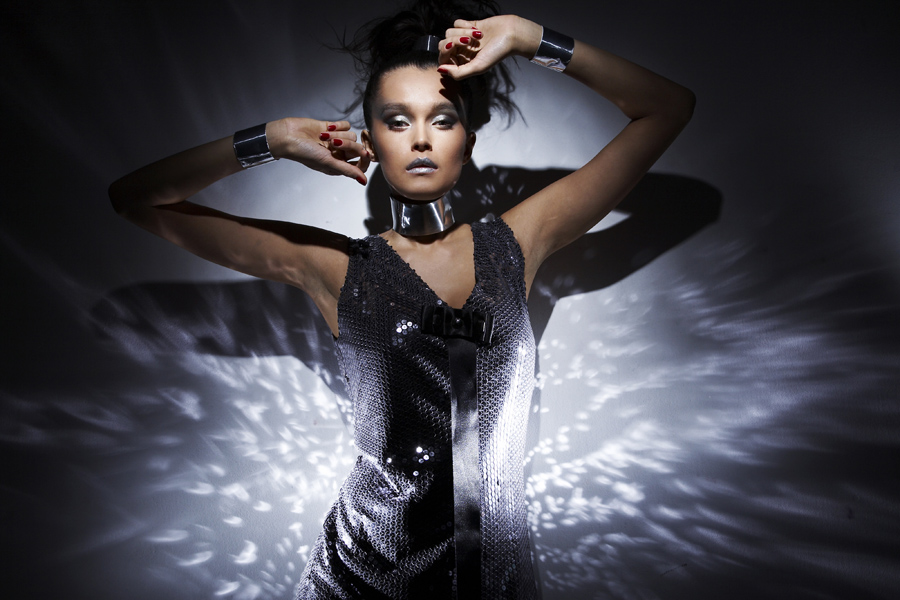
Photograph by Oleg Igorin. Click on the photo to enlarge.
Were you always interested in fashion photography or this interest developed over time?
Yes, I was always interested in fashion and beauty photography. I liked to paint and now it helps me to feel better the photographs that I make.
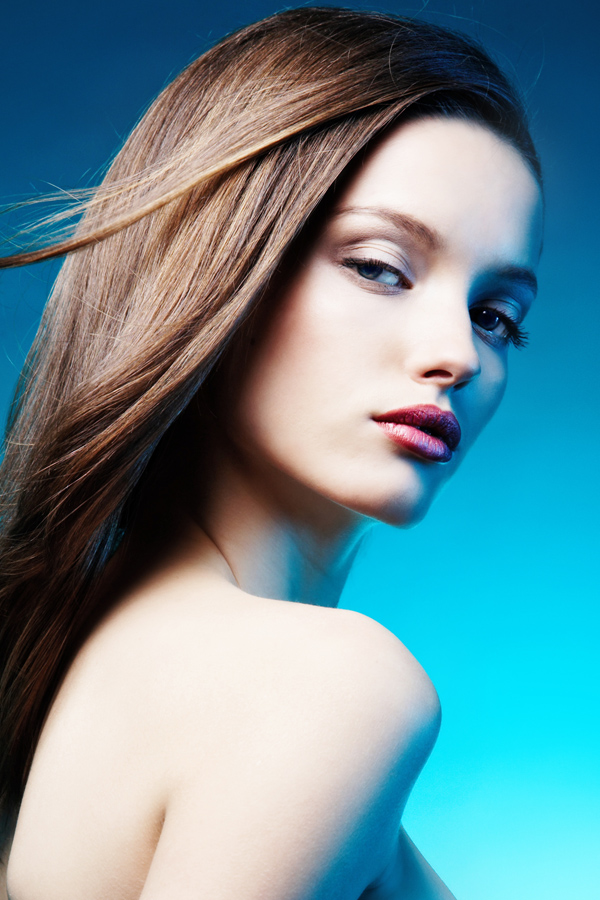
Photographs by Oleg Igorin. Click on the photo to enlarge.
How would you describe your photographic style?
With my work I want to show the beauty of people and fashion.
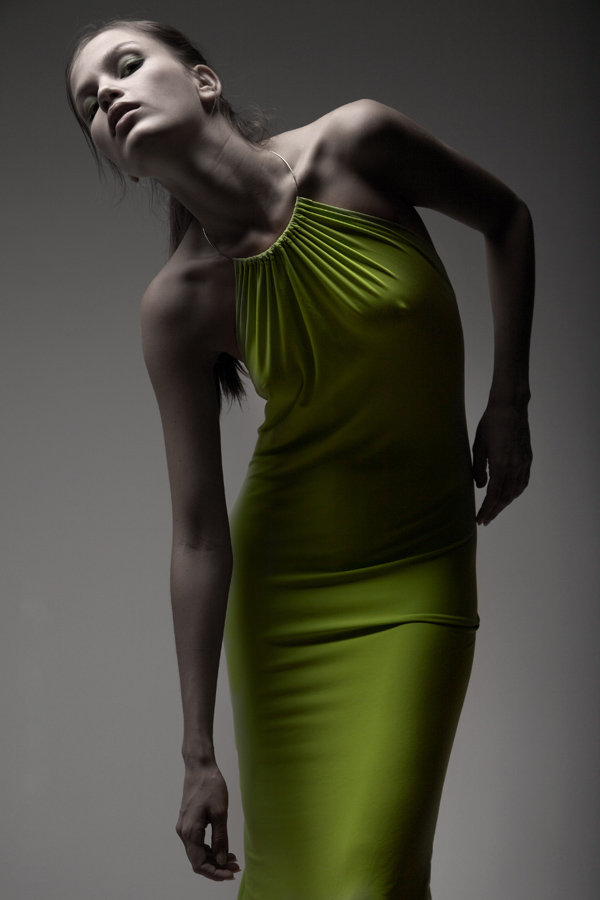
What does it take to be a fashion photographer?
It is very hard work that takes most of my time. But this is also a very interesting part of my life.
Photographs by Oleg Igorin. Click on the photo to enlarge.
Do you find your models or models find you?
Models are the part of my work. They appear when I need them.
Photograph by Oleg Igorin. Click on the photo to enlarge.
And now to more technical questions.
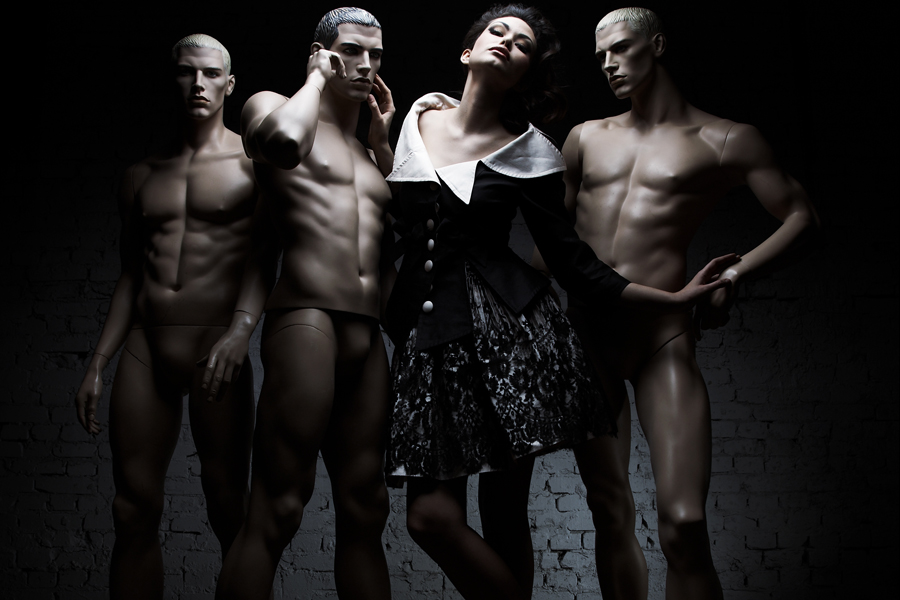
When you are photographing your models on the streets of New York city, how do you do that? I mean do you just take the model out on the street, take out all your gear and shoot ignoring the people around you, or you make certain preparations, ask people not to interfere?
New York is very “photographed” city and shooting on the streets doesn’t take a lot of people’s attention. For me it is much more interesting to take shots not in touristic places, but in the real New York – places that are usually not crowded.
Photographs by Oleg Igorin. Click on the photo to enlarge.
Where do you prefer to shoot – in your studio, or on location, and why?
I like studio, and I also like outdoor shooting. But I don’t like shooting in interiors. I don’t like it when a certain interior “forces” it’s story on my work.
Photograph by Oleg Igorin. Click on the photo to enlarge.
What photo and lighting gear are you using?
I use Hasselblad H3D-II 31MP, and for lighting I use Hensel equipment.
Can you share with us some of your favorite lighting techniques?
I like to experiment with lighting techniques, making a lot of discoveries every day. And I think that every photographer needs to do the same.
Photograph by Oleg Igorin. Click on the photo to enlarge.
What advice would you give to beginner photographers that want to start in fashion industry?
One of the best way is to work as an assistant of fashion photographer. You will get experience, connections and self-confidence.
Photographs by Oleg Igorin. Click on the photo to enlarge.
Thank you Oleg for your time and for sharing these great photographs with me and my readers!
Greg.
You can see more of Oleg’s work on his website
More Bubbles

Bubble Portrait
Almost Real
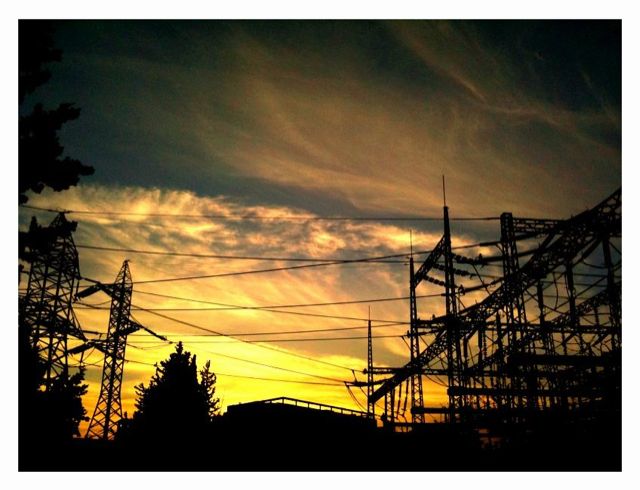
Electric Sunset
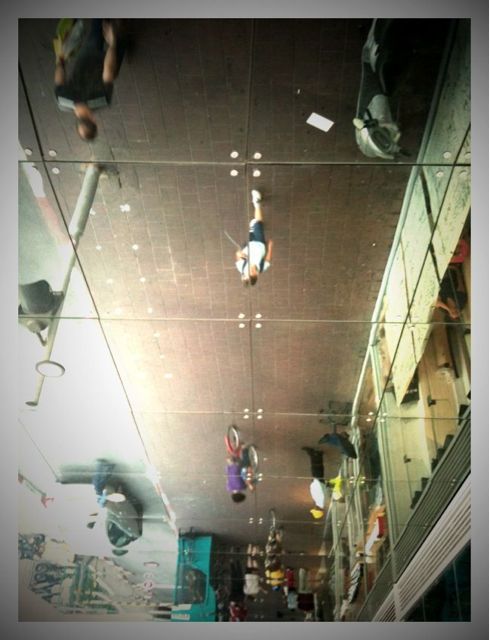
Upside down Street
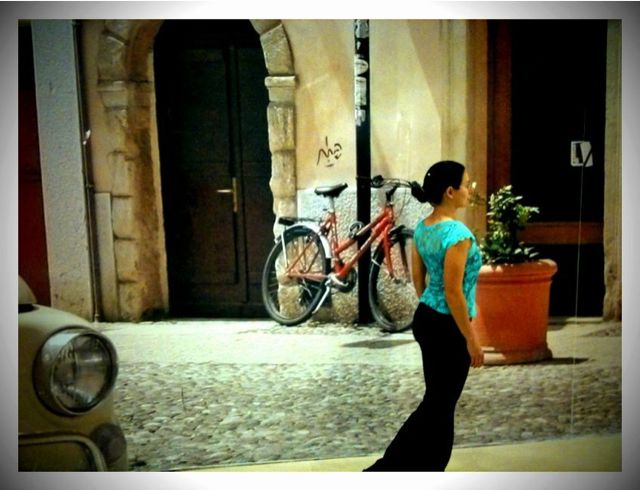
Lonely Girl
My Favorite Weather
Walking Trio
Beautiful Nature
Up and Away

On-location Photo Shoot
It was something I have been wanting to do for a long time, but didn’t have the guts to do it.
By “location” I mean simply going out to the city streets with my model and photographing her out there. I was always thinking – “what other people would think?” or “what would they say?” or something like that. But since I actually want to make progress in my photography, I thought doing photo shoot like that was absolutely necessary.
So I took my camera, my lighting equipment, my model :), and went out. Of course I didn’t just started wandering on the streets looking for nice places to be my locations. I noticed these locations beforehand while driving by, and thought that they would make a nice setting for a photo shoot.
On-location Photo Shoot, photo 1. Photograph by Greg Brave. Click on the photo to enlarge.
My lighting equipment was very simple – one Canon EX430 flash on a stand with umbrella and one cheap Chinese flash unit. I also had gels and gobos. The flashes were triggered remotely by wireless flash triggers.
During this photo shoot I had several problems from which I learned a lot, and now want to share with you.
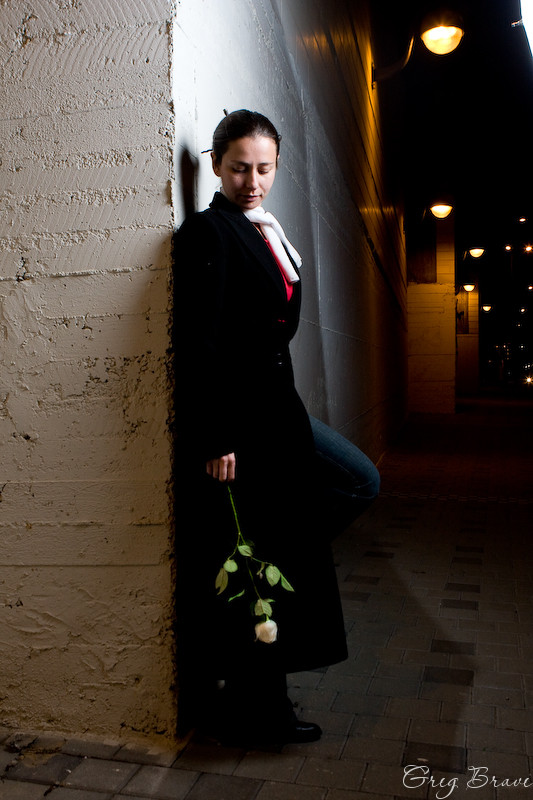
- It was a night time and my model, Ira, was wearing a black coat. It was pretty difficult to properly light the black coat in the dark. And though I planned that Ira would wear that coat during most of the shoot, eventually I had to give up and ask her to take it off. But! I also decided to use this lack of details to my advantage and tried to create compositions where it would add to the overall look instead of detracting from it.
On-location Photo Shoot, photo 2. Photograph by Greg Brave. Click on the photo to enlarge.
- This one is more tricky one, so pay attention: As I said I was using cheap Chinese remote flash triggers. The thing with them that they only trigger the flash, nothing more than that, so you have to use flash in manual control. But this wasn’t a problem. The thing is that when you shoot a person on a dark background, for example in a street at night, lit with street lights, and you want to light your person with a flash but you also want the background to be visible, you will have to use second curtain flash. This is a setting that you set in your camera, and I couldn’t do it because the remote flash triggers that I use do not support that. I found solution for this problem, but I am not fully satisfied with it: I put my camera on a tripod and first shot the background without the model exposing for the background. Then I started shooting Ira without moving my camera but having her adjusting her location so that she would be where I want her in the frame. And later in Photoshop I combined the foreground with the background.
On-location Photo Shoot, photo 3. Photograph by Greg Brave. Click on the photo to enlarge.
- My additional problem was focusing in the dark. In one location it was really dark – the closest street light was pretty far away, so that I had trouble auto-focusing. I have a Canon and I heard that Nikon has better auto-focusing in the dark. But in my case I wish I had a headlight so I could light my scene with it enabling my camera to focus. Eventually I had to focus manually, but I learned from it and in the future I will always have a flash light with me when shooting after dark.
On-location Photo Shoot, photo 4. Photograph by Greg Brave. Click on the photo to enlarge.
- And one last problem I would like to talk about was wind. I was lucky enough and the wind wasn’t strong, but if it would be just a little bit stronger, it would ruin my whole shoot. It is simple really – you have an umbrella on a light stand. Umbrella = sail. If wind blows into it, it will fall if the light stand doesn’t have counterweight. So always think about this when shooting outside and have something heavy to attach to the light stand.
On-location Photo Shoot, photo 5. Photograph by Greg Brave. Click on the photo to enlarge.
This is it for now. I hope my experience will help you on your photographic journey, and as always any comments about this article or about my photos presented here are welcome.
Cheers,
Greg.
I just like it
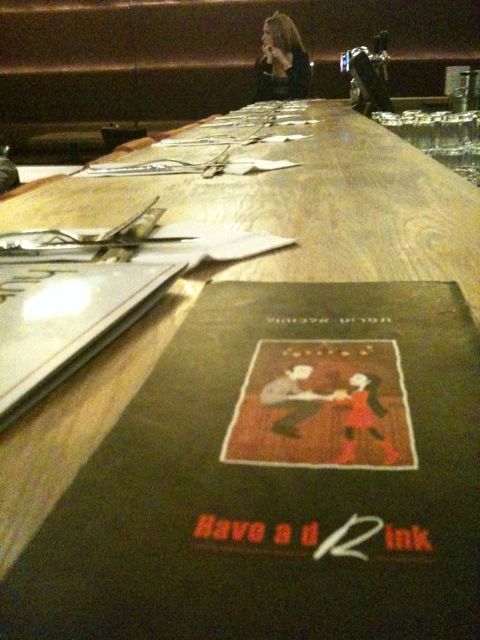
Restaurant-retro style
Yellow On Green
Jump of the Week
Photohraphy is my cup of tea
Simply Red
Amateur vs. Professional
Greek Church and Being Creative
I think that one of the most important aspects of photography is about joy of creation, expressing yourself and enjoying every minute of it. I always try to be creative, and though I don’t always get the desired results from my experiments I just continue trying. For me there is no other way. I try to put my heart and soul into my work mixed with feeling and emotions.
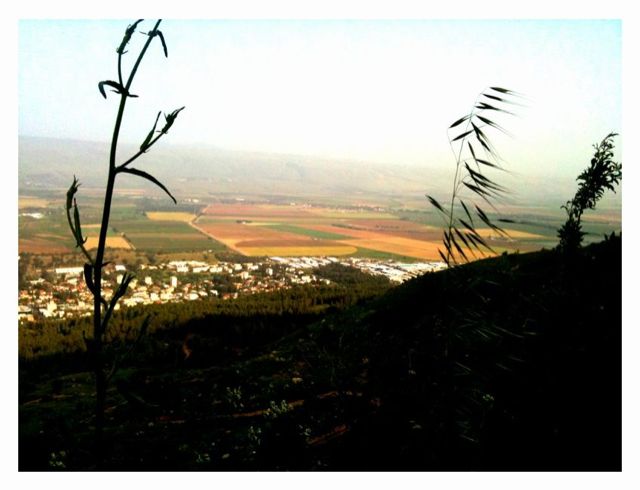
Today I’d like to share with you one of my attempts at creativity. It was a nice autumn weekend in Israel when me and Ira went to the Upper Galilee region to do a walking track near the Sea of Galilee. On our way back we stopped to visit the Greek Church of the 12 Apostles. This church always attracted me when I was driving by with its’ red roofs but I never had the chance to actually get inside.
This time we had about an hour, so we decided to finally give this church a closer look. I was so tired from our trip that I left my Canon DSLR in the car. I just didn’t have any mental mood for photography. But the closer we got to the church the stronger grew my desire to photograph it. Eventually I decided to photograph it with my iPhone.
This Greek church is very beautiful and is also located in a beautiful place. When we returned to our car I was surprised to find out that I took about fifty photographs of the church and its surroundings from variety of different sides and angles.
Another important aspect of photography (again, in my opinion) is to know how to choose your best photos, and to be brave enough to delete most of the rest. Otherwise you’ll end up with tons of photographs, which are very similar to each other (a tiny difference in a crop here, and in viewing angle there).
Thus on our way back (Ira drove the car) I went over all the photos of the Greek church that I took and deleted about 90% leaving only the ones I though were most successful. After that I started thinking – what would be the best way to present these photos in a way that would show the Greek Church of the 12 Apostles in all its beauty and also reveal some of the architectural details.
Eventually I decided to create a photo-collage of all the best photos. During the following months I was busy with other projects (including trip to Prague) and only recently got the time to put the idea of a photo-collage to test. It took me quite some time to do that as I had to change sizes, crops and other things in order to create what I had in mind.
Here is the collage of the Greek Church of the 12 Apostles. Remember that all the photos here were taken with my iPhone, and don’t judge the quality too harsh 🙂
And as always feel free to leave comments!
Cheers,
Greg.
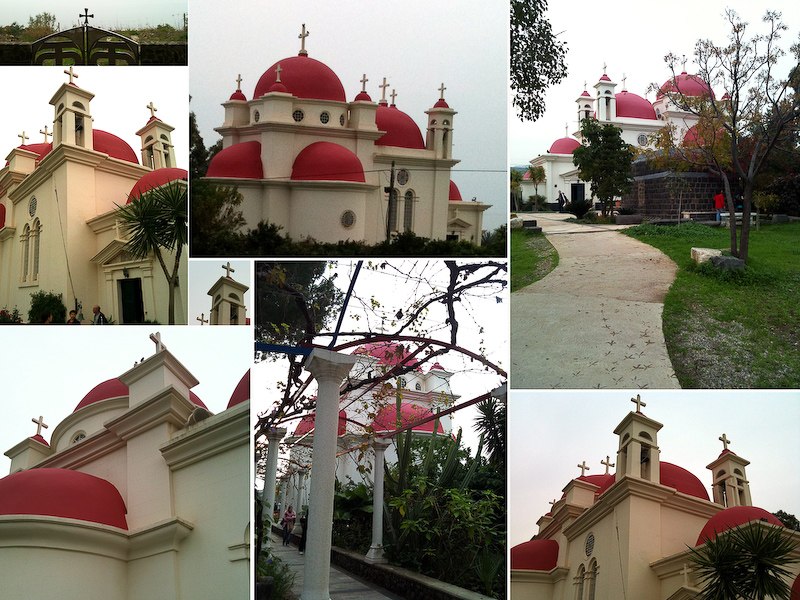
Greek Church of the 12 Apostles. Photograph by Greg Brave. Click on the photo to enlarge.
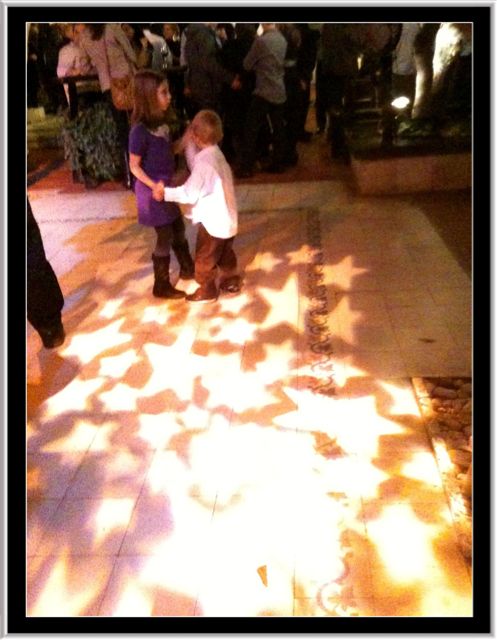
Dancing Kids
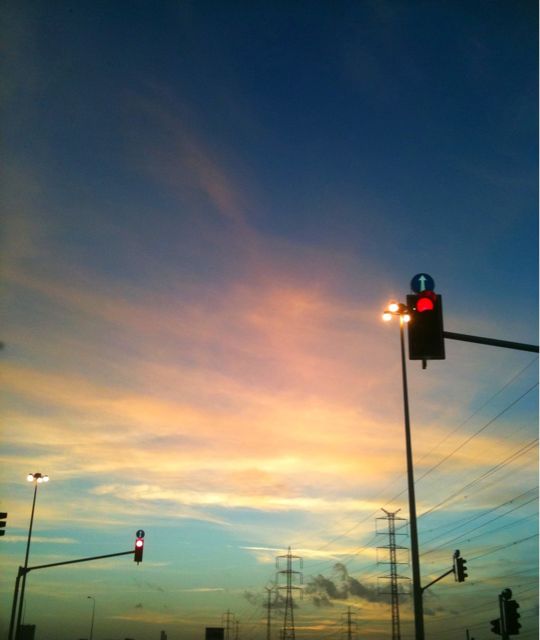
Today’s Sunset
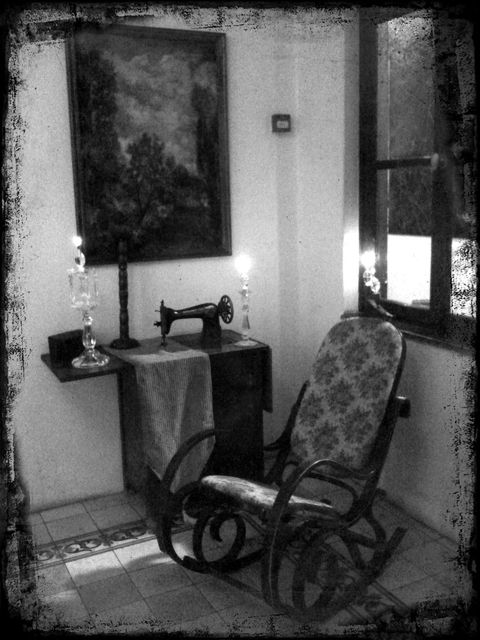
Old Style
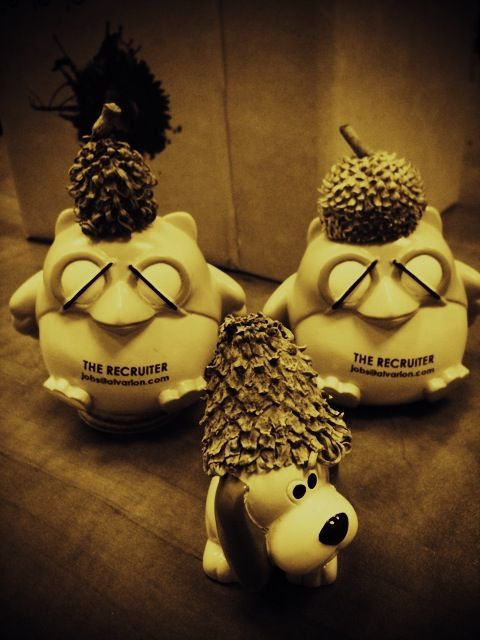
The Recruiter
Aliens Are Here!