Sigma 28mm f1.8 Short Review

Until only very recently I thought I would never use a prime lens on a daily basis. I have great zooms (Canon 24-70 f2.8 L, Canon 70-200 f4 L, Canon 10-22 f3.5-4.5), which are sharp enough for me, and their overall quality is superb. So I saw no need for a more “restricting” piece of glass. But after laying my hands on a prime lens I realized that I was wrong.

The full description of the lens I got is Sigma 28mm F1.8 EX DG Aspherical Macro. Since I have a cropped sensor, 28mm on it is almost like 50mm on a full frame sensor.

This is not a gazillion pages technical review (for that go to dpreview.com, though I’m not sure they reviewed this one), but more of my impressions from this lens, its good and bad sides, and my additional prime-lens-related thoughts.

Lets start with why I think prime lens is a great addition to anyone’s lens collection. When I don’t have any specific photographic ideas in mind, I grab only this lens with me and go out for a walk. It is like shooting with an iPhone in a sense that you don’t have to switch lenses, or to zoom in/out to find an optimal composition. All you got is your 28mm (50 on cropped sensor). One may think that it is very limiting, but I found that it took out the “worrying” aspect, and freed my mind. I was free to think about the creative aspects of photography, and didn’t have to think about which lens to choose. If I need to zoom in, I do it by getting closer to the subject. You get the idea.

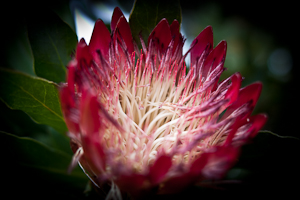
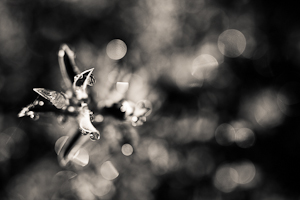
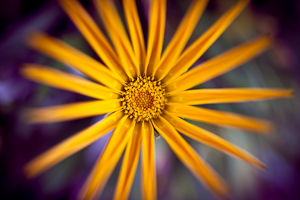
Now, about this lens in particular: f1.8 has a very shallow depth of field, which is wonderful if used consciously. Combined with amazing macro abilities of this lens it enabled me to get pretty nice shots. The two shots below were made using f1.8 and I also found them to be really sharp. I found some reviews of this lens saying that though it is very sharp, it gets softer at small f-numbers, but I didn’t notice that. Maybe I’m not that picky.

Click on the photo to enlarge.

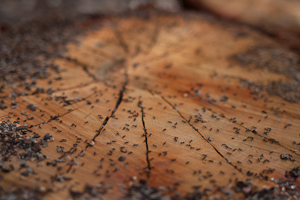
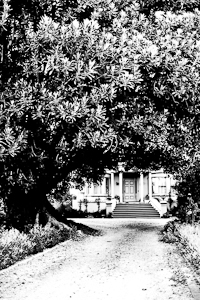
Note the nice bokeh in the b&w photo. Next photo is of ants on tree stump. It was also taken at f1.8 and shows nicely the shallow depth of field at this aperture.

Click on the photo to enlarge.

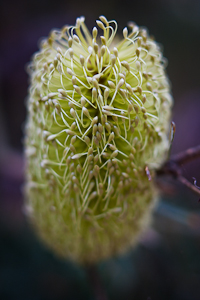
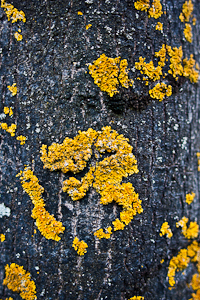
I’ve already mentioned the amazing macro of this lens – even though in the manual it says minimum focusing distance is 20cm (7.87 inch), I found that this lens just keeps on focusing no matter how close I am to the subject. I can’t say exactly what is the minimum distance, but it feels like you can bring the lens very close to your subject and still focus.

Click on the photo to enlarge.

This lens is also great for general purpose photography. It is sharp, it focuses pretty fast, and it renders the colors very good.

Click on the photo to enlarge.

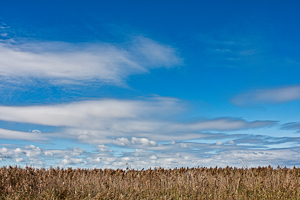
I also got to shoot a few landscapes with it, and was really satisfied with the results.

Click on the photo to enlarge.

Having said about the good qualities of this Sigma prime lens, there are a few issues that have to be mentioned.

This lens doesn’t have an ultrasonic motor which means that the focusing is pretty loud. Another thing to consider is when you want to switch from auto focus to manual (and back), you have to do it in two steps – there is a switch from AF to MF just like in canon lenses, and then you have to slide the focus ring a few millimeters. The thing is that when you are in manual focus mode and the focus ring is in the correct position, you will have to turn it to focus (hence the name 🙂 ), but when you switch to auto focus mode and leave the focus ring in the same position, it will turn automatically when the lens will try to focus, and you won’t be able to hold the lens comfortably. So you have to slide the focus ring a few millimeters and it stops moving.

There is one more thing which is a little less obvious, but I’ve noticed that this lens is more sensitive to flare than my Canon lenses. In several cases with front lighting my Canon lenses didn’t have flare but this lens had.

In conclusion I am very satisfied with this lens. I like the quality and the sharpness of the photos it produces. The only thing that bugs me a little is the noisy focus motor.

Disclaimer:

Everything written here is my opinion and my experience. All the photos in this article were taken with this lens (Sigma 28mm F1.8 EX DG Aspherical Macro) but they were also post processed in Lightroom. Post processing included subtle adjustments such as curves, clarity, and vibrance.  All photos were shot in RAW format, b&w photos were converted from color (all RAW photos are in color) to b&w.

Your opinion matters! The comments section below is for you to share your experiences, and ask questions.

Till the next time, take care!

Greg.

My Photographic Works

Anyone who finds a site about photography probably asks himself – who is the guy that writes this stuff ? What does he/she shoots? I think that these are very legitimate questions. You wouldn’t take a legal advice from a taxi driver, would you?

In order to provide an answer for such questions regarding myself  I created a website where I display my photographic works, and here I will make a short tutorial around my website.

“IsraNature”

As I wrote in my About page, I am relatively new to photography and I started my “PhotoPathway” from photographing nature, plus the fact that I currently live in Israel – and there you have it: IsraNature.

Most of this website is dedicated to the Nature of Israel, but there are also a few albums from my trips abroad, and I imagine there will be more of them in the future. Most of the albums are named after different places in Israel that I photographed, and some of them have general names like “Nature of Galilee Region”. In such albums I put photos that there are not enough of them to create designated album for the specific place.

In the album named Artistic Impressions I put my artistic works that I like the most. Here is an example:

greg brave artistic impression

If you like my photographs and want to see new photos that I add to my site, you can just visit the homepage of my site. There will always be my latest photographs.

You can also reach IsraNature from the thumbnails on the sidebar of this blog and from the top menu.  I will appreciate any comments on my photographs. I am always looking for other people’s opinion on my work.

What is Pseudo HDR image?

In one of my recent articles I wrote about HDR photography (you can read it here). So I learned about HDR, and I played with it, and everything seemed pretty clear to me. Of course there are endless variations that can be done with HDR, and only your creativity is the limit, but during my explorations I kept stumbling into these strange words: “Pseudo HDR”. Most of the photos I saw under this title looked pretty much as ordinary photos, but some of them looked like real HDR, and if I wouldn’t see that “pseudo HDR” phrase, I would have thought that it was usual HDR.

So this got my curiosity up and running, and finally I found out what the words “Pseudo HDR” mean. I want to share this knowledge, and in order to do that I have to start with something else.

RAW camera format

Those of you who have advanced point-and-shoot cameras or any type of SLR camera know that you can choose that your camera will save the photos you shoot in RAW format (there is usually a choice between JPEG of different qualities and RAW).

When you choose to shoot in JPEG, it means that when you click on shutter release button, light comes through the lens and hits the digital sensor. Then the information from the sensor is processed by the internal computer of the camera according to the camera settings (choice of white balance for example), compressed to JPEG file format, and finally saved to the memory card. Now, and this is important, during the JPEG compression phase, some information that was recorded from the sensor during the shot is LOST forever. Because of this loss, when you process the image in photo-processing software, you are less flexible in the adjustments that you can do to the photograph without compromising its quality.

This is why there is RAW format. RAW format means that all the information that is recorded by the digital sensor of your camera during the shot is saved without any compression or processing by the camera’s internal computer. When you process RAW file in your favorite photo-processing software you can apply pretty radical adjustments to your photograph without compromising its quality.

One of such adjustments is exposure. You can pull up your exposure by about 2 stops without compromising image quality (well, maybe I exaggerated a little with two, but 1.5 for sure). I wrote especially about the adjustment of exposure because it is critical for the explanation of the Pseudo HDR, but another generally very important adjustment is white balance, so even if you set the white balance setting completely wrong during the shot, you will be able to change it during the processing.

Note: In order to process RAW files you will probably have to install special software (however in Photoshop there is a built in plugin – so that when you open a RAW file you will automatically get a RAW processing window. You can also process RAW files in Lightroom, and almost certainly in Picasa). For example Canon supplies RAW processing SW for free when you buy a camera.

And now I finally get to the point:

Pseudo HDR

Pseudo HDR photo is made from a single RAW file. As I said you can change the exposure settings of the RAW file without compromising on image quality. So basically you open the same file two or three times, each time setting different exposure, revealing different areas. Thus in low exposure you have good highlights, and in high exposure you have good and visible shadowed areas. Then you merge this to a single pseudo HDR image. You see, it is not a real HDR image, you didn’t take three different photos taken with different exposure settings, but you achieve similar effect.

Of course there are some drawbacks. For example if the scene you shoot has very deep shadows and very bright highlights, then single RAW photo just won’t do it because there is a limit to how much exposure range you can pull from a single photo.
So pseudo HDR is mostly used when you only have to make slight adjustments to the picture. For this article I tried to take Pseudo HDR to extremes and here is what came out of it.

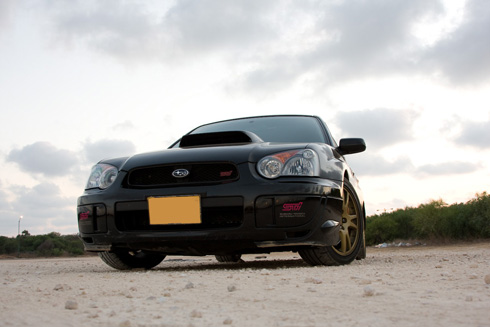
This is the photo without any adjustments and exposure changes ( shot in RAW format):

Pseudo HDR image before adjustments

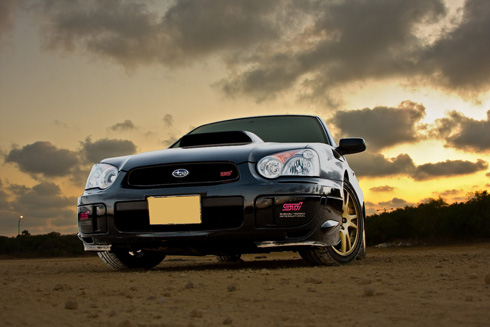
And here is what came out after processing this single shot using exposure and other adjustments:
Final Pseudo HDR photo of Subaru Impreza STI - Racing Car

You can see that in the final photo shadowed areas are more clearly visible, and hilights (the sky) are not burned. I created this pseudo HDR photo in Photoshop, but if you don’t have Photoshop, or want an easier way to create HDR or pseudo HDR images, check out Photomatix.