SetMyCam iPhone App Review

Recently I was asked to review an iPhone app SetMyCamera aimed to assist photographers in several aspects of photography.

Disclaimer: The only endorsement I received was a promo code to download the application for free, so I can play with it, and I don’t get any other benefits. Therefore, this review is my honest opinion of this application.

The app comes in three versions – SetMyCam Pro, MX, and DF. The Pro version contains all the features, while other versions contain less. I will go over all the features of the Pro app and at the end of the review will tell you briefly about the other two versions.

DoF – Depth of Field calculation

First of all, what is DOF? If you are not familiar with this concept, and you are into photography, you really should get to know it. I will briefly explain it with an example. Let’s say you are photographing your local basketball team and they all are standing in front of you in three rows (one row behind another). You aim your lens at them and focus on the faces in the middle row, so this row will be in focus for sure. But what about the row of players that in front and the one at the back? Will their faces be in focus as well? If you have sufficient Depth of Field then they will be in focus, otherwise they won’t. So which factors can change your DoF? There are quite a few:

1. The f/Stop that you chose. The bigger the f/Stop number, the bigger DoF you’ll get.

2. The focal distance of your lens. Wide angle lenses have generally bigger DoF than telephoto lenses. It means that at the same f/Stop wide angle lens will get you more planes in focus than a telephoto lens.

3. Distance from your lens to the plane on which you primarily focus.

4. Sensor size of your camera.

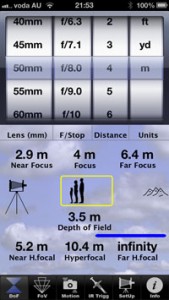
Most photographers develop an intuitive feeling for DoF from experience, but if you want to know exactly your DoF, or just better understand how it works, this tool in SetMyCam will be a good aid. Here is how it looks:

setmycam-dof

Before using any of the features in SetMyCam you’ll have to set your camera model so the app will know the size of your camera’s sensor. Then, in the DoF screen you can choose the lens that you are using, the f/stop, and the distance to your main focused object. Then the app will show you your DoF. Great educational practice would be changing various parameters and seeing how they affect the actual depth of field.

FoV – Field of View simulation

Again, first let me briefly explain what field of view is. In short, field of view, is what your camera sees. So when you use a wide angle lens your camera sees “more space”, and when you use a telephoto lens, your camera sees “less space”. However it is not as simple as that. Wide angle lens has a different perspective from a telephoto lens. If you shoot a landscape with a wide angle lens, for example, you will get more depth in your images, which means you can really tell that (for example) this tree is closer to me, than that cow in the distance. There is a better feeling of space. If you shoot the same landscape with a telephoto lens (first, you’ll have to get much farther from the point you shot it with wide angle lens, just to fit the same amount of space into your frame), you will get a “compressed” shot. It means that that cow in the distance will appear to be at the same distance as the tree, and just their sizes will be awkward. If you saw photos with a huge moon setting over a house or a hill – it was done by exploiting this fact. Photographer took a telephoto lens (lets say 1600mm) and shot this composition.

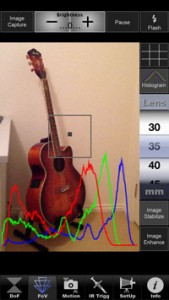
SetMyCam allows you to see on your iPhone screen what your camera will see using different lenses ranging from 30mm to 800mm (it can’t go wider than 30mm because this is the focal length of the iPhone’s camera), and it does it by utilizing digital zoom. You can also choose to display histogram.

ย setmycam-lens


Motion

If you are not familiar with the “camera shake” concept, let me briefly explain. You can never hold your hands perfectly still, there is always at least a slightest movement. When you shoot handheld at slow shutter speeds (1/15th of a second for example) this movement of your hands affects the image by making it blurry. So what is the slowest shutter speed that you can shoot at but still get a sharp image? The answer is – it depends. It depends on the lens that you use (focal length), on the distance to your subject, and also on the stability of your hands.

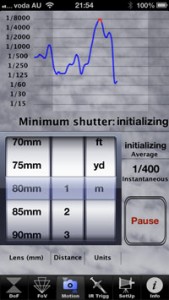
SetMyCam can calculate for you that slowest shutter speed. To do that you set your focal length and the distance to your subject (approximate distance will be just fine), and then you hold the iPhone as steady as you can. After a brief moment the app will display the minimum shutter speed that you can use and still get a sharp image.

setmycam-shake

However, you should also take into account that your camera is much heavier and ergonomically different from the iPhone, and possible use a shutter speed just a tad faster. Remember that if you use tripod, you don’t need to be worried about camera shake.

IR Trigger

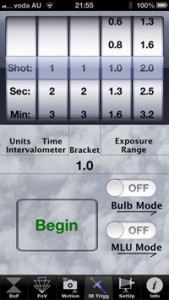
This feature of SetMyCam can be used only if you have an additional IR transmitter that plugs into your iPhone. I don’t have it, so I couldn’t play with this feature, however if you do have one and your camera supports IR triggering, this feature can be quite handy. In addition to simply remotely triggering your camera, you can do much more: you can shoot time-lapses, bracketed shots, and trigger the bulb mode.

setmycam-ir

This feature is pretty nice (provided you have the IR device for the iPhone), especially if you want to shoot timelapses, because you don’t have to buy an additional device for that and use your iPhone instead.


SetMyCam Pro has all these features and you can get it for $5.99 in Australian Apple store.

SetMyCam Mx has DoF, FoV, and Motion features (no IR trigger) and goes for $4.99

SetMyCam DF has DoF and FoV features and costs $2.99


Conclusion

This app might not be of much use in “real time” when it is time to shoot in my opinion. Because when you are shooting, for the most part you won’t have the time to get your iPhone, open the app, calculate everything that you need to calculate, then take out your camera and take a shot. However it is a great tool for self education – for example in DoF module you can play with different focal lengths and other parameters and see how exactly they influence the depth of field. Or when you know in advance the requirements of the shot and you must get everything in focus, it is a good idea to calculate the exact DoF.

Same with the Motion module – you can get a pretty good idea when your images will start getting blurry due to camera shake by changing focal lengths and seeing how stable you can hold your iPhone, so when the time comes you’ll have the knowledge to set your camera correctly.

FoV module: Personally I don’t find this feature to be very useful, however if, for example you go scouting locations for your next shoot, and you don’t bring your whole camera bag with all the lenses, using this feature can give you a feel of kind of photos you will get with your DSLR. Having said that, most of the photographers I know, do know their gear and don’t have to look through the viewfinder to know how the shot will look like using various focal lengths.
Guy Gowan’s Free Fuse Tv

If you are into photography and Photoshop in particular, and you never heard of Guy Gowan, you really should. Guy has a 30+ years of experience in the imaging industry, and his Photoshop workflow is pretty unique. He has a subscription based website, where you can buy an annual subscription and get access to his 100+ tutorials “teaching the art of image processing” as he writes on his website.

I was subscribed for a full year to his website and learned a lot! However, this post is not about the tutorials. Recently Guy added another cool and free (!) feature to his website – Fuse. He describes it as “A new free to view programme featuring new technology, techniques, ideas and personalities from the imaging world”. Basically what Guy does is he puts out every week or so a new Fuse episode, in which he talks about gadgets and various creative things he found on the web. Since Guy is a very smart and creative person himself, naturally he chooses very interesting stuff to talk about, and I find these episodes very interesting. In these days of information overload, I use Guy’s Fuse as a very delicate filter for what to watch and what information to take in.

If I’ve got you interested, you can see the latest Fuse episode here . If you decide to subscribe to Guy’s tutorials and webcasts, please enter my email into the “referrer email” field (greg at photopathway dot com) to show your appreciation ๐Ÿ™‚


Free Ebook from Craft&Vision

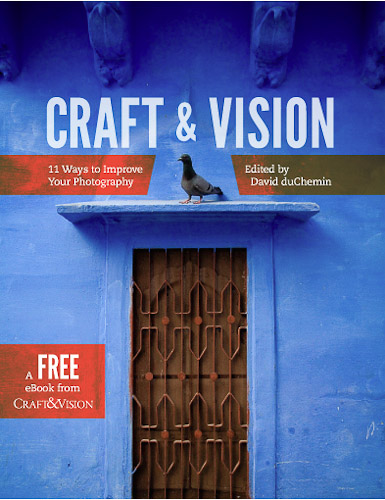
Recently Craft&Vision published a free e-book titled “11 Ways to Improve Your Photography”. For those of you who are not familiar with Craft&Vision project it was started by David duChemin, pretty well known photographer. In this project he publishes books about photography, some of which he writes by himself, and some written by other photographers. These books are sold in PDF format usually for $5 USD, and you get a discount when you buy a bundle. I have bought about twenty books and read them. Some I liked more and some I liked less, and maybe in the future I’ll write a few of my own reviews on these books.

The special thing about this book though is that you can download it for free and get a taste of the “Craft&Vision type of book”. The main point that David makes in most of his write-ups on his blog and his books is that photographer’s gear is much less important than his vision and in some of his books he suggests ways as to how you can improve your photographic vision. This book was not an exception and you won’t find there anything about photographic gear, except printers in the chapter on “the power of print”.

“11 Ways to Improve Your photography” has 11 chapters (obviously ๐Ÿ™‚ ) written by various photographers, each chapter suggesting a different way you can improve your images. If you want just to quickly to see the contents of the book before you download it, here’s the chapters:


1.Make your images more dynamic

2.Tame your digital exposures

3.The power of the print

4.Learn to direct the eye

5.Understand the stages

6.Create projects and collaborate

7.Refine your composition

8.The power of the moment

9.Forget lens stereotypes

10.Slow down and learn to see

11.Make stronger portraits

In my opinion this book is not special in its suggestions, and if you have been into photography for a while you probably heard most of this advice, but sometimes it is good to refresh your memory. There were two chapters that I liked the most – one is “Understand the stages” by Alexandre Buisse, in which he describes his understanding of the different stages that a photographer goes through from the moment he/she picked up the camera. A very interesting read.

The second chapter that I liked is “The power of the moment” by Eli Reinholdtsen, in which she shares her experience in street photography illustrating the text with her wonderful photographs.

I would also like to mention another chapter, “Make stronger portraits” by David duChemin, not because I liked it, but exactly the opposite. While the advices that David gives in this chapter are ok (nothing special though), the portraits that David chose to illustrate his points are not. In my opinion they are not “strong” as David presents them to be. They are just pictures of people. Some of them are pictures of unusual people, but merely this fact doesn’t make for aย  strong portrait.

You can download the book by clicking on the image above (which will take you to the Craft&Vision website). I would really like to hear your honest opinions about this book.


Learning From The Best

When I see a photo that captures my imagination, amazes me, or makes me think – I always want to know the story behind the photo – how it was made, why it was made, what was going through photographer’s mind when he created it.

Yes, I know, “photograph speaks for itself”, and for the viewer in me just looking at the photograph is enough, but the photographer in me always wants to know more.

One of the best photography web sites out there is 1x.com. Recently they created a new section – tutorials! In that section photographers whose photos passed the 1x.com selection process, and were published, can write tutorials how they created their works of art. It is something I was dreaming of!

Each tutorial has 6 sections. Lets go over them:

1. Context – In this section photographer writes about what led him to create the photo, what went through his mind.

2. The Picture – Here photographer explains how he took the photo, why he used that specific equipment, how he chose time of day, lighting etc.

3. Processing – This part is all about post-processing: how the photo was post processed and why, what programs were used. Decisions regarding cropping of the photo are also explained here.

4. Outcome – In this section photographer talks about how he sees the final photo. Did it meet his expectations? What he could’ve done to improve it (if at all).

5. Three Hints – Here photographer basically shares his wisdom. He gives three pieces of advice to his fellow photographers. I found here many gems, which gave me a great deal of inspiration.

6. Biography / Additional info – Here photographer tells a little more about himself as much or as little as he wants. In this section photographer can also add any additional information that he feels necessary.


I think that creating the tutorial section was a great idea, and any photographer can benefit from it!

You can find it here: http://1x.com/#!/tutorials

Sigma 28mm f1.8 Short Review

Until only very recently I thought I would never use a prime lens on a daily basis. I have great zooms (Canon 24-70 f2.8 L, Canon 70-200 f4 L, Canon 10-22 f3.5-4.5), which are sharp enough for me, and their overall quality is superb. So I saw no need for a more “restricting” piece of glass. But after laying my hands on a prime lens I realized that I was wrong.

The full description of the lens I got is Sigma 28mm F1.8 EX DG Aspherical Macro. Since I have a cropped sensor, 28mm on it is almost like 50mm on a full frame sensor.

This is not a gazillion pages technical review (for that go to dpreview.com, though I’m not sure they reviewed this one), but more of my impressions from this lens, its good and bad sides, and my additional prime-lens-related thoughts.

Lets start with why I think prime lens is a great addition to anyone’s lens collection. When I don’t have any specific photographic ideas in mind, I grab only this lens with me and go out for a walk. It is like shooting with an iPhone in a sense that you don’t have to switch lenses, or to zoom in/out to find an optimal composition. All you got is your 28mm (50 on cropped sensor). One may think that it is very limiting, but I found that it took out the “worrying” aspect, and freed my mind. I was free to think about the creative aspects of photography, and didn’t have to think about which lens to choose. If I need to zoom in, I do it by getting closer to the subject. You get the idea.

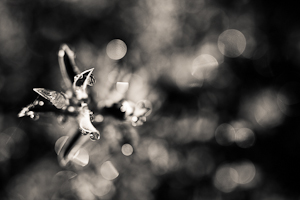
Now, about this lens in particular: f1.8 has a very shallow depth of field, which is wonderful if used consciously. Combined with amazing macro abilities of this lens it enabled me to get pretty nice shots. The two shots below were made using f1.8 and I also found them to be really sharp. I found some reviews of this lens saying that though it is very sharp, it gets softer at small f-numbers, but I didn’t notice that. Maybe I’m not that picky.

Click on the photo to enlarge.

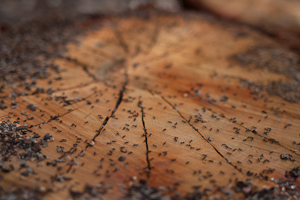
Note the nice bokeh in the b&w photo. Next photo is of ants on tree stump. It was also taken at f1.8 and shows nicely the shallow depth of field at this aperture.

Click on the photo to enlarge.

I’ve already mentioned the amazing macro of this lens – even though in the manual it says minimum focusing distance is 20cm (7.87 inch), I found that this lens just keeps on focusing no matter how close I am to the subject. I can’t say exactly what is the minimum distance, but it feels like you can bring the lens very close to your subject and still focus.

Click on the photo to enlarge.

This lens is also great for general purpose photography. It is sharp, it focuses pretty fast, and it renders the colors very good.

Click on the photo to enlarge.

I also got to shoot a few landscapes with it, and was really satisfied with the results.

Click on the photo to enlarge.

Having said about the good qualities of this Sigma prime lens, there are a few issues that have to be mentioned.

This lens doesn’t have an ultrasonic motor which means that the focusing is pretty loud. Another thing to consider is when you want to switch from auto focus to manual (and back), you have to do it in two steps – there is a switch from AF to MF just like in canon lenses, and then you have to slide the focus ring a few millimeters. The thing is that when you are in manual focus mode and the focus ring is in the correct position, you will have to turn it to focus (hence the name ๐Ÿ™‚ ), but when you switch to auto focus mode and leave the focus ring in the same position, it will turn automatically when the lens will try to focus, and you won’t be able to hold the lens comfortably. So you have to slide the focus ring a few millimeters and it stops moving.

There is one more thing which is a little less obvious, but I’ve noticed that this lens is more sensitive to flare than my Canon lenses. In several cases with front lighting my Canon lenses didn’t have flare but this lens had.

In conclusion I am very satisfied with this lens. I like the quality and the sharpness of the photos it produces. The only thing that bugs me a little is the noisy focus motor.

Disclaimer:

Everything written here is my opinion and my experience. All the photos in this article were taken with this lens (Sigma 28mm F1.8 EX DG Aspherical Macro) but they were also post processed in Lightroom. Post processing included subtle adjustments such as curves, clarity, and vibrance.ย  All photos were shot in RAW format, b&w photos were converted from color (all RAW photos are in color) to b&w.

Your opinion matters! The comments section below is for you to share your experiences, and ask questions.

Till the next time, take care!

Greg.

Hipstamatic – My Preferred iPhone Camera App

I should have written this post a long time ago, as I’ve been using Hipstamatic ever since I got my iPhone. First of all I must say that I am not affiliated with the creators of this app in any way, I simply love this app!

Wine Glass
So what is it? Simply put “Hipstamatic” is an alternative app to iPhone’s native camera application. It is very different though. This app attempts to emulate the ancient plastic film cameras in a very realistic way. Its creators put a lot of thought in the design and functionality of this app, and they keep improving it. Since this app emulates film camera, it has a virtual film loaded into it, and the great thing about it is that you can change this film. For example they have different types of B&W films. But it is not all – you can also swap virtual lenses on the Hipstamatic camera, each lens creating a different effect in the resulting photograph, and you also can swap flashes!

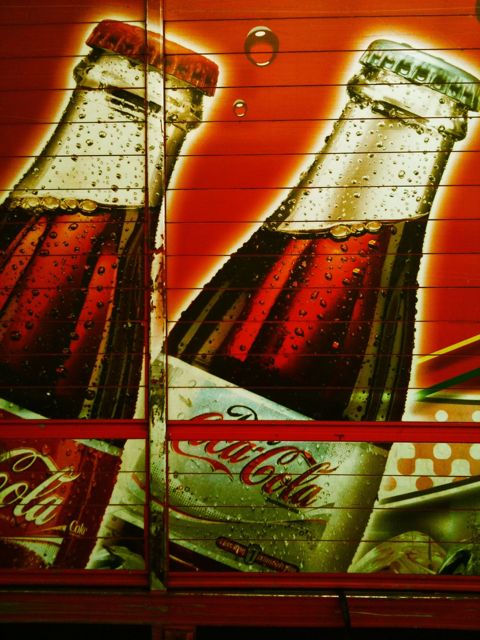
Coca Cola Bottles

Even though all these features are virtual, their effect on the final photograph is very real, and I find it very interesting. There are many combinations of flash/lens/film that you can use to achieve the look that you want.
Candle Light
Currently you can purchase this app from the Apple Store for $1.99 ($2.49 in Australia), and it comes with basic set of lenses and films. Then you can purchase additional “Hipstapacks” (packages of lens+film) from inside the application.

Evil Light

Though I found a few combinations of lenses and films that I particularly like, and have been using them a lot for my daily photo section, I still have tons of fun playing with different combinations creating different new looks for my photos.

Memories

If photography is your hobby, passion, or you just like playing with your iPhone, I highly recommend this app. In my opinion it worth every penny.

Till the next time, take care!

Greg.

Two Photography Books Review

I am self-taught photographer. Actually I did take one course in photography, but it didn’t help me much, besides understanding the fact that I don’t like to shoot in groups where ten cameras are pointed at single subject. I learned photography from much practice, web sites, other photographer’s work, tutorials, and books.

Books… books… sounds easy right? You pick up a book, you read it, and you become that much smarter. Well, as I found out in photography it is not always the case. There are tons of photography related books, but I might just start a war here by saying that many of them are pretty much the same. You know, books that named something like “The complete photography book” or “Everything you need to know about digital photography” or “The most useful photography tips”. I am just throwing titles here so you’d get the idea.

Here is the thing – when you’re into photography for a couple of years, and you already got your basics as to how to operate your camera, what are f-stops and shutter speeds, ISO, you know all the basic stuff – you realize that all such books have no value for you whatsoever because they are chewing on the same material over and over again. In photography all these basics are just the beginning, not really photography but the initial tools to it, and frankly you can learn all that on the net much faster.

So realizing that, I was looking for books that would really be helpful to me in my evolution as a photographer. And here are two of the books that I found to be just great! I learned so much from them, and I am sure that many of you will too, if you decide to read them.

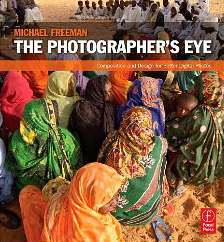
“The Photographer’s Eye” by Michael Freeman

In this book Michael describes different aspects of photographic composition such as framing the image, graphic and photographic elements of composition, composing with light and color, the intent of the photographer when composing, and more.

What I liked the most about this book is that Michael doesn’t say that you need to do this or that in order to get a successful image. He describes all the different aspects of composition and how they might affect the result, giving appropriate examples along the way.

Michael explains certain rules of photographic composition and at the same time shows that rules are meant to be broken.

In my opinion this book is… how can I put it… the advanced basics of composition in photography. I really couldn’t say that this book is very basic, but at the same time I think that any photographer should read it right after his camera’s manual, or even before. It is not enough to know how to operate your expensive equipment (though it is essential, I must say ๐Ÿ™‚ ) in order to create compelling photographs. You have to understand how composition is created in photography, and Michael Freeman explains it perfectly in this book.

If I would learn photography in any institution, I’d sure hope that this book is included in the curriculum.

In short – read it, you won’t regret it.

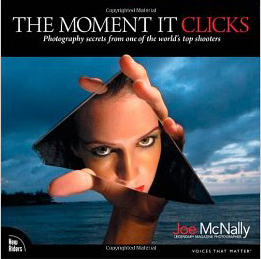
“The Moment It Clicks” by Joe McNally

This book is actually is pretty famous one, and Joe McNally is pretty famous himself. He was Life magazine’s staff photographer, he also shot for National Geographic, and many other big names. Really, I am sure that Joe McNally doesn’t need my introduction ๐Ÿ™‚

Recently I’ve read some negative feedback about this book, saying that Joe doesn’t teach in this book useful things but instead talks about his life and photographs. Another argument was that Joe has a big budget for his assignment and he could allow to buy expensive props for his shots. I felt pity for the person who wrote

that feedback as he (or she) didn’t understand what really this book is about. In this book Joe writes about his assignments – how he got them, what were the demands, and how he solved them. There is not a lot of technical data, but there ARE enough technical details, for a thinking person to fill in the blanks.

More important to me was to know HOW this man thinks, how he operates under pressure, and where his creativity comes from. Joe writes about all this in this book. It is also PACKED with creative solutions to many difficult problems that Joe’s assignments presented. I learned a lot from this book, and if you read it with right mindset you will too.

This book’s aim is to inspire photographers to explore and develop their creativity, to show that any photographic problem can be solved one way or another. And it contains lots of examples to back it up. From the other side Joe also tells the truth about photographer’s life, that it is not easy, and not everything always goes the way that you’d like it to.

Again, when you are past the basics of photography, you need to develop your photographic vision and creativity, and this book helped me a lot in my quest. I think it could help you too should you decide to read it.

Did you read any of these two books? What do you think of them?

Remember, you only have to enter your name to leave a comment!

Greg.

Compurover from Lowepro Review

As I promised in the article about my trip to Switzerland, I am writing a detailed review on a photo backpack, which I took with me on that trip. It is a “Compurover” from Lowepro. When I was looking for a photo backpack on the net, I had trouble to find good reviews made by people who were actually using the product rather than just going over its features. I also had trouble finding detailed photographs of products. On the manufacturer’s sites there is usually only one or two photos of each product, which is absolutely wasn’t enough for me to get an idea about them.

So I had to actually go to various shops and check out different backpacks and spend quite a lot of time on it. Now, after finding the product that was the closest match to my demands, and using it for a while I decided to write a detailed review of this photo backpack including my own insights and conclusions based on real experience and heavy duty use.

I will start with what were my demands from a photo backpack.

We both – me and my life partner Ira like to hike. We love nature and try to spend as much time as we can outdoors. And obviously I love photography so taking my photo gear with me is never a question. The only question is what gear I am going to take with me and how I will be carrying it. Along these lines my demands from a photo backpack were the following:

1. It has to have enough padded space for all the photo gear I am taking with me outdoors.

2. It has to have an additional compartment for other hiking related gear (clothes, food, etc.).

3. It has to have a good carrying system, to sit comfortably on my back and waist, and wisely distribute the weight across my body.

4. It has to have a tripod holder.

5. It has to have a place for hydration system.

6. It has to have small, and preferably external pockets for all the little things (filters, cleaning cloth etc.).

7. It has to have a rain cover (very important).

Pretty big list huh? I worked hard to find a bag to fulfill all this, and I can’t say that I found a perfect backpack, but I came close.

The biggest problem that I encountered was that most of the professional photo backpacks don’t have enough room for other than photo gear. So I found many great backpacks, with good carrying system, but with no place for other stuff. It still puzzles me – if photographer goes out on a long day of shooting, with tons of gear, doesn’t he need to carry also some personal stuff? I need.

And now to the actual review.

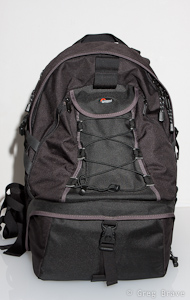
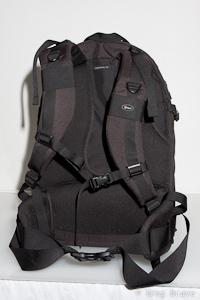
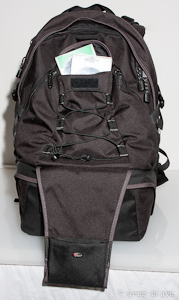
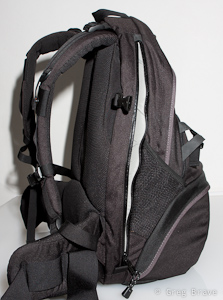
In the two photos below you can see the “Compurover” front and back. It is pretty big backpack, made from top quality materials. It has a comfortable (at least for me) carrying system. During my trip I was walking for about 10 hours (!) a day with it on my back and feeling very comfortable. The waist belt is great – it is wide and well padded, so are shoulder straps. You can also remove the waist belt for drying/cleaning purposes.

Lowepro Compurover Lowepro Compurover

Photographs by Greg Brave. Click on the photo to enlarge.

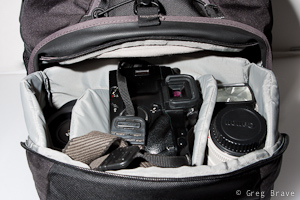
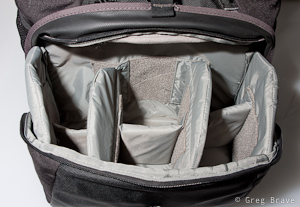
The bottom compartment is for photo gear. It is padded like any other photo bag, and you can also change its configuration to match your photo equipment. It was big enough for me. In this compartment I could carry the following equipment:

Body: Canon 40D

Lenses: Canon 24-70mm f2.8L, Canon 70-200mm f4L, Canon 100mm macro f2.8L, Canon EF-S 10-22mm f3.5-4.6

Flash: Canon 430EX

And there was still room left for one additional small lens such as Canon 28-105 f3.5-4.5

This compartment closes with a zipper and a security lock. When you open it, it slides out in an angle giving you a comfortable access to the equipment. One thing to notice – zipper is somewhat hard to zip/unzip at the corners.

Lowepro Compurover

Lowepro Compurover Lowepro Compurover

Photographs by Greg Brave. Click on the photo to enlarge.

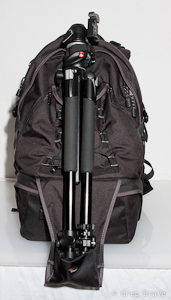
The tripod holder. When not in use it is folded upward (you can see it on the front view of the backpack above). When needed you unfold it downwards, and put a tripod in it as shown below. Lowepro’s original idea was that you put your tripod under the bungee mesh and use two additional bungee cords (which come with the bag) to secure the tripod at the top and bottom. I found that to be too inconvenient, so what I did was to remove the two bungee cords from top and bottom ( you can’t see them on any of my photos) and only on the top I put a Velcro strap. I put the tripod in the tripod holder without putting it under the bungee mesh, and secure it on the top with a Velcro strap. For me it was enough to securely carry my large tripod.

By the way if you have a small tripod, you can carry it on the side of the backpack putting its legs in the side mesh pocket and securing it with the side strap.

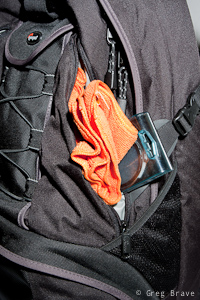
There is also a pretty spacious pocket, which I use to carry my polarizers as you can see on the photo below.

The downside to this tripod holder is that in order to access your photo gear you have to remove the tripod first.

Lowepro Compurover Lowepro Compurover

Photographs by Greg Brave. Click on the photo to enlarge.

Additional pockets. “Compurover” has two small zipped pockets on the front, which I use to carry cleaning stuff, micro leatherman, and filters. Pretty convenient. It also has mesh pockets on both sides.

Laptop compartment. The access to the laptop compartment is from the side, so that you won’t have to take out all your gear before getting to the laptop, which is especially convenient when you are passing airport security. But as you probably noticed, in my demands there was no need to carry a laptop. Actually the last thing I want with me on the outdoor hike is an additional 2-3 kilos of dead weight. Do you?

But here is my big breakthrough! I found this compartment to be very useful. Almost indispensable. I use it for my 3 liter hydration system! I put it inside, close the zipper almost all the way up and pull the hose from the top to the shoulder strap.

Lowepro Compurover Lowepro Compurover

Photographs by Greg Brave. Click on the photo to enlarge.

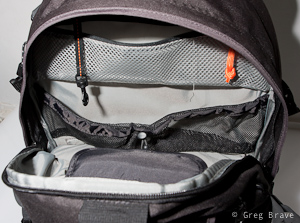
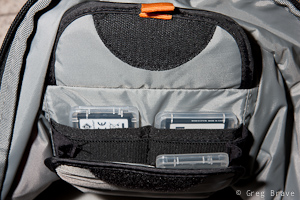
Top compartment for other stuff. You can see it on the left photo below. Actually it is pretty spacious. Unfortunately I didn’t show it in this photo. I could put quite a lot of stuff in this compartment such as rain coat, sandwiches, utility knife, and more. As you can see, inside the top compartment there is a zipped pocket and another divider. There is also a memory card holder there. You can see it in more detail in the photo on the right.

Lowepro Compurover Lowepro Compurover

Photographs by Greg Brave. Click on the photo to enlarge.

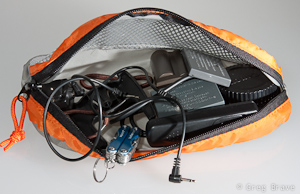
In addition, with the bag comes this small pouch, which I found very convenient to carry spare batteries, cables and stuff.

Lowepro Compurover

Photograph by Greg Brave. Click on the photo to enlarge.

The one thing that I didn’t show in the photographs is the rain cover. It has its own pocket at the bottom of the bag.

Additional important little thing is that on the shoulder straps there are two plastic rings (one on each side). If I want to hike with my hands free (for trekking poles for example), but I also want my camera to be ready any minute, I hang it on these two plastic rings instead of hanging it on my neck. And when your camera is as heavy as mine it is very important.

Summary

Pros

Lowepro’s “Compurover” is a good hiking photo backpack with good carrying system (wide and padded shoulder straps and waist belt). It has enough room for my photo equipment and it also has spacious compartment for other stuff. It has a tripod holder, and I can also carry about 2.5 liters of water in my hydration system in laptop compartment. This is especially good because I have all the top compartment for additional stuff. This backpack also has a sufficient amount of little pockets, and it has a rain cover.

Cons

The photo-gear compartment is a little difficult to open because zipper gets stuck a little bit on the corners. There is no quick access to the camera as I saw in other backpacks, so in order to get it out you will have to put down the backpack and open the photo-gear compartment. It is a big backpack, so if you want to go for a stroll in the park taking only your camera with one lens on it, this would be an overkill. If you carry a tripod then you would have to take it off the bag before being able to access your photo gear.

Conclusion

I am happy with this backpack, and most of the cons are not an issue for me. The only thing for me that is left to see is whether this backpack will hold through the years.

Comments are welcome as always, and if you find this review useful I would also like to hear about it.

Till the next time,

Take care!

Greg.

I was featured on DigitalRev

This is a big day for me! Actually it happened a little while ago – I got featured on DigitalRev.com!

DigitalRev is a very nice site. It is mostly a photography gear shop, but if you look closer, and I suggest that, you’ll find some hidden gems there.

Let me point out some of them:

  • They have the section named “News & Reviews”, and under it they have “Featured Photographers” section. Browsing through this section, I found many interesting interviews with great photographers. learned a lot from there, and I am very proud to be a part of this section!
  • They also have nice section named “DigitalRev TV“. In this section you’ll find video reviews of different photo and photo-related gear. These video reviews are pretty straight forward, and if you are a pro, you might not find them very useful, but to me, the great thing about them was that I got to see (in video and not in photos) the photo gear that I can only dream about, and what it can do.
    Take for example this review of the new Canon 70-200 f2.8L IS Mark II lens.
  • And finally they have a blog. If you want to keep up with all the news in the world of photography, this blog would be a big help, as it is constantly updated with articles about new stuff that comes out.

The whole site is written in a very friendly manner, which makes it fun and easy to read (and watch the videos), so if you would like to rest a little away from these fifty-pages detailed in-depth reviews of DPreview, DigitalRev just may be a good choice.

I will be visiting this site quite often to look for new blog posts, photographers, and reviews, and I’ll share my findings with you from time to time.

Shooting Panoramas with iPhone

At first this thought might sound crazy to you as it sure sounded to me, but then I thought that I could at least try to do that. Since my iPhone is always with me and my camera isn’t (due to circumstances beyond my control of course! ) it had already been more than a few occasions on which I really wanted to make a panoramic image but couldn’t.

So I decided to see if there are any apps for iPhone that can help me create panoramas. During my research I found several applications thatย  were created for this purpose. But after trying to use them I found out that most applications don’t do a good enough job – either the whole process was too time-consuming and difficult or the result wasn’t satisfying. And then I found application named AutoStitch.

First of all I want to say that I am not affiliated with makers of this application in anyway, and I don’t receive any benefits if you decide to buy this application after reading this article. I am writing this only because I loved this app and want more people to enjoy it.

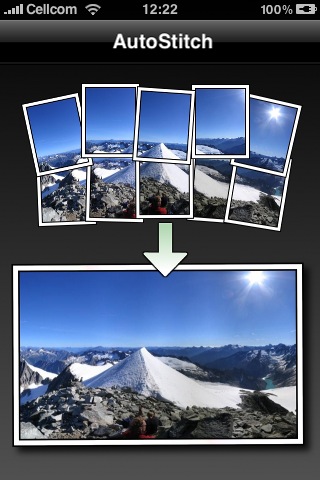
AutoStitch really did the job so well that I was truly amazed at the results! And the process is also very simple. All you need to do is to take photos for panorama with your usual iPhone camera application. Just make sure that each photo overlaps with the next one at about 30 percent. Then you open the AutoStitch application, simply choose the photos that you want to create panorama from, and let the application to do all the work.

After AutoStitch finished, you will see the final image and also will be able to crop it as you wish. Then you can save it to your photos. There are several great things about AutoStitch that I liked very much:

1. The panorama creation process is pretty fast and simple.

2. The result is very impressive – photos are stitched perfectly together, and if you made each shot correctly, the final result is just great!

3. The final panorama can be saved at the maximal resolution of the iPhone, what I mean is take for example 5 photos with your iPhone, stitch them together in AutoStitch, and the final resolution that you’ll get will be 5 times bigger than single photo resolution.

4.You don’t have to use tripod or to be extreeemely careful! Just try to maintain the initial angle of shooting, and make sure that your photos overlap with each other. AutoStitch will do the rest.

I’d like to show you two of the panoramas that I created using AutoStitch. Please note that I reduced the resolution of these images in order to fit them here.

High Tech District in Tel Aviv

High Tech District in Tel Aviv. Photograph by Greg Brave. Click on the photo to enlarge.

Alonei Itzhak Nature Reserve

Alonei Itzhak Nature Reserve. Photograph by Greg Brave. Click on the photo to enlarge.

And now here is what welcome screen of AutoStitch looks like, when you open the app in the iPhone:

AutoStitch Welcome Screen

In conclusion – AutoStitch is a great application for creating panoramas in your iPhone. It is cheap, simple to use, and delivers great results.

If this article was helpful to you, or you have additional thoughts on creating panoramic photos in iPhone, you are welcome to leave comments to this article or drop me an email to greg at photopathway dot com.


Canon 70-200 f4 L short review and more experiences

My friend had a trip to the US, and I used this opportunity to get me this great Canon lens, which I have been dreaming about for quite some time!

As you might have already guessed this is a Canon 70-200 f4 L-series lens. This is the cheapest one from this line of Canon lenses, f4, without image stabilizer. I bought it at B&H for about 630USD and had it shipped to the address my friend was staying at.

The telephoto lens I used before was Canon 75-300 f4-5.6 III USM, given to me as a present. I have enjoyed that lens for about two years, but eventually its lack of sharpness and overall image quality comparing to my other lenses started to bother me a great deal. After doing a little research, I came up with this Canon 70-200 f4 L lens. After reading tons of reviews and watching photos made with this lens I was convinced that it had very good sharpness and image quality, and though I was loosing a 200 to 300 mm range compared to my old lens, I decided to go for it.

There are also much more expensive variations of this lens – f4 with image stabilizer, which goes at B&H at about 1200USD (!!!) and there is also Canon 70-200 f2.8 IS L (1800USD). All these models are far beyond my financial capability, but I have to say that even if I could afford them, I am not sure at all that I would buy them.

This is something that has to be explained.ย  When you look for a lens, first of all you ask yourself what are you going to shoot with it? In my case it is landscapes, portraits, and studio photography.

  • When I shoot landscapes I mostly use a tripod anyway, so I don’t need that additional f-stop for quicker shutter speeds. In addition when shooting landscapes smaller apertures are used anyway.
  • When I shoot portraits and studio, I either do it in daylight, which is bright enough for f4, or I use flashes, and their power and position can also be adjusted for working with f4 and smaller apertures.
  • The more expensive Canon 70-200 models have also one disadvantage – weight: the f2.8 IS model weights about one 1.5 kilos (!) and the f4 IS model weights 760 gr, while f4 without image stabilizer (the one that I bought) weights 700 gr. The weight is very important when you are hiking with your photo gear, and also when you are holding camera in your hand for a long time.

As you can see currently I have no real need for the more expensive models, but what is important that Canon 70-200 f4 L – is an L-series lens, which means that it has L-series optical components, and the image quality it produces is the same (if not better due to its simpler build) as its more expensive modifications.

You might ask “but who does need those expensive models?”. Well I can think of a few reasons – for example birds photographers really need that lens-speed, or indoor sports photographers – there are many occasions in which they can’t use flashes, but have to shoot quickly moving subjects.

Enough about my choices. What about the lens itself? I will not write a full review here, at least not just yet, but I will share my first impression with you.

I am very happy with it. The build quality is superb, the lens sits good in my hand and the focus ring is very comfortable. The image quality is top-notch. The sharpness is the best I had so far, and the colors are stunning. This lens looks heavier and bulkier than it actually is, and it comes with its own original lens hood. The focusing process is almost silent and pretty quick. One disadvantage of this lens is that its filter size is 67mm and not 77mm like most of the L-series lenses, so I will have to buy an additional polarizing filter for it.

Enough words for this post, here are a couple of photos I made using the Canon 70-200 f4 L lens, and as always comments and critiques are welcome!

Ahula Reserve

Ahula Reserve . Photograph by Greg Brave. Click on the photo to enlarge.

Family Vacation

Family Vacation. Photograph by Greg Brave. Click on the photo to enlarge.

Watch Your Step...

Watch Your Step… Photograph by Greg Brave. Click on the photo to enlarge.

Tripod Holder for Kata 3N1 Bag Review

Few months ago I posted a review of the Kata 3N1 Bag.
In the review I mentioned that the bag doesn’t have anything to attach tripod to, and it was a “con” for me. Shortly after that I was contacted by Kata representative and informed that there is an accessory tripod holder that can be attached to the Kata 3n1 bag. Kata guys have been very nice to me and sent me the tripod holder so I could check it out.

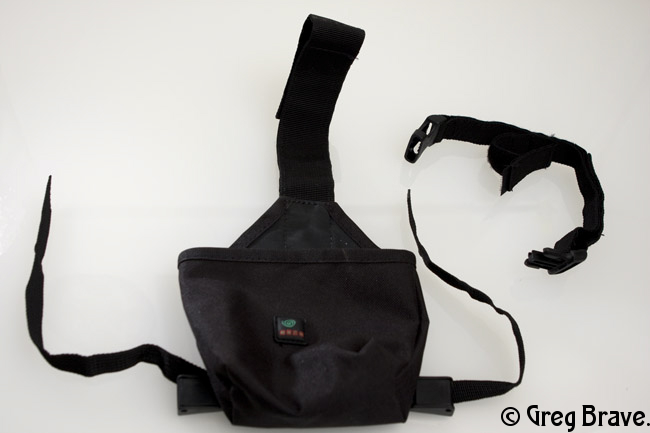
Kata Tripod Holder

Click on the photo to enlarge.

I have been using it ever since and here are my conclusions on this accessory.

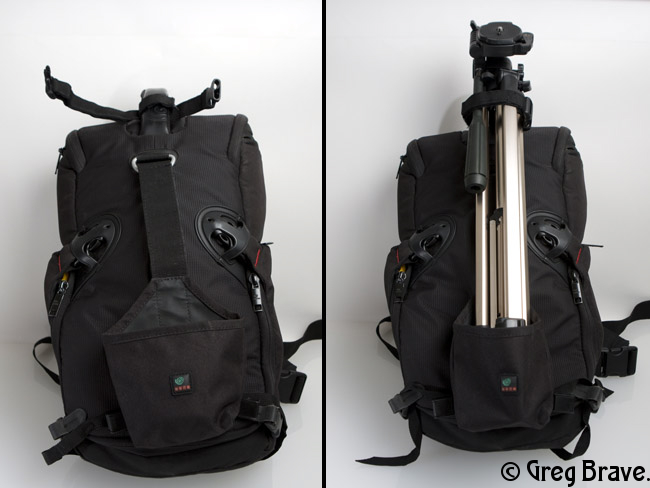
Though it looks like the Kata 3n1 bag wasn’t designed with this tripod holder in mind, it attaches pretty firmly to the bag. The tripod then is easily attached to the holder, and it is very easy to take the tripod off.

I tried to use the holder with my big Manfrotto tripod, and succeeded, but it is not very convenient to walk around with it, because if your tripod is large, it will stick way above your backpack.

Another drawback is that when you have your tripod attached to the bag, you won’t be able to open the main compartment from the top. You’ll only have side access. For me it was not a problem since use the side access 90 percent of the time.

Kata Tripod Holder

Click on the photo to enlarge.

In conclusion, though it is not perfect, the tripod holder for Kata 3n1 bag does the job well. If you already have the Kata bag and need to carry a small-medium tripod with you, then go ahead and get this accessory.

If you found this review to be useful, please consider supporting my site by buying this tripod holder through my affiliate link.

Wireless Flash Triggers

Starting to work with lighting the first thing you hear is that you have to work with off camera flashes. So you get a flash sync cord. But then you want to have two, three, or more flashes in your setup and encounter the problem triggering them all at once.

Then you find out about the wireless flash triggers and start looking into that. The first wireless trigger you find is the “Pocket Wizard” which is the most popular but costs a fortune, and you say to yourself – “I can’t afford this luxury of wireless triggering my flashes”.

And finally you find this post, where I write about my cheap wireless triggers ๐Ÿ™‚

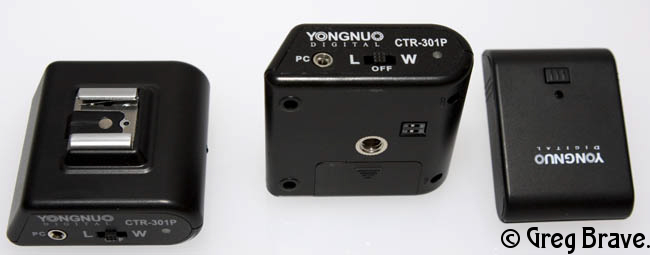
I found a cheap solution for wireless triggering my flashes. Same company (Yongnuo) that manufactures the flashes I wrote about, also makes wireless triggers for flash devices. They are cheap and have a 30 meters working range.

You will have to buy one transmitter, which goes on camera, and as many receivers as the number of flash units that you have. For example a bundle of one transmitter and two receivers on Ebay costs about $52.

Yongnuo Flash Trigger

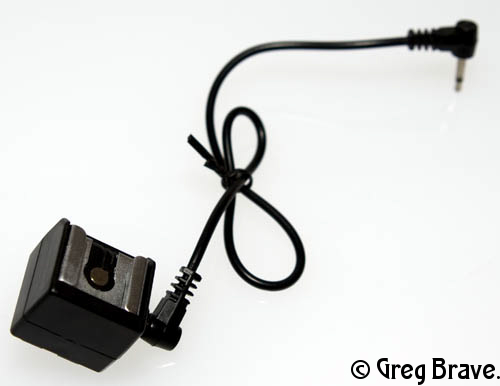
Their single disadvantage for me was that the receiver has only the regular tripod mount (as you can see in the picture), but I needed it to have the hot shoe mount. In order to solve this problem I bought flash sync hot shoe adapters ($12) for each receiver (see the photo below). However there are similar wireless flash triggers (also Chinese and cheap) that come with hot shoe mount.

flash sync hot shoe adapter

I mount the flash on the flash sync hot shoe adapter and connect it to the receiver with PC cord.

Additional advantage of these wireless flash triggers is that they can trigger the flash in two ways:

1. From the transmitter that you put on your camera.
2. From any other flash that fires in their line of sight.

Disadvantages of these wireless flash triggers may be in the build quality. I am working with them only couple of months (and they worked good until now), and I have no idea for how long they will function properly. Compared to pocked wizards their working range is pretty short but personally I never encountered (or could think of) a situation where 30 meters weren’t enough for me.

In conclusion I think that these triggers are perfect for beginners, and who knows, maybe I won’t ever consider upgrading to anything else.

My Lighting Equipment

After I wrote several posts about lighting (Light Study I, Light Study II, Patterns and Light Study), I received several responses from my readers saying – “You have up to three flash units in your setup! That is expensive. Not many amateurs who would like to experiment with lighting can afford that.”

Well, this is not exactly true. I agree that Canon flashes are expensive (even second hand), for example I bought my primary Canon 430 EX flash second hand for about 240 USD, and Nikon flashes are in the same price range. There are additional known brands that are a little cheaper but still expensive.

But I found really cheap flashes on e-bay from Chinese company named Yongnuo. Two of them cost me on e-bay only about 95 bucks (for both). Now you have to agree that this is cheap and much more affordable than branded flashes.

Of course there are pros and cons to such a purchase. Let me list here some of them:

Pros:

  • Price. Very affordable flash units.
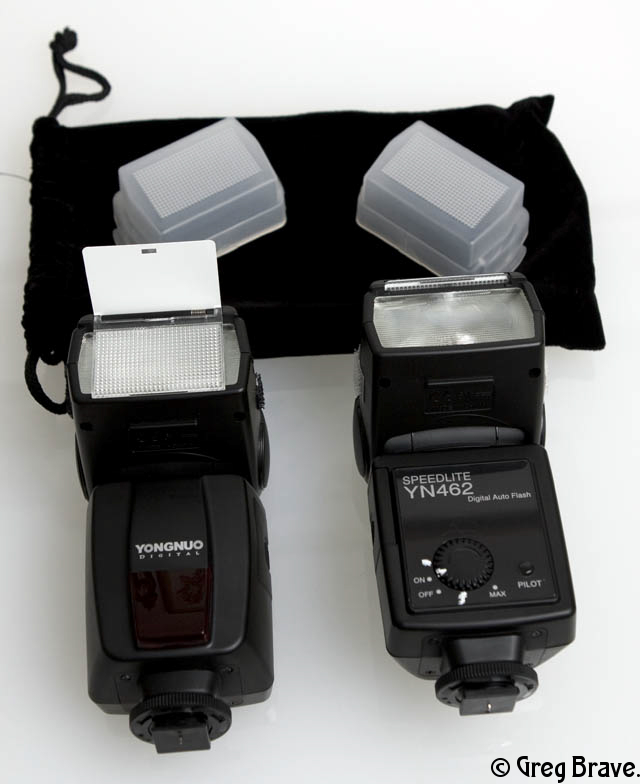
  • Flash comes with diffuser dome, built-in bounce card, and wide angle cover (see on the photo below)
  • Flash head can be rotated in all the common directions almost the same as Canon/Nikon flashes.
  • The output power of the flash can be controlled (but look at the “Cons” section also)
  • GN number – 33, which means that this flash is pretty powerful.

Cons:

  • Recycling time of 5 seconds. My Canon 430EX recycles at about 2.5 seconds with Ni-Mh batteries.
  • No ETTL controls (so that flash power has to be set manually)
  • No flash zoom adjustments.
  • Power is controlled by turning wheel (see the photo below) and not digitally, so I can’t set, for example, exactly 1/2 power. I can do it only approximately.
  • No PC sync connector (but actually my Canon 430EX doesn’t have it either).
  • I am also not sure about the build quality. What I mean is that externally this flash looks good, but I don’t know how long it will work. Until now I have been using it for two months and didn’t have any problems.

Looking at the pros and cons, I can say that some of the cons are not that important to me – for example the fact that there is no ETTL controls doesn’t bother me because I always work manually with these flashes. I use them primarily as off camera flashes with remote trigger. If I have to use flash on-camera, I use my Canon 430EX. No flash zoom adjustments are also not that important – if you put your flash behind an umbrella or put a gobo on it – the zoom doesn’t really matter. Even without all this, you can just vary the placement distance of the flash.

I would like to warn you again – I can’t guarantee that the build quality of these flashes is the same as the branded ones. It probably is not. But in my opinion for beginners they can be a perfect start.

In conclusion – if you have the money buy the good and proved branded models, but if your budget is limited like mine and you still want to learn how to work with light, these Yongnuo flashes are good solution for starters.

Yongnuo Flashes
The white marks that you see near the power wheel are made by me.

In my next post on lighting I will talk about my remote flash triggers. So everyone interested – stay tuned!


If you got interested in these flashes you can visit the e-bay store where I found them. This is not an advertisement, I am not affiliated in any way with that store and don’t receive any benefits if you buy there.

Yongnuo Flashes

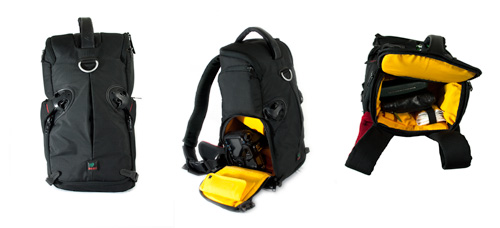
Kata Bag 3n1 20 Review

I decided to write this review since I have this bag for more than 7 months now and have been using it a lot. Before I bought it, like most of us do, I searched the net for reviews and thought I’ve got it completely figured out. I was sure back then that this bag is exactly what I need. And now, after months of experience with it I would like to share my conclusions and hope they would help some of you to make the right decision.

Buying Kata 3n1 (20) bag my requirements were:

1. I like to hike a lot, mostly one-day hikes, and I always want my camera with me. So I needed my photo bag to sit comfortable on my back.

2. Usually I take three lenses on a hike with me, all of them being Canon lenses: EF-S 10-22, EF24-70 2.8L, and EF70-300 f4-5.6. I needed my backpack to have room for these lenses, their hoods, 40D camera body, two polarizing filters and some additional stuff.

3. All the equipment should be properly stored but easily accessed when I need it.

4. Sometimes I take a tripod with me.

5. I also wanted a very durable bag that would provide a proper protection for everything I put in it since I am not so gentle with my equipment (except lenses of course!!!).

So did Kata 3n1 20 bag do the job?

Let’s go over each requirement and see:

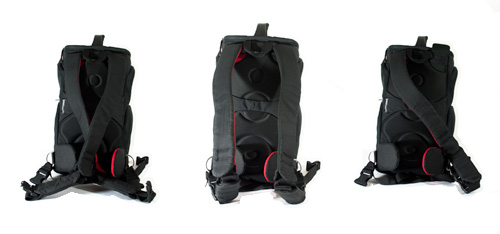
1. This bag has very versatile shoulder straps. You can unclip each strap at its base and clip it to the other side making it possible to carry the backpack in three different positions: the usual backpack position, the sling position, and the x-position.

kata bag 3n1 20 review carrying positions

I tried all of them during my hikes and here are my conclusions:

The usual backpack position is the most comfortable one. I could hike for hours on rough terrain with backpack sitting comfortably on my back. The X-position is not very comfortable. I couldn’t walk long distances using it because x-shaped straps started pressing on my neck and shoulders and I had to pull them to the sides with my hands. Also the sling position, which is very convenient when you want to quickly get your camera, is not very comfortable. I couldn’t hike long distances using this position – the weight on a single shoulder (and neck) was too big. I think that if your gear doesn’t weight as much as mine, then you could use the sling position, but since I had to carry pretty big weight I didn’t find it useful.

2. I have enough room for all the equipment described above and I even have some free space left. So this requirement was fully satisfied.

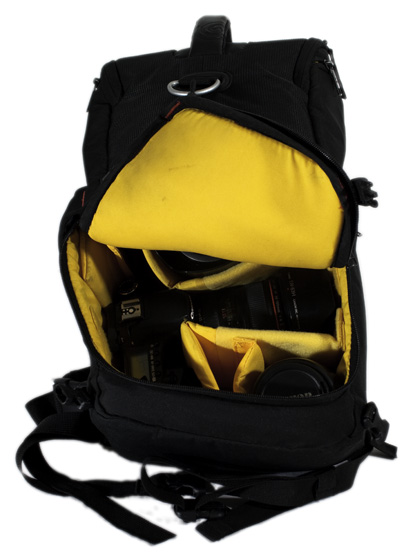
3. But having this equipment organized conveniently is whole another story. The easiest thing is to get the camera with attached lens out of the side opening (the bag has openings from both sides so you can choose which side you want to use). But when you want to reach other lenses, it is not so easy. You have two options: a. To try and pull the lenses through the side opening and this is pure hell. And b. To take the backpack off your shoulders, put it on the ground (or table, or something), open the central compartment and take out what you need. Even the second option is not as easy as it seems since the central compartment can’t be fully opened – you can see it from the photo:

kata bag 3n1 20 review  main compartment

So when I put a lens in the far end of the bag then it won’t come out as easily as I would like it to. I have to say that the top compartment is very good. I like the way it opens and although it seems pretty small, I manage to put there quite a lot of stuff. I also like the handle on top. Two small side pockets on the outside are good for ipod, filters and cleaning cloths.
4. There is nothing on this bag that allows to attach a tripod, and this is too bad. If it had only a little something that I could use to securely attach a lightweight tripod, I would be a much happier man ๐Ÿ™‚

5. This bag is very and I mean VERY durable. Its build quality is excellent. Much thought was put in all the weak elements, and in this bag they are very strong. All the gear is perfectly protected inside the bag, and it also has a rain cover. I took it on several hikes during rain and all the equipment stayed dry. I couldn’t say enough good things about the materials and the build of this bag and I am not going easy on it when I use it!

kata bag 3n1 20 review angle views

Conclusion

Pros:

  • Excellent build quality.
  • Comfortable when carrying it as a usual backpack.
  • Very convenient side openings.
  • Great top compartment.
  • Good equipment protection.

Cons:

  • The main compartment can’t be fully opened, which makes it difficult to access gear.
  • If your equipment is heavy, then you can only use this bag as a backpack and not as sling.
  • Impossible to attach tripod.

All that said, I am still using this bag and probably will use it for a while. If you found this review to be helpful, consider supporting my site by buying the Kata 3N1 20 backpack through my affiliate link.

After publishing this article as you can see from the comment below, I was contacted by Doug Feldner, the product manager for the Kata line in the US. He told me something very interesting! There is a tripod holder for the Kata 3n1 series! When I try it I sure will write a few lines about it here.

You can read my review on the tripod holder for the Kata 3n1 series here.