
About a month ago I wrote a post about shooting baby closeups. Just a quick reminder – my friend asked me to shoot his baby boy, and I used natural window light to shoot mainly closeups because I had problems with background.
This time it so happened that I visited my friend again, and I happened to have my camera with me. His baby boy was in a playful mood and since he liked my previous photos he (not baby, my friend of course!) asked me to take a few more. This time I decided to solve all my background problems and shoot something more than closeups. In addition, it was late in the afternoon, and the sun light was almost gone, so In all photographs that you’ll see here, I used flash, and only in the first one, in addition to flash from the right, there is window light from the left.
In order to get good shots I had to solve several problems – to figure out lighting would be the most important one, and background would be the second important. Since me and my friend’s family are good friends I had no problems communicating with them and their baby boy Eric was in a perfect mood for taking photographs – he was smiling and playful.
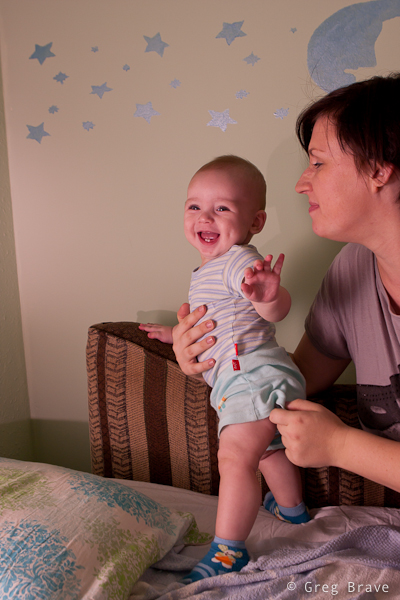
In the photo below the main lighting was sunlight from the window on the left, but if I didn’t use flash from the right side, then the shadows on the faces would be too deep. So I used a flash and set it to 1/8th of it’s full power to fill in the shadows.
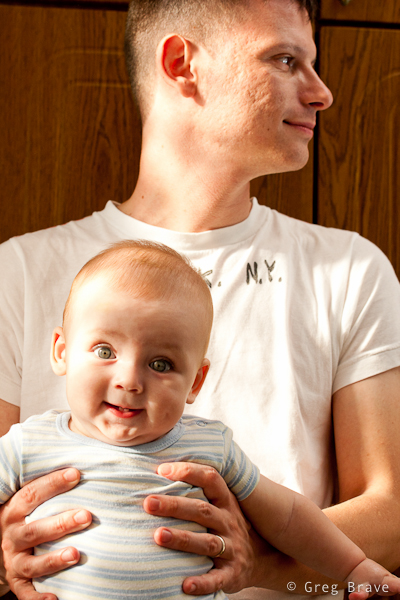
Click on the photo to enlarge.
For lighting I only had one flash (Canon 430EX) but I also had remote trigger making it possible to have lighting off-camera. In the photo below Eric was sitting on the couch, and I placed a flash with 1/4 CTO gel on it facing away from him straight into the pillows of the couch so that Eric would be lit not with direct but with reflected light (this made the light source bigger and shadows smoother). In addition I asked his father to hold a white bed sheet close to Eric’s right (camera left) side. This made the shadows on his face lighter, because light from the flash reflected from the pillows hit the white sheet, and reflected from it to the shadowed part of Eric’s face.
The background in this photo is almost black because I used flash and the ambient lighting didn’t affect the shot at all.
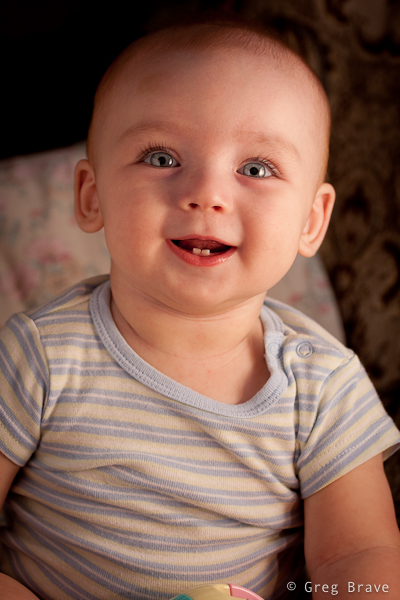
Click on the photo to enlarge.
For the next photo I wanted to do something different, something bright and happy. They had these pieces of soft foam that they used to place on the floor for Eric, and they made an interesting background. In addition I asked Eric’s mother to blow some bubbles for him to play with, and started shooting. I caught a few nice frames and this one I liked the most. In this shot there is still only one flash placed on the right side and reflected form the pillows.
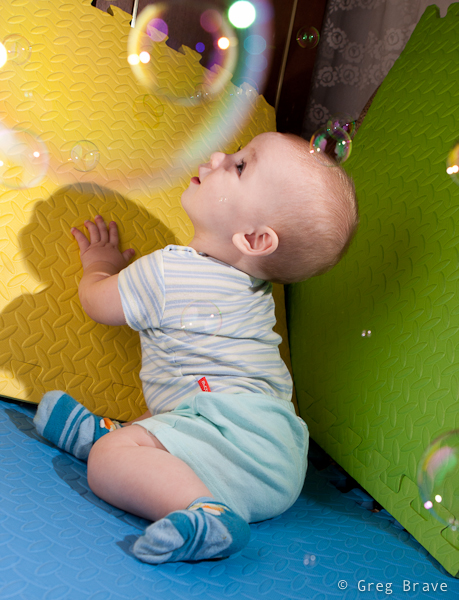
Click on the photo to enlarge.
Now we went from the living room to Eric’s room, and here I encountered another problem. The walls of Eric’s room were green, and this is bad for your white balance. I know, I know – you say “shoot in raw, and then correct in post”, but I wanted to fix this in-camera making post processing time shorter. So here is what I did – I placed my flash facing the opposite wall so that the light would reflect off of it (because this is how I wanted my lighting to be) and then I took a shot of a green wall (the opposite wall from the flash). Then I changed to manual white balance and chose that shot of a wall as a reference. This made wonders for my white balance, and photos started to look so much better!
Click on the photo to enlarge.
In this photo Eric’s father is holding the flash facing the wall and reflecting from the wall to Eric’s and his mother’s faces. Yes, it is still only one light 🙂
Click on the photo to enlarge.
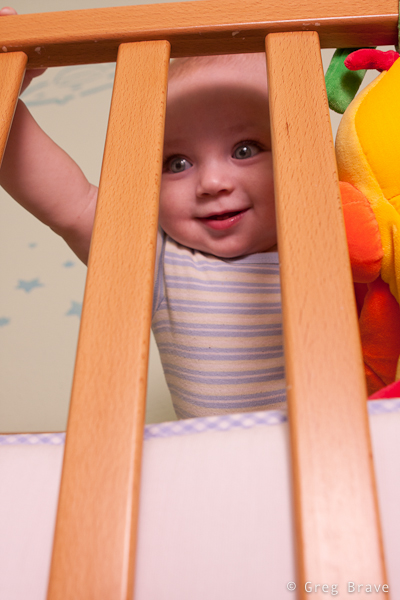
And finally I wanted to play around and take some unusual shots. So I changed to a wide angle lens (with UV protector on it, in a sec you’ll understand why) and started shooting Eric from various angles from a very close distance. Eric got very interested in me and my camera and started touching the lens (you see, the UV protector was a good idea 🙂 ), and I made some very nice shots even though they were distorted due to the wide angle.
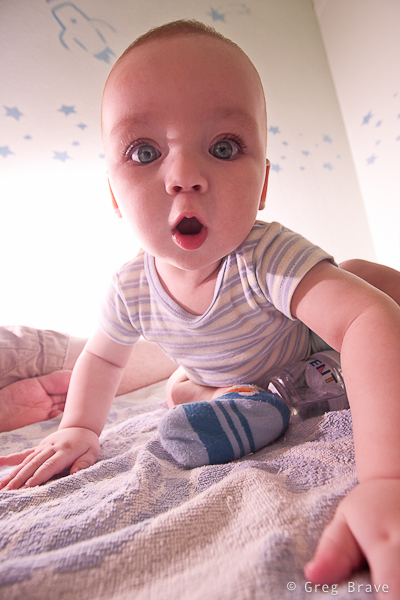
Click on the photo to enlarge.
In this post I talked about lighting and background, which are all technical details, but it is not enough to make a good shot of a baby and his parents. My advantage here was that I knew them so they were comfortable around me, and I was comfortable around them – this is very important. The more relaxed your subjects are, the better your pictures will be. It is also important to know what do you want to show in your photos (the love of parents for their child, happiness, thoughtfulness) and then try to find situations and angles to show it. And of course – experiment, experiment, and experiment!
Till the next time,
Take care!
Greg.
EXСELLENT!!!!!!!!
EXCELLENT!!!!!
I WANT YOU TO MAKE PHOTO OF MY BABYS
Thank you for your compliments!