Sometimes, after shooting portraits, when I look at the photos, I see that in some of them the persons’ iris is too dark. In that case I want to brighten it (obviously 🙂 ). To do that, in Lightroom 3 I used to choose the adjustment brush, bump up the brightness slider a little bit, and brush the eyes. This presented a problem because it would brighten up everything I “brushed”, so I had to be very accurate with the brush and the process took quite some time considering I would do it to many photos.
Luckily Lightroom 4 improved the overall processing workflow and now I can do it much faster and more efficiently. So If you have Lightroom 4 and want to brighten up a bit eyes of your models here’s a quick and easy way to do it.
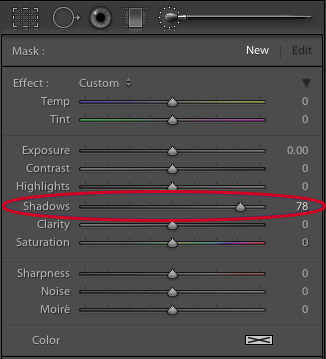
1. Go to develop module in Lightroom and select the adjustment brush:
2. Increase the Shadows slider quite a bit, but make sure that all other sliders are zeroed out.
3. Brush over your model’s eyes quickly, not trying to make the exact selection.
4. Adjust the Shadows slider to taste 🙂
What happens is that the Shadows slider brightens (or darkens if you slide it to the left) only the darks, and usually around the area of the eye, the iris is the darkest part. The eyelashes and the pupils are completely black and Shadows slider doesn’t affect them. So if you accidentally select a small portion of the white of the eye, or the skin, they won’t be affected by this adjustment.
Here’s an example of before and after using this technique
Before (click to enlarge)
After (click to enlarge)
I hope you will find it useful, and be sure to let me know how you go in the comments section below!
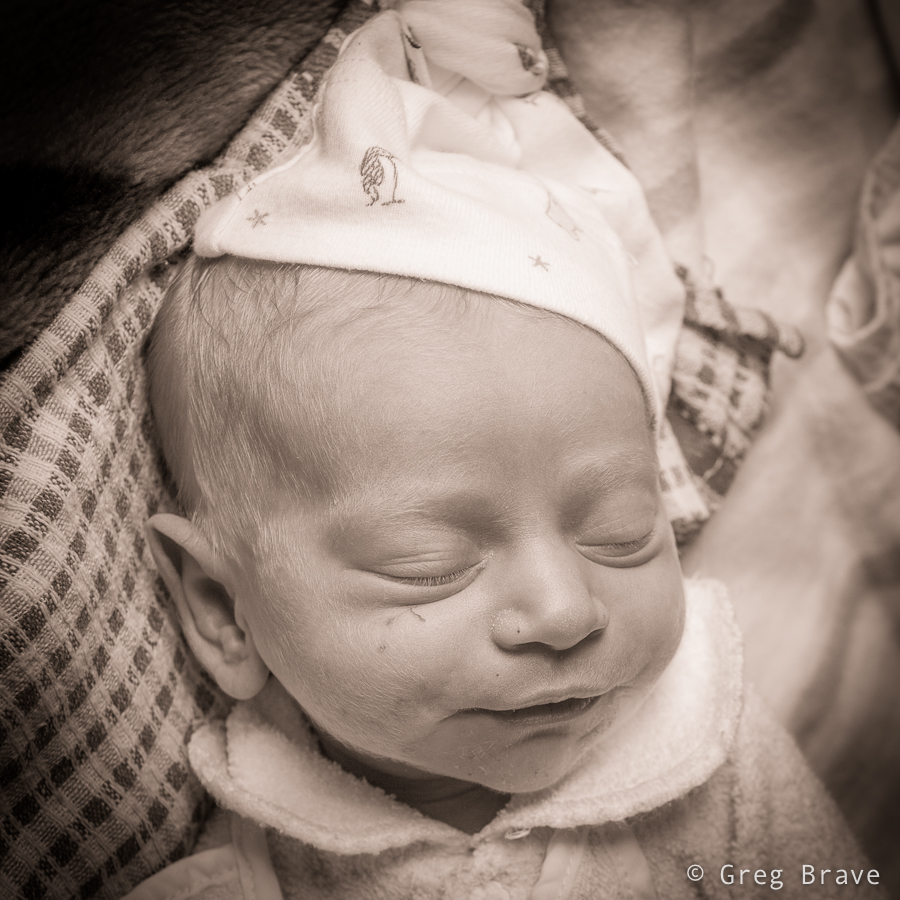
I know I haven’t been around lately, but it was for a good reason! Last week Ira and I welcomed our baby daughter into this world. So this post will be all about her, our dear Eve.
Click on the photo to enlarge.
Being a photographer-dad, needless to say that already after one week, my hard drive doesn’t have enough space for all the photos I took of her. So I try to force myself to delete some of them. It is really hard, even when as a photographer, I see that the photo isn’t that good… but this is my daughter we are talking about!
Anyway 🙂 watching her for a while I saw that her face is constantly changing, different moods and expressions passing through like clouds in the sky. Sorting the photographs I chose a few of them to post here.
Hope you enjoyed the photos, and have a nice weekend!
In this post I’d like to talk about composing photographs “after the fact”. Wait, don’t jump to any conclusions just yet, let me explain what I mean.
About a month ago I had to fly to Sydney for work but got stuck at the airport due to bad weather. I spent about two hours sitting in front of the large viewing glass looking at the runways. The weather was indeed stormy, it was dark from all the clouds, and there was nothing to photograph.
But when the weather started to get better, clouds began to clear, and airport started to come back to life, I finally took my camera out and started to stock my prey. I wanted to capture this feeling of the “airport awakening” when the planes begin to approach the runways, and workers move to and fro. Unfortunately no matter how hard I tried or how long I waited, I couldn’t capture the picture I had in mind… at least not in a single frame. Needless to say that I was very disappointed.
Later, when I returned home and went over those photos, my imagination switched gears – I saw details in different photographs, that put together would be able to create that image I had in my mind while shooting. Since I know my way around Photoshop, I decided to go ahead and try to do that.
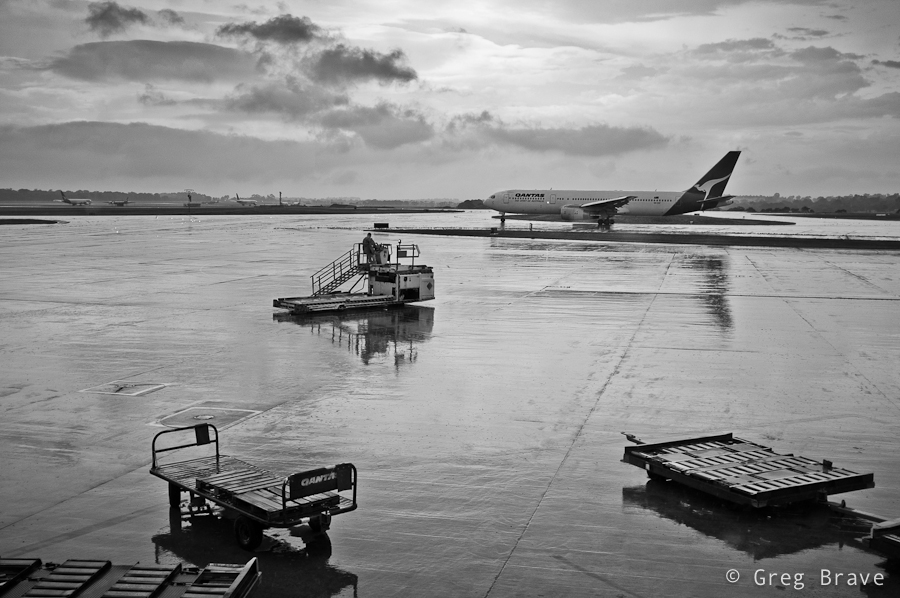
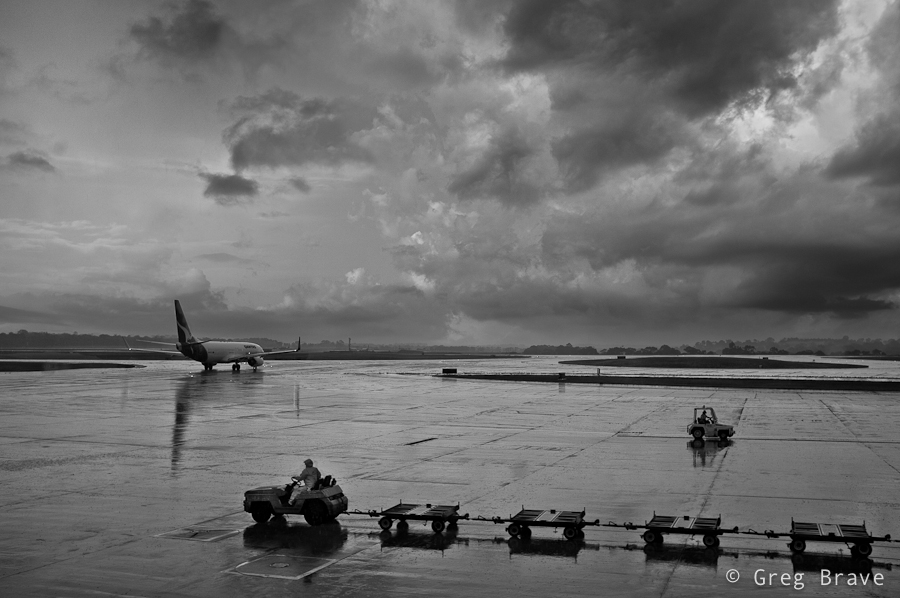
I ended up with two images which both have two things in common – both of them I would call “airport awakening” because they portray the clearing of the storm, and resuming operations of the airport. The second thing is the way in which I created this sense of awakening – with directions. I’ll explain this in more detail by going over the images.
In this first image I have three different “directions”, which go in zig-zag shape leading the viewer’s eye from one element of composition to the next. First is the direction of the two trolleys, which goes from lower right to somewhere in the middle left side of the image, next is the direction of the moving utility vehicle which catches the eye on its way to the left and redirects it towards the upper right corner, and finally the eye reaches the plane and again changes direction to the left ending up on the airplanes in the distance. The floor is still wet from the rain, but the sun starts to shine through, giving the feeling that storm has ended…
Click on the photo to enlarge.
The second image is darker, as if there is still the danger of the storm, but the moving vehicles hint of a hope for good weather. And again, we have the directions theme – from right to left, then from left to right, and finally the plane takes us into the depths of the image.
Click on the photo to enlarge.
The main thing that made the compositing easy was that I shot all the photos from approximately the same location and also I was using the same focal length.
As always your thoughts, suggestions, and critiques are welcome in the comments section below.
The first great and glorious era of modern art left the stage to the accompaniment of shots of World War II. Photography, ever since the Man Ray, and Laszlo Moholy-Nagy, sought after its particular poetry, took over the role of the informant, an agitator and propagandist. Editorial images from the war and political life of the rear attracted attention and aroused the emotions much lighter and stronger than the most sophisticated pictorialistic shot, which relies on the beauty and harmony of the plot and form. Reportage photography, having unprecedented resources and technical equipment at its disposal during the wartime, realized its power. It rejected the simple descriptiveness, making the photographic document into a work of art.
After the war, the attitude of a busy and feverishly anxious world towards photography hasn’t changed. News and reportage photography began to play a leading role, while the amateur photography, which affected profoundly the photographic industry, followed its steps. This was not at all surprising: the increasing number of magazines consumed tons of photos. Intense competition demanded for original, unique shots. An unexpected opportunity unraveled before the amateur photographers – to bring their images into the world of professional photography.
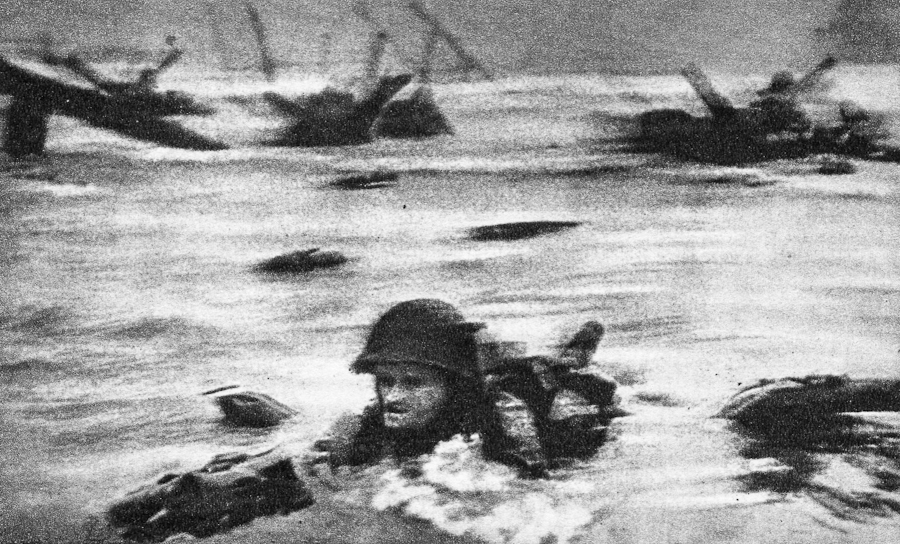
Photo by Robert Capa. Click on the photo to enlarge.
“Earn with your camera!” – Called ads in newspapers and magazines during the 1940s and 1950s as strongly as ever: “Photograph, and your life will be richer!”.
The quality of newspaper photography was growing rapidly. A new type of photography emerged, it served for the artistic decoration of newspapers, which before the war, editors firmly rejected as unnecessary clutter of valuable newspaper-space. Competition with television forced photographic magazines to compensate for the lack of “currentness” by perfection of technical execution and aesthetic impact. Painstakingly prepared photo-essays began to appear. And at the head of this new direction was the “Magnum” agency with amazing images of exotic, incredibly bold frames.
“MAGNUM” again revived the fashion for “pictures of everyday life,” which found the most complete and artistically most significant expression in the collection of photographs of Cartier-Bresson, published in a book titled “The Europeans”, in Paris in 1955. Under the influence of work of Robert Capa, David Seymour, and Cartier-Bresson, western photography discovered the everyday life, and deeply penetrated into it capturing its dramas and diversity. Edward Steichen organized the exhibition “The Family of Man”, which contained pictures, selected from hundreds of thousands of photographs, and was the biggest event of the photographic life at the time. It was also the apex of reportage photography, the victory of photojournalism over the pictorial and poetic photography.
But then this rich source began dry up. Television won the battle in a dominating fashion, basically condemning the Hollywood and illustrated magazines to die. The publishers could no longer be satisfied with pictures of amateur singles that had very limited resources. They started more often to commission creative teams that actually, became photo agencies long before. These agencies could fulfil any commission, from military photos, and ending to the spicy photos of beauties that adorned the covers of fashion magazines.
Photo by Rene Burri. Click on the photo to enlarge.
“MAGNUM” secured its place in the history of photography. It firmly entrenched in its chosen field of photography and distributed materials mainly for the “Life” magazine. It did not resort to gangster methods of “scandalous” photographers stalking their victims in the back streets of “sweet life” on the Via Veneto. Agency managed to thrive without the assistance of gangs of apaches and did not resort to extortion, relying entirely on the simple but proven means of ensuring the success of the enterprise: darkrooms, helicopters, money, cooperation of diplomats or even prime ministers.
The optimistic ads prompting amateur photographers to earn money with their own cameras disappeared from the pages of magazines. Nobody believed them anyway. Nobody would pay several hundred dollars for a new camera just because it would allow for a few milliseconds shorter shutter speeds. Those decoys became a thing of the past (or did they? – Greg’s note).
Amateur photography all over the world returned to its true nature of simply love for photography, photographic trade and industry started to decline, but with renewed vigour sounded the photographic poetry, while the so-called “photography of everyday life” started losing his fans. All these phenomena were closely related to each other, although the “Photo-dealer” (a big photo equipment seller) said the source of all evil was Japanese produce and required high duties on imports of Japanese cameras.
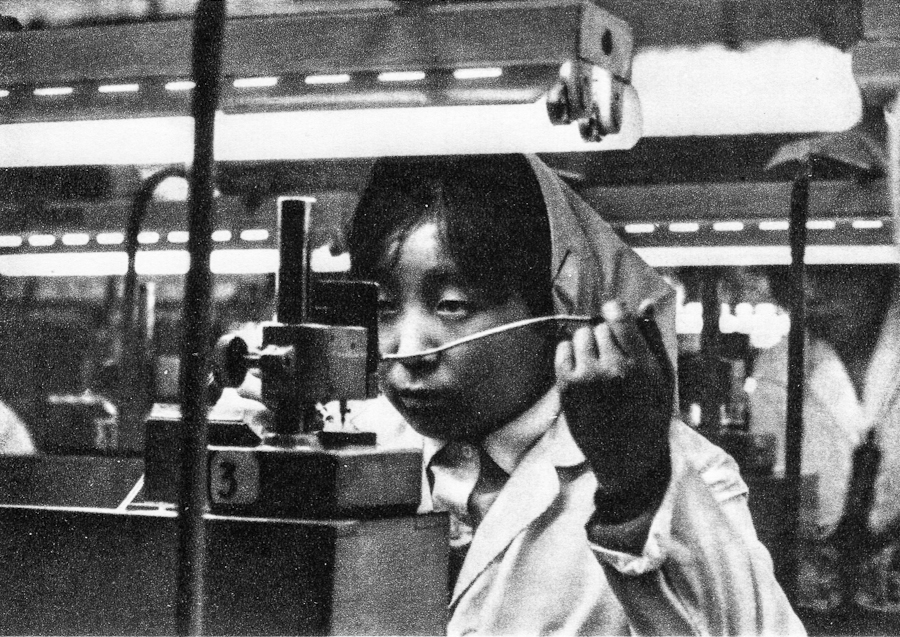
Photo by Rene Burri. Click on the photo to enlarge.
However the “Magnum” agency moved its central office from Paris to New York, closer to the editors of the “Life” magazine, closer to sources of funding. This wasn’t particularly surprising: New York, Paris, Cape Town or Sydney – does it matter? This was just a station in endless traveling and the pursuit of pictures.
Photos of “Magnum” agency are still selected very carefully. No imperfect or weak images are allowed to slip to the press. 99 percent of production goes to trash, nevertheless what is left after the selection are images representing the very best of the Western storytelling photography.
But the agency founders are dead – and so is the noble motto of their creative team, calling for humanity and against the war. What remains is the perfectly organized company.
In one of my articles I told you about the wonderful old Czech photo magazine Revue Fotografie. I also complied a pdf photo album with some of the photographs from one of its issues. Since then I have found quite a lot of Revue Fotografie issues, and red many of its great articles, but unfortunately they were all in Russian language, so I can’t display them here. However, just recently I red this article by Ludwig Soucek about the “Magnum” photo agency, which still exists today. This article was written in 1965 and it describes not only the history of the agency but the overall photographic history leading up to that time. I loved this article so much that I decided to translate and share it here. I had to “revise” it a bit because it speaks of some events in present tense while they already long gone – for example when this article was written Henry Cartier-Bresson was still alive and working at Magnum!
I’m sure this article will be of interest to anyone who is into photography.
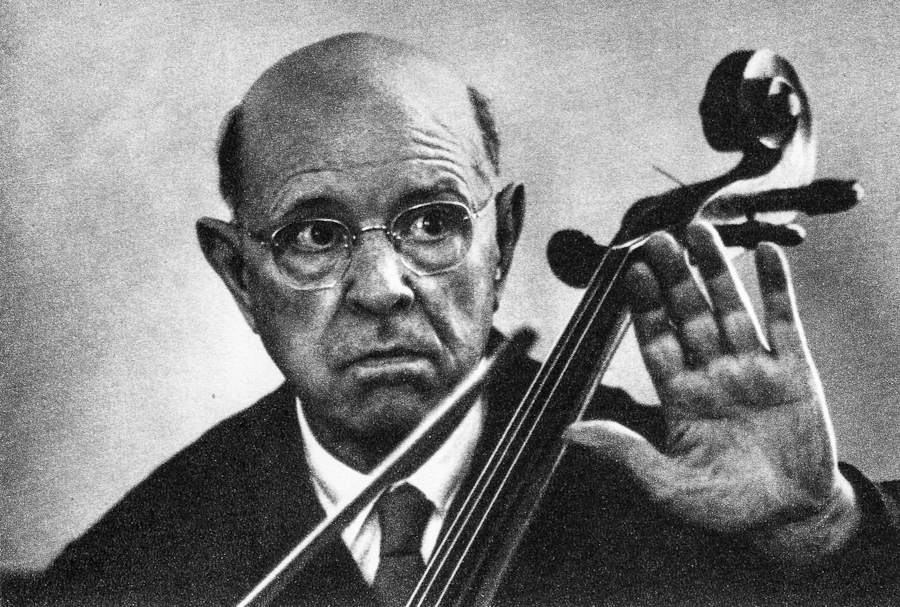
Photo by Henry Cartier-Bresson. Click on the photo to enlarge.
The author of the fundamental piece “The Arts” Hendrik Willem van Loon wrote in 1939: “I am confident that after a hundred years, art researcher will dedicate the same amount of chapters in his book to photography, as well as to painting.” And when this prophecy comes true, then one of the largest chapters will probably be dedicated to the famous “Magnum” agency – a typical phenomenon of the global photography of our age that discovered and showed the world new forms of expression.
In the spring of 1947 three friends gathered together around a bottle of champagne: Robert Capa, Henri Cartier-Bresson and David Seymour, tramps who roamed all the seas and oceans, people with colourful biographies. Judging by their pseudonyms one can hardly guess that the first one is a Hungarian, the second – a Frenchman, and the third – a Pole. They founded a creative team that set a goal to introduce a fair share of sensationalism and emotion into journalistic and documentary photography (through which it would be able to sustain an unequal battle with television) – the humanistic tendencies and personality traits.
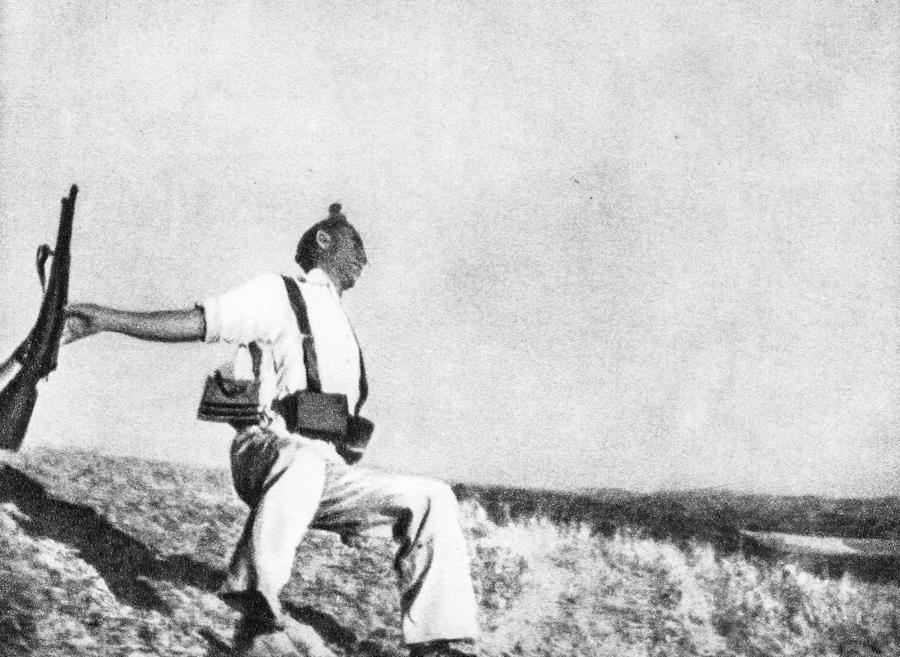
They had much to tell. During the Spanish Civil War they were on the same side of the front along with Ernest Hemingway, Ludwig Renn, General Walter (whose real name was Karol Sverzhevsky), and a physician Allen Gorgon. During the Second World War, Henry Cartier-Bresson was taken prisoner, tried to escape twice but without success, and only the third time was successful. Capa and Seymour fought as well – Capa armed with a rifle, Seymour with a camera.
Over a bottle of champagne this new group set its motto: “No to war!” Capa dreamed of photographing children and his beloved country, Greece; Bresson was going to visit the countries in which freedom was just being born – China and India.
Photo by Erich Lessing. Click on the photo to enlarge.
However, Robert Capa hit a mine, while as a war correspondent he was shooting a dirty war in Vietnam in 1954. And David Seymour was caught in machine gun fire, when he was in Israeli trenches shooting the report on the Suez conflict in 1956. Henri Cartier-Bresson was the lone survivor of the group. He became a press photographer of the magazine “Life” and has won great popularity. He also continued to work for “MAGNUM” flying all over the world, and constantly photographing. He would take hundreds, thousands, tens of thousands of images, but did not publish them, did not care about their application and did not create photo-essays from them. All that was dealt with by the Magnum’s headquarters staff group, which called itself “Cooperative for allocation and distribution of reportage photographs”
Agency’s funds, once very scarce – only sufficed for a bottle of champagne – had increased significantly. For the photo on the cover of the Life magazine in 1965, photographer could receive anywhere between 500 to 2000 dollars (according to his fame), and fees for the reportage would be twice or three times as much. The number of cooperative members grew. Englishman George Rodger, Austrian Ernst Haas, a Swiss Werner Bischof were the fourth, fifth and sixth members. Werner Bischof died tragically in 1954, falling into the abyss near Lima, where he was sent by the agency to shoot the holy city of the Incas – Machu Picchu.
“MAGNUM” didn’t suffer from lack of personnel though – it was a dream of every photojournalist to become a member of the agency. This popularity brought the agency vast new possibilities and glory. The agency welcomed several new photographers: Marc Riboud, Erich Lessing, Rene Burri, Brian Brake, Inge Morath, and others. All of them used Leicas, advertising the brand, as their shots were way better than any other type of advertising. Those photographers were setting the tone and dictated the fashion in the photography world.
After the Second World War photography captivated the world. Shares of the photographic industry, which was building more and more factories were the most reliable and profitable investment. During 1956 alone, more cameras were sold worldwide than during the hundred years that have passed since the invention of photography. After the WWII small-format cameras alone had sold about 125 million. Photographic companies that had billions in capital, united into powerful monopolies. In Japan, for example, the combined plants Aires, Canon, Fujica, Kalimar, Minolta, Nikon, Yashica, Mamiya, Ricoh, Bronica, Sankyo and others constituted one of the most powerful monopolies in the country. Before that happened, market conditions seemed secured for years to come. Hundreds of millions of amateur photographers, thanks to whom there was photographic market, were willing to buy new cameras having even the most minor improvements.
Photo by Robert Capa. Click on the photo to enlarge.
But in 1962, the first time since the Second World War, the number of units sold and materials ceased to grow. Prices have fallen – in some cases up to the one fourth of the original cost. Temporary instability of the market transformed into a crisis. The numbers of the first half of 1964 were very disappointing: out of the hundreds of factories, only three or four (Swedish “Hasselblad” American “Kodak”, German “Franke and Heidecke”) sustained the volume of production. Others clung to a straw – new and cheap models. They promised the maximal use of the film, and ensured completely successful photographs, but all their efforts were in vain: the photography craze that swept the world twelve years before, vanished.
This phenomenon was caused by a number of reasons. One of them was “Magnum.”
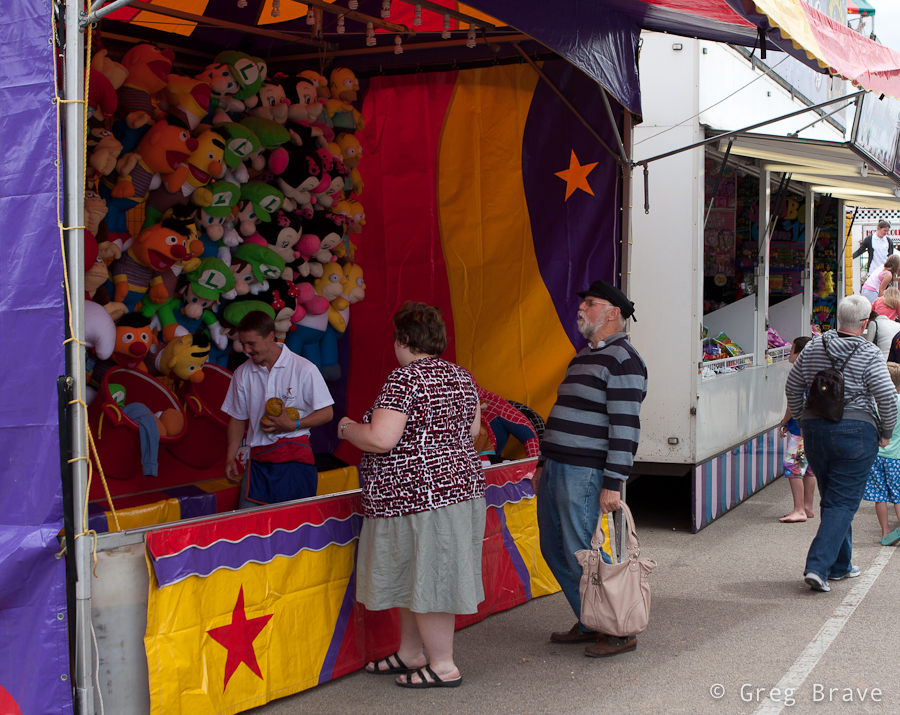
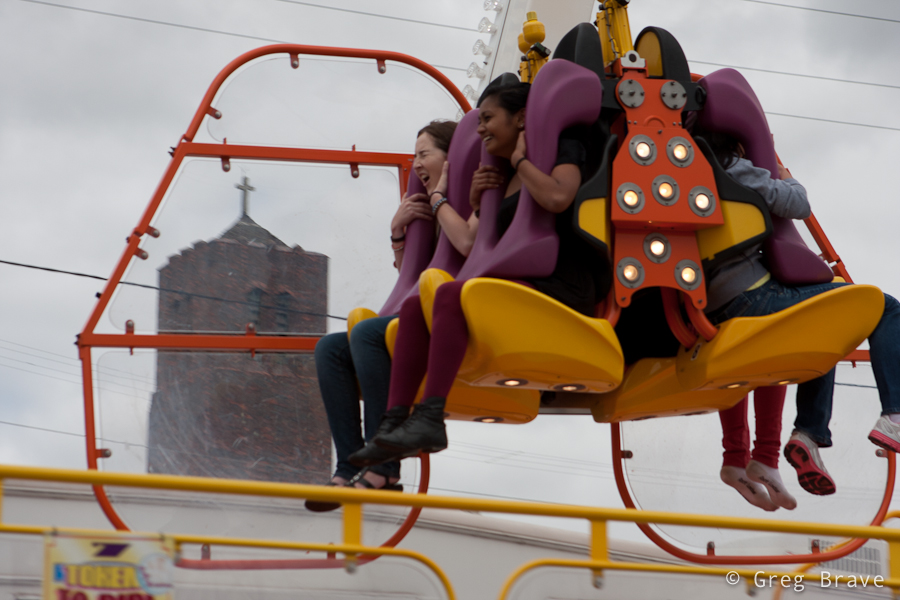
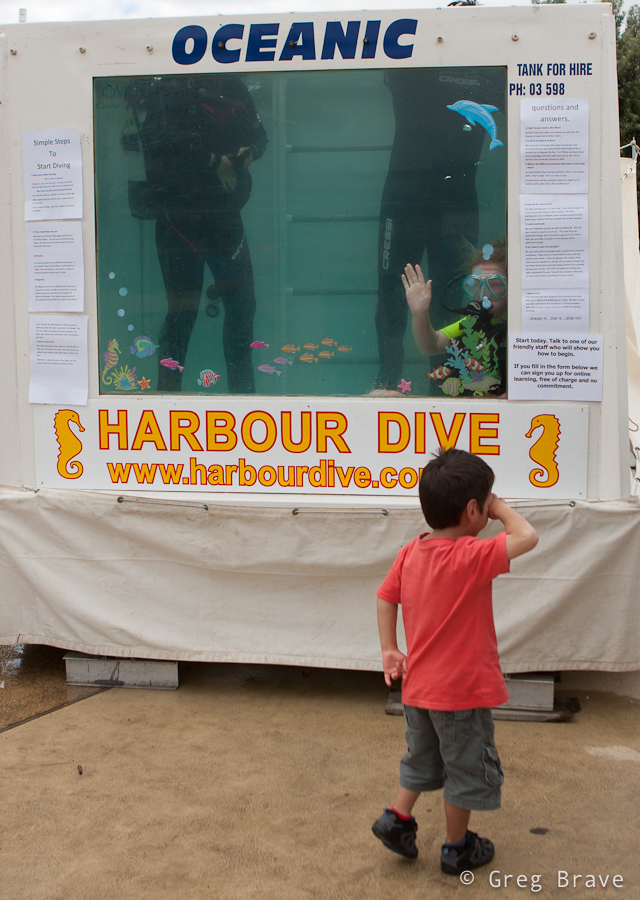
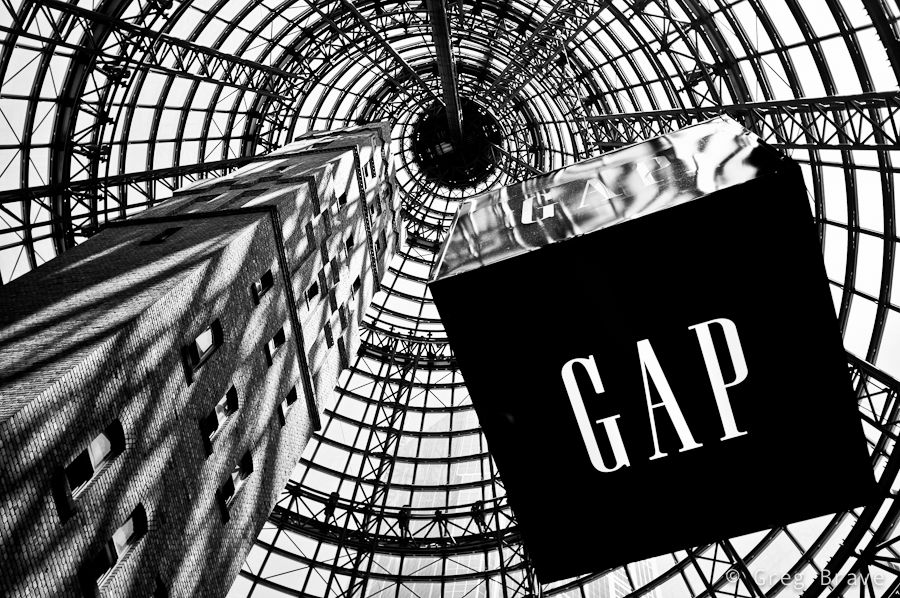
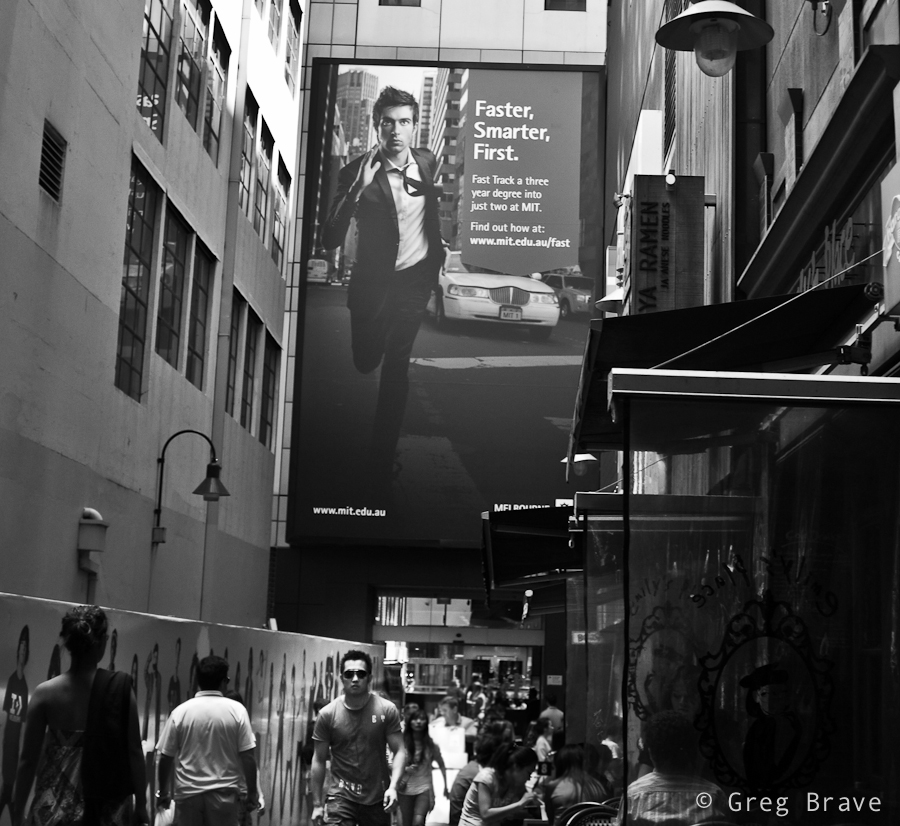
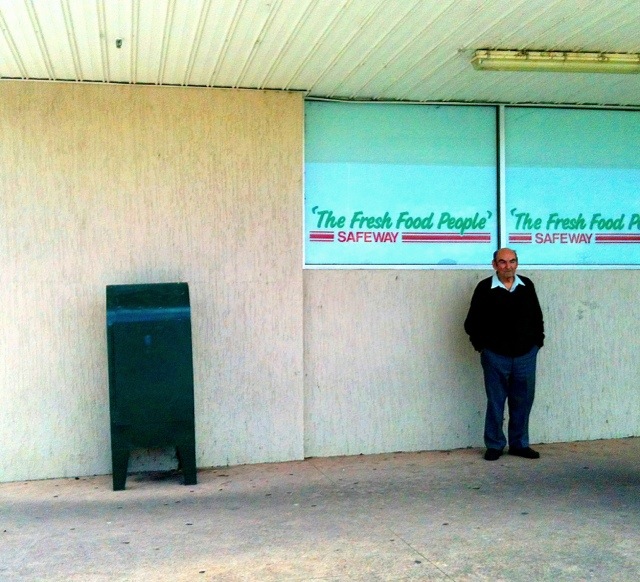
Lately I didn’t have much time for photography, so these photos are from couple of months ago. First three are from Frankston’s waterfront festival. And the last two were taken at Melbourne Central train station.
The following shot was planned. I saw this couple and was waiting for an expressive moment. I actually took several shots and this is my favorite.
I call this photo “Oh My God” :). I was trying to capture some of the kid’s expressions while riding this… thing, so I made a few shots, and only later saw this quite interesting result.
In the next photo I really like the hand gestures and little kid’s body language. It is a bit sad but very expressive
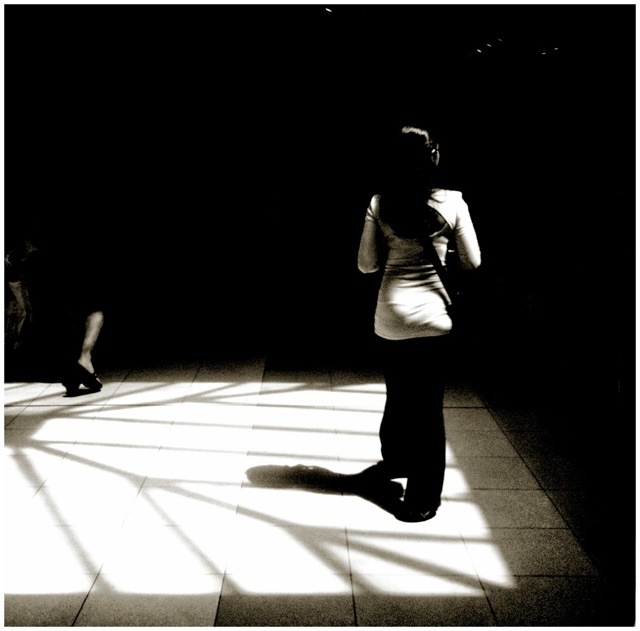
The photo below wasn’t Photoshopped – it is what you can see at the Melbourne Central station if you look straight up. In addition to the 3D effect, I like the shadow/light play on the building.
The next photo was also taken at Melbourne Central.
That’s it for now. I’m off to shoot one of my favorite subjects – the Sunset!
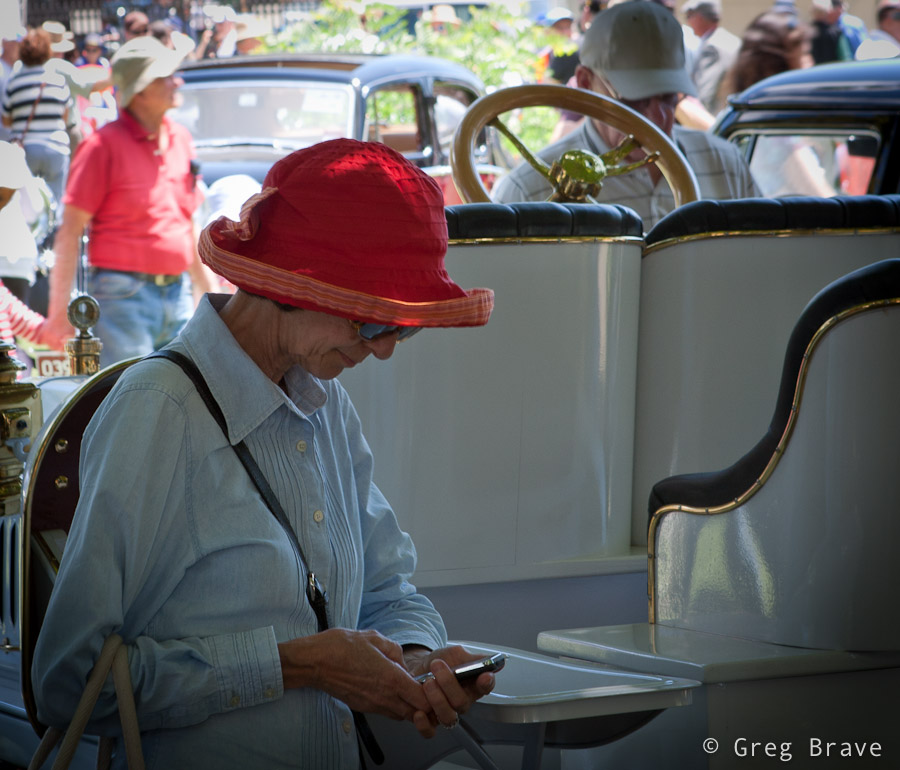
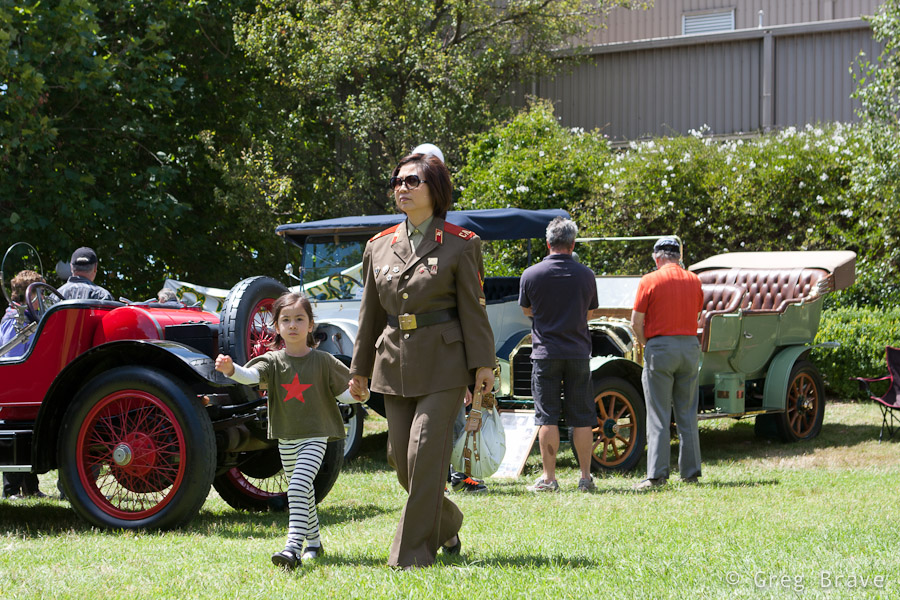
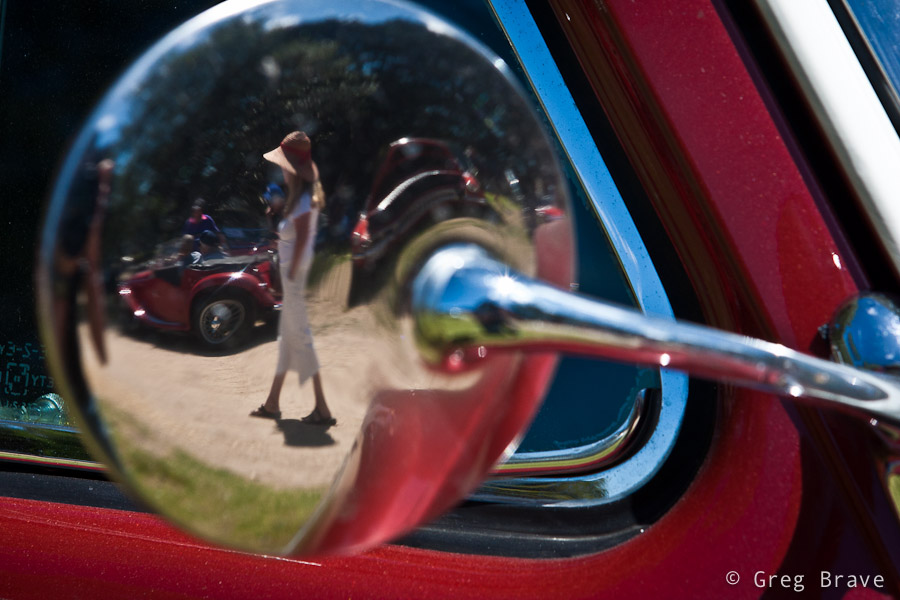
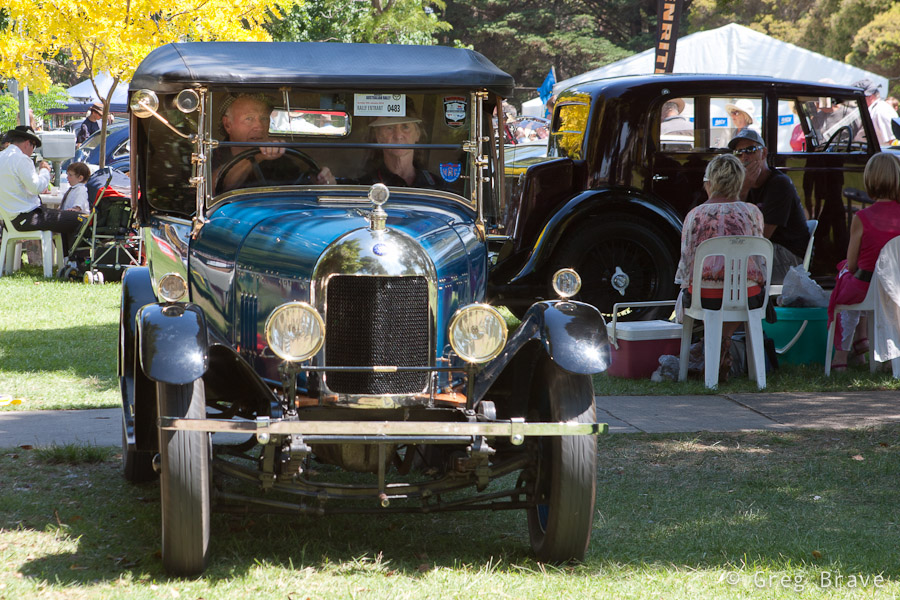
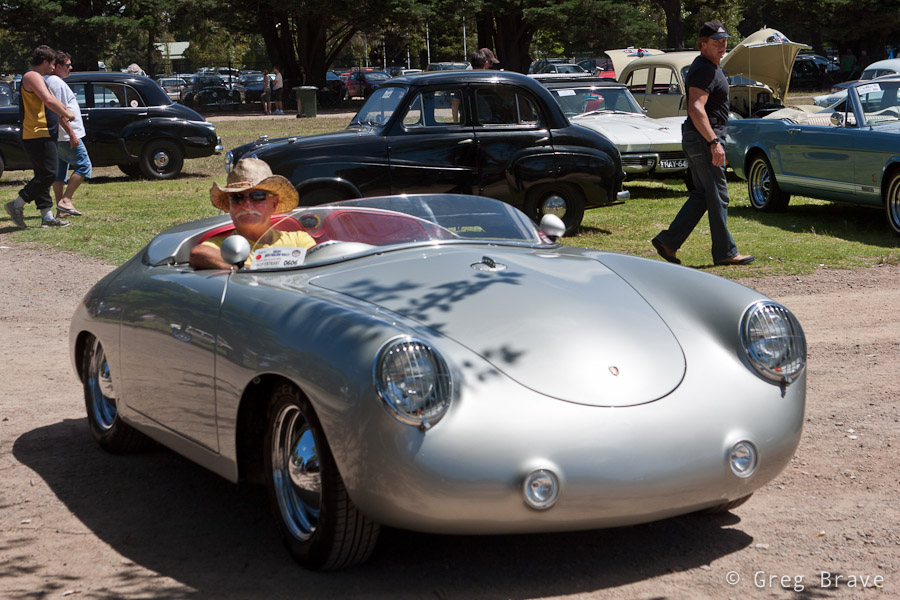
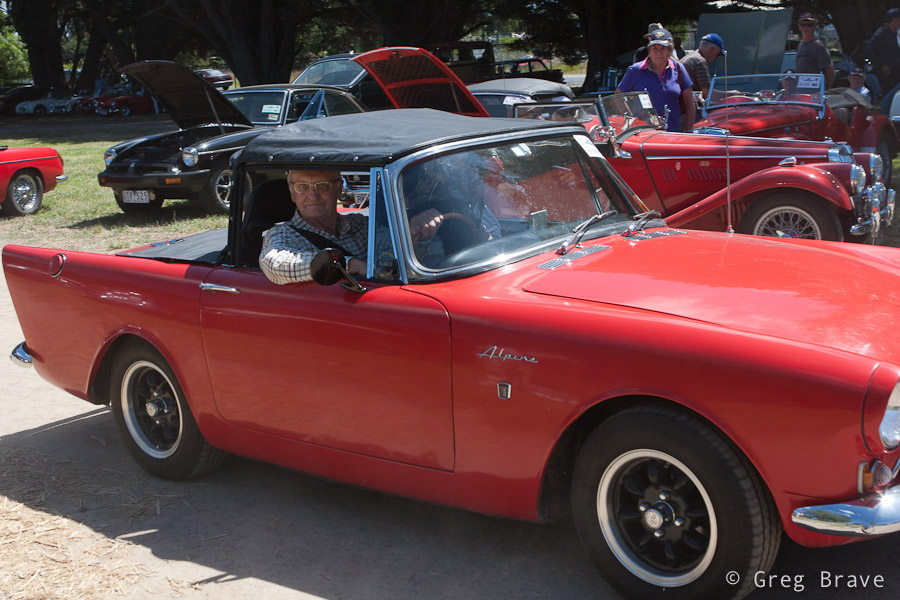
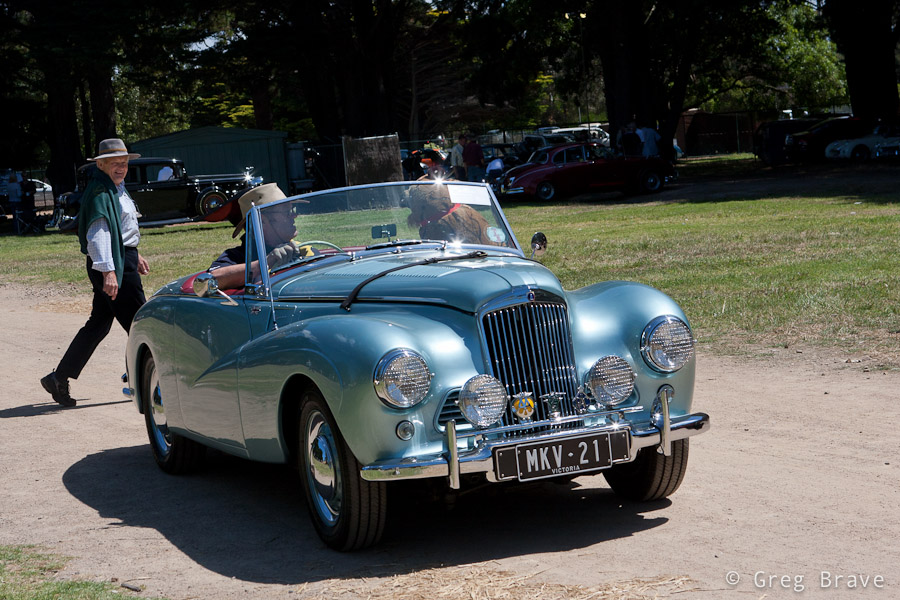
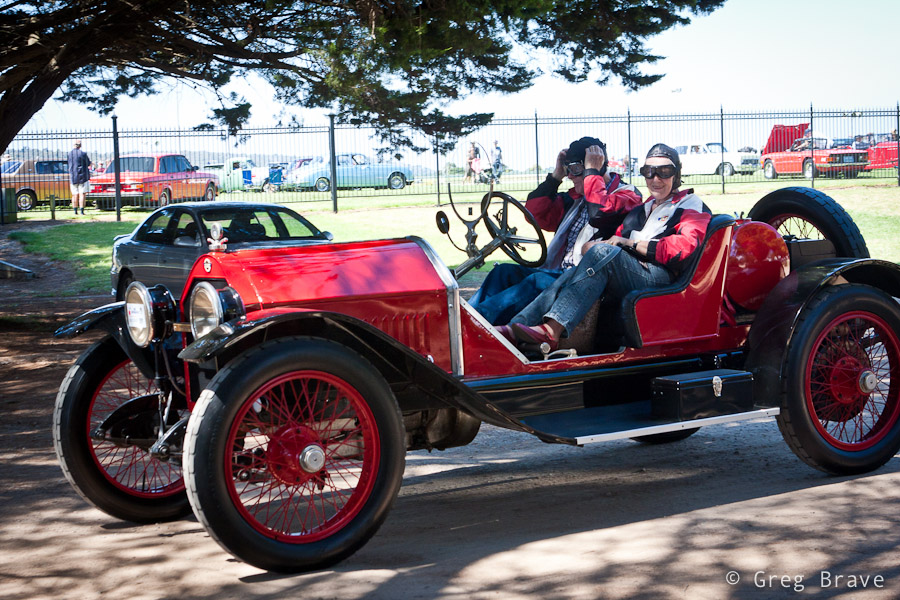
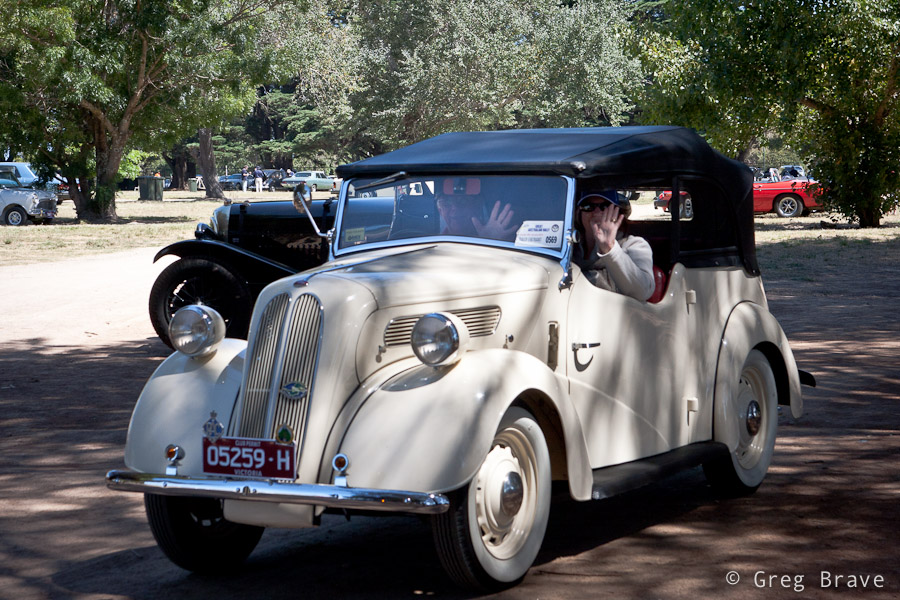
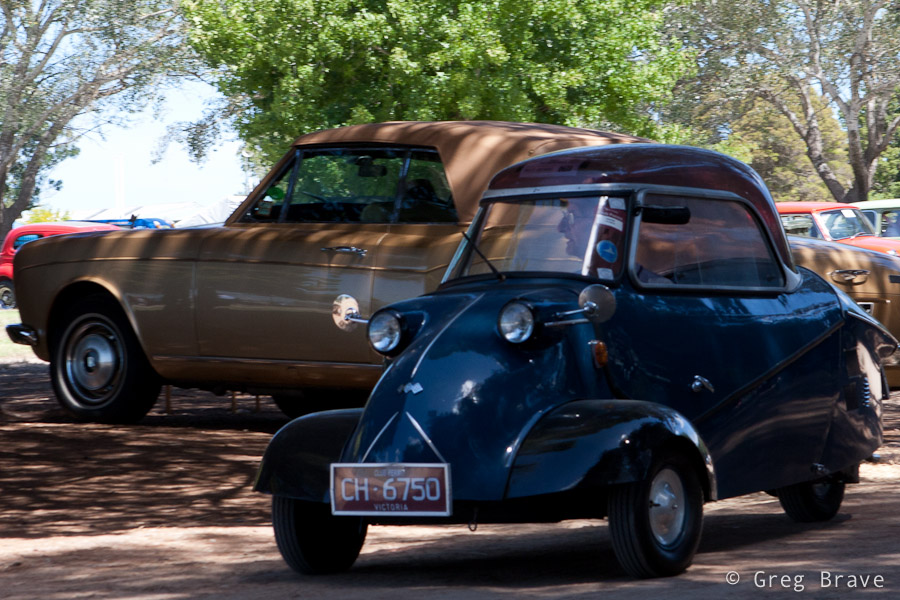
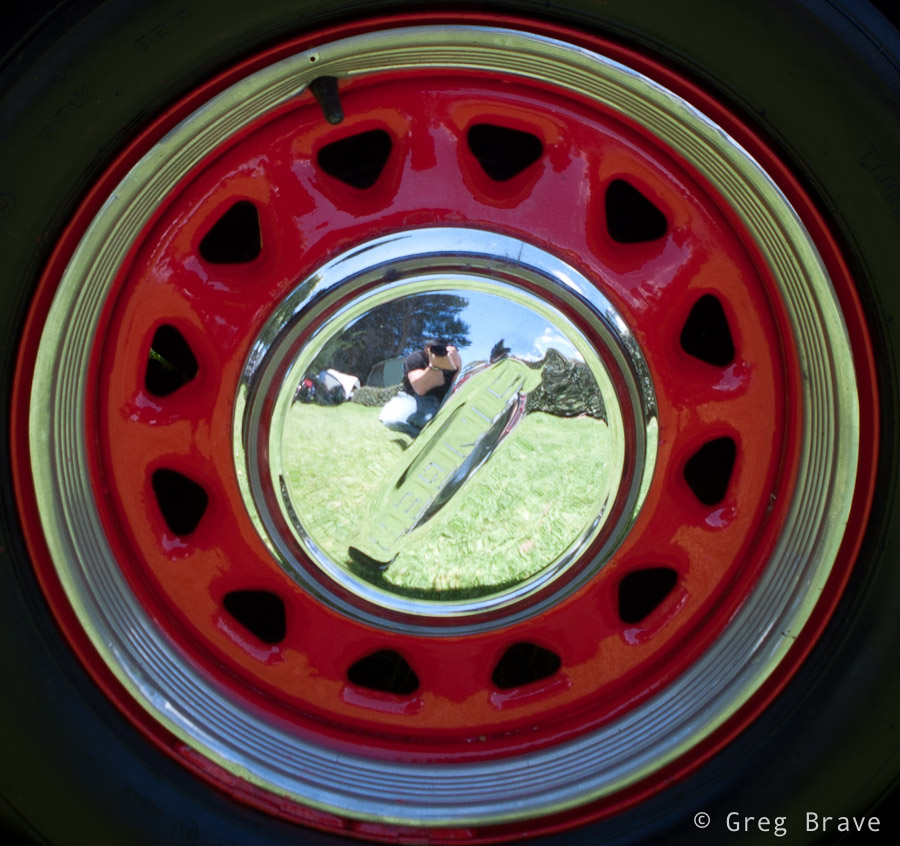
A couple of weeks ago Ira and I visited a collectible cars show at the Mornington’s racecourse. There were lots of beautiful old cars and we had lots of fun.There were also quite a few photographers taking shots of these beauties. But from my photographic perspective, I didn’t want to simply photograph the cars as I am sure there are already many photos of each model that was showcased there.
So instead I tried to look at the event not as “this is a car show, so I am going to photograph cars” but more as “this is a social event featuring nice cars, so there will be people interacting with them, and I want to capture this interaction”. And even when I photographed only the cars I tried to convey how I see them. For example when shooting the b&w Jaguar in the photo above I tried to show the “facial expression” of that car which was kind of “right in your face” 🙂
We spent about one and a half hours at the show, and just when I thought that I’m done photographing, the car owners began starting up their cars and drive away – it was the end of that day. During the show the cars were standing unattended, while their owners were sitting somewhere in the shadow chatting and drinking coffee, so now it was a great opportunity for me to capture the cars together with their owners, and I tried to make the most of it.
From the technical side the biggest problem was the harsh sunlight, which created deep shadows and sharp transitions from light to shadow, so it was difficult to capture both the car and its surroundings and the driver sitting inside the car in the shadow. My solution to that problem was to shoot in RAW and slightly overexpose my photographs. This way in post processing I could lighten up the shadows and darken the highlights (the RAW format gives you a bit of freedom in correcting your exposure).
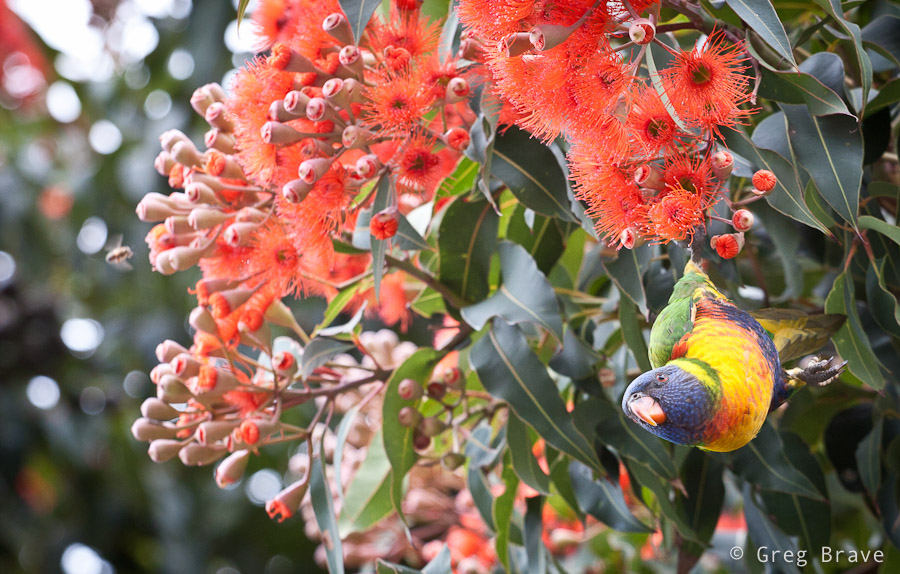
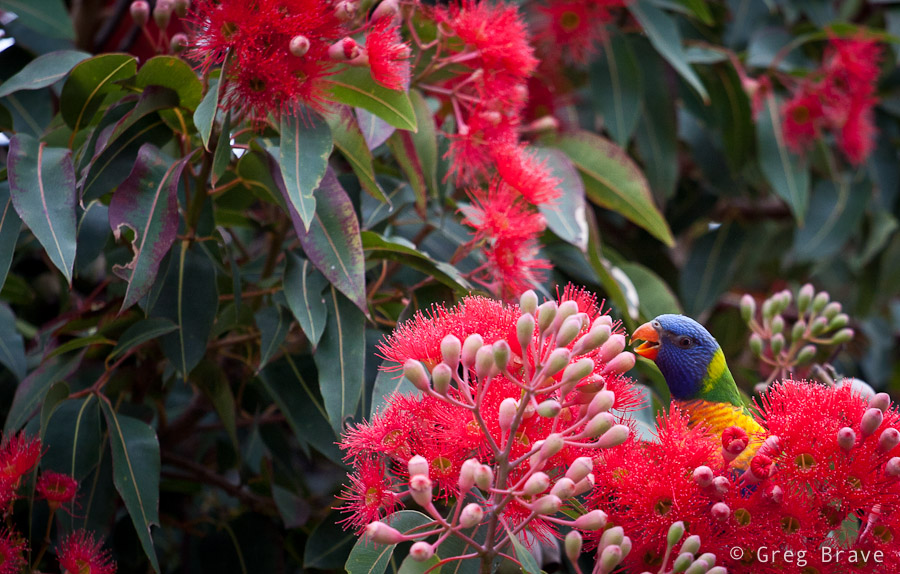
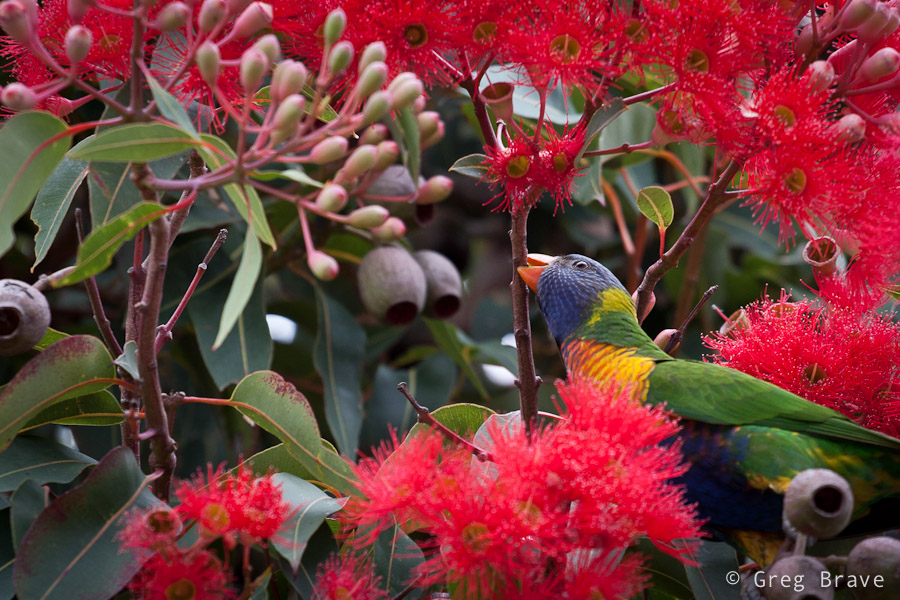
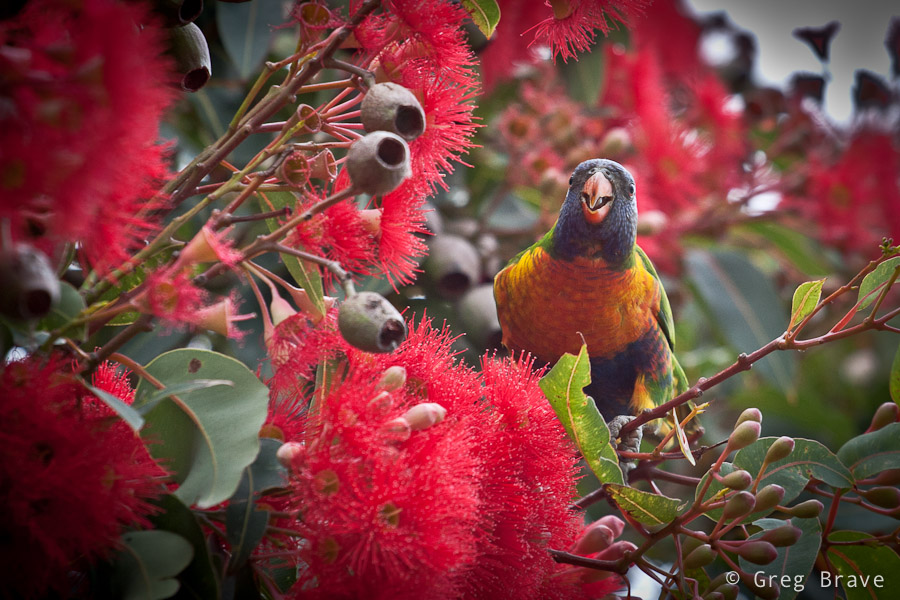
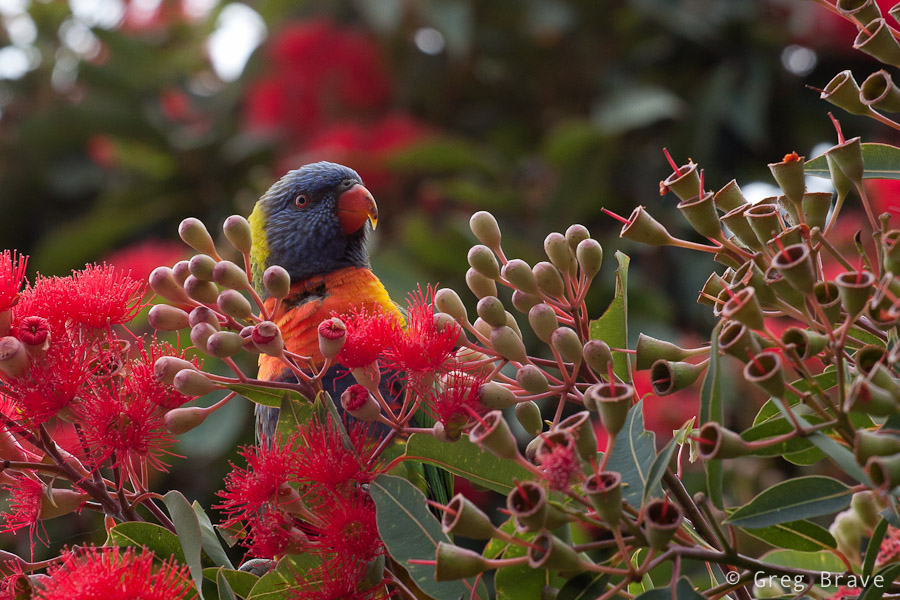
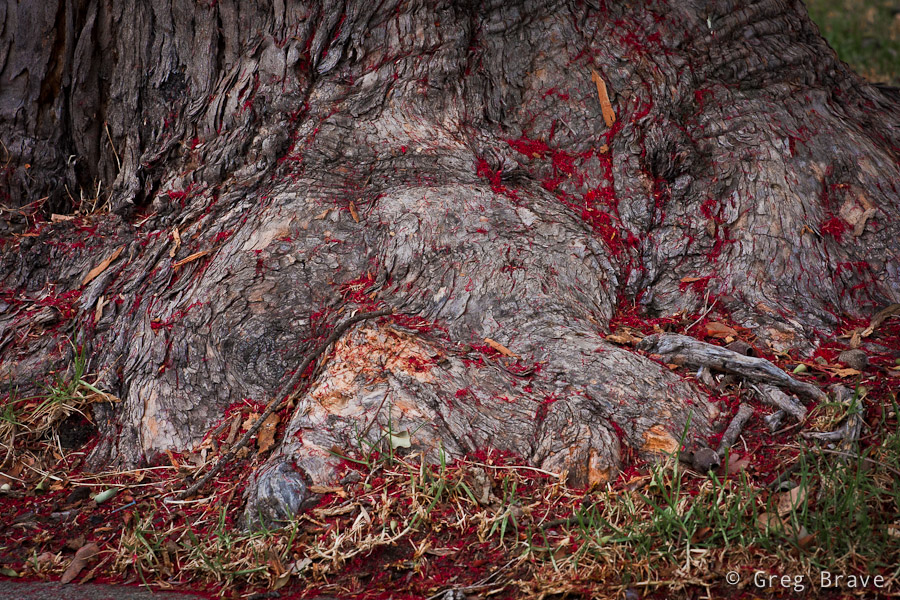
In the summer, here in Australia, Red-flowered gum trees start to blossom. This is a very beautiful sight! The whole tree is covered by marvelous, red-colored flowers. These trees have various hues of red, and when you have the whole street planted with them, the view is stunning!
Click on the photo to enlarge.
But merely this fact wasn’t enough for me to set aside some time on weekend and go photograph them. There was one more thing – early in the morning starting about at 7 o’clock and until about 9 the Rainbow Lorikeets (beautiful little parrots) come to feed on these trees. Most of the chances that you won’t see them later in the day there, but in the morning the blossoming trees are filled with these brightly colored little birds. It is quite simply a celebration of colors!
Click on the photo to enlarge.
I couldn’t miss this event, took my 70-200mm lens, and set out early in the morning to capture the nature at its best :). You can see what came out of that photo session in this post.
Click on the photos to enlarge.
I needed to have quite a lot of patience as the parrots were restless, kept moving all the time coming out and disappearing in the foliage, but I managed to get a few nice images. Hope you enjoy them!
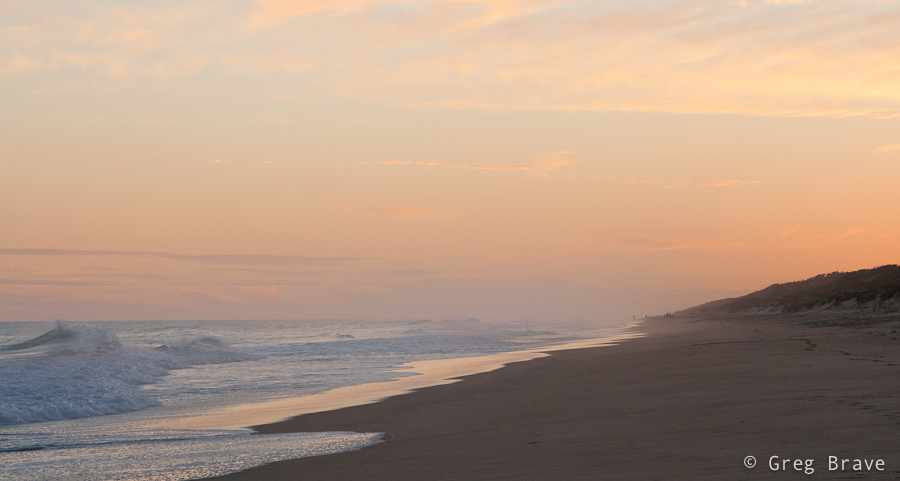
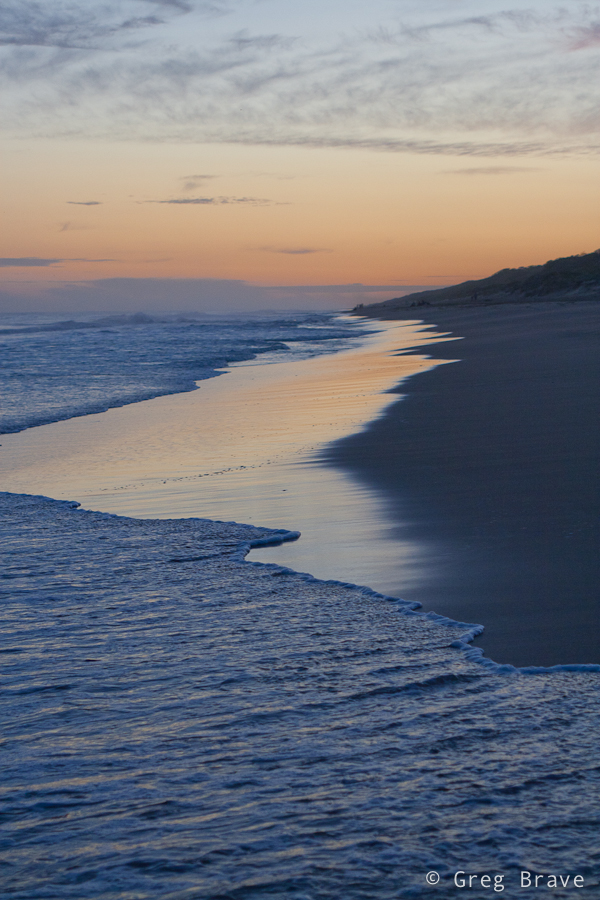
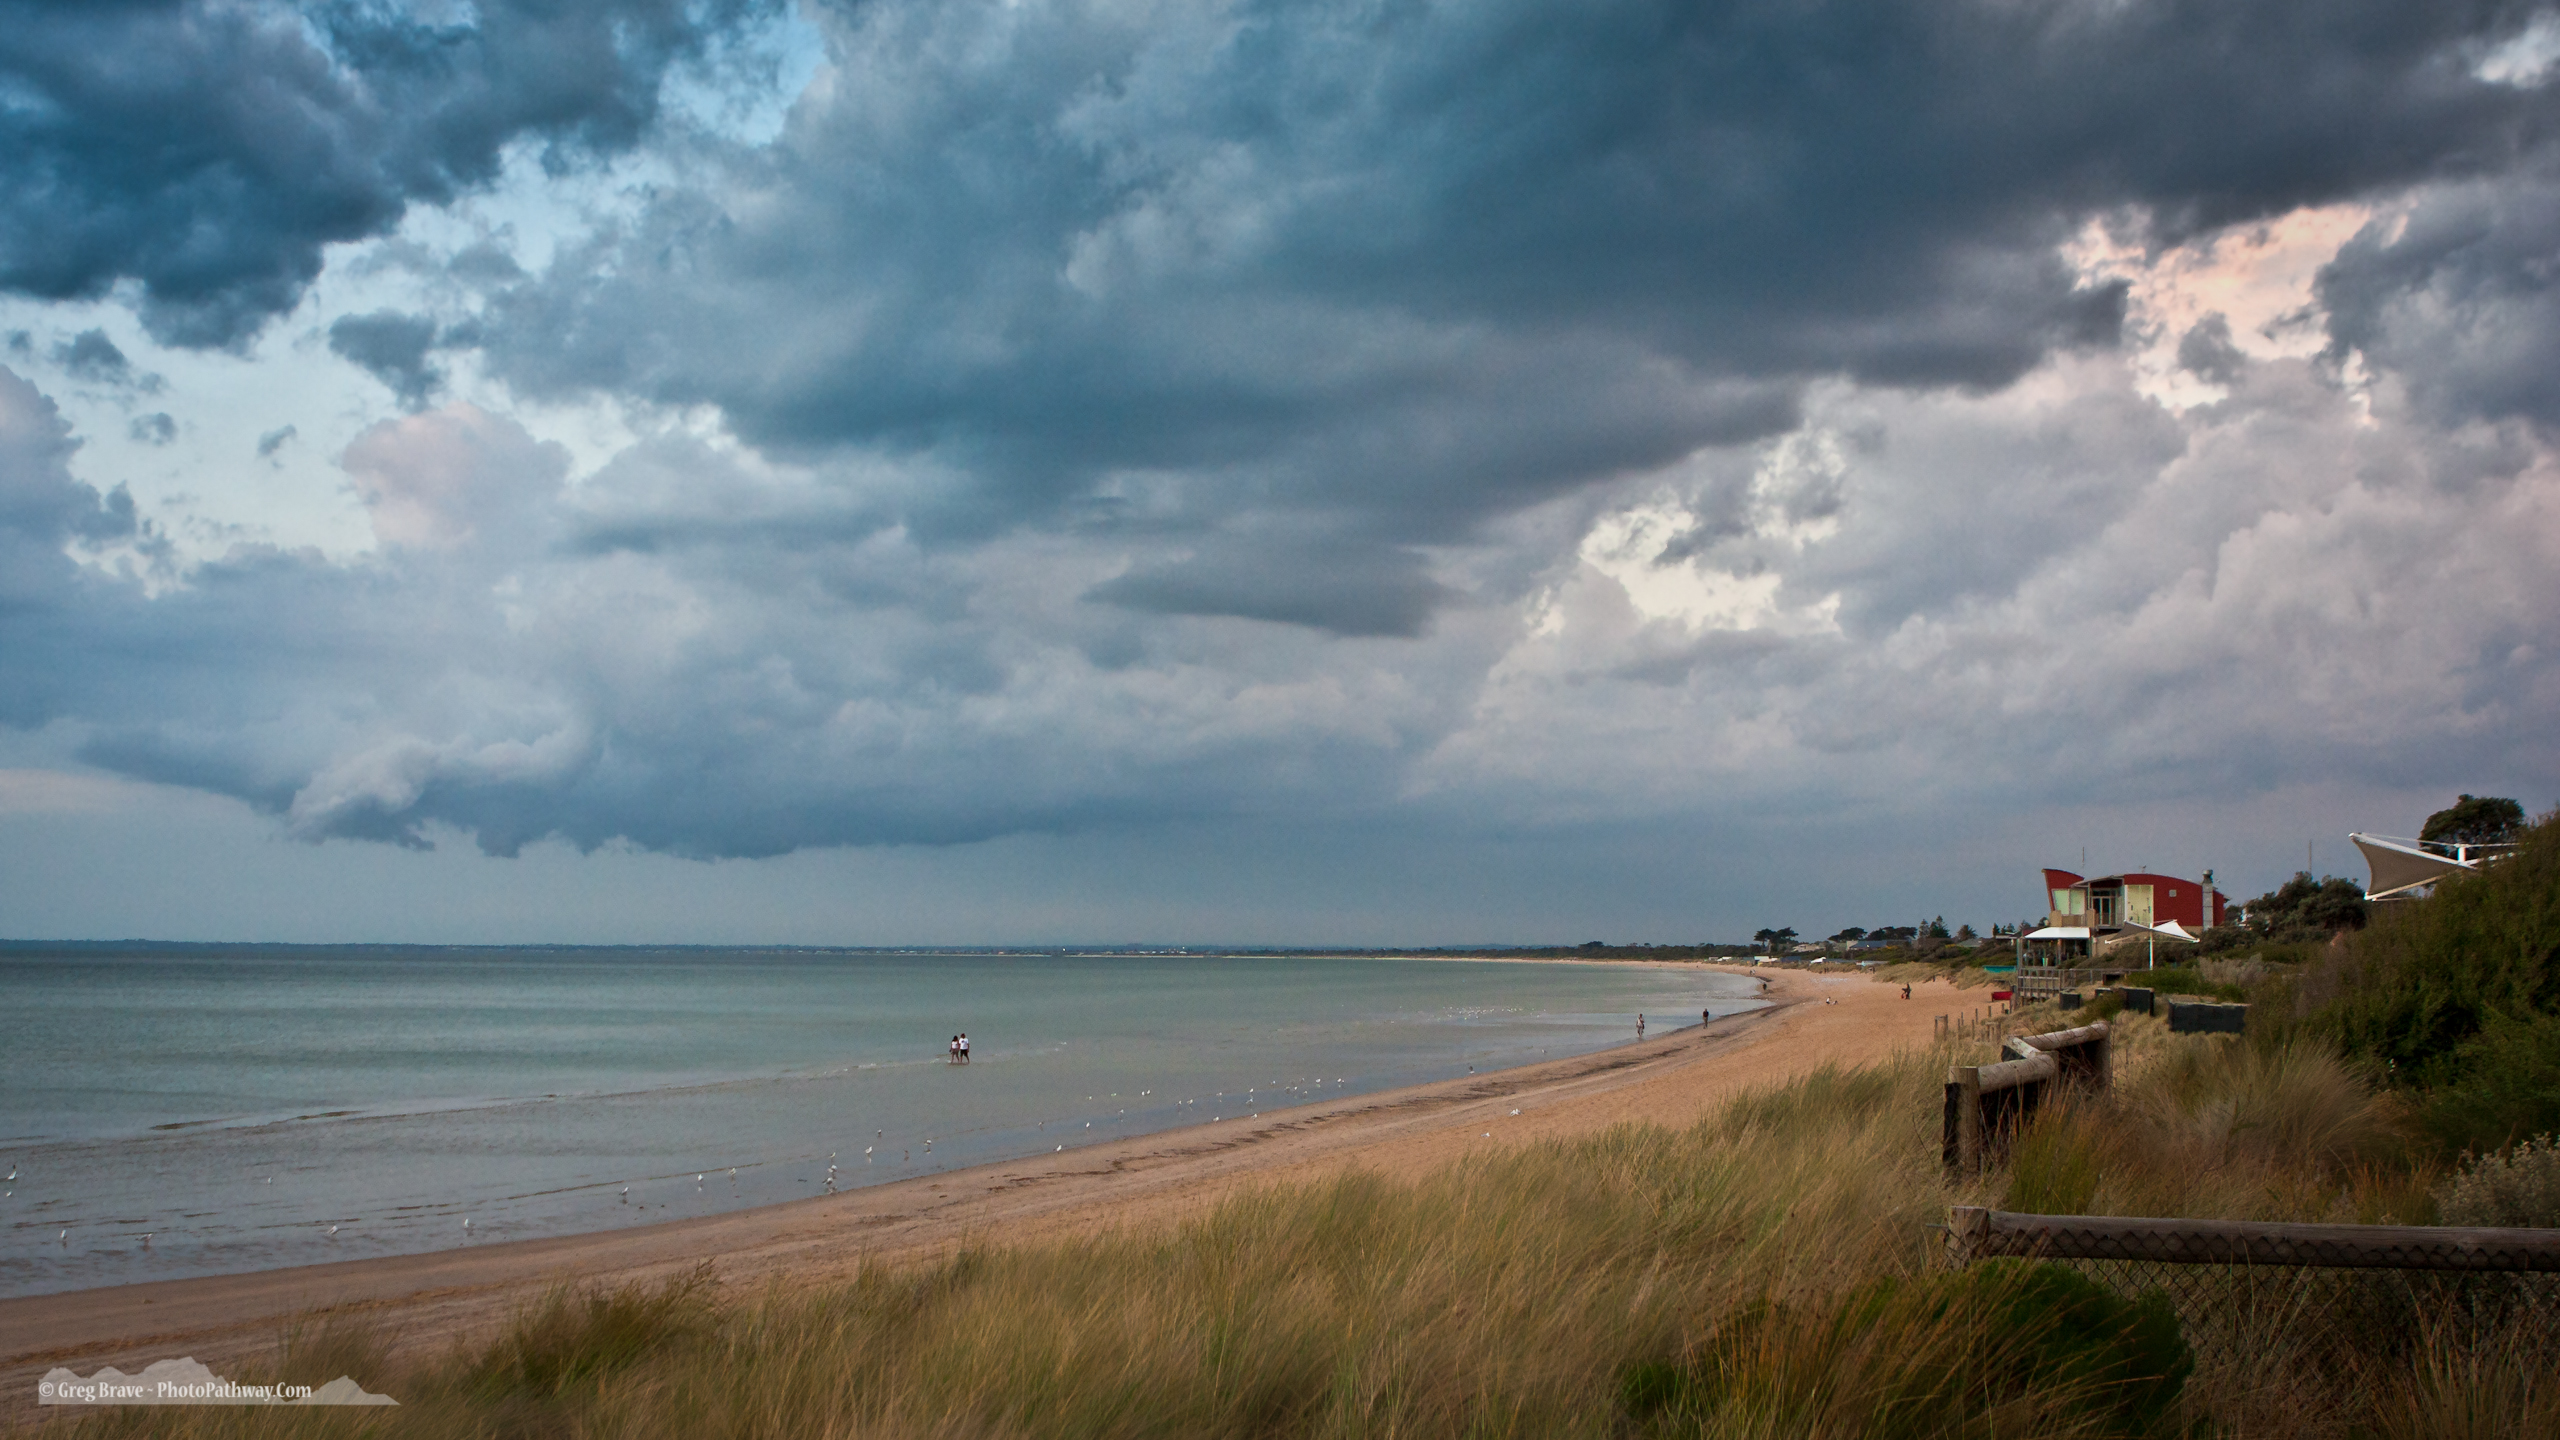
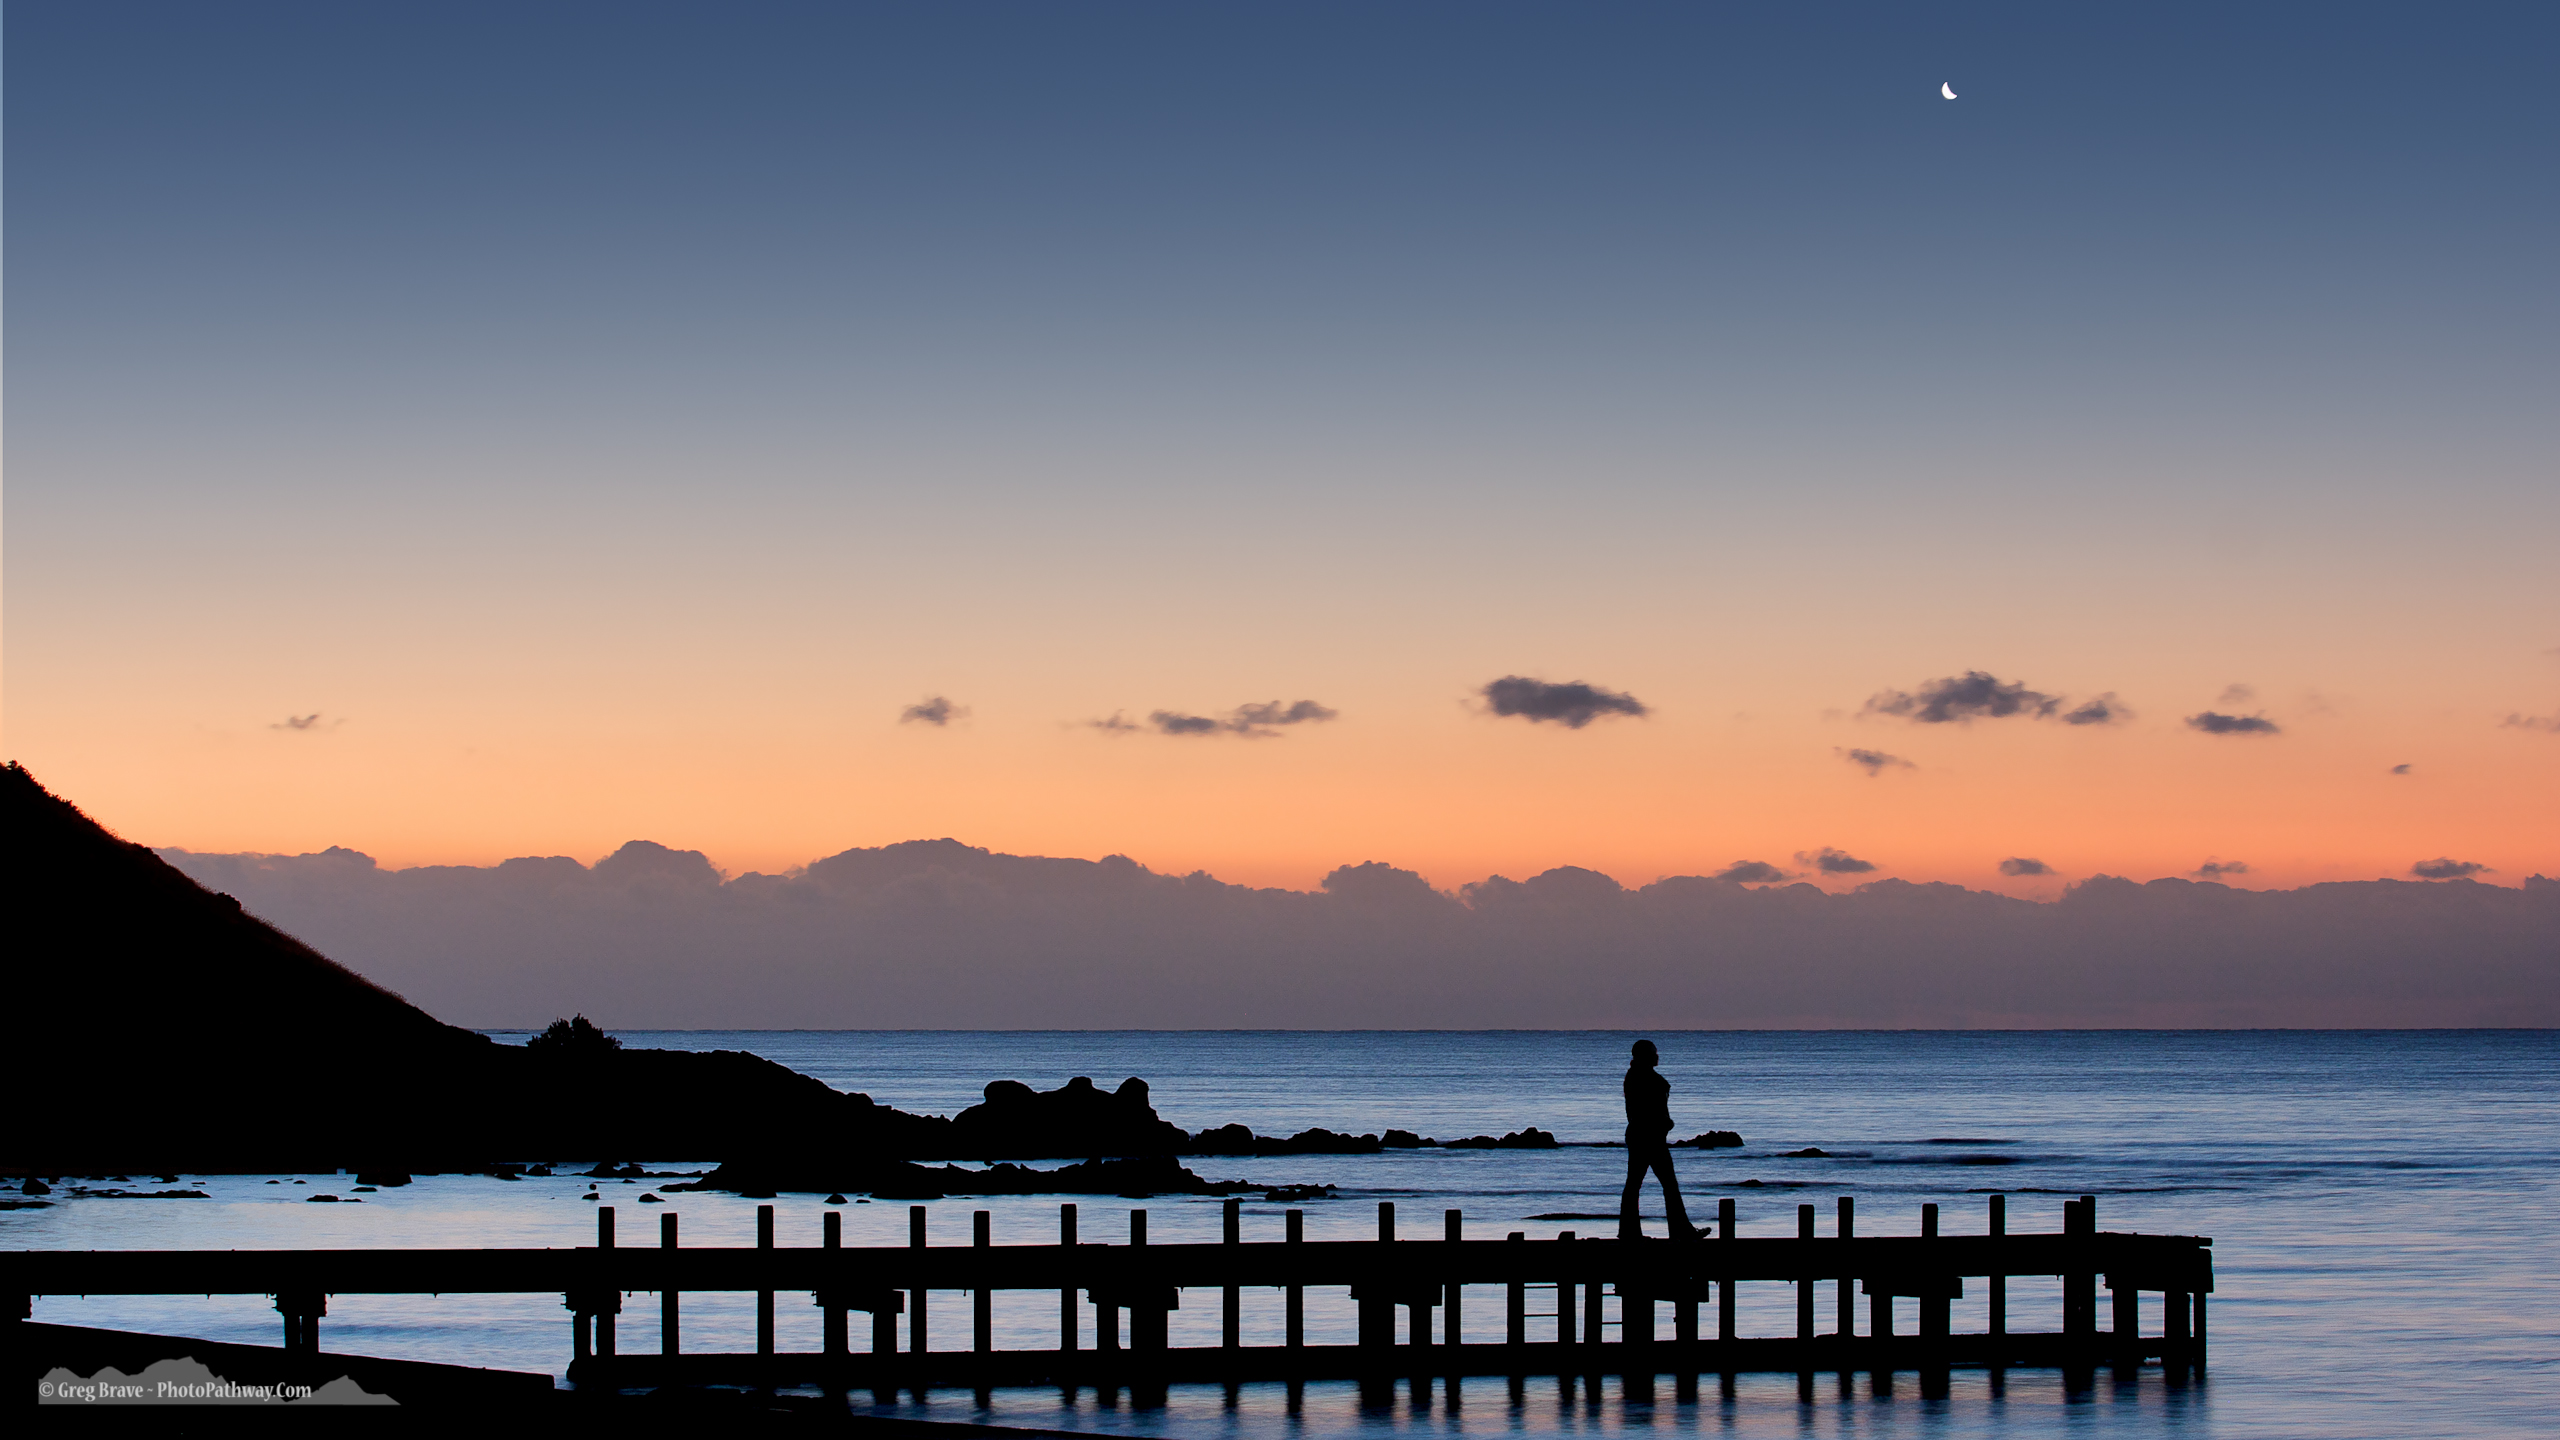
Ira and I have a tradition – we always try to spend the New Year’s eve somewhere far from the crowds and close to the nature. This time we spent it on the Ninety Mile Beach in Victoria. There are small pockets of free camping areas in the bush along the coastline, and though we weren’t alone there, when we went for our sunset walk on the beach, there was almost no one there.
Click on the photo to enlarge.
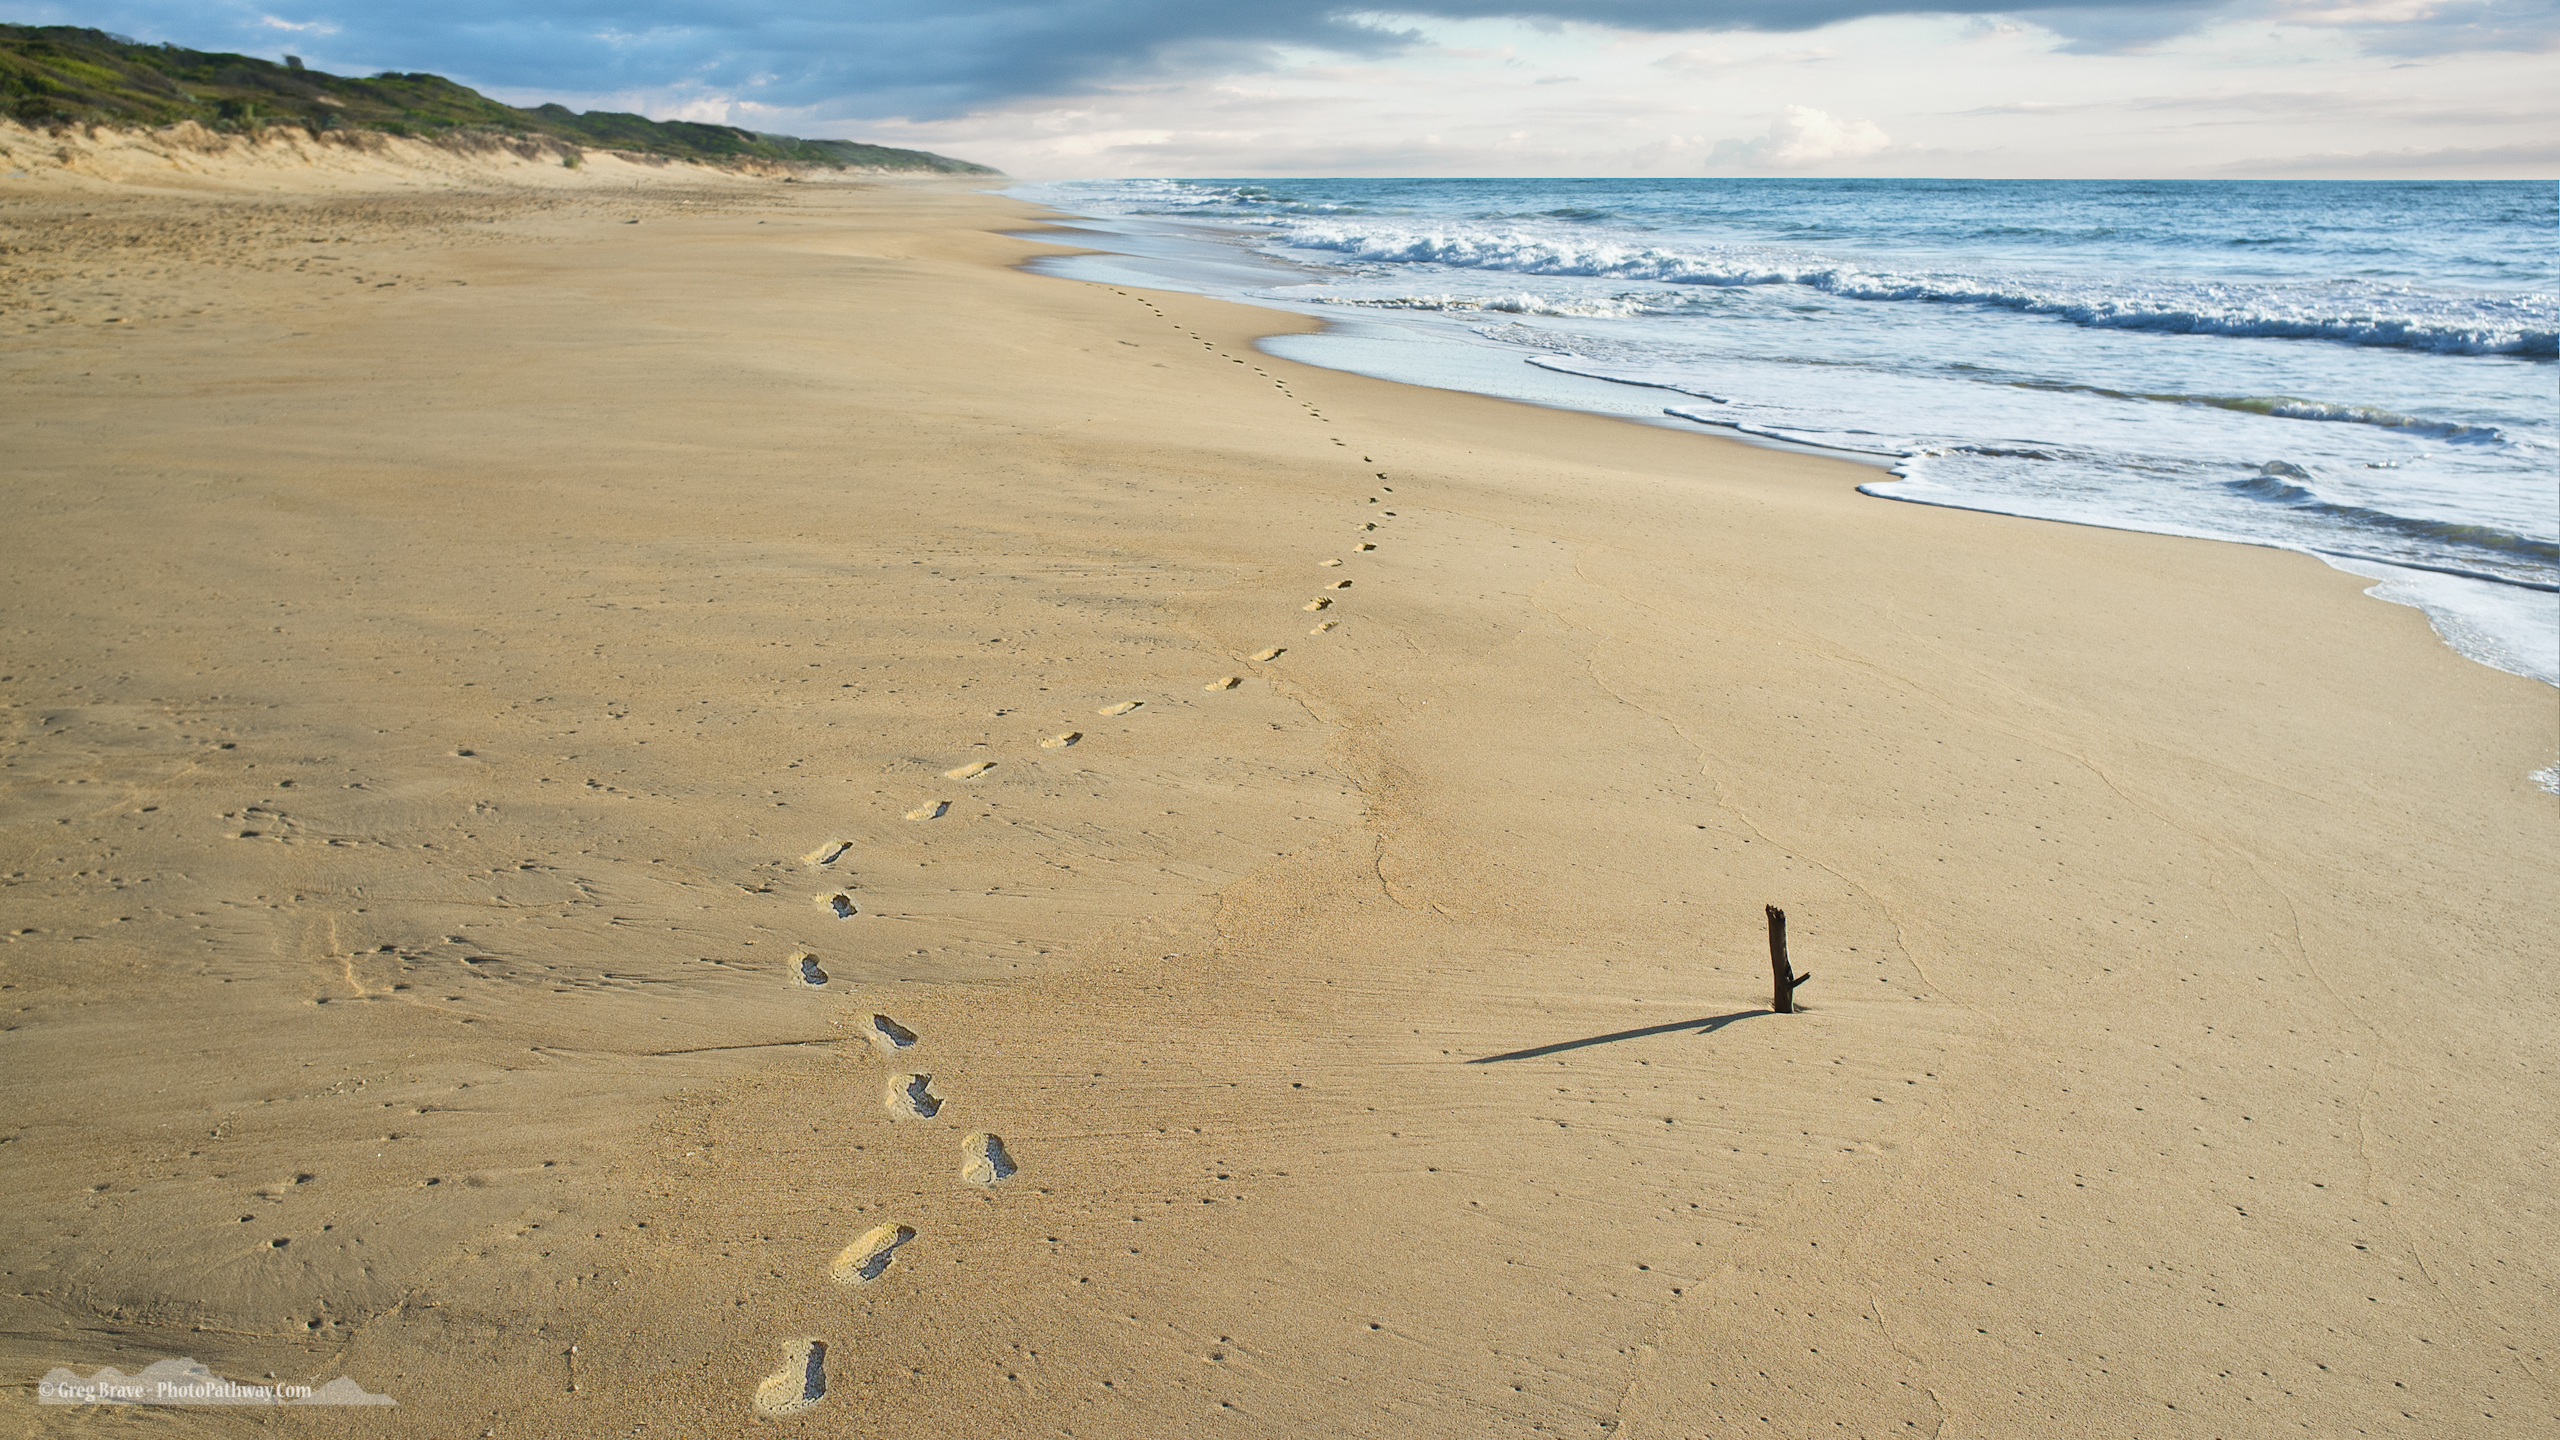
The last Sunset of the year 2011 was beautiful! The clouds slowly changed colors from golden to light pink, and the waves created intricate ever changing patterns on the sand erasing our footsteps as if we weren’t there at all.
Click on the photo to enlarge.
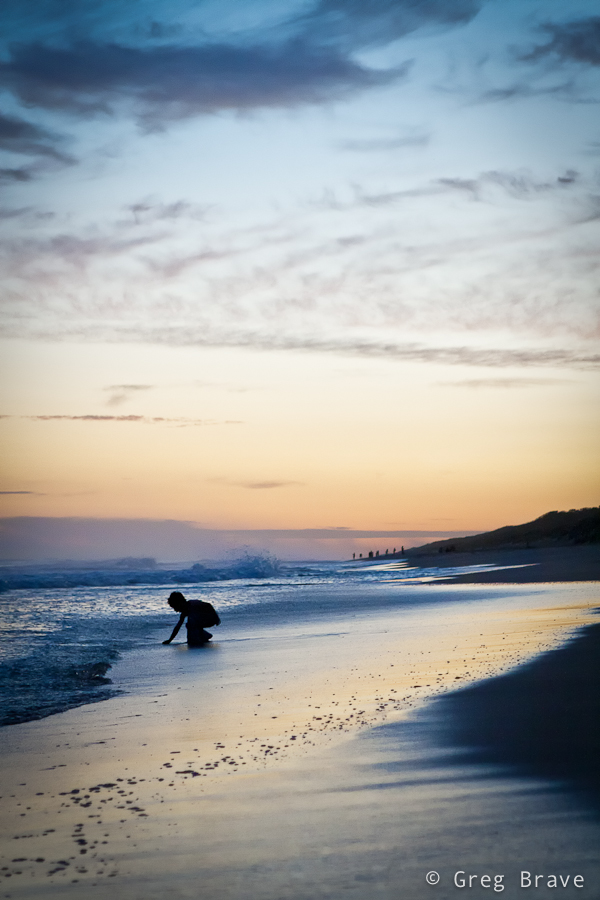
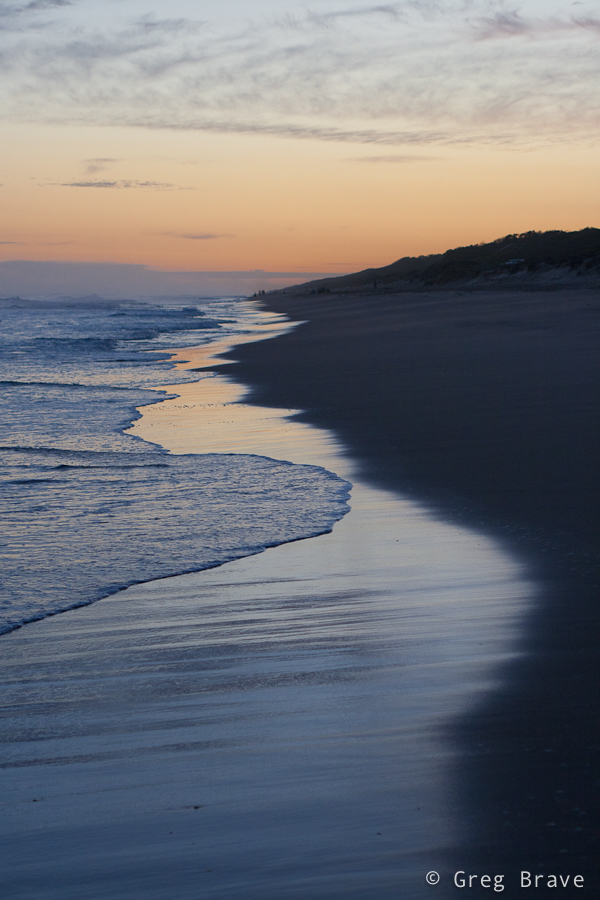
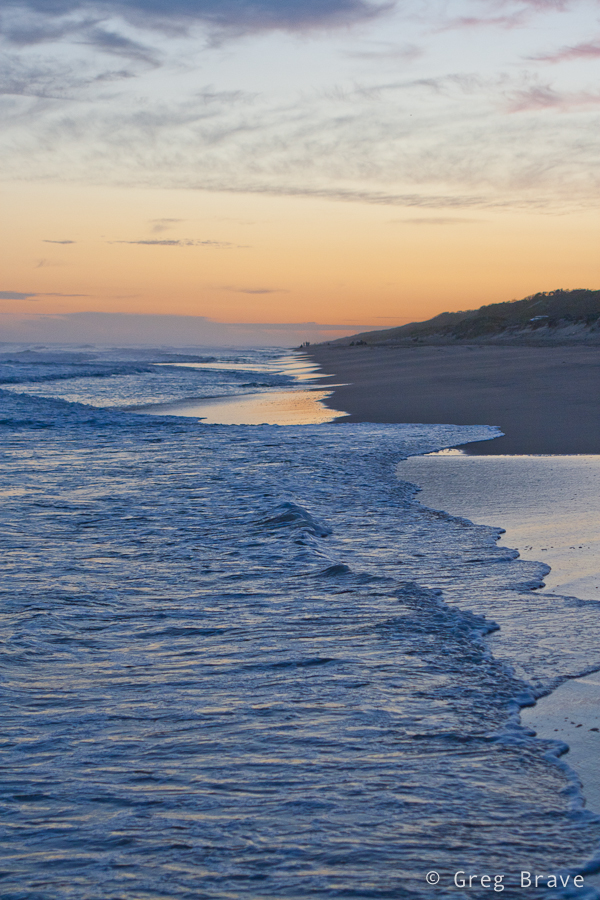
I became fascinated with the different shapes that the surf left on the beach and kept taking photographs, and later I had trouble to choose between them, so in this post you’ll see quite a lot of them.
Click on the photo to enlarge.
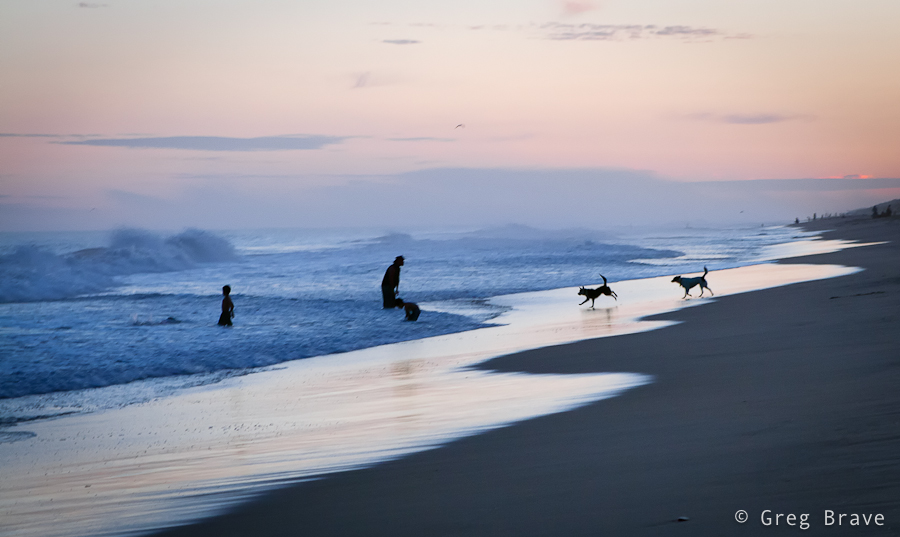
I’ve seen many photographers writing their resolutions for the new year. Well I don’t have one other than keep doing what I’ve already been doing, which is “Think and become a better photographer”. And when you think, you might change your opinion on various aspects of photography making your other resolutions obsolete. But you know, that’s only my opinion 🙂
Click on the photo to enlarge.
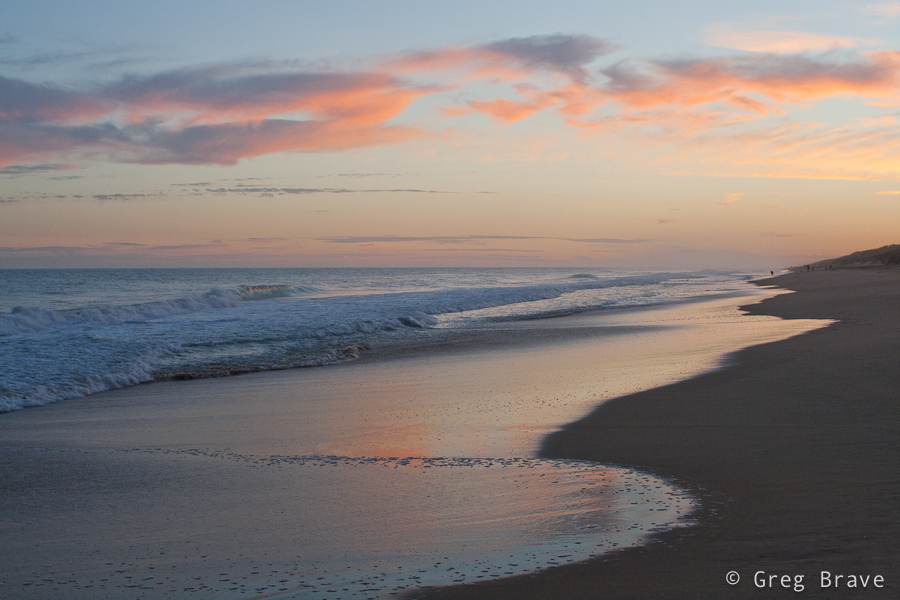
Click on the photo to enlarge.
Whatever your resolution for the 2012 might be, I’m wishing everybody a very Happy, Creative, Productive, Peaceful, and Healthy New Year!
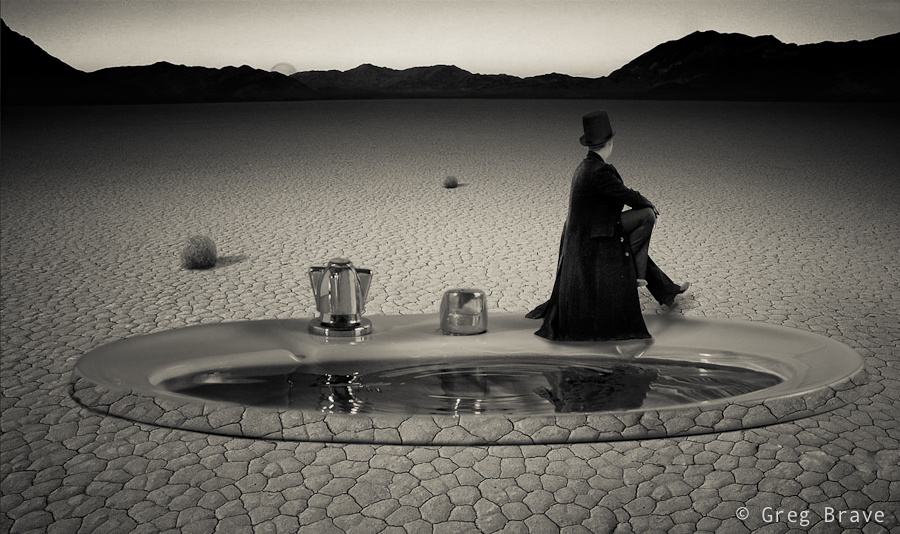
Nobody knows what’s inside artist’s mind, so in order to express themselves and to share their visions with the world artists write music, paint, sculpt and use other means of expression. Mine is photography. Sometimes I have these crazy pictures in my mind, and I want to somehow realize them. Since I can’t draw very well, I am trying to do that by other means, currently it is compositing in Photoshop.
Recently an idea popped into my mind – a crazy magician who wanted to help all the thirsty people in the desert and he wanted to use his magic to create a lake in the desert, but something didn’t work right and he created a huge sink… so he sits on one of the knobs and feels blue 🙂
Here’s what came out of this idea:
Click on the photo to enlarge.
It is a composite of five photos – the background, which is the desert, the magician, the sink, the moon (yes! it is the moon 🙂 ), and the tumbleweeds. I did the composite in black and white because it is easier to blend all the parts together.
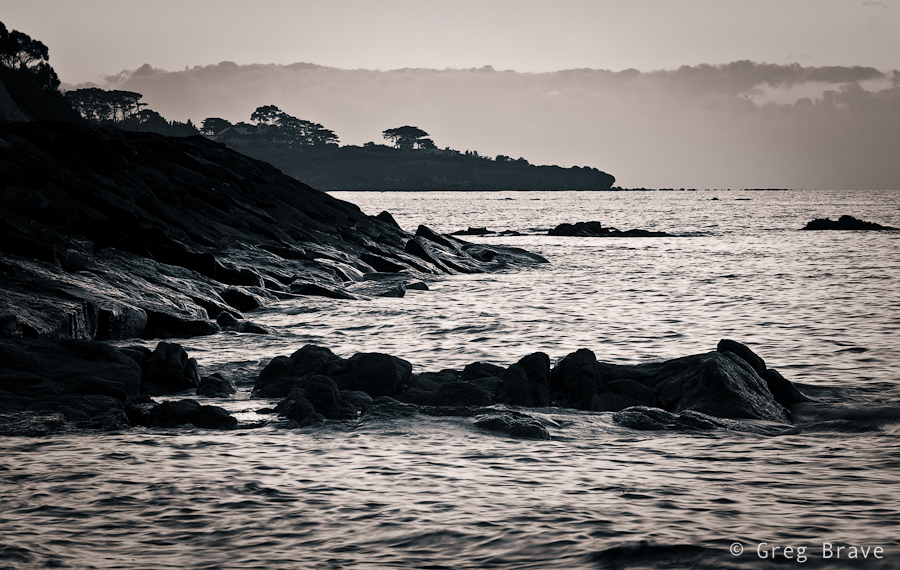
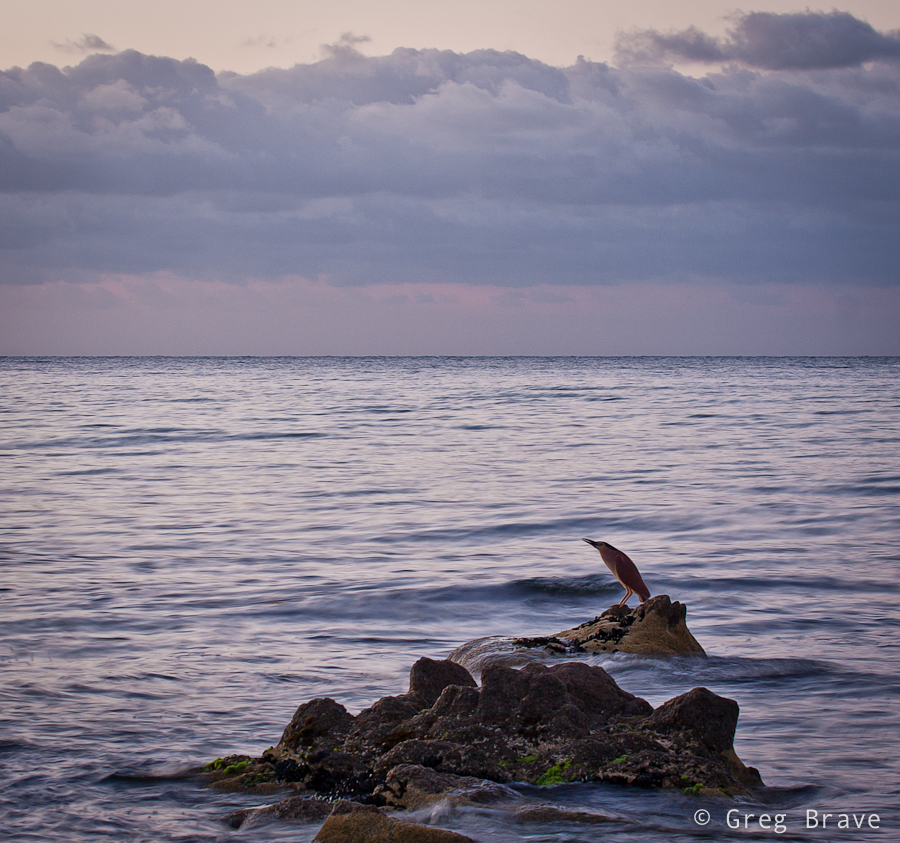
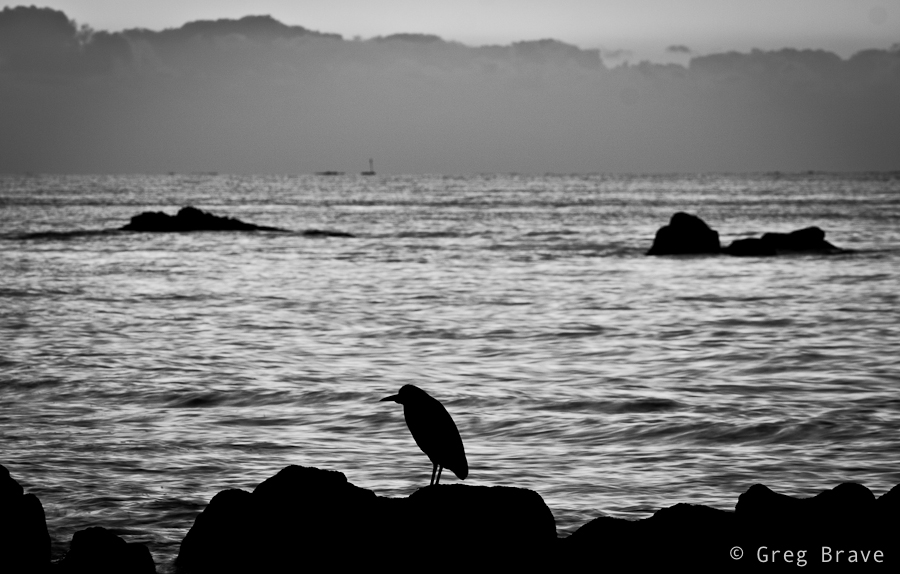
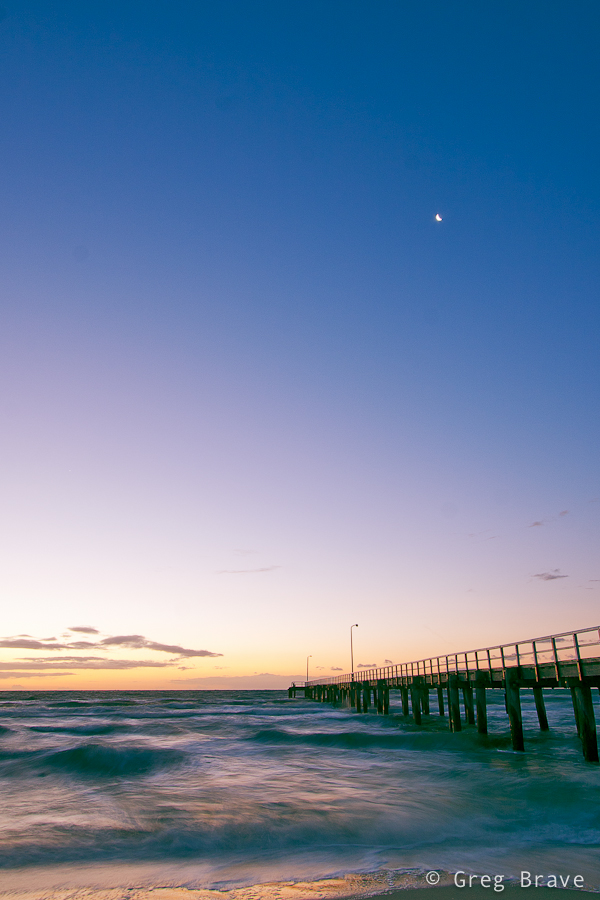
Lately I haven’t made much noteworthy photographs… either that or my understanding of what “good photograph” is has changed. Either way I don’t like almost anything that comes out of my camera. And what’s more important, I don’t know how to improve.
I guess I’m just searching now for something… another point of view on the world maybe. This is really confusing for me – to search for something not knowing what it is.
Click on the photo to enlarge.
Nevertheless I keep on shooting and analyzing my work, most of which you will never see here on my blog because I don’t think it is worthy. The photos I included in this post are nice, I like them, but I also think that they are nothing special, just another bunch of seascapes among thousands.
Click on the photo to enlarge.
One of the things that I changed about my photography is that I take much less pictures, and before taking one I stop and think about the composition, about what I want to say with this photograph, what emotions I want my photo to express. And later, when viewing the photo on my computer I try to understand whether I achieved what I wanted or not. Most of the times I don’t.
Click on the photo to enlarge.
Long exposures of the sea and sunsets (just like the one below) simply don’t cut it for me anymore.
Click on the photo to enlarge.
If you have or had similar issues, and have any suggestions, I would be more than happy to hear them.
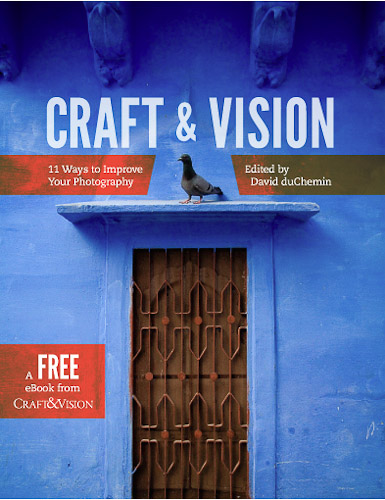
Recently Craft&Vision published a free e-book titled “11 Ways to Improve Your Photography”. For those of you who are not familiar with Craft&Vision project it was started by David duChemin, pretty well known photographer. In this project he publishes books about photography, some of which he writes by himself, and some written by other photographers. These books are sold in PDF format usually for $5 USD, and you get a discount when you buy a bundle. I have bought about twenty books and read them. Some I liked more and some I liked less, and maybe in the future I’ll write a few of my own reviews on these books.
The special thing about this book though is that you can download it for free and get a taste of the “Craft&Vision type of book”. The main point that David makes in most of his write-ups on his blog and his books is that photographer’s gear is much less important than his vision and in some of his books he suggests ways as to how you can improve your photographic vision. This book was not an exception and you won’t find there anything about photographic gear, except printers in the chapter on “the power of print”.
“11 Ways to Improve Your photography” has 11 chapters (obviously 🙂 ) written by various photographers, each chapter suggesting a different way you can improve your images. If you want just to quickly to see the contents of the book before you download it, here’s the chapters:
1.Make your images more dynamic
2.Tame your digital exposures
3.The power of the print
4.Learn to direct the eye
5.Understand the stages
6.Create projects and collaborate
7.Refine your composition
8.The power of the moment
9.Forget lens stereotypes
10.Slow down and learn to see
11.Make stronger portraits
In my opinion this book is not special in its suggestions, and if you have been into photography for a while you probably heard most of this advice, but sometimes it is good to refresh your memory. There were two chapters that I liked the most – one is “Understand the stages” by Alexandre Buisse, in which he describes his understanding of the different stages that a photographer goes through from the moment he/she picked up the camera. A very interesting read.
The second chapter that I liked is “The power of the moment” by Eli Reinholdtsen, in which she shares her experience in street photography illustrating the text with her wonderful photographs.
I would also like to mention another chapter, “Make stronger portraits” by David duChemin, not because I liked it, but exactly the opposite. While the advices that David gives in this chapter are ok (nothing special though), the portraits that David chose to illustrate his points are not. In my opinion they are not “strong” as David presents them to be. They are just pictures of people. Some of them are pictures of unusual people, but merely this fact doesn’t make for a strong portrait.
You can download the book by clicking on the image above (which will take you to the Craft&Vision website). I would really like to hear your honest opinions about this book.
I am not a believer in the “straight out of camera” philosophy. You know, the photographers who don’t do post processing at all and sometimes shoot in plain JPEGs. Anything in addition to that, would be “distorting the reality” they claim. My opinion on this subject is that there is no such thing as objective reality. Everyone sees what he sees through his own eyes and his own perspective. Your previous life experience also alters your perception of everything that you see around you. Even when you simply point your camera at a scene and shoot, the light goes through the lens, hits the sensor, gets transferred into electronic signals, then is processed by your digital camera’s own processor, and undergoes even more transformations until you see the photo on your computer screen. I don’t think I need to go further.
So, when I work on a photo, first I usually perform basic adjustments in Lightroom such as brightness and contrast and then, if I feel that it is not enough, first I try to understand why I feel that way. Is it the composition? If it is the composition then there’s nothing much can be done in post processing, and I will probably discard that photograph. But if the composition feels right then I continue my exploration. Are the shadows too shallow or too deep? Can the colors be improved?
Next, I open the photo in Photoshop and start playing with it, changing color palette, increasing/decreasing lights and darks, and other adjustments. Usually I come up with several versions of processed image, which look good to me, then I compare them and choose the one that I like the most.
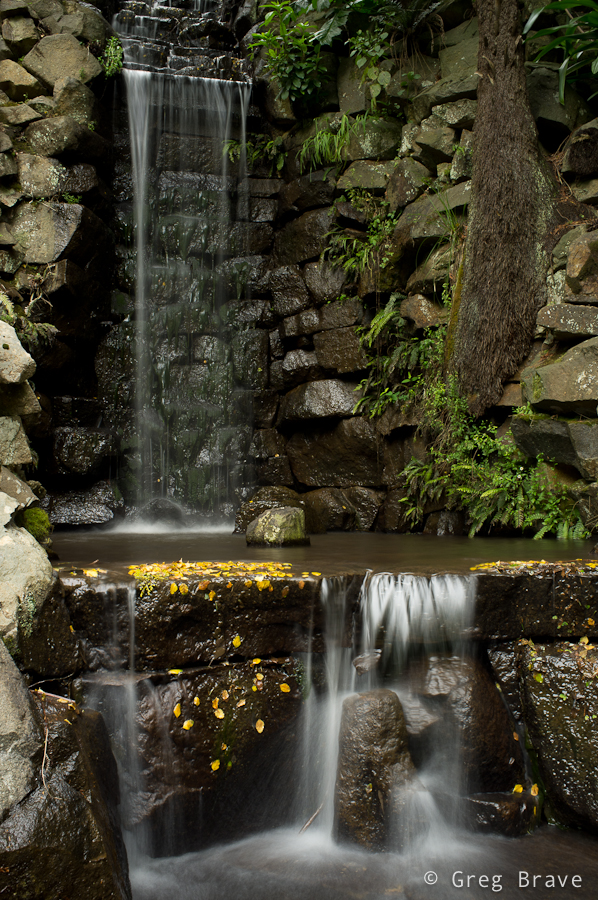
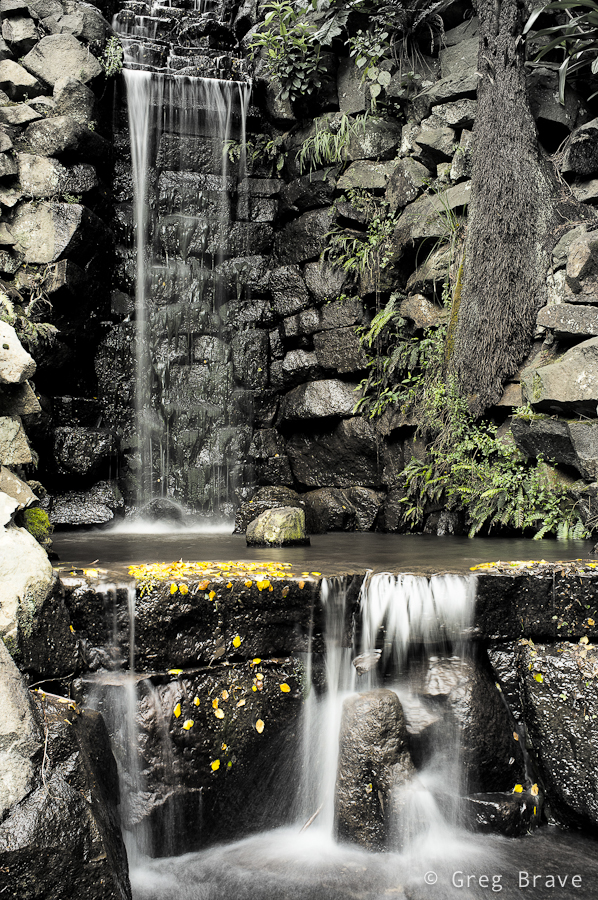
Below I have three versions of the same photo, but the thing is that I can’t choose the one that I like the most. Each version has its own mood, and I have trouble choosing.
The first image below is the original version with only minor brightness adjustments.
Click on the photo to enlarge.
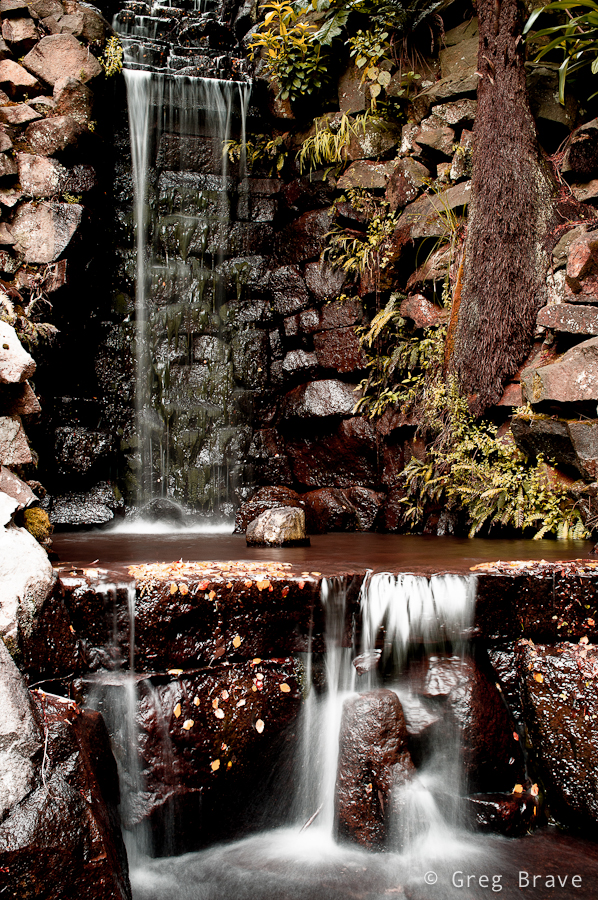
The second version received quite a bit of processing, and has a warm autumnal feeling to it. I like the purplish glow and how it contrasts with the white of the water.
Click on the photo to enlarge.
In the third version I used the original photo as the base, substantially decreasing color saturation, of all the colors except the yellow of the leaves in the water. I also happen to like this version a lot.
Click on the photo to enlarge.
Which version did you like? Please help me choose, but I also need to know the reason for your choice, and this is what the comment section below is for! You can also leave your comments on my Facebook page – http://www.facebook.com/photopathway
The Internet is full of advice on how to become a better photographer, but quite frankly most of this advice is misleading.
Browsing the Internet (or a book shop for that matter, it’s just that Internet has infinitely more information) one might get an idea that if he would just read this book or complete that course he would become a better photographer. Others go further than that – they strive to read as much books on photography as they can, attend as much seminars as they can afford, and process god knows how many additional different kinds of educational material on photography.
Part of the courses or books suggest you buy a better equipment, so people get hooked on that, upgrading their cameras as frequently as their purse allows, but not all of them – others try different software products, which promise to make their photos look professional with a click of a mouse, and yet others combine it all together.
Well, guess what – it is all useless. It is useless because deep underneath its shiny cover it suggests no effort on your side. The key to your success as a photographer lies within you. You can only read in books what already exists inside you, and if you do not evolve from within, you will not truly become a better photographer.
If you wholeheartedly want to become better, then at this point you are screaming, if only in your mind, “then how do I do that? How do I evolve from within to become a better photographer?”
I do have an answer for you, but be aware it is not an easy one. It will demand your effort and time… how much effort and time? I have no idea. But it is the only way. If you still want to hear it – read on.
In order to become a better photographer you have to do several things:
– Think. Think about photography. What is it? How it works? Why are you interested in it? And I mean really think, even meditate on it. Look deep inside yourself to answer these questions. Don’t lie to yourself. Write down the answers. After a week do it again, then after a month, a year. You will see that each time your answers will be deeper and more profound.
– Study art. Look at drawings of great artists. Rembrandt, Van Gogh, Dali, Repin, just to name a few. But again, simply looking, flipping through the pages, is not enough. Try to understand WHY these paintings are exquisite works of art. This is very important. Do the same with works of masters of photography – Ansel Adams, Cartier-Bresson, and others. Have in mind that the process of getting to understand and appreciate art doesn’t happen instantly or even quickly for that matter. It can take years…
– Take photos constantly. If you don’t have a camera with you then take them in your mind. But merely taking thousands of photos is not enough. Look at your photos, analyze them. What do you like about them? What would you like to change? When looking at photos from a shoot, pick one that you like the most and think – why do you like it? What would you do differently if you had to make that shot again? Why?
– Save your best photos (the ones that you think are best), come back to them at later times, and remove the ones that you change your opinion about.
– Print your photos (in large format if possible) and hang them on the walls of your living space. Look at them over time and think about how your opinion about them changes. Think about why does that happen.
– Work on your imagination. Create photos in your mind, which not yet exist in reality. Make them so vivid in your mind, as if they were real. These photos are most likely to define your unique style in photography.
– Think about a photo that you would like to create. Imagine it to the smallest detail. Then go ahead and try to create it. Use photoshop as much as you like (or not), I don’t care. Just try to achieve whatever you imagined in the first place. If you feel that you lack some technical skills at this point – Internet most definitely has the answers.
Conclusion
Getting better in photography mainly involves THINKING. It also involves emotions and feelings, and thinking about why you feel the way that you feel. No course and no tutorial will make you a better photographer, and the first step to becoming one is to understand this fact. To become better you have to dig deep inside you. That photographer is already there waiting to be discovered. On this journey at different points you will see that you want to achieve this or that effect, look, or feel, you will see it clearly in your head, and it will be the right time to go online for technical information on how to achieve it – but this will be only after you already have the image in your mind.
And one more thing – even though this process will require time and effort, have fun! You won’t get better if you don’t enjoy your journey!
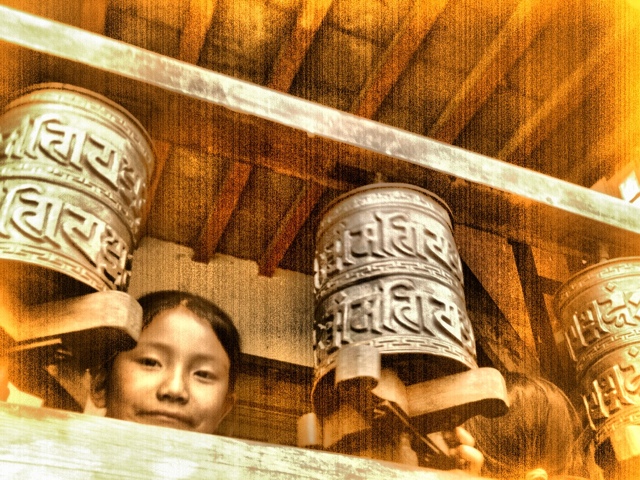
This is my second post, in which I write about my photographic experience in Nepal. You can read the first part here. While in the first part I showed you Nepali landscapes, now I’d like to show a few portraits of Nepali people.
Interestingly in some cases people would not let me to take their photographs at first. In that case I would nod in agreement (like, hey I won’t take your photo if you don’t want me to) , point my camera at other subjects, and take a few photos here and there. This would get them interested. Then I would approach them and show them the photos I just made on the back screen. Next thing you know they are posing in front of the camera and running back to me to see the picture. I wished I had a portable printer with me so I could print out and give them their photos.
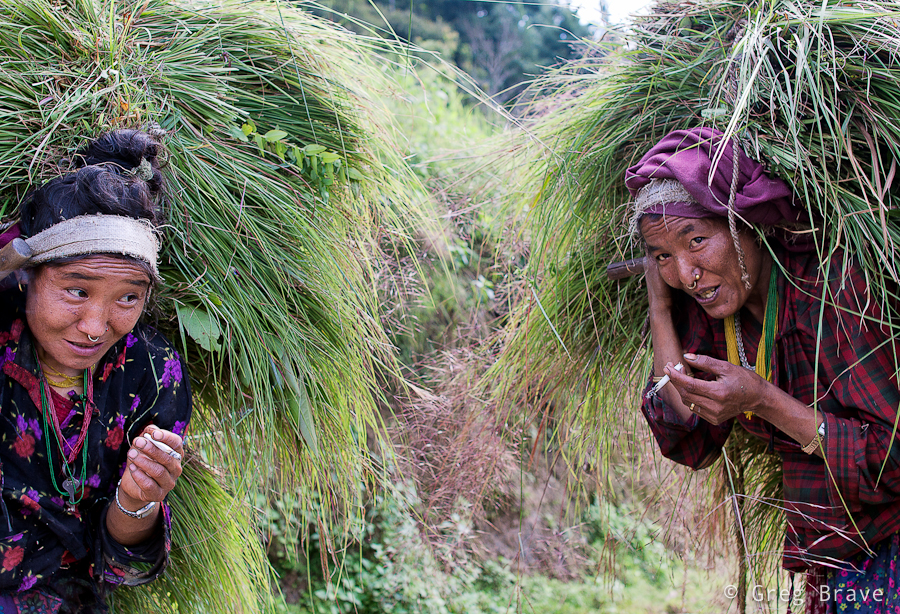
The photo below was taken on Helambu trek. We were passing a settlement in the hills of Kathmandu valley and made a short break in a nice spot overlooking rice terraces. These women were passing by, and seeing us smoke asked for a cigarette. In return we asked to take their photos 🙂
1/200sec at f3.5, 28mm | Click on the photo to enlarge.
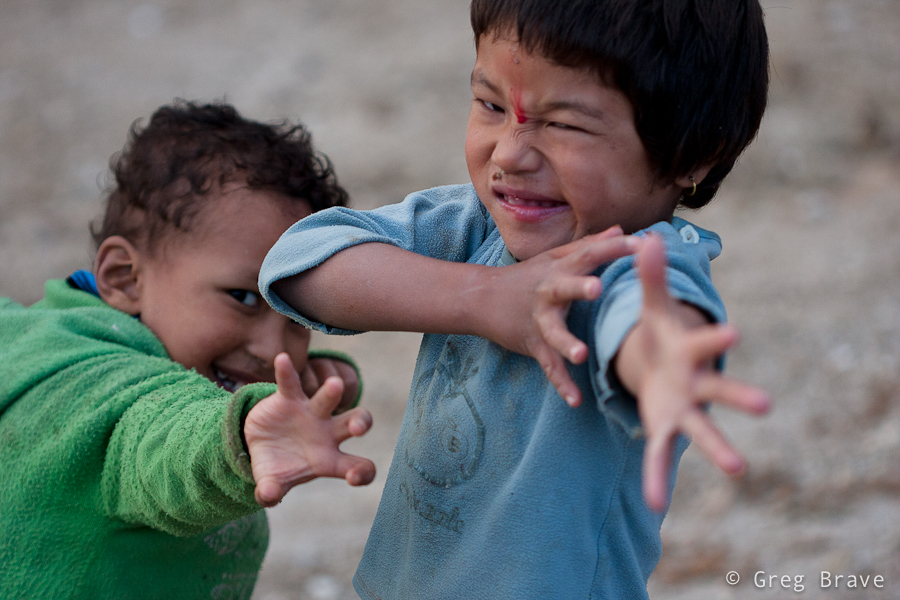
One of the settlements on Helambu trek is Golphu Banyang. It has only one main “street” and not many tourists are staying there overnight, trying to reach the next village of Khutumsang. But it so happened that we did stay there, and I had the whole evening to photograph local kids. Once I showed them a photo on my camera they wouldn’t stop posing, only downside being late time of the day and, as a result, very dim light.
1/500sec at f2.8, 100mm | Click on the photo to enlarge.
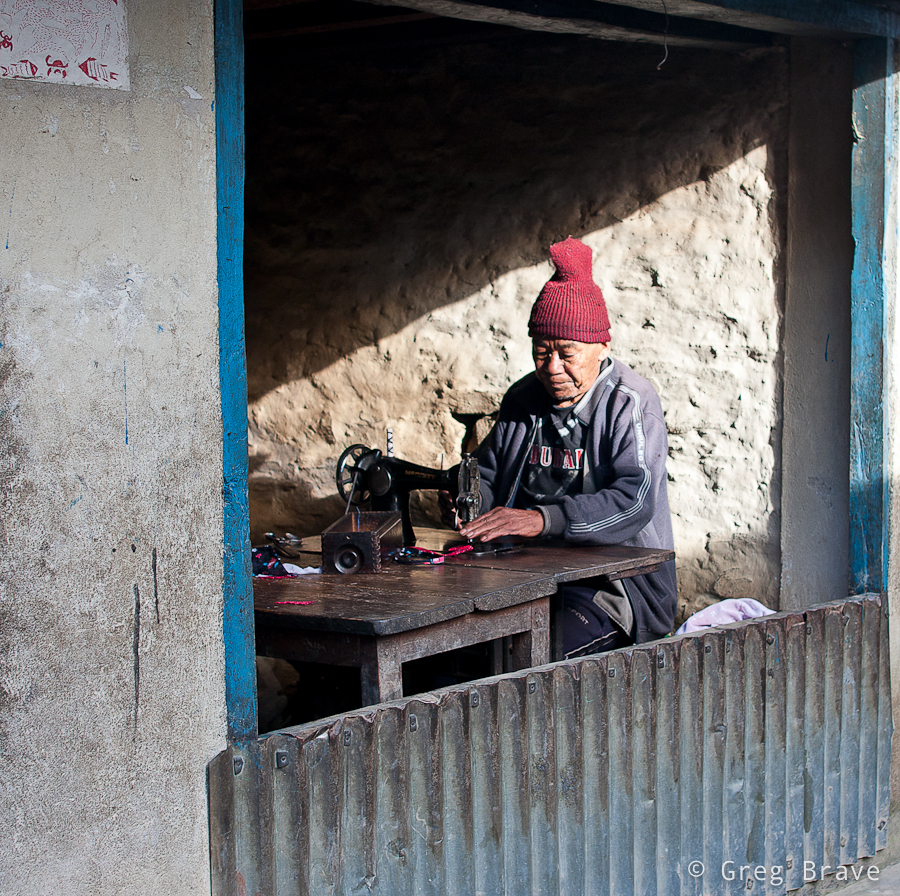
The photo below was also made at Golphu Banyang on the following morning when we were leaving the village. The evening before I saw this old man in the same pose, doing the same thing, but it was too dark to make a good photo. In the morning though, there was this beautiful ray of light, lighting perfectly his face and hand. The result you can see below.
1/160sec at f3.2, 28mm | Click on the photo to enlarge.
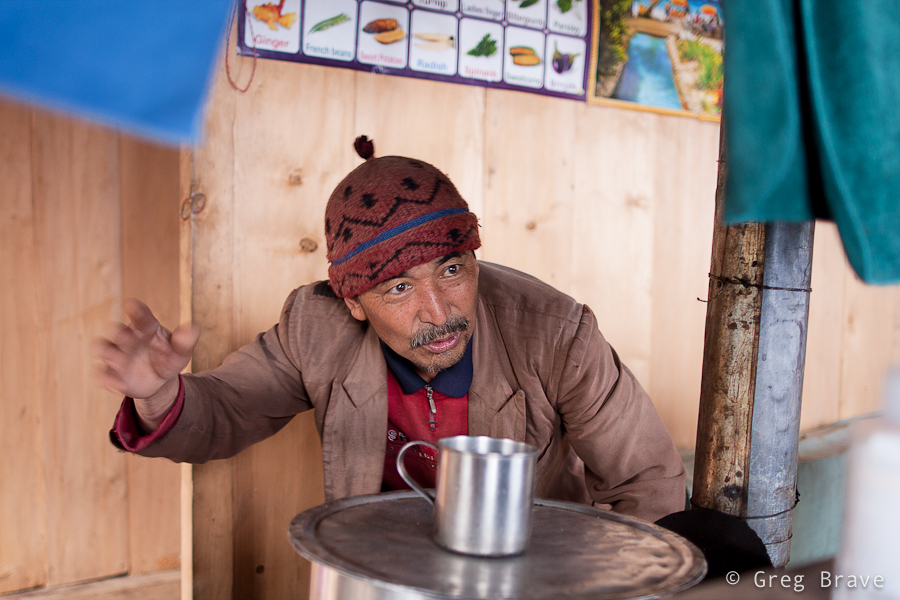
On our way to Gosainkund Pass we stopped at one of the two lodges in Phedi. The lodge was run by a Sherpa couple. While woman was preparing our dinner, we were chatting to the man. Well at least we tried. Even though he seemed to be speaking English fluently, I realized that we hardly understand each other. In any case the conversation turned out to be very interesting and we learned a lot about local animals… or at least we think we did 🙂
I took the following shot of this man in the lodge’s dining room in very poor light, hence the f1.8 and 1/30sec. This is one of several shots I made trying to get his eyes to be sharp, which was difficult with f1.8 and his constant movement.
1/30sec at f1.8, 28mm | Click on the photo to enlarge.
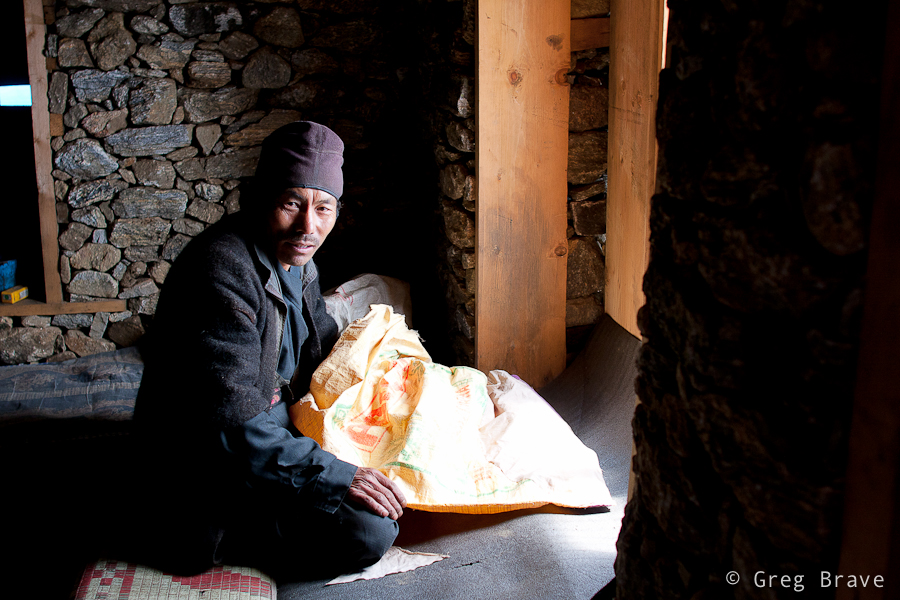
Continuing from Phedi up to the Gosainkund Pass we reached a lonely lodge standing in a beautiful view of the surrounding mountains above and the valley below. Ram Sherpa, the owner of the lodge kindly agreed to be photographed. Ram was fixing holes made by some rodents in his rice bags when we reached his lodge. I liked the window lighting on him, which created definitive shadows on his face.
1/200 at f3.2, 28mm | Click on the photo to enlarge.
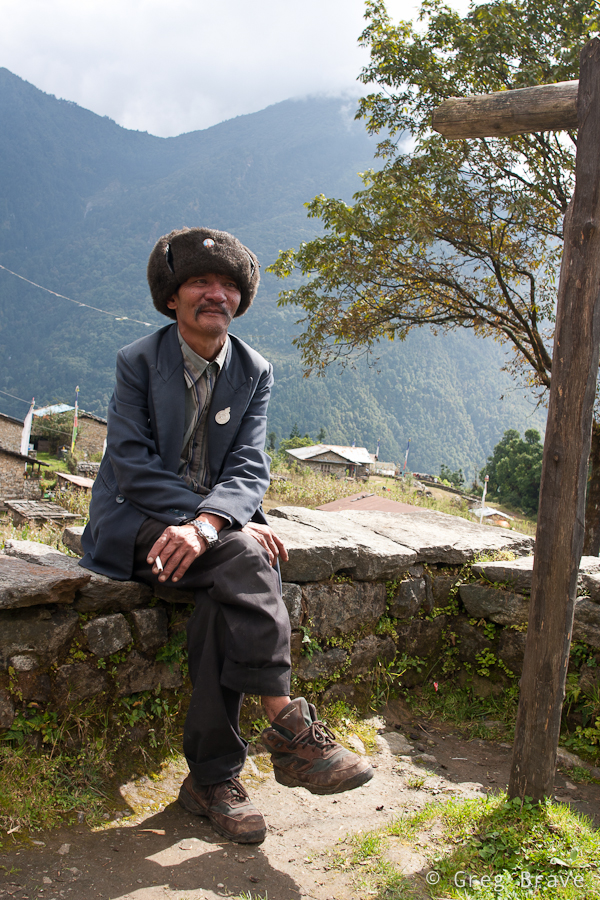
The man below is a Tibetan refugee living now in Nepal, in a village named Melamchi Gyang. He has a Dalai Lama badge on his hat, and he runs a small tourist lodge in the village. He asked me to take his picture and said I should bring him the photo when I come visit again… I wonder if there are any postal services to this village.
1/100sec at f8, 28mm | Click on the photo to enlarge.
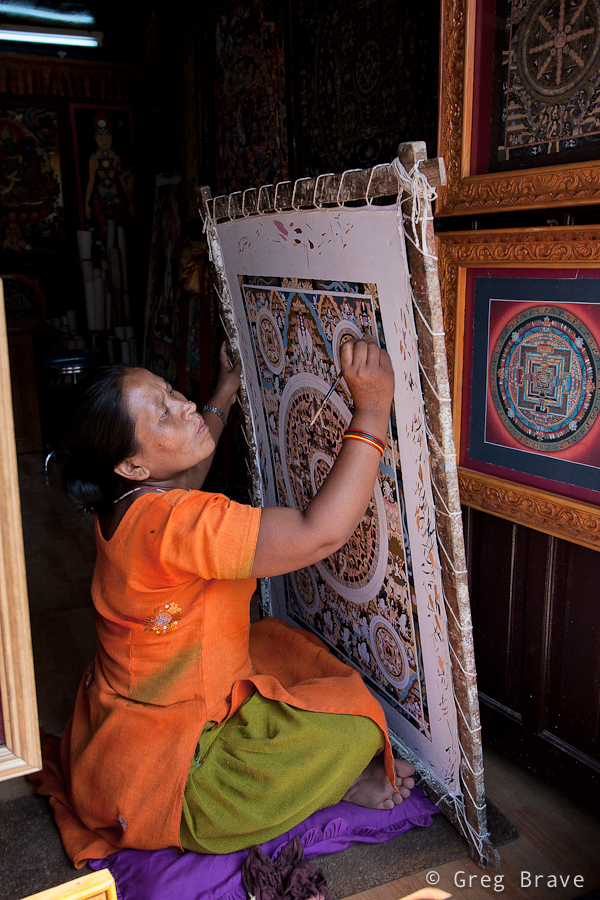
In one of our final days in Nepal we went to an ancient city of Bhaktapur. It is about 30 minutes drive from the touristy Thamel, and it well worth a visit! One of my future posts on Nepal will probably consist solely of Bhaktapur’s photos. Bhaktapur is the third largest city in Kathmandu valley, and was once the capital of Nepal during the great Malla Kingdom until the second half of the 15th century. It is also listed as a world heritage site by UNESCO for its rich culture, temples, and wood, metal and stone artwork ((C) Wikipedia).
In addition to all the heritage sites, there are many shops for tourists. Walking around I saw a large Mandala shop and a woman drawing Mandalas for sale right there. If you saw mandalas you know that it is a very laborious task, which requires concentration and devotion. And look, she also holds the canvas by herself!
1/500 at f4.5, 20mm | Click on the photo to enlarge.
All in all I can say that people in Nepal are open and friendly to tourists, which doesn’t deny them to try and make as much money as they can from them.
As I promised, in the next posts I will write about my photographic experience in Nepal. To get everyone up to date – recently I took a rather long vacation of almost one month and went with my life partner Ira and one good friend to a trekking trip in Nepal. As always my camera was with me, but since we didn’t hire a porter (or a guide) I couldn’t take just any photo equipment that I wanted.
I was facing a hard decision – which lenses can I take with me and not add too much weight to my already heavy backpack? And here’s the list of the photo equipment that I took:
Canon 40D body. This wasn’t really a choice since this is the my only DSLR.
Let me explain my choice of lenses. Even though I have two Canon L-series lenses (70-200 f4 and 24-70 f2.8) I didn’t take them with me for one simple reason – they weigh too much. Instead I decided to go mostly with prime lenses, which are much smaller and lighter but still produce very good quality photographs even though they are not from L-series. Canon 100mm f2.8 macro lens is known for its superb quality, and after shooting with Sigma 28mm f1.8 for a while I saw that it is also a very good lens though it has some minor issues with lens flare. In addition I took the Canon EF-S 10-22mm, which is known for its good quality-to-price ratio. In this case I didn’t have much of a choice since it is the only wide angle lens I have, and you can’t go trekking in Himalayas without a wide angle lens, can you?
The only thing I could’ve taken less of were the batteries. I found out that for a nine day trek I only need two batteries. But I must say that I didn’t use the live view, which is known for its ability to drain power quickly.
Our first trek was the famous Annapurna Base Camp (ABC) trek. In order to get to its beginning, we had to fly from Kathmandu to Pokhara (second largest city in Nepal) and then take taxi (~1h drive) to Phedi. Phedi is a small village, in which ABC trek starts with a long climb via stone stairs.
Before setting off to the ABC trek we had a rest day in Pokhara. One of the main attractions of this town is Pokhara Lake. For 300 Nepalese rupees you can take one of the boats below for a 1-hour sail. Add 50 more rupees and you’ll also get a boats-man.
1/60sec at f5.6, 28mm | Click on the photo to enlarge.
The next photo happened almost by accident. It was raining all morning that day, and we got completely wet, walking carefully not to slip on wet rocks. The heavy backpacks made it that much harder to keep balance, and we seldom shifted our eyes from the ground. It was a hard climb, and while we were getting near its ending, the skies suddenly cleared, and then we reached this house. I saw the mountain and the dog, which was laying calmly. My hand instinctively reached for the camera, suddenly a man appeared from the house adding final touch to this photo.
1/200sec at f9, 28mm | Click on the photo to enlarge.
On our ABC trek, as a general rule the weather was at its best early in the morning, 5 – 6am, sometimes until 8, then gradually clouds came in and covered everything. And then again weather would improve at about 4 – 5pm. Of course it was only usually like that, and different variations were possible, but our most certain bet would be to get up as early as we could. If we wanted to have clear view of the peaks that is. And as you can imagine – I really, and I mean REALLY wanted to see the peaks!
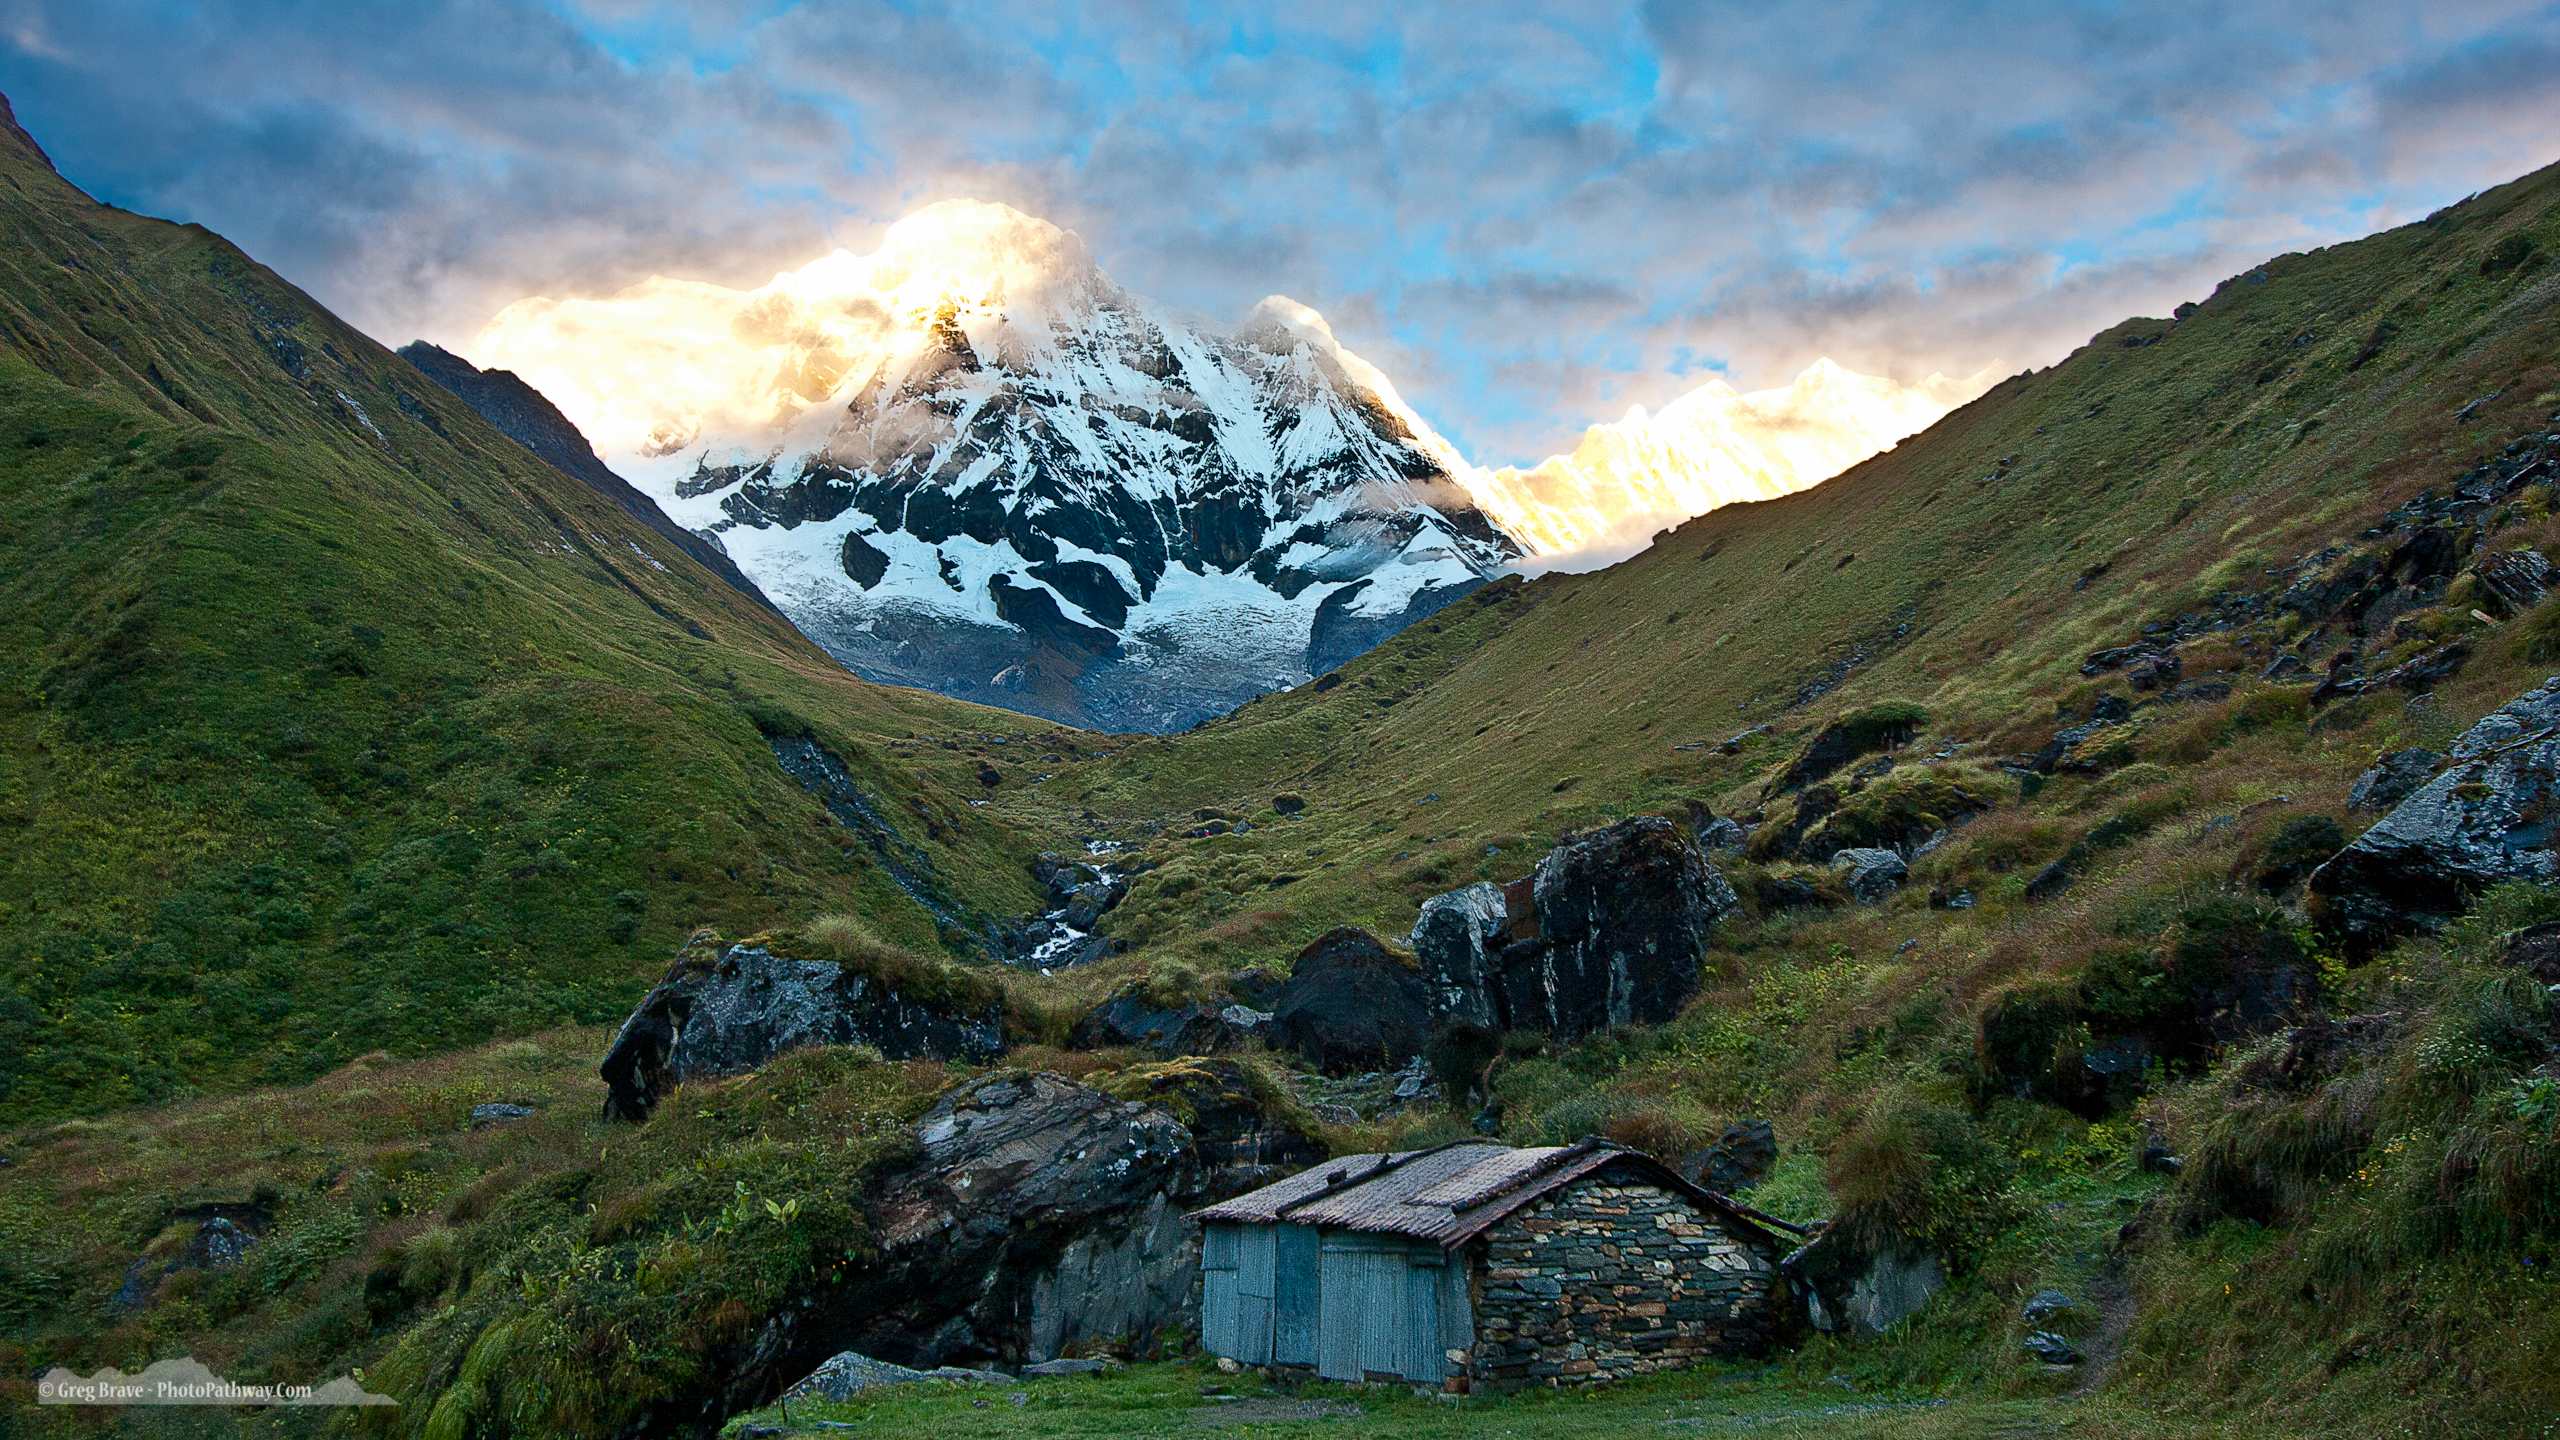
The next shot was taken early in the morning and the mountain peak that you can see on the right called “Fish Tail”. Locals call it Machapuchare, and revere it as very sacred to the god Shiva. This makes Fish Tail forbidden for climbing.
Click on the photo to enlarge.
Unfortunately, good colorful sunsets were rare because at sunset time the skies were usually covered with clouds, and the next photo is one of the very few I made during sunset time. But that particular sunset was marvelous! The orange colors changed hues constantly, and I made a dozen photos trying to capture them. I only wish there would be slightly less clouds so that more of the snowed mountains were visible.
Click on the photo to enlarge.
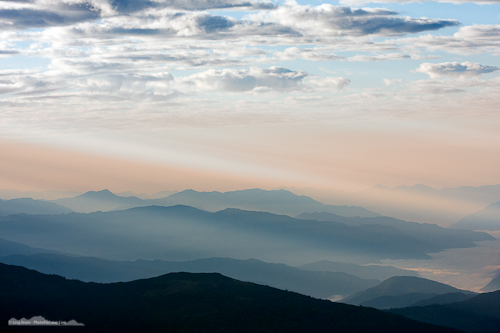
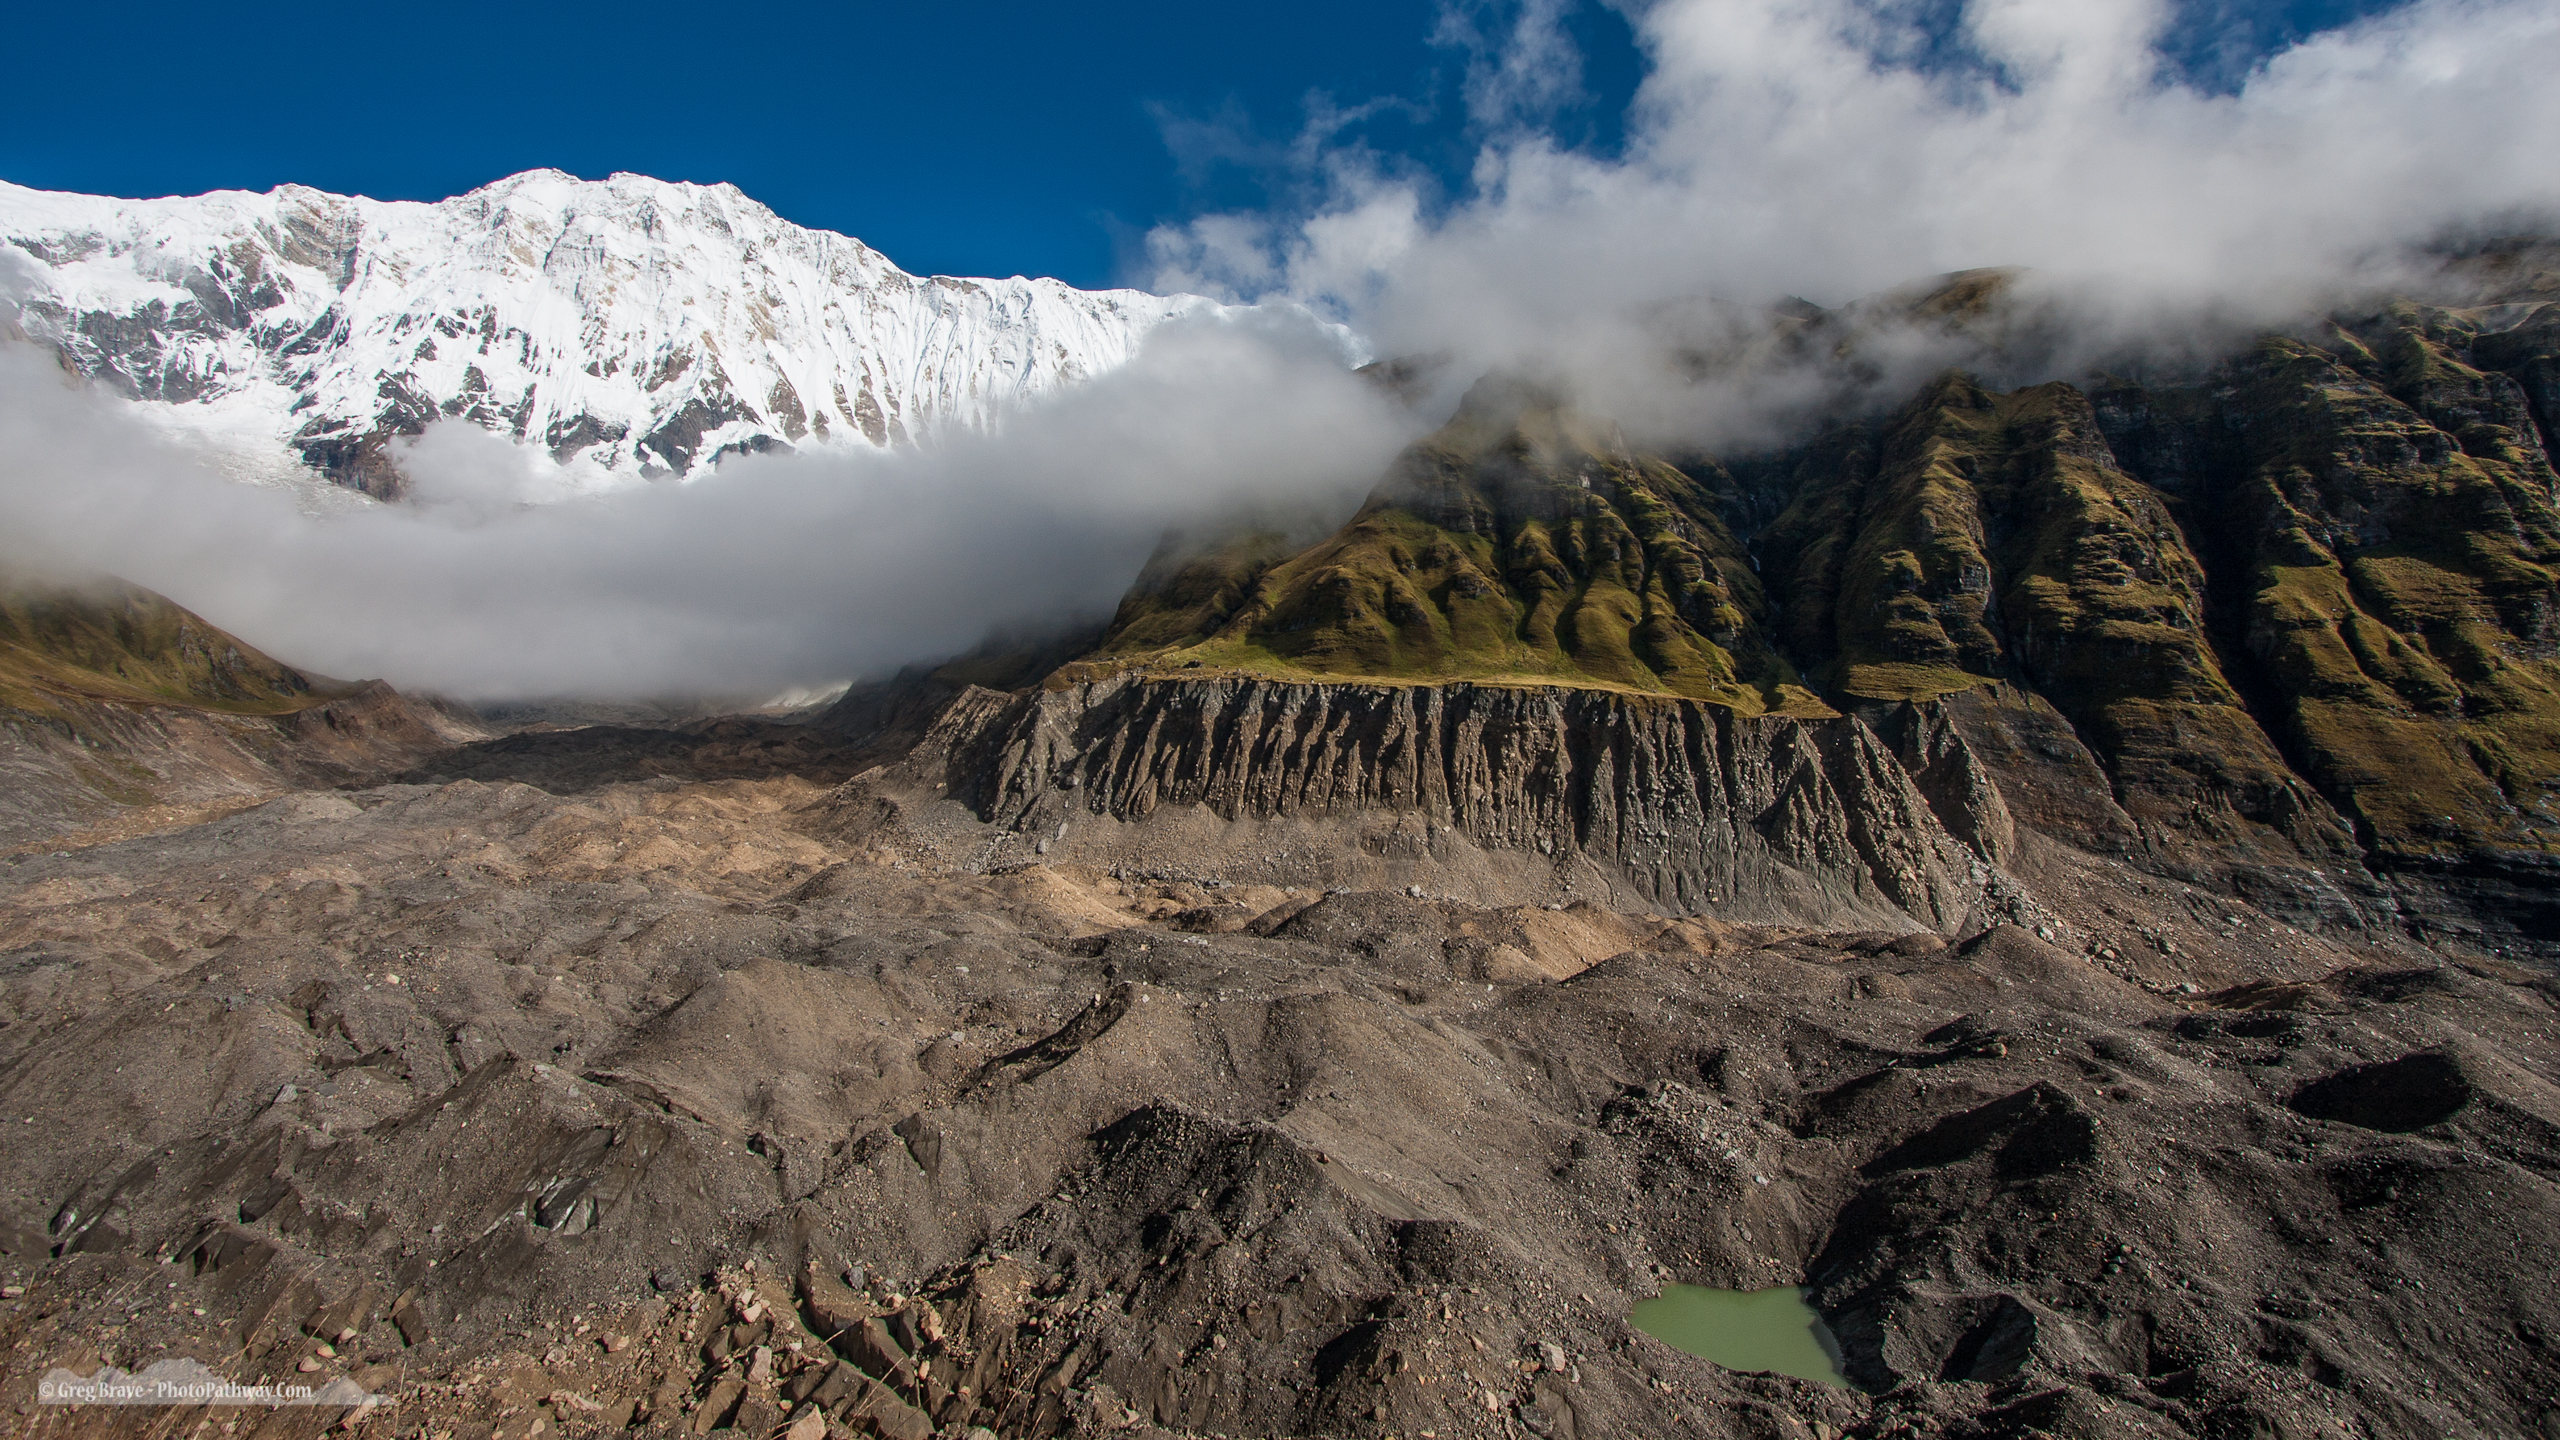
While two photos above were taken looking up at the mountain peaks, they are not the only attraction in Himalayas. When you are at high altitude, looking down can take your breath away as easily as looking up. The next photo was taken in the morning looking down on the “small” hills of Annapurna National Park. Some of these hills are higher than the highest mountains in Europe (let alone Australia), but they still look tiny in this vast landscape.
Click on the photo to enlarge.
This is it for my first post in the Nepali series, and I hope you enjoyed it.
Let me know what you think, and what photographs and information would you like to see in my next posts on Nepal. This is what the comments are for!
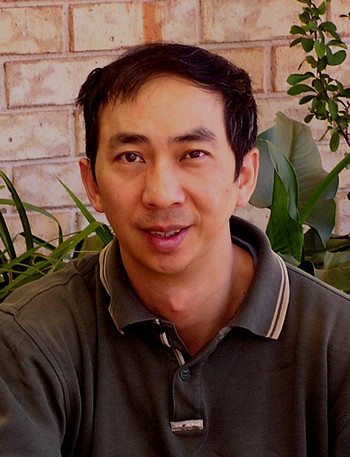
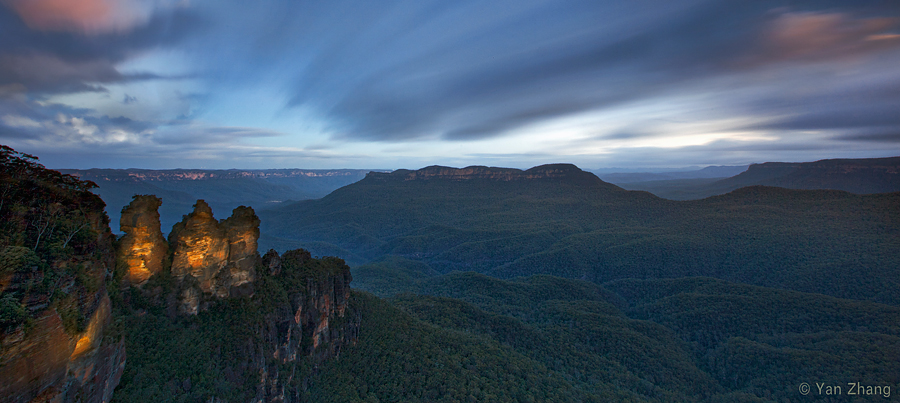
I first saw Yan Zhang’s photos on 1x.com and I loved them. Then I followed the link to his own website. Needless to say – I wasn’t disappointed. Yan is a very talented and passionate nature photographer. Luckily for me and you, my readers, he kindly agreed to an interview for Photopathway.
Ladies and gentlemen please welcome Yan Zhang !
Click on the photo to enlarge.
Tell a little about yourself. What do you do for a living?
I am a computer scientist, currently working as a professor in University of Western Sydney. I have been in academia in last 16 years.
How did you get involved with photography?
Well, this is an interesting question. I had a manual SLR camera before 2007, but only used it when I travelled. In 2007 I noticed that digital SLR cameras had become more and more popular, and I decided to buy one as well. I just went to a camera shop and asked which camera was good. The shop owner showed me Canon 400D, and said this was the best camera so far. So I bought it :).
Since I had my Canon 400D, I started to shoot around and during traveling. Sometime around 2008, I developed a deep interest in landscape photography, and since then, landscape photography has become my unique focus in photography.
Photo by Yan Zhang. Click on the photo to enlarge.
Your landscapes are magnificent. How do you choose your locations?
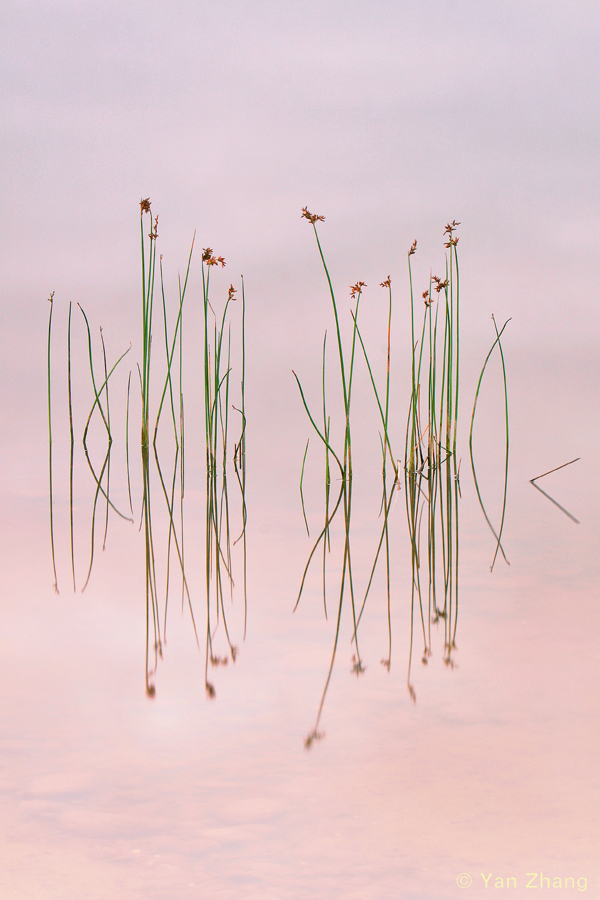
I think locations for landscape photography are not as hard to find as people usually think, except for those extreme places. In fact, some of my landscape photos were taken just around my home or my work place. For instance, the following photo (Reeds) was the first photo I sold since I had my first digital SLR camera in 2007 and it was taken at an unnamed small pond near my home. The next photo (The Touch) was taken in my university campus this July.
Photos by Yan Zhang. Click on the photo to enlarge.
In general, I always pay special attention to subjects that have certain characteristics. Once I found something attracting me, I then imagine whether it would look interesting under suitable light and weather conditions. Photograph “The Touch” was made this way: In order to capture the best light and sky, I went to this location more than 30 times within 3 months.
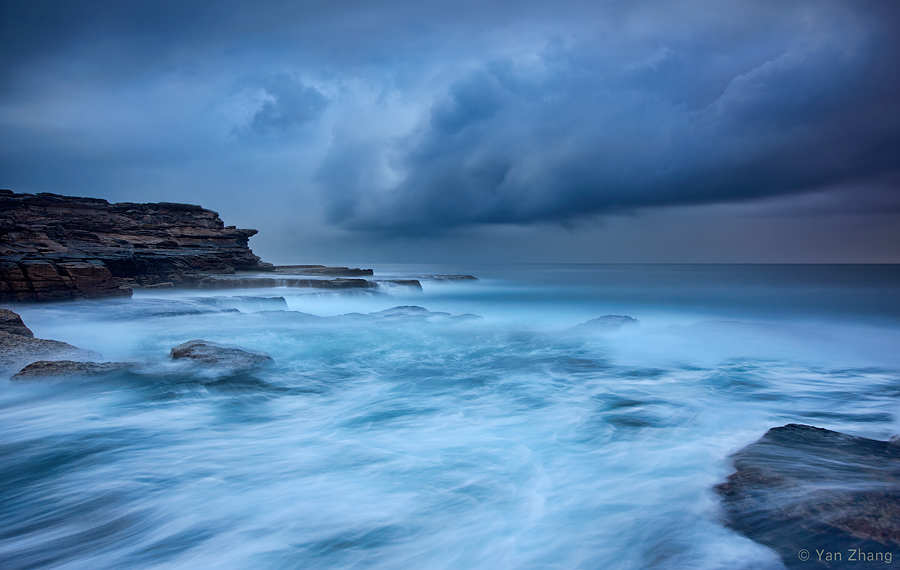
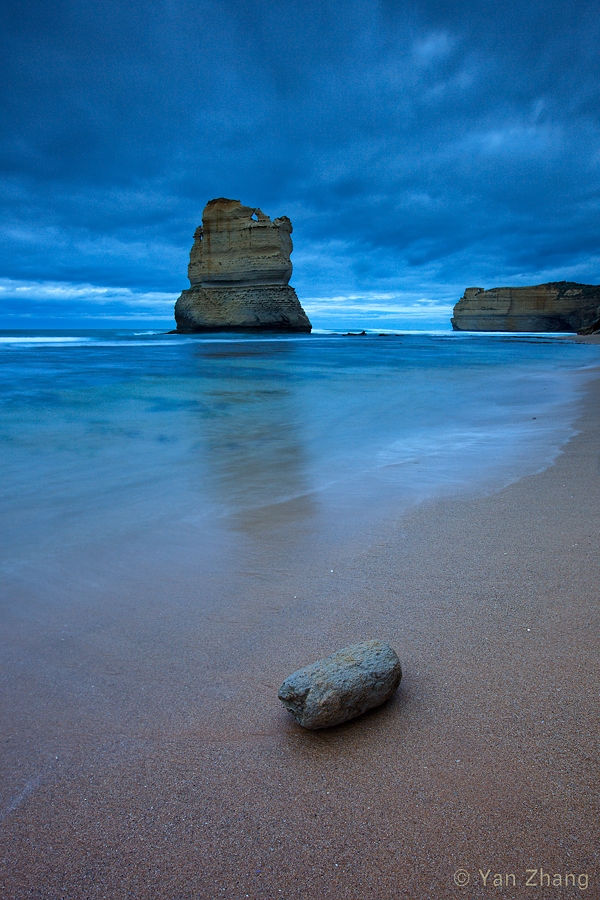
Since I am living in Sydney, I think I am very lucky to have the access to beautiful coast areas near Sydney. The following images were made on the East Coast of Sydney this year:
Photos by Yan Zhang. Click on the photo to enlarge.
Nevertheless, most landscape photographers believe that travelling to those unique places probably is essential to make original and stunning photographs. In recent years, I have travelled a lot to several places overseas to make photographs. China and New Zealand are the two special countries that I go for my landscape photography, because these two countries have many unique landscape locations and are relatively easy for me to travel to.
When you are planning your trip abroad, to the place you’ve never been before, how do you decide on your photographic locations?
This is a hard task indeed. Usually, I do a lot of research before I go. Looking at other photographers’ works on those candidate locations is very helpful. Traveller’s guide is also another information source. However, sometimes I think it is more important to discover some places that haven’t been considered by other photographers. In that case, it takes me a lot of time to find such interesting places abroad. However, once I found one, I would come back again and again to make good photographs.
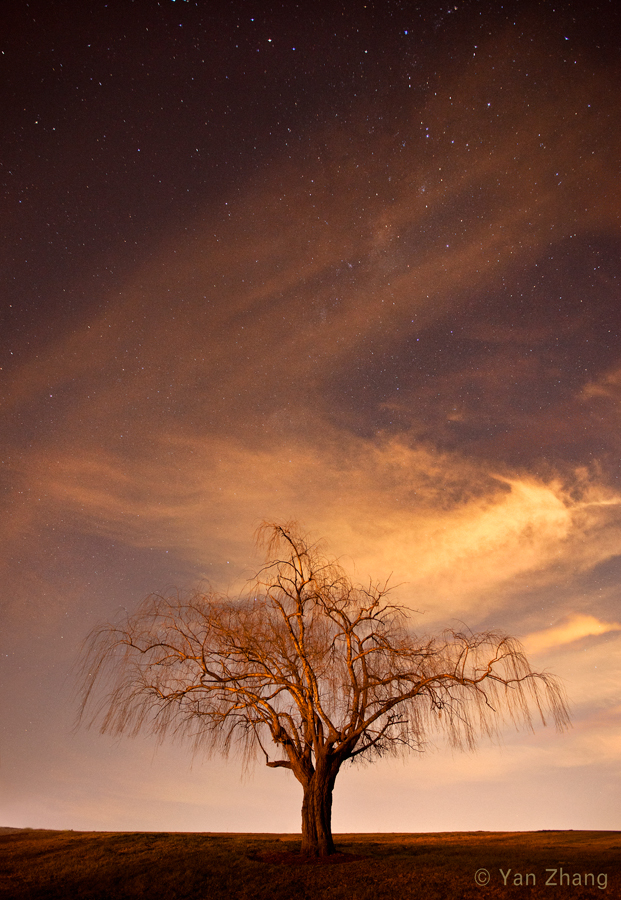
Photo by Yan Zhang. Click on the photo to enlarge.
Where do you draw your inspiration? What motivates you?
I have a deep passion for the nature, which always motivates me to experience such a pure beauty only existing in the nature’s wilderness. For a very long time, I knew that I was so passionate about the nature, but somehow I did not know how to express that until I started landscape photography in 2007. For me, I think photography probably is the most effective way to get close to the nature.
Do you hike and photograph alone, or you have a partner?
Most of the time, I travel only with my camera and make photographs alone. However, since I’m living relatively close to Blue Mountains area of Sydney, almost every weekend, my wife and I spend one day hiking in the Blue Mountains. Sometimes I take my camera gear with me on our hike.
What photographic equipment do you use?
As I mentioned earlier, I started with Canon 400D, then in 2008 I bought my Canon 5D Mark II full frame digital SLR camera. Now I am still using it. Since I only focus on landscape photography, filters are critical to my photography. I use both Lee and Singh Ray graduated ND (Neutral Density) reserve and graduated ND filters. I also use CPL (Circular Polarizer) filter sometimes for certain subjects such as waterfalls.
For landscape photography, I think that having a complete filter system and mastering it in practice are very critical to achieve high standard landscape photographs. A stable tripod is also essential.
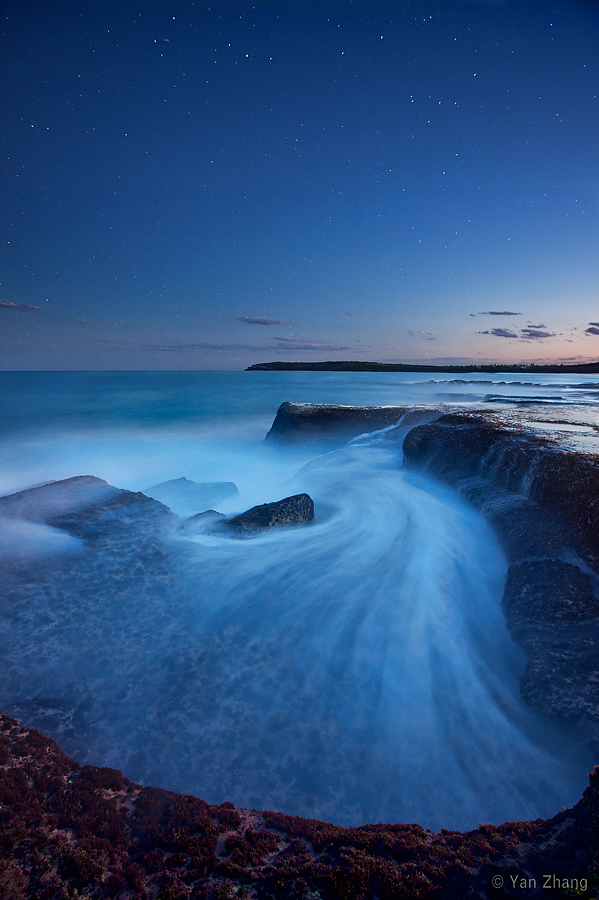
Photo by Yan Zhang. Click on the photo to enlarge.
How do you post process your photos? What software do you use, and what are the main adjustments that you perform?
I believe in the principle of “getting it right in camera in the first place” in my photography practice. During the process, I always put great efforts in the field to make proper shots. Nevertheless, post process is an unavoidable procedure in current digital photography. I always shoot in RAW format and process in Photoshop CS 5.
Generally speaking, my approach to photo adjustments in CS 5 is quite standard: first open raw file in Adobe Camera Raw, perform necessary adjustments there, then load it to CS 5 to perform further adjustments, such as using layer masks, curves, contrast, etc., to adjust the photo to meet my vision.
However, from time to time, I apply a specific Photoshop technique to do a certain adjustment. It is called Tony Kuper (TK) Luminosity Mask technique (http://goodlight.us). It is a very powerful technique allowing you to do some very subtle adjustments on certain pixels to increase/decrease their brightness, and so on.
Photo by Yan Zhang. Click on the photo to enlarge.
Do you have any specific goals that you want to achieve in or with your photographs?
I said earlier that I started my digital landscape photography in 2007, and I sold my first landscape photo in the same year. Since then, each year I would sell some of my photographs through various art exhibitions in my area. In September 2010, I established my own photography website. Recently I sold several large prints. As an amateur photographer, I feel I am very lucky to be selling photos.
Having said that, I should stress that my photography goal is not just to make my works to be of some commercial value. More importantly, I wish my works to be recognised by the professional photography community. This was the main motivation that brought me to get involved in 1x.com photography website’s activities.
Photo by Yan Zhang. Click on the photo to enlarge.
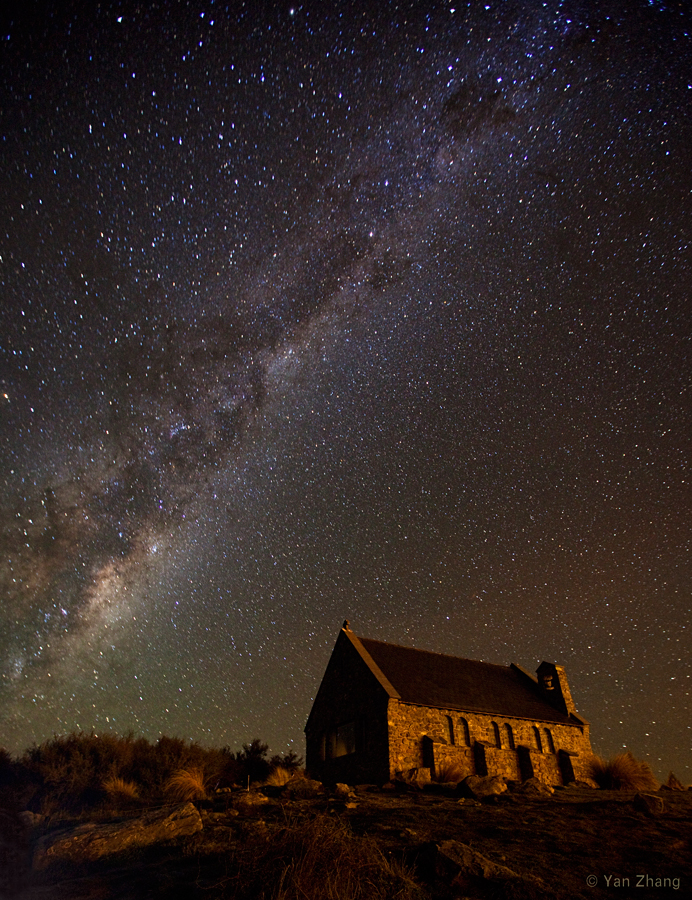
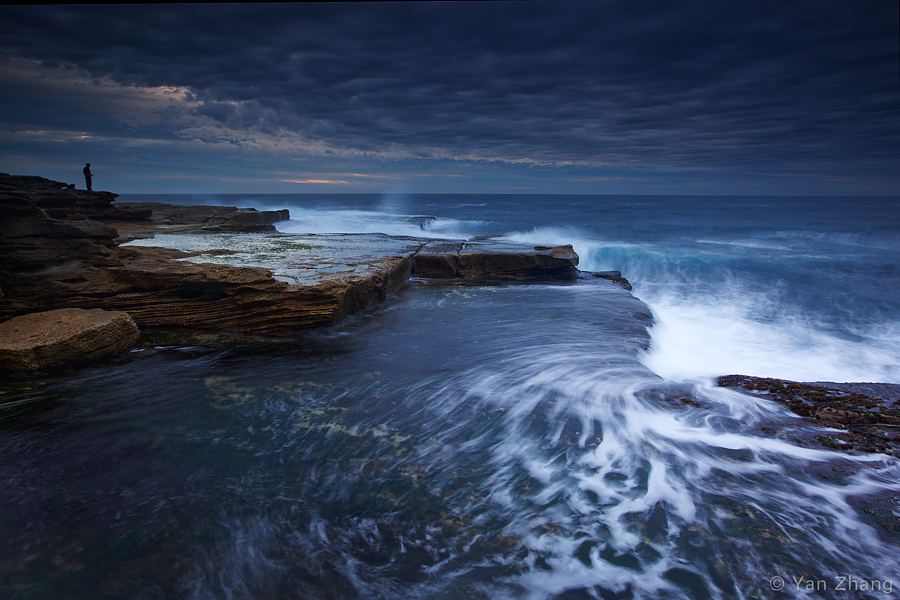
This one is a selfish question, but I had to ask it :). In my photographic portfolio, landscapes section, did you see a photo that you particularly liked? And if you did, what did you like about it?
Yes. I like this shot:
because this image presents a nice mood with mist in the forest. The vertical trees in the mist create a good depth of field, which makes me try to explore this wilderness.
And finally, my traditional question. If you had only two advices to give to a beginning photographer, what would they be?
My two advices for beginning photographers who are dedicated to landscape photography would be:
(1) Originality – I believe that originality is the key to make photographs that differ yourself from other photographers;
(2) Persistence – to make outstanding photographs you have to be persistent, to stick to the idea you have in mind and then try every effort to fulfil this idea or adjust it in the field.
Photos by Yan Zhang. Click on the photo to enlarge.
Yan, thank you very much for this interview, and good luck in your future artistic endeavors!
You can see more of Yan’s beautiful photographs on his website:
Big thanks to everybody who didn’t loose faith in this blog 🙂
I had three unforgettable weeks of trekking in Nepal, saw and photographed unbelievably beautiful mountains, and different cultures. More about that in my future posts, in which I will share my photographic experiences and, of course, photographs from my trip. Few of these photos you can already see on my Facebook page:
Now I would like to go back to the article that I started writing before my vacation, but didn’t have time to finish.
There are different ways to tell a story with a photograph. Photojournalism is one of the most common. There are also various kinds of creative edits. For example, Katerina Lomonosov creates great story-telling works of art, which stir the viewer’s imagination. Landscape photography in addition to showing the beauty of nature can also sometimes tell a story of the photographed place. Thinking of it, any kind of photography tells a certain story, and this fact is what makes the viewer to look at a good photograph for more than a brief moment.
I don’t remember where I saw this quote: “If you want to tell whether a photograph is good or not, hang it on your office/home wall. If after a week (or so) you’ll still enjoy looking at it, then most of the chances that it possesses artistic value”
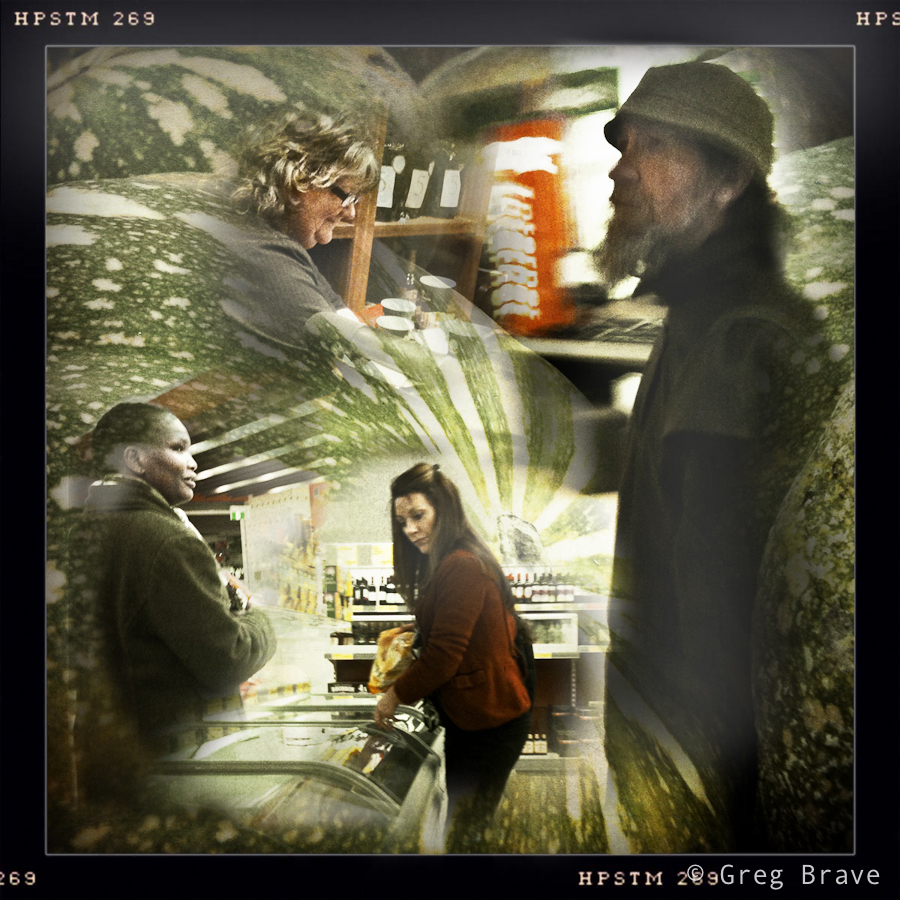
A few days before my vacation I was buying food in our local supermarket, and I’ve got the idea to photograph ordinary people that I saw there and to try and tell a story of “people in the supermarket”… you know – to see extraordinary in the ordinary. I used my iPhone to photograph these people because it was be the most discrete way to do it. I wanted to capture them in their most natural environment, doing everyday chores (in this case – shopping).
So when I came home I had a collection of photographs, which I needed to somehow combine into a single photo. After playing with the idea for a while I decided on a collage, and here’s the final result:
Click on the photo to enlarge.
To create this collage I loaded all the photos as layers into a single Photoshop file, and then used layer masks. The most difficult thing was to choose photos for the collage, and then to arrange them. Another problem was the choice of background.
I hope I succeeded to tell a story with this image, but I will let you be the judge of that.
Once a year comes a wonderful time, when I take some time off work and fly away to fulfill my lust for traveling. This time it is a place I’ve dreamed about for a very long time. I’ll tell you all about it when I come back 🙂
When a person looks at a photo, he (or she) can almost immediately say whether he likes it or not. In rare cases it can take a while, but eventually you can either like the photo, not like it, or stay indifferent to it.
But have you ever tried to ask yourself exactly why do you like or don’t like the photograph? It is much more difficult to pinpoint the reasons for which you feel about the photo the way you do.
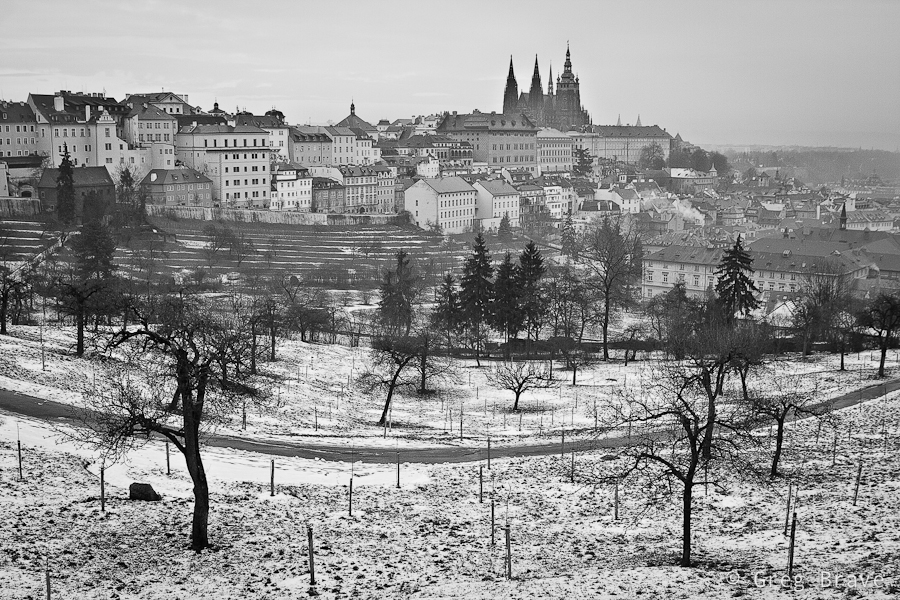
In this post I am going to present three photos that I made during one of my visits to Prague, and try to explain why I like them. It will be a good exercise for me, and also a good experience for you, my readers. You might agree with my observations, or might not, but in any case I hope to help you to be more conscious not only when looking at images, but also when creating them.
Click on the photo to enlarge.
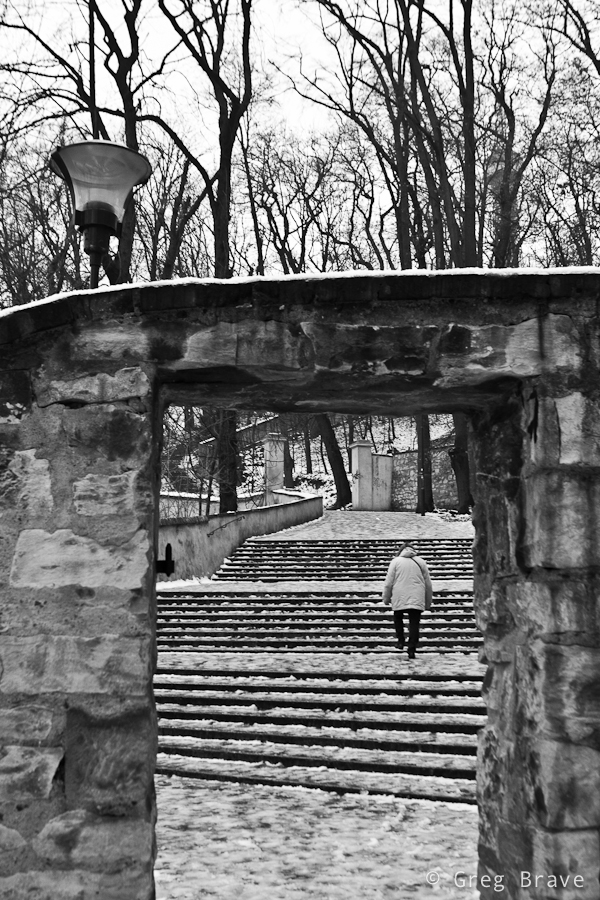
I like the photo above for several reasons. Main reason being that it creates a winter-cold feeling, and gets me in the wintery mood. How it does that? Well, first of all the B&W helps – it emphasizes the lack of colors on a typical overcast winter day. The lonely figure also adds to the mood. Imagine for a moment that instead of lonely figure there would be bunch of kids playing with snowballs – would that add to the mood that I’m talking about? Of course not. Considering everything else in the photograph would remain the same, they would create a contradiction by adding playful joy and “bright colors” into pale surroundings. This is why lonely figure is much more appropriate for this photo’s aim. What else? The bare trees and the snow on the ground of course. In addition there is also a three-dimensional feeling to this photo created by the narrow gate at the front leading the eye to the stairs and further on into the photo – different planes create a feeling of space, and the small human figure looks even lonelier in this space.
Click on the photo to enlarge.
Here is another photo of a snowy winter day, and also with a lonely human figure 🙂 What can I say, these photos were taken in the winter, it was cold and I was in THAT mood. I didn’t convert this photo to black and white because I didn’t feel that it was needed. On the contrary, I wanted the snow on the wall to be distinguishable, and the wall being colored helped that. There are several rhythms in this photo – the rhythm of the street lights, the rhythm of the columns on the wall, and the rhythm of the stairs, all creating a sense of harmony. The human figure has strong visual connection with the statue and the viewer’s eye travels between the two. This connection also prompts us to “humanize” the statue, to think of it as if it was a human figure standing there. These two figures are located in the frame in a way that creates compositional balance. The statue in front “tilts” the balance to the left, but the human figure “counterweights” it by being in the center. The statue is bigger, but because it has snow on it, it is brighter, and bright colored objects are perceived as light by the human eye, while human figure is smaller but it is much darker and thus perceived as “heavier”.
Click on the photo to enlarge.
This last photo is my favorite. By the way, it almost didn’t need the conversion to B&W – the colors were missing from the world that day…
The arched walking path and the bare trees standing on its sideways create a sense of swirling motion around the city buildings with St. Vitus Cathedral rising in the middle and being steady as a rock. The horizontal lines in the middle background also add to the motion feel. It is almost a scene from fairytale with a mystical castle and enchanted trees.
Actually, besides what I wrote in the paragraph above, I find it hard to explain why this photo has such a strong impact on me, and maybe you can help me out here. How do you feel about the photos presented in this post, and this last photo in particular? And more importantly why do you feel that way?
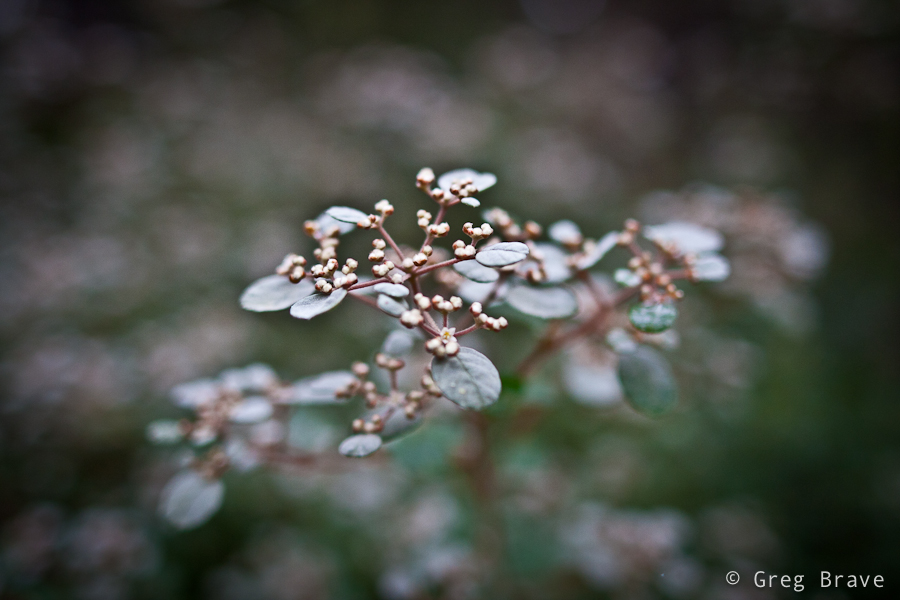
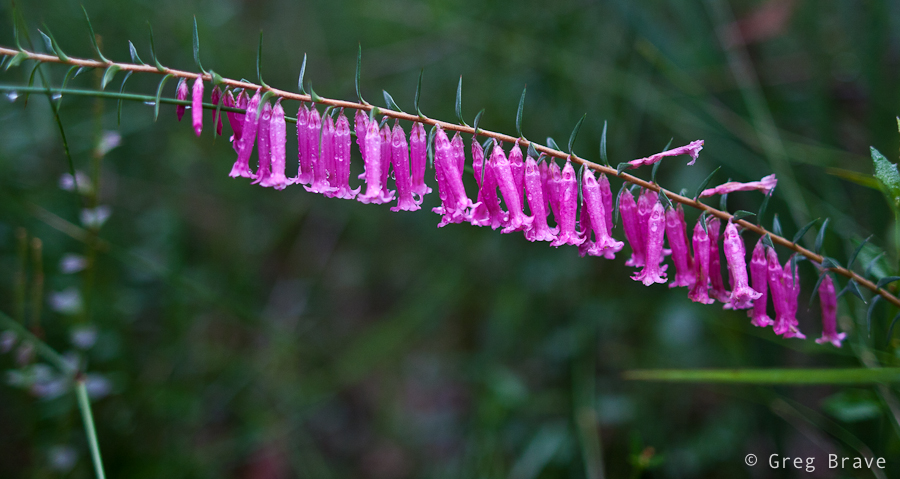
I just realized that even though I love photographing flowers, I haven’t shown much of them here. But hey, don’t worry! I’m here to fix that 🙂
A couple weeks ago me and Ira went hiking in the Bunyip State Park here in Victoria. To be honest there wasn’t much to photograph, at least where we were hiking, as it was mostly plain and boring eucalyptus forest.
Click on the photo to enlarge.
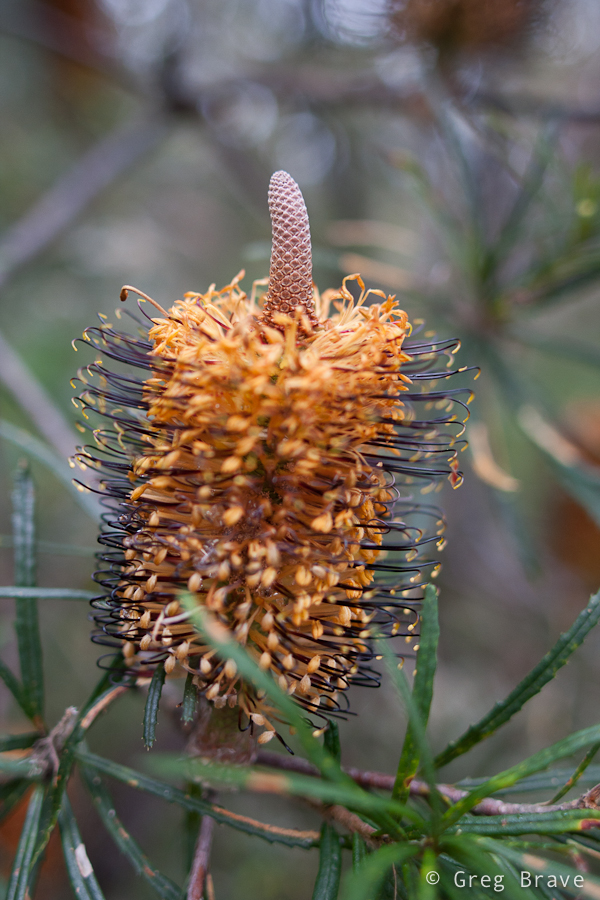
But when there are no breathtaking views around me, I take out my macro lens and start looking for the little things. And there were quite a few beautiful flowers there. Macro photography in the nature has its own tricks. Aside from artistic aspects such as choosing the subject, angle, composition etc., there are technical issues that should be thought of.
Click on the photo to enlarge.
When shooting Macro, even the slightest movement of your subject can result in loss of focus. So having that in mind I would suggest shooting at shutter speeds above 1/100 sec. It is more difficult with choosing apertures because that would be part of an artistic choice. Generally speaking, the wider your aperture, the faster shutter speed needs to be.
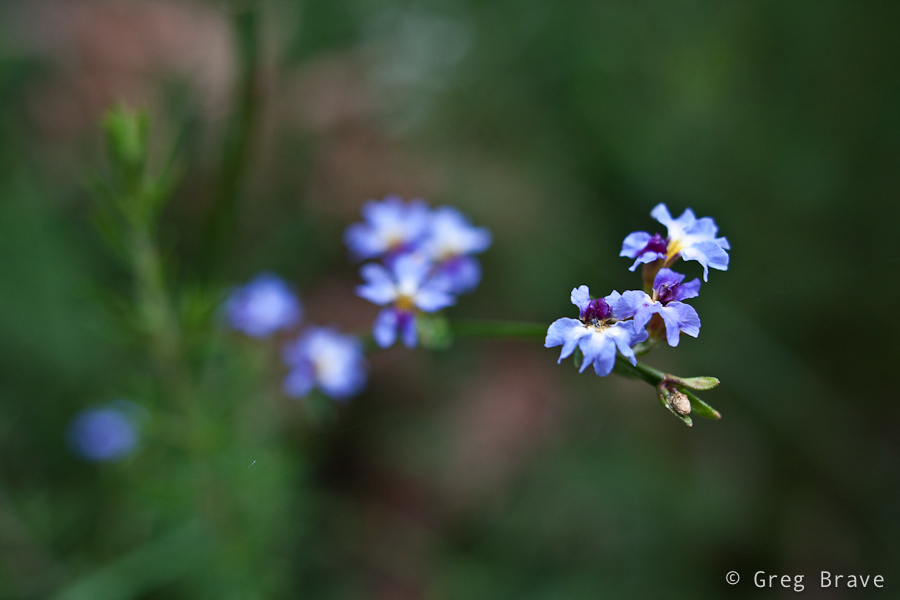
Now, you’re probably going to ask me – what about tripod? Well tripod can be a huge help, but it is not a “complete solution” to all your problems, because when shooting in the nature you have wind, and even if your camera is dead still on your sturdy tripod, one blow from the wind and your flower moves out of the focus area.
Click on the photo to enlarge.
Personally, I find using tripod in macro shots too constraining. Tripod gets in my way when I circle around my subjects looking for a nice spot to shoot from, especially when there are fast moving clouds in the sky and the lighting conditions change constantly.
Of course there are conditions in which using tripod would be very beneficial. For example picture this: Early morning, everything stands still. The insects are sleeping inside flowers covered with droplets of dew. The morning light is beautiful, and a little dim. This is the perfect time to use tripod – you would have enough time to put the camera in place, choose the composition and shoot away.
Click on the photo to enlarge.
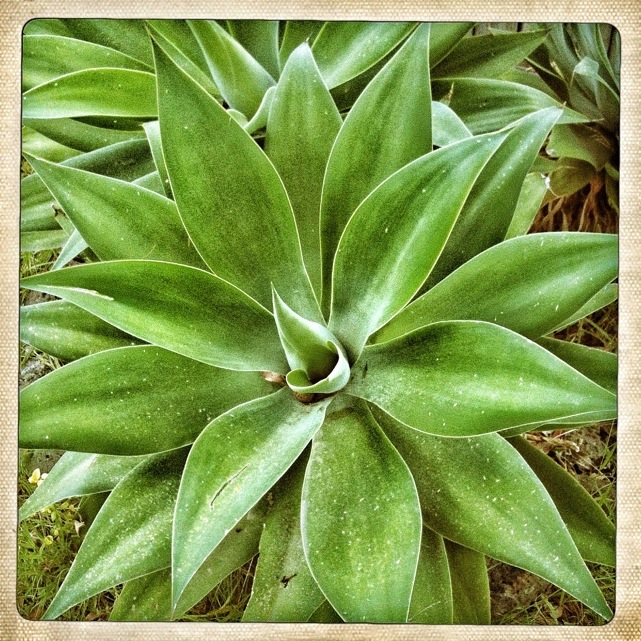
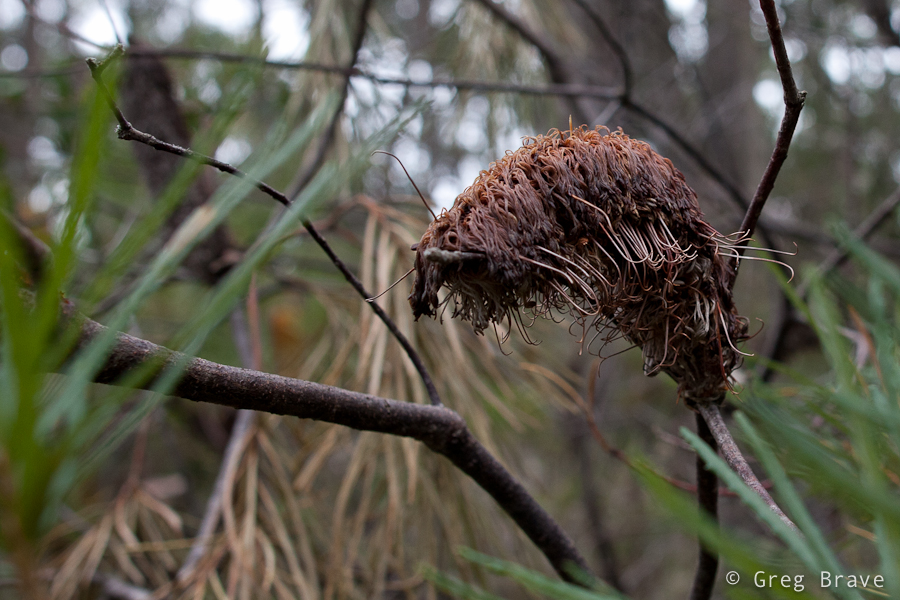
Here, have a look at this plant, at first I thought it was a giant caterpillar 🙂
Click on the photo to enlarge.
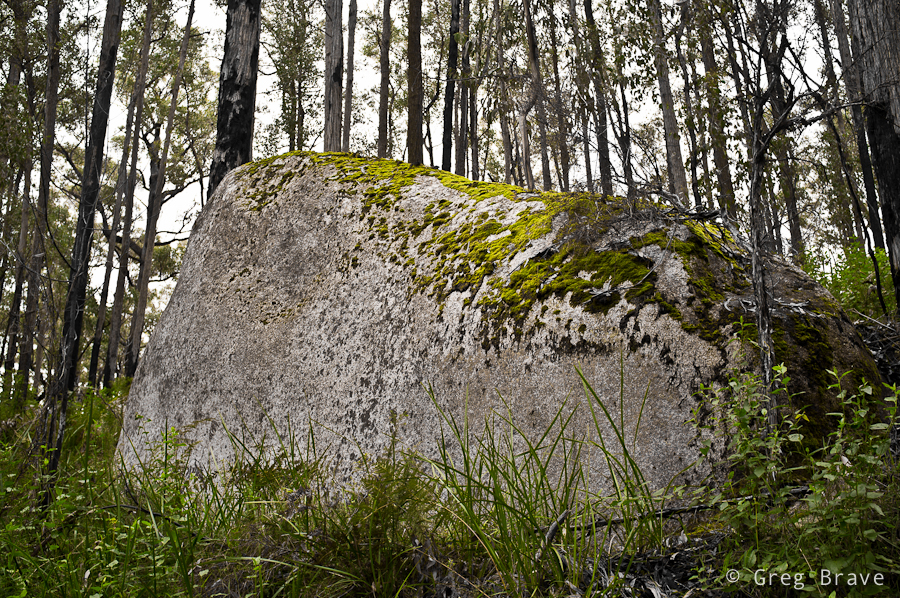
When I had enough of shooting macro, I started looking for a “bigger” subjects to put in front of my lens. I liked the moss on this huge stone. By the way, it is still a mystery to me how this huge stone ended up in the forest… it probably got there before these trees grew up.
I think I’ve already mentioned it in one of my previous posts – it is very difficult to take interesting pictures of forests, and if you just see a nice section of forest, point your camera at it and shoot, chances are that the photo won’t be of any artistic value.
In order to make your photo of the forest interesting, you must find a point of interest, something for the eye of the viewer to rest upon.
Click on the photo to enlarge.
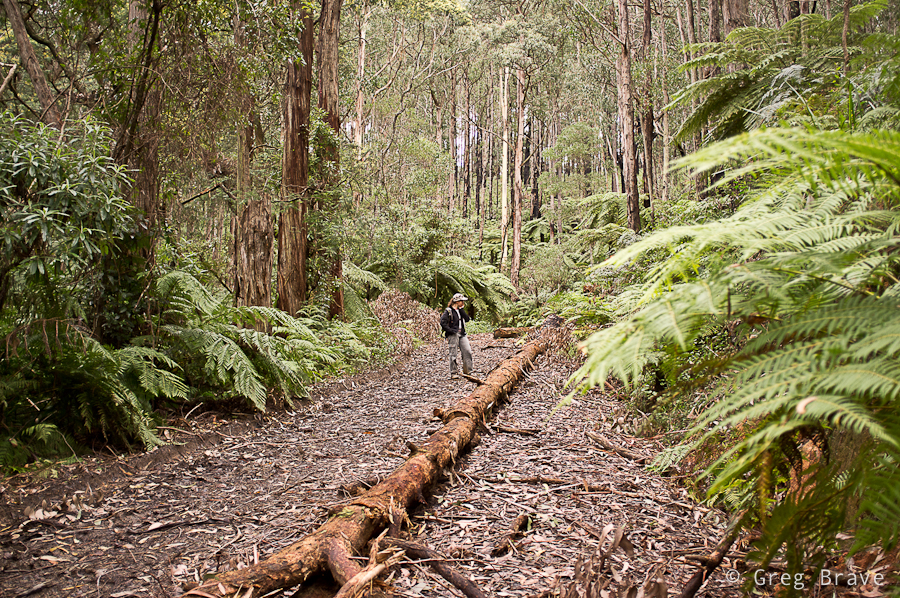
And finally, here is one of my favorite photos from that hike. Ira serves as a good reference point to show the scale of this place.
Click on the photo to enlarge.
What are your favorite macro tips? I am always willing to learn new stuff!


