Fantasy Edits – Starting with photography to end up with artwork [Updated]

Sometimes I get a little tired with just a ‘simple’ photography. I think this is true for most of people – we can’t just do the same thing over and over again and not get bored with it. We need to mix things up. Thinking about it, I guess it doesn’t apply to the Japanese culture, in which people can dedicate their whole life to perfecting a single skill. Have you seen the documentary “Jiro Dreams of Sushi” ?

Anyway, I got a little sidetracked here. As I was saying sometimes I get really sick with photography to the point I can’t look at my camera without wanting to puke. Well, maybe I exaggerated a little, but you get the point. When it happens though, my creative urge doesn’t go away, so I try to come up with ways other than photography to let it out.

Being a photographer I have a lot of images in my Lightroom library, and when I don’t feel like shooting new ones, I try to reuse my old images to create something new out of them. Sometimes I get lucky and something nice comes out of my efforts, and when it does I want to share it with the world!

I call these series – “Space Fantasies”.

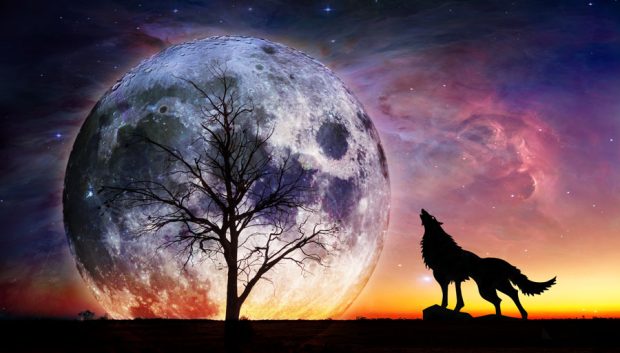
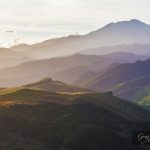
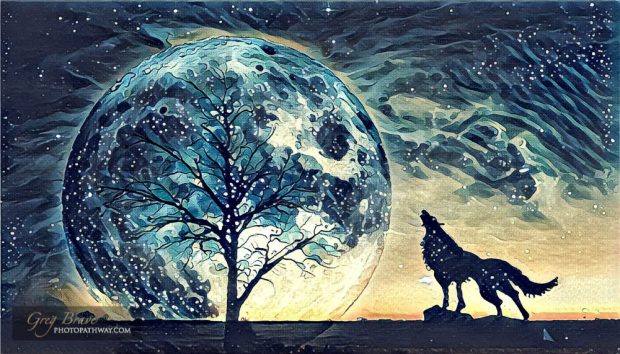
Since one of the purposes of this blog is to educate (ambitious, don’t you think?) I will share a bit about how the  image above was created. The rest of the images you’ll see in this post were created similarly.

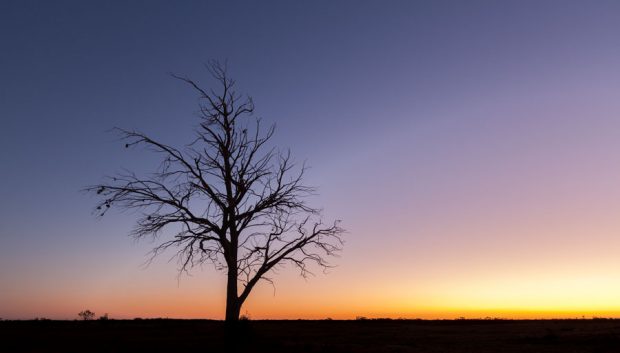
As you might’ve guessed it all started with a photograph. This one:

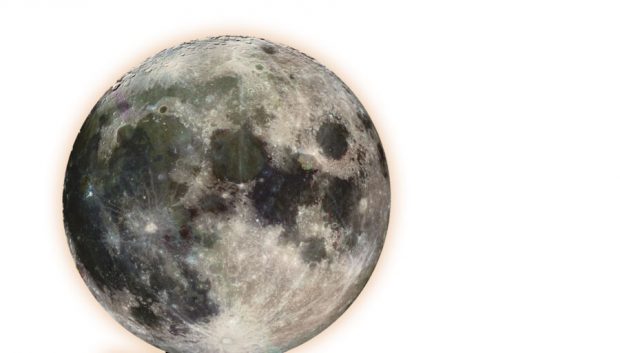
At first I was inspired by images of things with huge moon in the background so I just tried to add a moon to this image. Did you know that NASA has a great library of space imagery that is free to to use for anyone? That’s where I found my moon, since I don’t have a 600mm lens to shoot it myself. This moon:
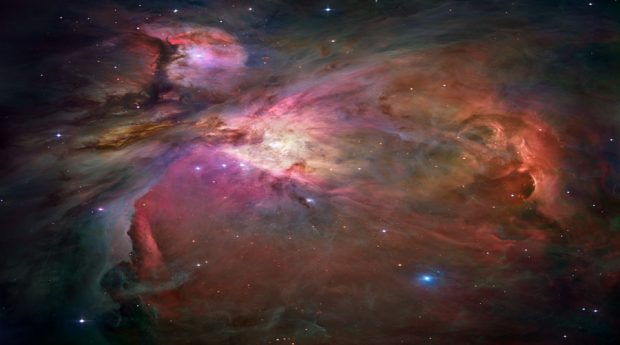
In order for the moon to seem behind the tree, I changed the blending mode of the layer to “Overlay” (did I mention that all this is done in Photoshop? Duh! Obviously :). When I did that, the image wasn’t interesting enough for me. I felt that something is missing. So I looked and looked at it and suddenly a thought popped into my head (or maybe not suddenly. Maybe something totally different happened, I don’t remember) – what if this is not our moon, what if all this is not happening on earth? So I added another image from NASA to reinforce my idea. This one:

And again, to blend it with the rest, changed blending mode to “overlay”.

Now we are getting somewhere! I thought to myself, but still something was missing…

A few days later I looked at it again and crazy thought crept into my perfectly sane mind – What if it was our moon after all!? If this is a moon, and it looks like night – something that was missing was a howling wolf! But I am not a wildlife photographer, and I don’t have photos of wolves laying around. Even if I did, I doubt I would have one in exactly the right pose that I imagined it should be. To find a solution, or to be more exact, to find a wolf, I started browsing through Google images searching for “howling wolf”, and I found quite a few images. But it didn’t feel right to use them in my artwork – I wanted to make it myself, you know?

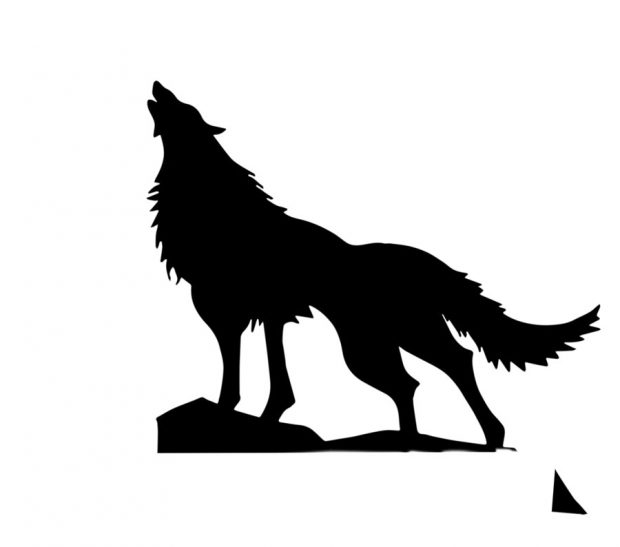
The solution came to me when I saw black and white logos of wolves – I realized that all I need is a silhouette! It doesn’t have to be a photograph. And still I wanted to make it myself. So I drew a wolf on a piece of paper using several different photos as references to get the exact pose I wanted. Then I took a photo of my drawing and brought it into Photoshop. Using the Image->Adjustments->Threshold filter I converted the photo to black and white:

After tinkering with the image a little bit more, it seemed that all the pieces fell into place! I was quite satisfied with the result:

But my perfectly sane mind kept poking me, saying things like “psst! this could be better! try something else“. A few days later (you see, this was a long process!) I was playing with the Prisma app on my phone and got an idea to try putting my work through it. After trying a bunch of their filters, the one I liked the most was “Wave” (A tribute to the famous painting by Hokusai).

And that’s pretty much gave me the final image.

There is one more thing left to mention – Prisma outputs low res images, but I wanted it to have much larger resolution, so here is my somewhat complicated solution to the problem:

  1. Open the Prisma-processed image in Photoshop
  2. Enlarge the image to about 11 megapixels (Image->Image Size)
  3. Use Nik Sharpener Pro (for output) changing the following settings from defaults
    1. Structure = 50%
    2. Local contrast = 7%
    3. Focus = 10%
  4. Open the resulting image in Adobe Illustrator
  5. Trace the image in order to turn it into vector using “full color” leaving the rest of the settings as defaults
  6. Export back to JPEG from Illustrator at your desired resolution


After getting my first fantasy-photo-collage-painting I couldn’t stop, and ended up with a whole series of works. Here they are. I hope this was of interest to some of you and provided useful info.

Enjoy!

– Greg

[UPDATE] Lately Prisma started offering an in-app purchase to be able to output high-res photos of up to 12MP.


[box type=”bio”] P.S. If you want one of these beauties printed on canvas and hanging on your wall – shoot me an email at greg@photopathway.com[/box]

Brightening the eyes in Lightroom 4 quickly and easily


Sometimes, after shooting portraits, when I look at the photos, I see that in some of them the persons’ iris is too dark. In that case I want to brighten it (obviously 🙂 ). To do that, in Lightroom 3 I used to choose the adjustment brush, bump up the brightness slider a little bit, and brush the eyes. This presented a problem because it would brighten up everything I “brushed”, so I had to be very accurate with the brush and the process took quite some time considering I would do it to many photos.

Luckily Lightroom 4 improved the overall processing workflow and now I can do it much faster and more efficiently. So If you have Lightroom 4 and want to brighten up a bit eyes of your models here’s a quick and easy way to do it.

1. Go to develop module in Lightroom and select the adjustment brush:

Lightroom adjustment brush tool

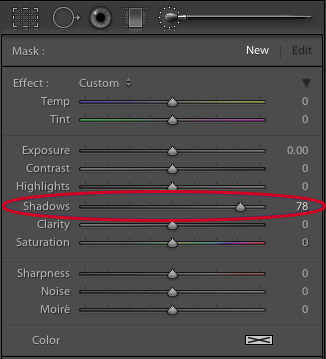
2. Increase the Shadows slider quite a bit, but make sure that all other sliders are zeroed out.

Lightroom adjustment brush tool settings

3. Brush over your model’s eyes quickly, not trying to make the exact selection.

4. Adjust the Shadows slider to taste 🙂

What happens is that the Shadows slider brightens (or darkens if you slide it to the left) only the darks, and usually around the area of the eye, the iris is the darkest part. The eyelashes and the pupils are completely black and Shadows slider doesn’t affect them. So if you accidentally select a small portion of the white of the eye, or the skin, they won’t be affected by this adjustment.

Here’s an example of before and after using this technique

Darker Eyes

Before (click to enlarge)

Brighter Eyes

After (click to enlarge)


I hope you will find it useful, and be sure to let me know how you go in the comments section below!

P.S. For best results I recommend shooting RAW

Using Your Imagination

Nobody knows what’s inside artist’s mind, so in order to express themselves and to share their visions with the world artists write music, paint, sculpt and use other means of expression. Mine is photography. Sometimes I have these crazy pictures in my mind, and I want to somehow realize them. Since I can’t draw very well, I am trying to do that by other means, currently it is compositing in Photoshop.

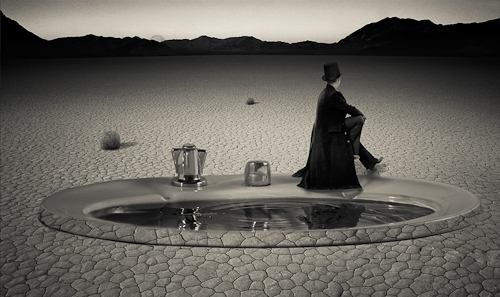
Recently an idea popped into my mind – a crazy magician who wanted to help all the thirsty people in the desert and he wanted to use his magic to create a lake in the desert, but something didn’t work right and he created a huge sink… so he sits on one of the knobs and feels blue 🙂

Here’s what came out of this idea:

magician in the desert

Click on the photo to enlarge.

It is a composite of five photos – the background, which is the desert, the magician, the sink, the moon (yes! it is the moon 🙂 ), and the tumbleweeds. I did the composite in black and white because it is easier to blend all the parts together.

And what crazy ideas do you have ?

Post-processing variations

I am not a believer in the “straight out of camera” philosophy. You know, the photographers who don’t do post processing at all and sometimes shoot in plain JPEGs. Anything in addition to that, would be “distorting the reality” they claim. My opinion on this subject is that there is no such thing as objective reality. Everyone sees what he sees through his own eyes and his own perspective. Your previous life experience also alters your perception of everything that you see around you. Even when you simply point your camera at a scene and shoot, the light goes through the lens, hits the sensor, gets transferred into electronic signals, then is processed by your digital camera’s own processor, and undergoes even more transformations until you see the photo on your computer screen. I don’t think I need to go further.

So, when I work on a photo, first I usually perform basic adjustments in Lightroom such as brightness and contrast and then, if I feel that it is not enough, first I try to understand why I feel that way. Is it the composition? If it is the composition then there’s nothing much can be done in post processing, and I will probably discard that photograph. But if the composition feels right then I continue my exploration.  Are the shadows too shallow or too deep? Can the colors be improved?

Next, I open the photo in Photoshop and start playing with it, changing color palette, increasing/decreasing lights and darks, and other adjustments. Usually I come up with several versions of processed image, which look good to me, then I compare them and choose the one that I like the most.

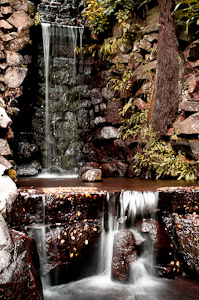
Below I have three versions of the same photo, but the thing is that I can’t choose the one that I like the most. Each version has its own mood, and I have trouble choosing.

The first image below is the original version with only minor brightness adjustments.

Waterfall version I

Click on the photo to enlarge.

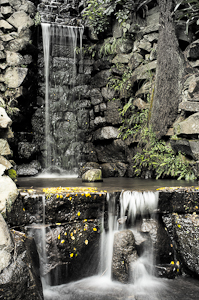
The second version received quite a bit of processing, and has a warm autumnal feeling to it. I like the purplish glow and how it contrasts with the white of the water.

Waterfall version II

Click on the photo to enlarge.

In the third version I used the original photo as the base, substantially decreasing color saturation, of all the colors except the yellow of the leaves in the water. I also happen to like this version a lot.

Waterfall version III

Click on the photo to enlarge.

Which version did you like? Please help me choose, but I also need to know the reason for your choice, and this is what the comment section below is for! You can also leave your comments on my Facebook page – http://www.facebook.com/photopathway

Telling a story…

Greetings, I am back from my vacation!

Big thanks to everybody who didn’t loose faith in this blog 🙂

I had three unforgettable weeks of trekking in Nepal, saw and photographed unbelievably beautiful mountains, and different cultures. More about that in my future posts, in which I will share my photographic experiences and, of course, photographs from my trip. Few of these photos you can already see on my Facebook page:

www.facebook.com/photopathway

Now I would like to go back to the article that I started writing before my vacation, but didn’t have time to finish.

There are different ways to tell a story with a photograph. Photojournalism is one of the most common. There are also various kinds of creative edits. For example, Katerina Lomonosov creates great story-telling works of art, which stir the viewer’s imagination. Landscape photography in addition to showing the beauty of nature can also sometimes tell a story of the photographed place.  Thinking of it, any kind of photography tells a certain story, and this fact is what makes the viewer to look at a good photograph for more than a brief moment.

I don’t remember where I saw this quote: “If you want to tell whether a photograph is good or not, hang it on your office/home wall. If after a week (or so) you’ll still enjoy looking at it, then most of the chances that it possesses artistic value”

A few days before my vacation I was buying food in our local supermarket, and I’ve got the idea to photograph ordinary people that I saw there and to try and tell a story of “people in the supermarket”… you know – to see extraordinary in the ordinary. I used my iPhone to photograph these people because it was be the most discrete way to do it. I wanted to capture them in their most natural environment, doing everyday chores (in this case – shopping).

So when I came home I had a collection of photographs, which I needed to somehow combine into a single photo. After playing with the idea for a while I decided on a collage, and here’s the final result:

Click on the photo to enlarge.

To create this collage I loaded all the photos as layers into a single Photoshop file, and then used layer masks. The most difficult thing was to choose photos for the collage, and then to arrange them. Another problem was the choice of background.

I hope I succeeded to tell a story with this image, but I will let you be the judge of that.

As always, your comments are highly appreciated!

How Ideas Come To Life

Thinking of it, maybe I should’ve titled this post “story of an idea” because I will be talking about creation of one particular image. But I eventually I decided on the current title because the way this creation emerged from the depths of my imagination is one of the most common ways.

A few weeks ago I had a photo session with Ira, in which my primary goal was to try some new lighting techniques that I thought of. In that shoot I decided to focus on close up portraits (chest line and up). I experimented with different backgrounds and asked Ira to put on a few different shirts.

At first nothing was working for me. The lighting was bad, and I didn’t get any interesting results… but then again, I didn’t start this shoot with a specific idea in mind – it’s like that phrase from Alice in wonderland:

– In which direction should I go?

– It depends on where do you want to arrive

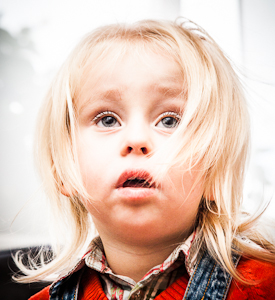
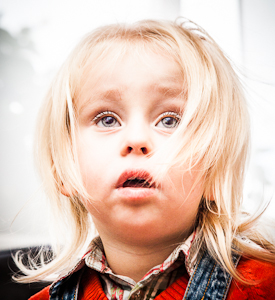
But I felt inspired that day and just kept on shooting and trying to get some nice shots. At one point Ira suggested adding an accessory – a piece of white semi transparent white fabric that she had, and I agreed to try it – it is a good idea to listen to your model, especially when you are out of ideas 🙂

Trying different variations we came up with this photograph:

Click on the photo to enlarge.

I liked it, but quite frankly it lacks an idea behind it. I looked at this photo and thought “nice photo! but what am I trying to tell with it?”. And I couldn’t find an answer. So I forgot about this photo for a while and focused on other tasks.

After a while (a few days have passed since the shoot), when I was watching a Phlearn Pro photoshop tutorial (which by the way was magnificent!), suddenly an idea emerged in my mind. I remembered this photo of a spider’s web that I took:

Click on the photo to enlarge.

And it suddenly got layered, in my mind, onto that photo of Ira holding white fabric, as if she was holding the web itself. I rushed into photoshop to try it, to see how it looks in reality. It was nice but still something was missing… what was it? The spider of course. So I searched the net for images of spiders and chose the one I liked the most. Then I brought it as a layer into my working file, and converted the spider to be pure black.

Now I needed to find a meaningful placement for the spider. I tried different variations before I came up with the final result, which you can see below. I call this image “The Way Up” :

The Way Up...

Click on the photo to enlarge.

By describing my creative process on one particular image I wanted to show one of the many ways creative ideas come to life – they are not always pre-conceived, and sometimes, as it was in this case, they develop step by step over time, graduating slowly towards the end result.

What do you think about the final image? Your thoughts, comments, and suggestions are always appreciated!

Resolution, Megapixels, DPI Explained

Yesterday at dinner me and my sister had conversation about how digital photos are made, and what do all these strange definitions mean. Then I remembered the time when I was struggling to understand all these concepts. It took me some time to wrap my head around them.
I think many beginner photographers are still struggling with them. So I’d like to share what I have learned and understood in the way that is clear to me, and hopefully will be clear to you.

Let’s start with the initial image that comes out of the camera – what does it mean that camera produces, let’s say, 10 Mega pixel image?

Ok, before answering this question let’s explain what a “pixel” is. Pixel is a virtual dot. Yes, a virtual one – it doesn’t have dimensions of its own. Let’s just leave it at that for now and I’ll explain down the road when pixel gets it’s physical dimensions. Now imagine a rectangle shape filled with dots. On its long side it has  3648 dots and on its short side it has 2736 dots. So the total number of dots would be 3648*2736=9,980,928 – it is almost 10 million dots or in other words 10 Mega pixels.

All digital images are “composed” from pixels (dots). Each pixel has its own set of values such as color, brightness, saturation etc.
So when we say that camera produces 10 Mega pixel images, it means that for each image camera provides this set of values for ten million pixels, all these numbers being put into a single JPEG or RAW (or any other format) file.

When you load this image on your computer’s display all these values are translated into actual color, intensity, etc. and together form the captured photo. Remember I said that pixel has no dimensions? As long as it “sits” in the JPEG or RAW file it doesn’t, but as soon as the file is displayed on the display, pixel receives its physical dimensions depending on DPI, on which I’ll explain next.

Let’s stay with the 10 Megapixel photo for now, and try to understand the DPI. DPI stands for Dots Per Inch. So basically if we have, for example, 10 DPI resolution then it means that for each square inch of image we have 100 pixels (10 by 10) with information regarding their color, intensity, etc. And these 100 pixels are taking the whole square inch, so they each pixel has certain size. And if we have 20 DPI resolution then we have 20×20 pixels per square inch (400 in total), therefore each pixel is smaller, and the result is better sharpness of the image.

You might get confused a little bit at this point – DPI stands for DOTS per inch but I’m talking about pixels. Here’s the thing – when a dot displayed on the computer screen, it is called a pixel, and when this same dot is printed on the paper, it is called a dot. Sometimes the abbreviation PPI (Pixels Per Inch) is used for computers but I’ll mostly stick to DPI.

Now let’s talk some real numbers

If you are displaying your images on computer display, then you don’t need resolution higher than 72 DPI because of physical limitations of the display (the smallest dot that display can show is of certain size, so physically there can be no more than 72 pixels per inch displayed on computer screen). If you’ll save your images in a higher resolution than 72 DPI and only look at them on your computer, you will just waste your storage space because the bigger your DPI, the more space the photo will take on your hard drive provided its physical dimensions stay the same.

If you want to print your photos, then resolutions of 240 DPI or even better 300 DPI are appropriate. This is due to the fact that printer can print much smaller dots than computer screen can show. If you’ll use a much lower resolution for printing, then instead of nice photo with sharp detail and smooth color transitions you’ll see image comprised of colored squares because your digital file will contain inefficient amount of data.

Let’s go back to the digital image produced by a 10 Megapixel camera. As we already said, this image contains information about 10 million dots/pixels. That’s it, not less and not more. Now when you want to print this digital image, these 10 million dots are your limit, and it is for you to decide how to use them.
For example if you want to print at resolution of 300 DPI (to remind you DPI stands for Dots Per Inch) then you are limited to picture size of 12.16×9.12 inches (30.89×23.16 centimetres). How did I get these numbers? Easy: remember that we said that a 10 Megapixel image has the following dimensions 3648×2736? Now if you divide 3648 by 300 (your desired resolution), you’ll get 12.16 inches for the long side of the printed photograph, and similarly divide 2736 by 300 to get 9.12 inches for the short side. Don’t forget that it is the maximum size for resolution of 300 DPI. You can always print smaller sizes. In that case not all the information contained in the file will be used for printing.

After understanding how the Megapixel count and the resolution (DPI) are affecting the size of the printed image, it is clear that for any given digital image (in our example it is an image from a 10 Megapixel camera) the lower your desired resolution, the larger the printed photo can be.

For most of the printers you don’t need to go above 300 DPI because of the physical limitations of the printer – it simply can’t print more than 300 dots per inch, but when would you like to decrease the printed resolution? I can give one most common example here – printing large posters or ads that will be viewed from long distance. If you look closely at big advertisement signboards with photos, you’ll see that their resolution is very low and you can distinguish between printed dots when looking from close distance, but when looking from farther distances it looks like a good photograph.

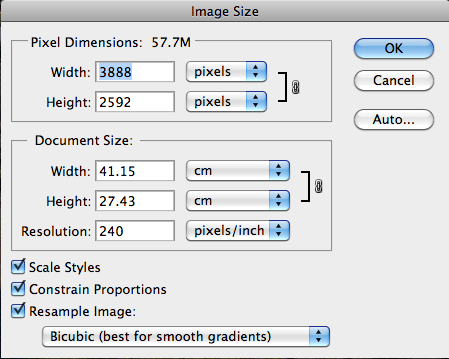
The last thing that I’d like to discuss is the dialog box in Photoshop named “Image Size” because it illustrates perfectly all the concepts I wrote about. In order to get to this dialog box, in Photoshop go to the “Image” menu and from there choose “Image Size”. Then the following window will open:

Of course, the numbers shown are depended on the currently opened image. The numbers that you see in the screenshot above are from 10.1 Megapixel image, but you can play with any photo that you’ve got. As you can see there are three sections in this window:
1. Pixel Dimensions
2. Document Size
3. Check boxes
(For the sake of this exercise, make sure that the “constrain proportions” check box is checked – we want the image to keep its original proportions)
The first two sections are interconnected, which means that if you change numbers in one section, numbers in the other section are also changing.

Lets start with the “Document Size” section, and change the Resolution to a higher number. You’ll see that “Pixel Dimensions” are also changing to higher numbers, and it makes perfect sense – if you want to have more pixels per inch, the total pixel width and height of your image will increase provided that physical dimensions of the photo stay the same. Now change the Width in the “Document Size” section to a lower number. The Height in the “Document Size” section will also change to a lower number because we are constraining our proportions, and more importantly, the Height and Width in the “Pixel Dimensions” section will also change to a lower numbers. Let’s explain that: we kept the resolution intact, but we want the physical width and length of the image to be smaller, which means we want less inches (or centimeters) but with the same 240 Pixels Per Inch, therefore we have less total pixels in our image. Now if we go over to the “Pixel Dimensions” section and change Width (and Height will change correspondingly due to constraining proportions) there to a larger number, then Width and Height in the “Document Size” section will also change to larger numbers. I hope that by now you gained sufficient understanding to explain this change by yourself.

There is one important thing to remember when changing dimensions of your photo in Photoshop – if you try to save the image larger than its original size, Photoshop will use mathematical algorithms to artificially add the additional pixels to enlarge your photo, which won’t always look smooth and natural.

That’s it. It is pretty easy when you take some time to understand the concepts. I hope that if you didn’t fully understand the discussed concepts before, you understand them now, and if not, feel free to leave me your questions in the comments section.

To wrap things up I’ll present some key points to think of when dealing with digital photographs

  • When saving photo for only web usage save it at resolution of 72 PPI

  • When saving photo for printing save it at resolutions of 240 or 300 DPI

  • When saving photo for web or for printing know the size of the photo that you want and save it at that size. This way you won’t waste storage space on your computer.

As always any comments are highly appreciated, and

Remember, you only have to enter your name to leave a comment!

Till the next time,
Cheers!
Greg.

Enhancing Photographs in Lightroom

There is so much talk about post processing, and whether it is good or bad. There are people who never post process their photos, and there are also people who always process their photos, and also anything in between.

I do process my images in Lightroom or Photoshop, but not always. Sometimes the weather is perfect, and the air is so clear that nothing needs improvement. But in our busy world, we don’t always have the time to wait for the perfect conditions, and have to settle for whatever weather there is when we have the time for shooting. In such cases post processing can significantly improve the end result, and it is very important to shoot RAW in such cases because it gives you more flexibility in post processing.

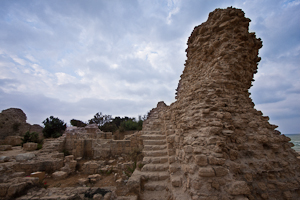
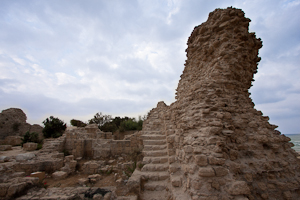
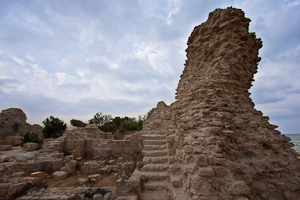
In this post I will walk you through my Lightroom post processing steps, using one of the recent photos I took. Below on the left you can see the initial photo of an old fortress that I took on early morning. Unfortunately the sky was covered with clouds so that there was no contrast in the photograph.

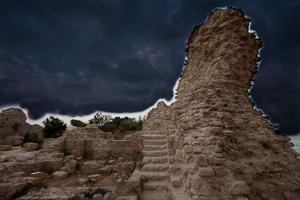
Below on the right you can see the final image, after I finished working on it in Lightroom 3.

Initial Image Final result after processing in Lightroom

Click on the photo to enlarge.

So how I achieved this end result? Let me walk you step by step. All the steps below were performed in the Develop module.

First of all the sky bothered me the most in my initial image. It lacked contrast and was completely colorless. So I opened the adjustment brush, set it up and covered the sky area. Below you can see the screen shot of the settings that I used for the adjustment brush. Let’s go through some of them:

Contrast – though in most cases increasing contrast is more useful, in this case with clouds decreasing the contrast revealed more detail in the clouds.

Saturation – I increased the saturation of the adjustment brush because I also changed the Color to a shade of blue (as I’ll show in the next screen shot), and for this addition of color to be seen better I had to increase the saturation.

Clarity – Clarity is always good for clouds :). Really, increasing clarity makes clouds pop.

Color – I decided to add a slight color tint to the clouds so that they won’t be boring gray, but still have a realistic color.

Feather and Flow of the brush are needed for creating smooth gradients between the adjusted and not adjusted areas. The values that you see here are not a must, and you’ll have to play with them to find what suits your taste.

screenshot_1

Below you can see the color selection box and the values that I chose. screenshot_2

Now, I painted with the adjustment brush over the sky. There is a slight problem when you want to paint with adjustment brush over large areas, especially when the changes that brush does are subtle – you might miss a few spots in the middle and even more at the edges. I found a pretty easy solution for this: temporarily, in the adjustment brush settings decrease the exposure value to -4 so that in addition to all your essential adjustments, you’ll also significantly darken the image in the painted area. This will make the painted area perfectly visible. Then, after selecting everything that you want, slide the exposure slider back to it’s initial position.

In the image below you can see the clouds painted over with the adjustment brush with exposure set to -4.

Click on the photo to enlarge.

And here you can see the result of painting with the adjustment brush after I returned the exposure slider to zero:

Click on the photo to enlarge.

After adjusting the sky I examined the overall look and decided to make a few more adjustments to the whole image. In the screen shot below you can see the initial settings, with which I started.

screenshot_3

Let me explain the adjustments that I did.

I decreased Exposure slider to -0.45 in order to reveal even more details in clouds, but this also darkened too much the lower part of the image. To compensate for that I increased the Fill Light slider to 20. After increasing the fill light, I felt lack of contrast in the fortress, so I increased the Contrast to +34. Next I increased the Clarity and Vibrance just a little for a finishing touch. In the screen shot below you can see the final settings.

screenshot_4

And this is how the image looked like after performing those changes.

Click on the photo to enlarge.

We’re almost done, but not just yet.

I stared at the image for a few minutes, and it seemed to me that something was missing. Finally I understood what it was – subtle vignetting. Let me explain. The shape of the right column together with the clouds create a sense of movement from the outer frame towards the center of the image, and vignetting would emphasize this sense of movement.

And here is the final image (same one as in the beginning of this post).

Click on the photo to enlarge.

So this is how I do my post processing – by first analyzing the image, deciding what is missing or could be improved, and performing the adjustments. Of course this whole process is not “scientific” at all. It is very intuitive and imaginative, because in order to achieve an end result you have to visualize it first. Sometimes though it is more like “lets move this slider and see what it does to the image”.

Did you find this article helpful? How do you post process your images? Any examples of before and after will be much appreciated, and

Remember, you only have to enter your name to leave a comment!

Greg.

How Photographic Ideas Can Come to You

This is a very interesting question you know. I am sure that anyone who takes interest in photography at times thinks about it. In my head sometimes these thoughts sound like “I’d really like to make a great photograph… yeah… but what should I shoot?… what should I create?…

If you really want to create something, especially if you are not sure yet what it is, you have to allocate a certain amount of time to thinking about it. I mean that you have to tell yourself – “today between 10:00 and 11:00 I am thinking about creating an interesting (also can be beautiful, romantic, breathtaking, sad… anything you prefer) photograph”.

I want to demonstrate this from my own experience. A few days ago I felt this urge to photograph something at my tiny home studio. I didn’t have any idea what it would be, but I just had this desire to create. So I made myself sit down for about 45 minutes, come up with ideas, and briefly sketch them on piece of paper.

My first problem was that not ANY idea that came to my mind was possible to shoot because I was limited to the objects that I had in my apartment. Having realized that fact, instead of just thinking of any idea for photograph, I started looking around my home at different objects and thinking how can I use them creatively?

While looking I saw my table lamp. Actually it was always standing on my table, but until I made myself to think creatively, I never thought about this lamp as a subject for my photographs. And then, while looking at this lamp I remembered of some TV program I saw as a kid that had these two lamps jumping around like live beings, and I decided to try and create something in that direction.

I still had no idea what would come out of it, and I didn’t have any definite final result. So I just started sketching this lamp standing on the table in different poses and thinking what can be done with that. No, I can’t draw, and it doesn’t matter, because you need sketching only to help your thinking process.

One of the ideas that came to my mind was to photograph this small lamp with it’s light bulb lying beneath it, while the lamp “sadly looking” at the bulb. And so I did as you can see in the image below.

thinking lamps

Photograph by Greg Brave. Click on the photo to enlarge.

In this image of lonely lamp looking at its light bulb I used only one flash from the left side with 1/2 CTO gel on it (this gel makes the white flash light to be warmer). I wanted a warm lighting here. Looking at the result I felt that it is not enough for an interesting image… I felt that it doesn’t conveys the “stare” of the lamp at the light bulb.

And then suddenly it hit me – I need another lamp to make this more interesting! And luckily my life partner Ira had one on her table. I took that lamp and started playing with two lamps. Finally great idea came to me – to make the second lamp “look” inside the first lamp as if to see “what happened? why you lost your bulb?” and so you can see my compositional setup in the photo below.

thinking lamps

Photograph by Greg Brave. Click on the photo to enlarge.

Now, having the final idea of a shot in place I started thinking of little details. I wanted to emphasize the fact that the second lamp did have its bulb. How would I do that? Well, I decided that I would light the whole scene with white light, but I would also have yellow (warm) light coming out of the second lamp towards the first lamp. And you can see in the photo below that the down-looking lamp is warm-lit.

The final photograph below I accomplished using three strobes. Two strobes without any gels from left and right sides (I had to play with their powers to achieve the desired lighting), and the third strobe with 1/2 CTO gel on it I held in my hand and pointed inside the first lamp.

thinking lamps

Photograph by Greg Brave. Click on the photo to enlarge.

After getting the final image above, I felt that there is not enough emphasis on the light that comes out of the second lamp. I wanted those rays of light to actually be seen. And here is a point that I am sure not all of you thought about. Rays of light are invisible unless they reflect off of something and hit our eyes. So in order to make these rays of light to be actually visible I had to have them reflect off of something – for example dust, or smoke. So if I would fill up the whole area with smoke then the rays of light would be seen. But then the rays of my two other flashes would also be seen, and the whole image wouldn’t be clear and crisp.

So I decided to take this work to Photoshop, and artificially add the rays of light, using the original light warmth that 1/2 CTO gel gave me (just used eyedropper tool in photoshop to sample that color). To give you an idea how I did it – think of Radial Blur filter in Photoshop. If you have additional questions regarding how I did it feel free to ask me in the comments. And for all the people who are against “Photoshop manipulation” –  in the case of this photograph my goal was not to show reality, but to convey an idea of mine, therefore I am totally cool with using Photoshop here.

Here is the final result, which I am pretty happy to come up with.

thinking lamps

Photograph by Greg Brave. Click on the photo to enlarge.

In conclusion – the main idea of this article is to show that in order to come up with interesting photographs, you have to allocate time for thinking – what you want to do and how you are going to do it. Even if you don’t have any specific idea in mind, just make yourself sit down and think for half an hour or so, and I am sure that you’ll come up with something interesting!

As always your thoughts and comments are welcome.

Do you agree with this article? If you don’t then why? Can you suggest additional steps towards being more creative?

Remember, you only have to enter your name to leave a comment!

Till the next time,

Cheers!

Greg.

Greek Church and Being Creative

I think that one of the most important aspects of photography is about joy of creation, expressing yourself and enjoying every minute of it. I always try to be creative, and though I don’t always get the desired results from my experiments I just continue trying. For me there is no other way. I try to put my heart and soul into my work mixed with feeling and emotions.

Today I’d like to share with you one of my attempts at creativity. It was a nice autumn weekend in Israel when me and Ira went to the Upper Galilee region to do a walking track near the Sea of Galilee. On our way back we stopped to visit the Greek Church of the 12 Apostles. This church always attracted me when I was driving by with its’ red roofs but I never had the chance to actually get inside.

This time we had about an hour, so we decided to finally give this church a closer look. I was so tired from our trip that I left my Canon DSLR in the car. I just didn’t have any mental mood for photography. But the closer we got to the church the stronger grew my desire to photograph it. Eventually I decided to photograph it with my iPhone.

This Greek church is very beautiful and is also located in a beautiful place. When we returned to our car I was surprised to find out that I took about fifty photographs of the church and its surroundings from variety of different sides and angles.

Another important aspect of photography (again, in my opinion) is to know how to choose your best photos, and to be brave enough to delete most of the rest. Otherwise you’ll end up with tons of photographs, which are very similar to each other (a tiny difference in a crop here, and in viewing angle there).

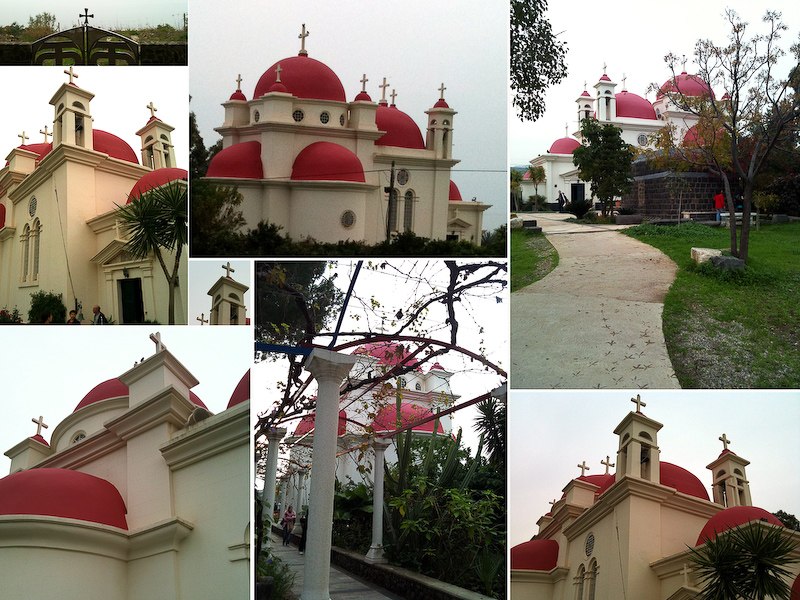
Thus on our way back (Ira drove the car) I went over all the photos of the Greek church that I took and deleted about 90% leaving only the ones I though were most successful. After that I started thinking – what would be the best way to present these photos in a way that would show the Greek Church of the 12 Apostles in all its beauty and also reveal some of the architectural details.

Eventually I decided to create a photo-collage of all the best photos. During the following months I was busy with other projects (including trip to Prague) and only recently got the time to put the idea of a photo-collage to test. It took me quite some time to do that as I had to change sizes, crops and other things in order to create what I had in mind.

Here is the collage of the Greek Church of the 12 Apostles. Remember that all the photos here were taken with my iPhone, and don’t judge the quality too harsh 🙂

And as always feel free to leave comments!

Cheers,

Greg.

Greek Church of the 12 Apostles

Greek Church of the 12 Apostles. Photograph by Greg Brave. Click on the photo to enlarge.

How to create HDR image in Photoshop

Recently I have seen many HDR images that were too exaggerated, making them completely unrealistic and in some cases even unpleasant to watch. Programs such as Photomatix make it very easy to create HDR images but they are also tend to lead people to create very exaggerated HDR images, maybe because it is very easy to accomplish in these programs.

I have nothing against using HDR techniques in creating artistic imagery, but I would like to remind you that the original intention of the HDR was just to increase the dynamic range of the photograph.

However with a little knowledge of Photoshop, you can do that – you can create an HDR image that will look very realistic but still show all the detail that you want it to show.

I created a pretty simple tutorial that shows how to manually create HDR image in Photoshop. In this tutorial I used two photos taken at the same location (using tripod), one exposed for the bright sky and the other one exposed for the darker lower part. Though I used only two photos, you can use as many photos as you like revealing detail in any part of the scene according to your preferences.

There is one point of this tutorial that I would like to stress out one more time – use large brush with soft edges and opacity around 50 to 60 percent. It is important so that your final image won’t have these “white glow” edges that can be seen in so many HDR images.

If you are new to the whole HDR thing, you can read my previous posts on the subject: HDR – Introduction and What is Pseudo HDR image?

If this tutorial helped you to create your own HDR images I would sure like to see them! But if you don’t have Photoshop, but still want to create HDR images, you might want to try Photomatix.

What is Pseudo HDR image?

In one of my recent articles I wrote about HDR photography (you can read it here). So I learned about HDR, and I played with it, and everything seemed pretty clear to me. Of course there are endless variations that can be done with HDR, and only your creativity is the limit, but during my explorations I kept stumbling into these strange words: “Pseudo HDR”. Most of the photos I saw under this title looked pretty much as ordinary photos, but some of them looked like real HDR, and if I wouldn’t see that “pseudo HDR” phrase, I would have thought that it was usual HDR.

So this got my curiosity up and running, and finally I found out what the words “Pseudo HDR” mean. I want to share this knowledge, and in order to do that I have to start with something else.

RAW camera format

Those of you who have advanced point-and-shoot cameras or any type of SLR camera know that you can choose that your camera will save the photos you shoot in RAW format (there is usually a choice between JPEG of different qualities and RAW).

When you choose to shoot in JPEG, it means that when you click on shutter release button, light comes through the lens and hits the digital sensor. Then the information from the sensor is processed by the internal computer of the camera according to the camera settings (choice of white balance for example), compressed to JPEG file format, and finally saved to the memory card. Now, and this is important, during the JPEG compression phase, some information that was recorded from the sensor during the shot is LOST forever. Because of this loss, when you process the image in photo-processing software, you are less flexible in the adjustments that you can do to the photograph without compromising its quality.

This is why there is RAW format. RAW format means that all the information that is recorded by the digital sensor of your camera during the shot is saved without any compression or processing by the camera’s internal computer. When you process RAW file in your favorite photo-processing software you can apply pretty radical adjustments to your photograph without compromising its quality.

One of such adjustments is exposure. You can pull up your exposure by about 2 stops without compromising image quality (well, maybe I exaggerated a little with two, but 1.5 for sure). I wrote especially about the adjustment of exposure because it is critical for the explanation of the Pseudo HDR, but another generally very important adjustment is white balance, so even if you set the white balance setting completely wrong during the shot, you will be able to change it during the processing.

Note: In order to process RAW files you will probably have to install special software (however in Photoshop there is a built in plugin – so that when you open a RAW file you will automatically get a RAW processing window. You can also process RAW files in Lightroom, and almost certainly in Picasa). For example Canon supplies RAW processing SW for free when you buy a camera.

And now I finally get to the point:

Pseudo HDR

Pseudo HDR photo is made from a single RAW file. As I said you can change the exposure settings of the RAW file without compromising on image quality. So basically you open the same file two or three times, each time setting different exposure, revealing different areas. Thus in low exposure you have good highlights, and in high exposure you have good and visible shadowed areas. Then you merge this to a single pseudo HDR image. You see, it is not a real HDR image, you didn’t take three different photos taken with different exposure settings, but you achieve similar effect.

Of course there are some drawbacks. For example if the scene you shoot has very deep shadows and very bright highlights, then single RAW photo just won’t do it because there is a limit to how much exposure range you can pull from a single photo.
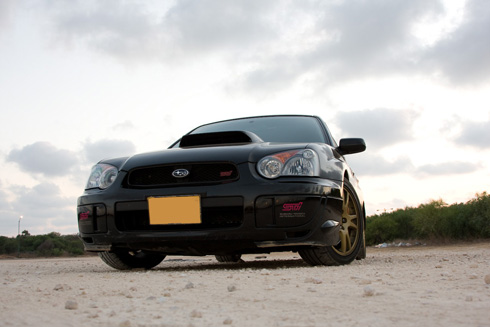
So pseudo HDR is mostly used when you only have to make slight adjustments to the picture. For this article I tried to take Pseudo HDR to extremes and here is what came out of it.

This is the photo without any adjustments and exposure changes ( shot in RAW format):

Pseudo HDR image before adjustments

And here is what came out after processing this single shot using exposure and other adjustments:
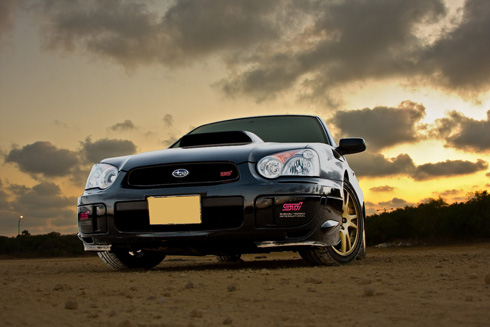
Final Pseudo HDR photo of Subaru Impreza STI - Racing Car

You can see that in the final photo shadowed areas are more clearly visible, and hilights (the sky) are not burned. I created this pseudo HDR photo in Photoshop, but if you don’t have Photoshop, or want an easier way to create HDR or pseudo HDR images, check out Photomatix.

Creating a Banner from initial Image

I bet that some of you had to do this: you had to create a desired size image from a photo. But you needed this new image to be a certain part of the initial photo (with a specific dimensions) but without changing the aspect ratio of the image – so it will still look natural.
Recently I had to create a head-banner for a web site of my friend. He gave me initial image and asked me to make a banner of a size 800×250 pixels from this image. It turned out to be not as simple as I thought at first, but finally I managed to do it. I want to share what I learned and so I created a tutorial.
So here we go: