
Category Archives: Photography
Everything photo-related from my point of view.
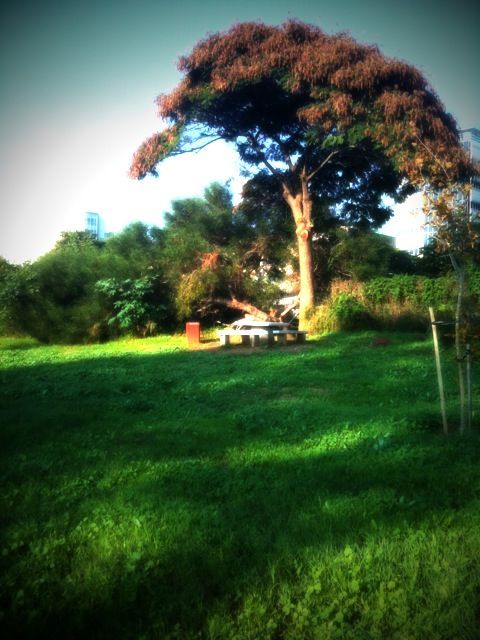
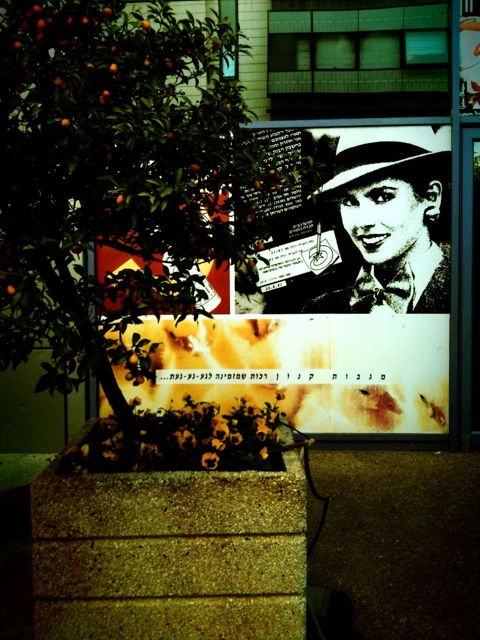
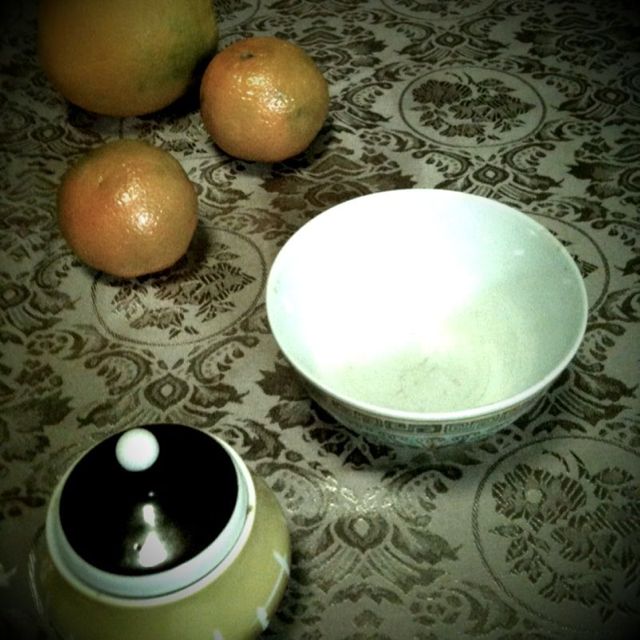
Mantree

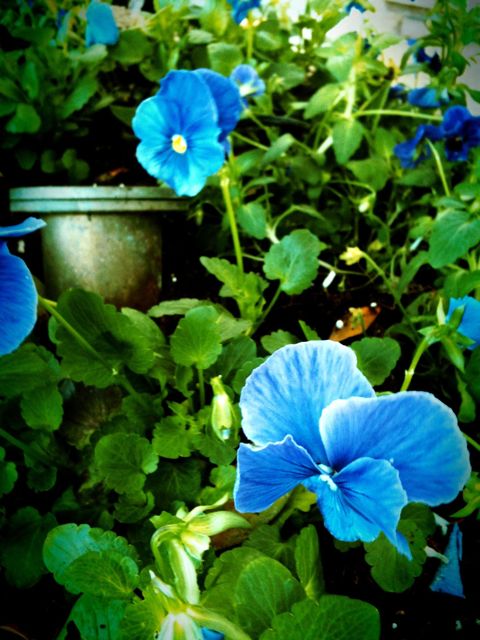
Blue…
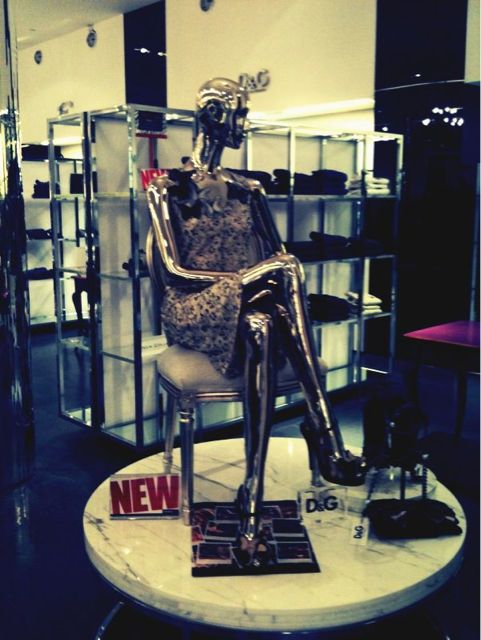
Almost Human…
No Comment

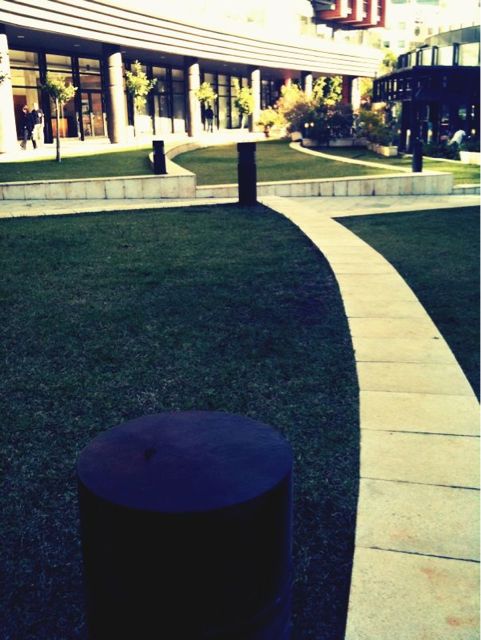
Diagonals and Curves
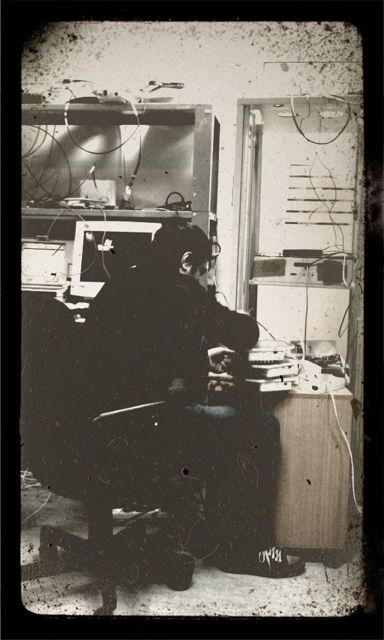
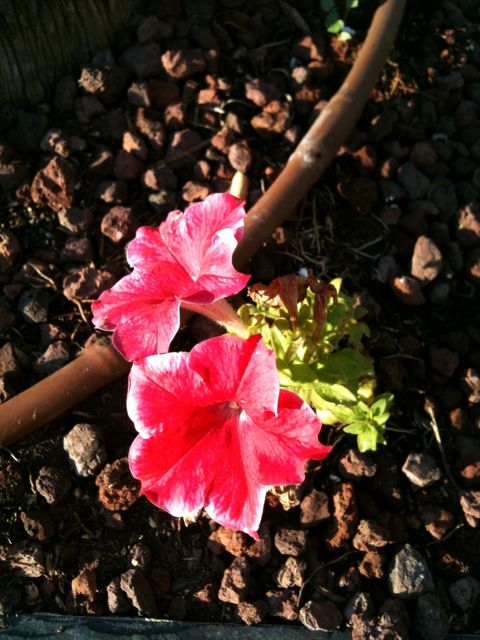
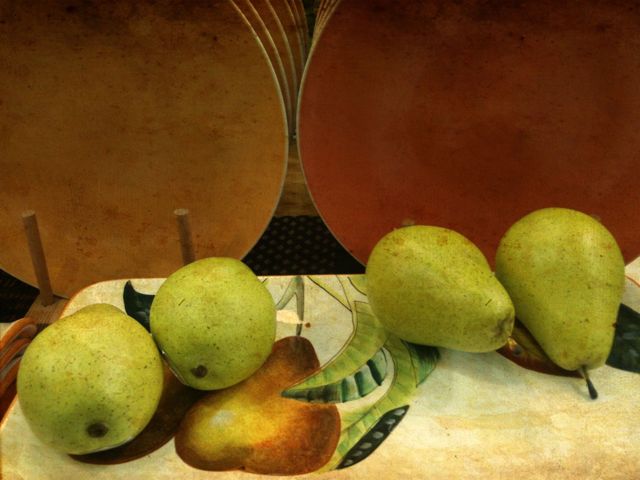
Coffee?

Resting Place
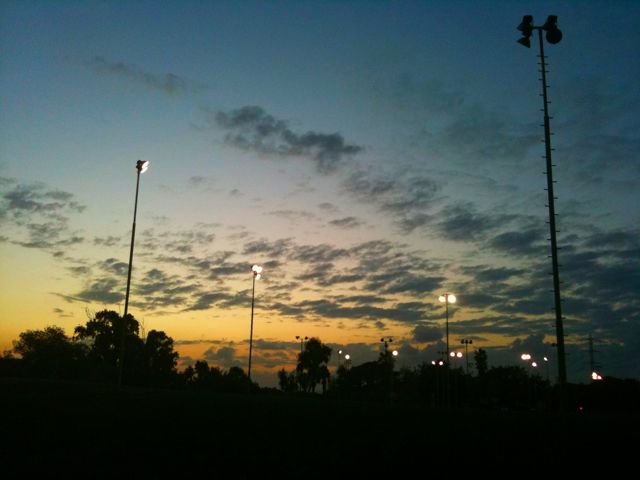
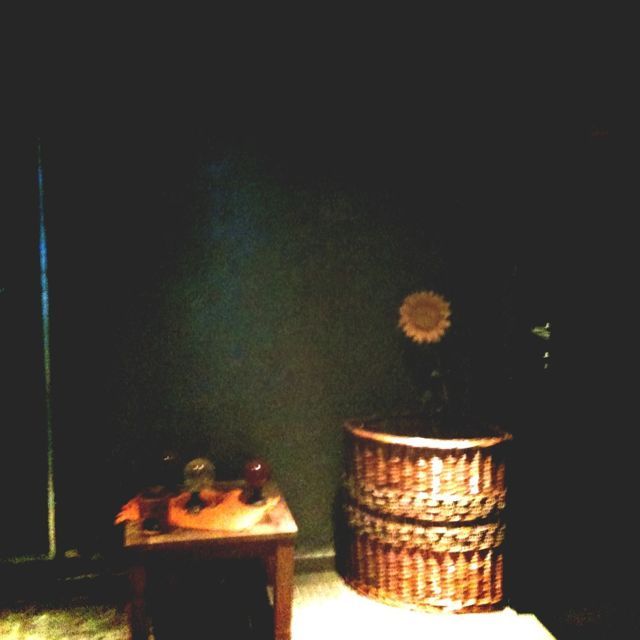
Night is coming
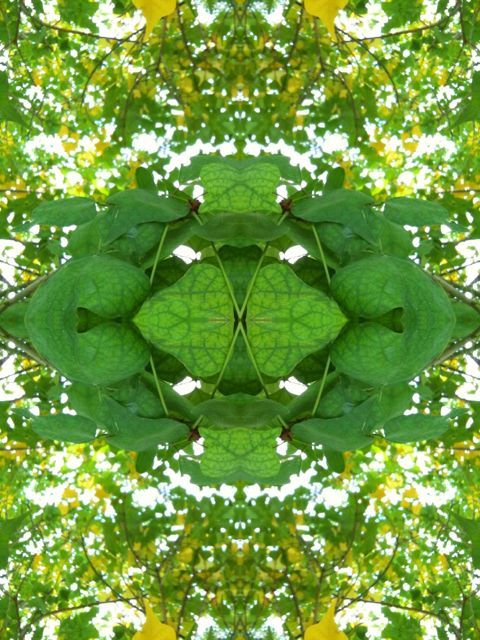
Playing with form
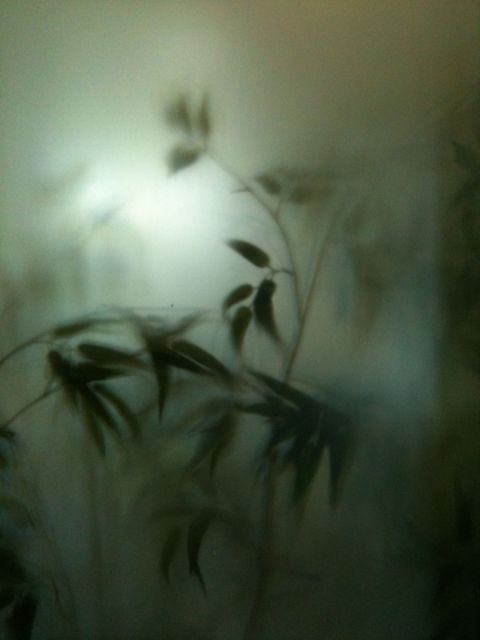
Vague
Color
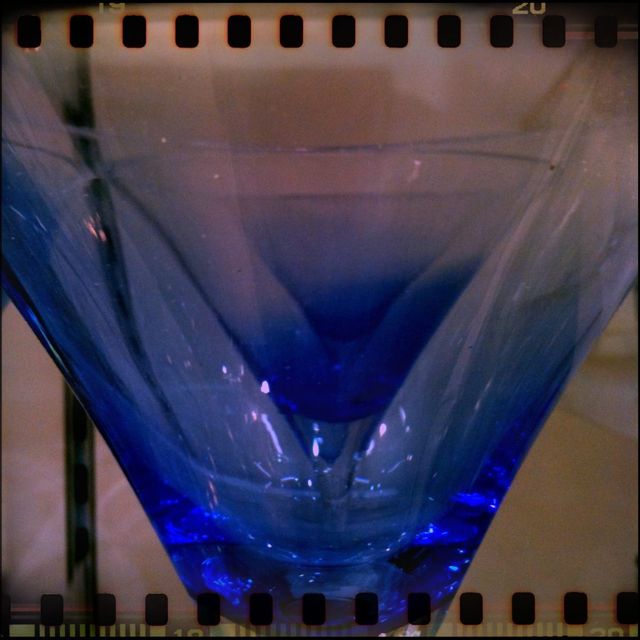
Glass

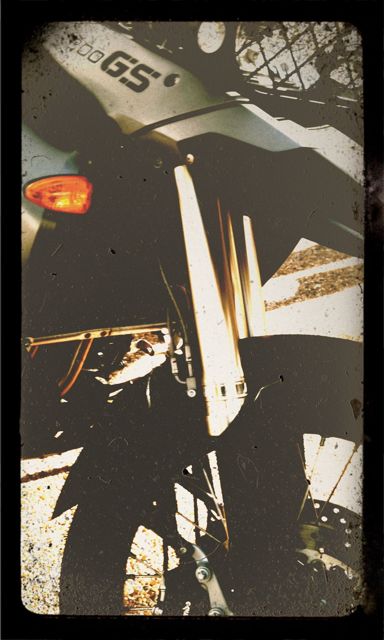
Tripod Holder for Kata 3N1 Bag Review
Few months ago I posted a review of the Kata 3N1 Bag.
In the review I mentioned that the bag doesn’t have anything to attach tripod to, and it was a “con” for me. Shortly after that I was contacted by Kata representative and informed that there is an accessory tripod holder that can be attached to the Kata 3n1 bag. Kata guys have been very nice to me and sent me the tripod holder so I could check it out.
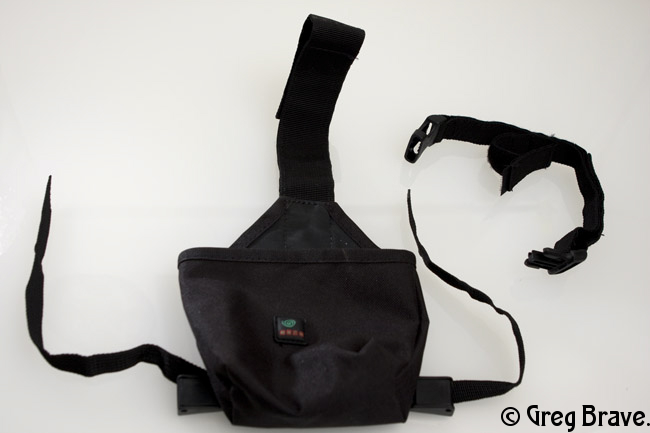
Click on the photo to enlarge.
I have been using it ever since and here are my conclusions on this accessory.
Though it looks like the Kata 3n1 bag wasn’t designed with this tripod holder in mind, it attaches pretty firmly to the bag. The tripod then is easily attached to the holder, and it is very easy to take the tripod off.
I tried to use the holder with my big Manfrotto tripod, and succeeded, but it is not very convenient to walk around with it, because if your tripod is large, it will stick way above your backpack.
Another drawback is that when you have your tripod attached to the bag, you won’t be able to open the main compartment from the top. You’ll only have side access. For me it was not a problem since use the side access 90 percent of the time.

Click on the photo to enlarge.
In conclusion, though it is not perfect, the tripod holder for Kata 3n1 bag does the job well. If you already have the Kata bag and need to carry a small-medium tripod with you, then go ahead and get this accessory.
If you found this review to be useful, please consider supporting my site by buying this tripod holder through my affiliate link.
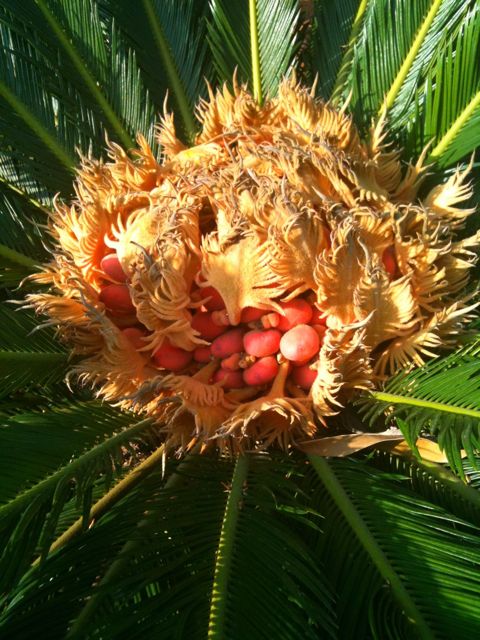
Exotic
Patterns
Predator

Color Harmony
Many Dimensions
Invitation
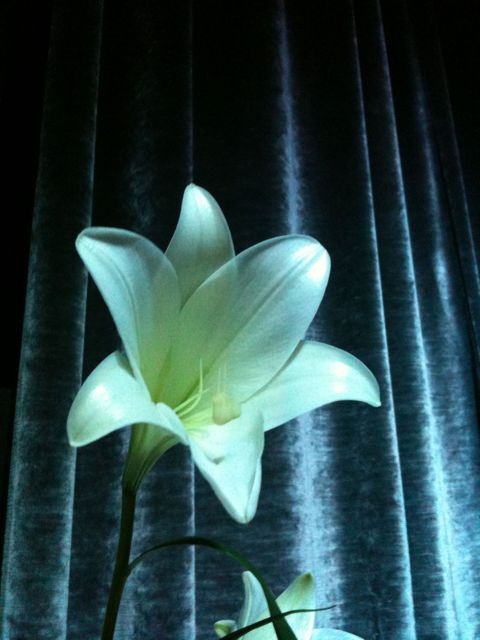
White On Blue
A friend of mine

Industrial Curves
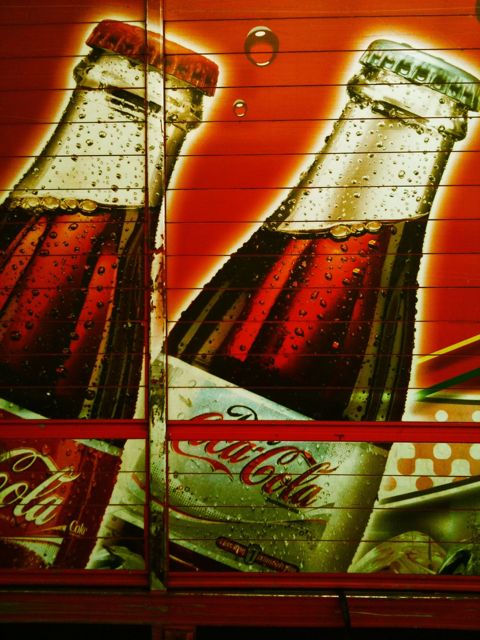
Always Coca-Cola
Wireless Flash Triggers
Starting to work with lighting the first thing you hear is that you have to work with off camera flashes. So you get a flash sync cord. But then you want to have two, three, or more flashes in your setup and encounter the problem triggering them all at once.
Then you find out about the wireless flash triggers and start looking into that. The first wireless trigger you find is the “Pocket Wizard” which is the most popular but costs a fortune, and you say to yourself – “I can’t afford this luxury of wireless triggering my flashes”.
And finally you find this post, where I write about my cheap wireless triggers 🙂
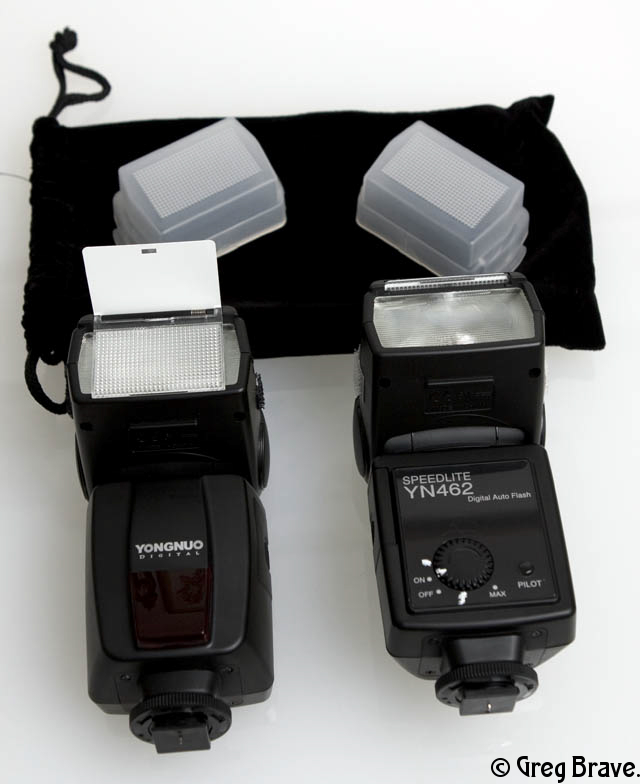
I found a cheap solution for wireless triggering my flashes. Same company (Yongnuo) that manufactures the flashes I wrote about, also makes wireless triggers for flash devices. They are cheap and have a 30 meters working range.
You will have to buy one transmitter, which goes on camera, and as many receivers as the number of flash units that you have. For example a bundle of one transmitter and two receivers on Ebay costs about $52.
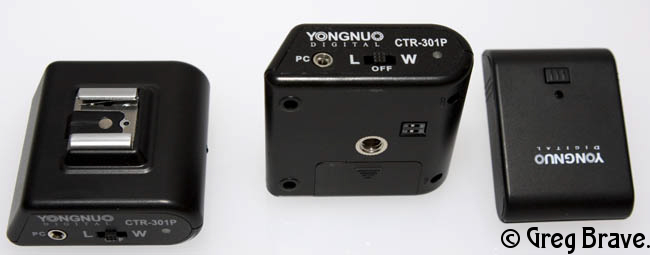
Their single disadvantage for me was that the receiver has only the regular tripod mount (as you can see in the picture), but I needed it to have the hot shoe mount. In order to solve this problem I bought flash sync hot shoe adapters ($12) for each receiver (see the photo below). However there are similar wireless flash triggers (also Chinese and cheap) that come with hot shoe mount.
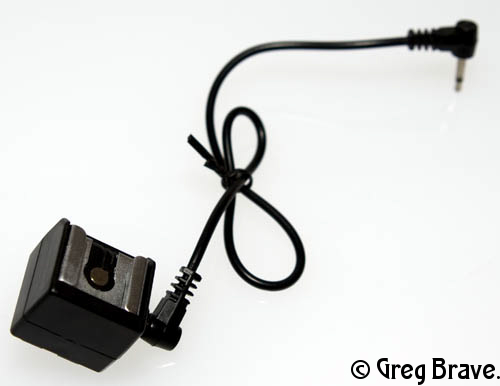
I mount the flash on the flash sync hot shoe adapter and connect it to the receiver with PC cord.
Additional advantage of these wireless flash triggers is that they can trigger the flash in two ways:
1. From the transmitter that you put on your camera.
2. From any other flash that fires in their line of sight.
Disadvantages of these wireless flash triggers may be in the build quality. I am working with them only couple of months (and they worked good until now), and I have no idea for how long they will function properly. Compared to pocked wizards their working range is pretty short but personally I never encountered (or could think of) a situation where 30 meters weren’t enough for me.
In conclusion I think that these triggers are perfect for beginners, and who knows, maybe I won’t ever consider upgrading to anything else.
Tea for one
Quiet Spot
Daily Photo from my iPhone – Introduction
About a week ago I received a birthday present from my sister. Though my birthday is still a few months away, my sister knew that I really wanted this present so she didn’t keep me waiting and simply gave it to me – the new shiny iPhone 3Gs!!! And, of course, first thing I did with it was to check out the camera it has. I played with it a little and the best thing about this camera is that it is always with me. I noticed that amount of photos that I take grew significantly since I first laid my hands on the iPhone. In addition I got several programs for iPhone that create various effects to the photos and enjoyed playing with those also.
In order to improve my photographic skills (mostly composition-wise) I decided to take on a mission (!) – post one photo each day, here on my blog, directly from the iPhone. Each day I will choose one photo from my daily shots and post it on the sidebar. This way in the future I will be able to see my evolution in photography from these daily photos. I also think that it can be interesting to you, my readers. And yes, I know that the technical quality of the photos from iPhone is much worse than from my DSLR, this is why I am aiming mostly to improve my compositional photographic skills (and not technical) through this project.
As always, your thoughts, comments, critiques and anything else that you’d like to share are highly appreciated!
Till the next post, take care!
Cheers
Greg.
Can’t take it no more!
Vintage
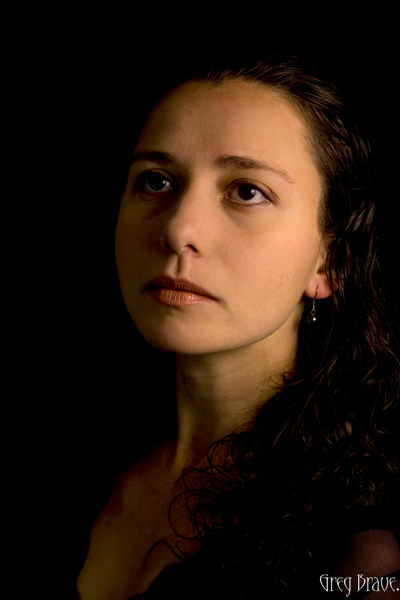
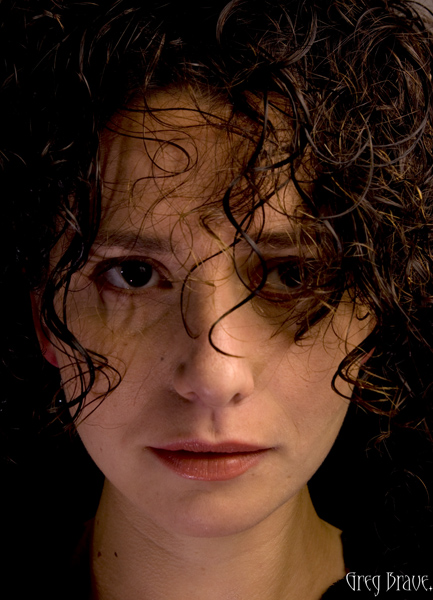
Beginnings in portraiture
As a result of my interest in working with light in photography I am starting to get interested in portraiture. From time to time I stumble across a good portrait on the net and find myself thinking about how photographer achieved the final result, and what things he had to consider before making the portrait. I also think about the lighting techniques used in different portraits. Finally I decided to give it a try myself. In the following photos you can see what came out of it.
My lighting equipment was pretty simple: Two flashes (Canon 430EX and Yongnuo) One flash was used as a main light placed on a light stand shooting through umbrella. Second flash was also on a stand but without umbrella used mostly as fill light or hair light. I had a piece of black fabric for the background, but in any case my ambient light was pretty low and most of the light came from flashes.
This portrait is pretty straight forward. I think that my lighting is a little harsh, and I don’t have a hair light from the left/top to separate the model from the background. I could say that I intended it to be that way… but I didn’t 🙂
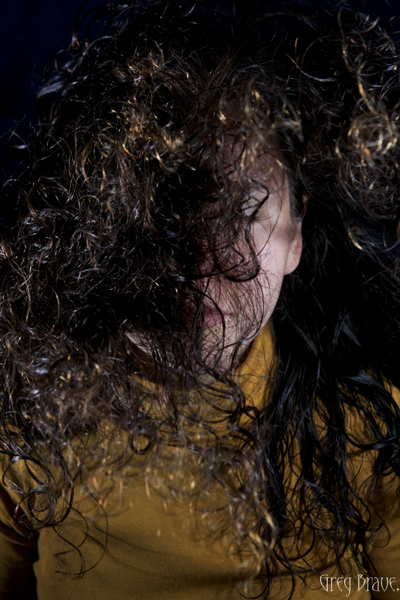
In the next two photographs I experimented with different facial expressions that in my opinion suited the model. I chose B&W because of two main reasons:
1. There were not many colors in the scene anyway, and I wanted to make the viewer concentrate on the expression of the model.
2. I confess – I couldn’t achieve the skin tone that I wanted.
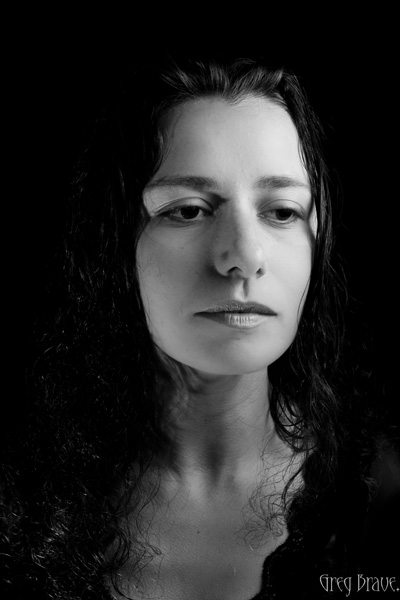
I noticed an undesirable shadow near model’s right eye only after the shoot so I couldn’t do much about it, but I sure will pay more attention to this kind of details in the future.
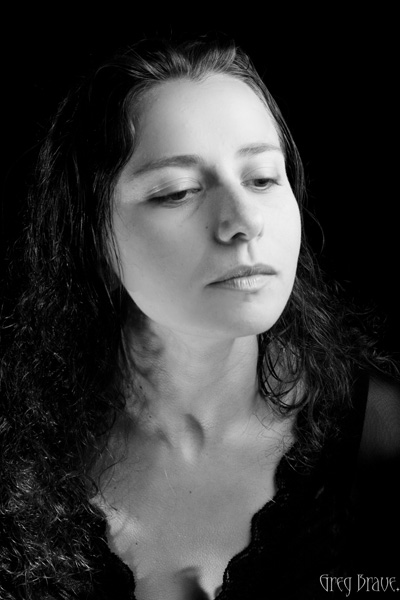
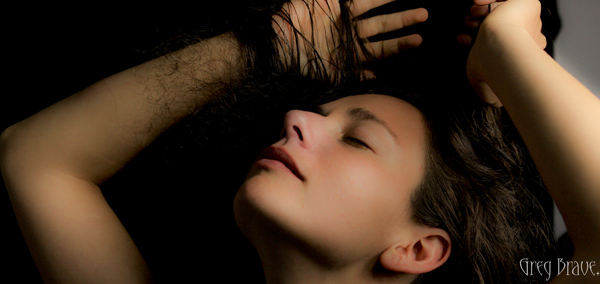
While shooting I asked my model for different poses (even though it was a strictly portrait shoot, I think that pose affects the facial expression), and at first I took all the control. What I mean is that I told her what to do, where to look, where to turn her head, etc.
But at some point I told her to feel free to do what she wanted, to pose as she would like to be photographed herself. And it was the best decision I ever made in that shoot.
Just look at the following photos.
And as she got more relaxed I could get more interesting photographs. Here is an example of one, which I especially like:
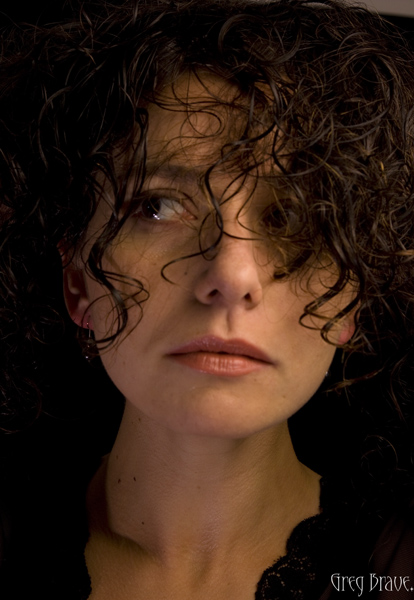
I felt great after this photo session because finally I got to try something that I thought a great deal of. I doubted that I could get any satisfactory results. And though I do understand that I have a long way to go from here, I still really like these photos and they keep me motivated to continue improving my skills.
I will be more than grateful for any comments or suggestions. Feel free to comment on my work – it will help me and other readers a lot!
And here is one last photo from that photo session:
Until next time,
Take Care!
Greg.
My Lighting Equipment
After I wrote several posts about lighting (Light Study I, Light Study II, Patterns and Light Study), I received several responses from my readers saying – “You have up to three flash units in your setup! That is expensive. Not many amateurs who would like to experiment with lighting can afford that.”
Well, this is not exactly true. I agree that Canon flashes are expensive (even second hand), for example I bought my primary Canon 430 EX flash second hand for about 240 USD, and Nikon flashes are in the same price range. There are additional known brands that are a little cheaper but still expensive.
But I found really cheap flashes on e-bay from Chinese company named Yongnuo. Two of them cost me on e-bay only about 95 bucks (for both). Now you have to agree that this is cheap and much more affordable than branded flashes.
Of course there are pros and cons to such a purchase. Let me list here some of them:
Pros:
- Price. Very affordable flash units.
- Flash comes with diffuser dome, built-in bounce card, and wide angle cover (see on the photo below)
- Flash head can be rotated in all the common directions almost the same as Canon/Nikon flashes.
- The output power of the flash can be controlled (but look at the “Cons” section also)
- GN number – 33, which means that this flash is pretty powerful.
Cons:
- Recycling time of 5 seconds. My Canon 430EX recycles at about 2.5 seconds with Ni-Mh batteries.
- No ETTL controls (so that flash power has to be set manually)
- No flash zoom adjustments.
- Power is controlled by turning wheel (see the photo below) and not digitally, so I can’t set, for example, exactly 1/2 power. I can do it only approximately.
- No PC sync connector (but actually my Canon 430EX doesn’t have it either).
- I am also not sure about the build quality. What I mean is that externally this flash looks good, but I don’t know how long it will work. Until now I have been using it for two months and didn’t have any problems.
Looking at the pros and cons, I can say that some of the cons are not that important to me – for example the fact that there is no ETTL controls doesn’t bother me because I always work manually with these flashes. I use them primarily as off camera flashes with remote trigger. If I have to use flash on-camera, I use my Canon 430EX. No flash zoom adjustments are also not that important – if you put your flash behind an umbrella or put a gobo on it – the zoom doesn’t really matter. Even without all this, you can just vary the placement distance of the flash.
I would like to warn you again – I can’t guarantee that the build quality of these flashes is the same as the branded ones. It probably is not. But in my opinion for beginners they can be a perfect start.
In conclusion – if you have the money buy the good and proved branded models, but if your budget is limited like mine and you still want to learn how to work with light, these Yongnuo flashes are good solution for starters.
The white marks that you see near the power wheel are made by me.
In my next post on lighting I will talk about my remote flash triggers. So everyone interested – stay tuned!
If you got interested in these flashes you can visit the e-bay store where I found them. This is not an advertisement, I am not affiliated in any way with that store and don’t receive any benefits if you buy there.
Light Study (II) – Flashes and Macro shooting
My personal study of light continues and this is the third post, which I am writing after another several hours of playing with light. My first post on this is “Patterns and Light Study” and second is “Light Study (I) Working with flashes”.
This time I was inspired by some abstract photographs I saw on the net, and wanted to try and do something abstract (or almost abstract 🙂 ) myself. For this shoot I used Canon 100mm F2.8 Macro lens, and two flashes with gels on them. The colors that you see on the final photographs were not edited in photoshop. I achieved them only by lighting, and of course this Canon macro lens is great!
As I said I wanted to achieve abstract photographs with certain aesthetic value main goal being my personal study of light techniques. First of all I needed a texture, so I walked around my apartment and searched for something suitable. Eventually I found a big blue plate with interesting ornament. Then I filled it with water (since the plate wasn’t deep, I had to be careful not to spill). Finally I had to decide on lighting. Because the plate was blue, I decided to choose a matching blue gel on my main flash to the right of the stage. I also wanted to have more than one color in the frame so I added another flash with pink-red gel to the left and a little behind the stage. I set the second flash to lower power than my main flash. Both flashes were with gobos (if you don’t know what gobo is, read my previous post).
[kml_flashembed movie=’http://www.photopathway.com/Gallery/Slideshows/light2/loader.swf’ height=’500′ width=’650′ base=’http://www.photopathway.com/Gallery/Slideshows/light2/’ wmode=’transparent’/]
The first photograph (from the left) is simple this plate with water (which is not seen). You can see that the strong foreground blue color slightly changes to purple towards the back due to the second flash coloring. And also because I was using a macro lens from close distance, the depth of focus is pretty low.
Then I thought of making some splashes in the plate and see what happens. Everybody saw at least some photos with water drops and ripples, so I thought that I can also try some of that, and my second photo shows one of the many interesting pictures I got.
When I had enough of playing with splashes, I added a sunflower petal to the picture and dropped a small water drop on it. Now I had to change my secondary lighting because the petal was yellow, and red light didn’t do it any justice. After experimenting I finally decided to put very light green gel on my secondary flash, and it resulted in emphasizing the yellow color of the petal with light and gentle shades of green. Third and fourth photos were taken with this setup (left flash on low power with light-green gel and right flash with blue gel).
And finally the fifth photo was taken using only the left flash with light-green gel on it. I worked on this photograph for quite some time to achieve the deep interesting shadows.
As always any comments and your own experiences are welcome!
Light Study (I) – Working with Flashes
Finally two additional flash units that I ordered on e-bay arrived and I could experiment with more than a single light source. Now I have one Canon flash (430 EX, bought second hand) and two Yongnuo flashes. Yongnuo (full name is Shenzhen Yong Nuo) is a Chinese company, which makes photographic equipment. They sell many products, which can be cheap replacements for the branded expensive Canon or Nikon stuff. For example these two new Yongnuo flash units cost me less than one Canon 430EX second hand! Anyway I’ll talk about the equipment in another post.
Basically what I was doing in this photo-session is placing light sources differently, shooting the picture, and looking at the result. My aim was to be able to predict how the image would look like so in the future I will be able to first visualize in my mind certain composition and then consciously achieve it using my light sources.
At first I couldn’t get any result that would satisfy me, my light was too scattered around and uncontrollable. Then I understood that I need more directional light, so I created gobos. This is something I learned from Strobist. You know that website right? If you don’t and interested in light, you definitely should visit it.
Anyway gobo is a simple cardboard rectangle box that you can do yourself. You then place it on your flash so it directs the light from it in one direction. And this helped a lot in achieving more predictable and neat results.
In addition I used colored gels on my flashes. Gels are transparent colored plastic stripes that you put on the flash to make its color different from daylight. By the way, there is one trick I learned myself in the process: if you use these gels, and work with auto white balance, your camera may try to adjust its white balance incorrectly since there is too much colored light in the scene. My solution was to put the white balance to “daylight” and that solved it.
[kml_flashembed movie=’http://www.photopathway.com/Gallery/Slideshows/light/loader.swf’ height=’500′ width=’650′ base=’http://www.photopathway.com/Gallery/Slideshows/light/’ wmode=’transparent’/]
And now to the results I received, and what I did to receive them:
In the first photo (from the left) I used two flashes. Both flashes were with gobos. The flash on the right side was without gel, and I pointed it more to the “base” of the light bulb. The flash on the left side was equipped with red gel and gobo, and was pointed a little above the lamp. This way I got less specular highlights on the light bulb. Both flashes were on manual control and placed approximately at the same distance from the subject, but the power of the left flash was weaker. This way I tried to achieve the feeling that the light bulb is glowing with red light.
In the second photo the setup was essentially identical to the previous one. I just added blue gel to the right flash. While this added interesting color to the photo I tend to like the first photo better because in my opinion it better achieves my goal – getting the light bulb to glow with red color.
Next two photos are of a champagne glass lighted with the same two flashes (still having gobos on them) left flash with red gel and right flash with blue gel. The difference now is that I put the left flash on minimum power so there would be much more blue and only a touch of red. Of course I achieved the result you see in the photos by trial and error.
One more thing to notice is that the background is almost completely black. This is not because I had a black backdrop. Actually my background was plain white wall, but all my light was directional (thanks to gobos) and none of it got spilled on the background. And since I worked with exposure settings that were too “low” for the ambient light in the room, as a result the background was heavily underexposed. If I wanted to have a background, I could use my third flash to light it.
That’s it for today’s photo-session. If you have any questions or comments, please feel free to leave comments here or drop me an email and I will be happy to get back to you. And, of course, your own experiences will be highly appreciated!
Just one more thing – don’t forget to visit the Strobist web site – I learned a lot there and sure that you would too!

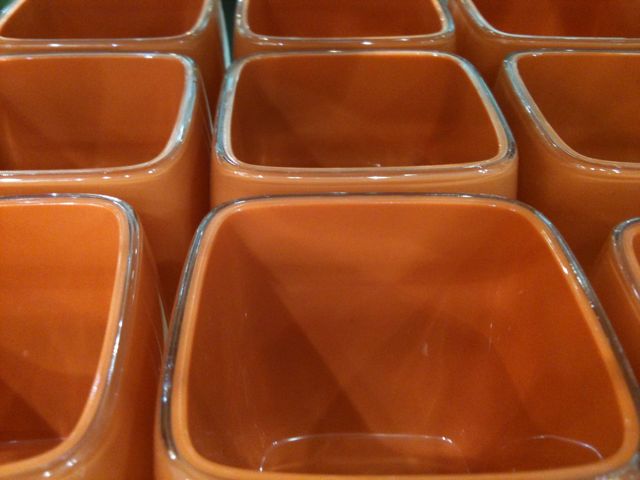
Patterns and Light Study
Recently I have built a photographic table in order to improve my photographic skills, and now I am studying light and compositions. By studying I mean reading some books, looking at many photographs from a good photographers, and, of course trying to shoot myself.
In this photo session I was trying to create a repeatable pattern from some cups that I have. I saw that I could arrange them in some interesting ways but something was missing from the overall composition. After a long hard thinking and trying I finally came up with the idea of grapes. When I added grapes to the composition, I felt that they contributed a lot and I tried to arrange them in various shapes. By the way, I had to wash these grapes pretty hard in order to get rid of any dirt and fertilizer remnants.
In the first two photographs you can see two of the most successful patterns I could come up with.
However I had one more problem during my shoot – the Light. I had only one flash and it was without any diffuser, so I had to find a right place for it, so that the final lighting would be satisfactory.
I finally placed the flash on a stand on the right side of the composition, about a meter above, and not facing directly to the subjects but pointed “above” them, hitting a white wall behind.
You can see that the shadows inside the cups in the second photo are going rather steeply down as a result of flash placement. I also had to shoot my composition at such an angle that these shadows (inside the cup) wouldn’t be too harsh and too visible.
Another important thing composition-wise was to make the reflections remain in the frame, which gives additional dimension to the final photograph.
In the third photograph I tried to create another interesting form. Originally this photograph isn’t as tightly cropped, but putting it in this slideshow somehow cropped it. I am still new to making slideshows like that, and I will have to figure out why it happened.
Will be glad to hear any opinions and to answer any questions regarding these photos.
[kml_flashembed movie=’http://www.photopathway.com/Gallery/Slideshows/cups/loader.swf’ height=’500′ width=’650′ base=’http://www.photopathway.com/Gallery/Slideshows/cups/’ wmode=’transparent’/]
My Photographic Works
Anyone who finds a site about photography probably asks himself – who is the guy that writes this stuff ? What does he/she shoots? I think that these are very legitimate questions. You wouldn’t take a legal advice from a taxi driver, would you?
In order to provide an answer for such questions regarding myself I created a website where I display my photographic works, and here I will make a short tutorial around my website.
“IsraNature”
As I wrote in my About page, I am relatively new to photography and I started my “PhotoPathway” from photographing nature, plus the fact that I currently live in Israel – and there you have it: IsraNature.
Most of this website is dedicated to the Nature of Israel, but there are also a few albums from my trips abroad, and I imagine there will be more of them in the future. Most of the albums are named after different places in Israel that I photographed, and some of them have general names like “Nature of Galilee Region”. In such albums I put photos that there are not enough of them to create designated album for the specific place.
In the album named Artistic Impressions I put my artistic works that I like the most. Here is an example:

If you like my photographs and want to see new photos that I add to my site, you can just visit the homepage of my site. There will always be my latest photographs.
You can also reach IsraNature from the thumbnails on the sidebar of this blog and from the top menu. I will appreciate any comments on my photographs. I am always looking for other people’s opinion on my work.
Sharing a personal achievement and a few tips
Good day everybody!
I hope this day was as good for you as it was good for me. My photo was printed in National Geographic magazine, Israeli August issue! I wanted to share my joy, and I’d also like to explain how I did it. I imagine that this is a dream for many photographers.
As you know (or might guess) there is a National Geographic web site – www.nationalgeographic.com. At their web site they also have a section named “Your Shot”. In this section people from all over the world submit their photos. Each day twelve photos are picked to be displayed on the site that same day – they call it “The Daily Dozen”. But in addition photos that editors like the most are picked and printed in the printed version of National Geographic magazine.
Since many countries translate National Geographic magazine to their language, they also add to each issue some articles regarding the local country. In that section they sometimes also print photos from local photographers with a few lines about the photographer and the photograph.
I created an account at National Geographic Your Shot section and uploaded my photo there. It turned out that they liked it in NG headquarters in Washington and also in Israel, contacted me and asked for a little info about me and the photograph. Then after a month or two – voila! my photo was printed, and I also received a free issue of that month.
Now I will show my photo (show off!!!) and describe how I shot it. First of all here is the photo:
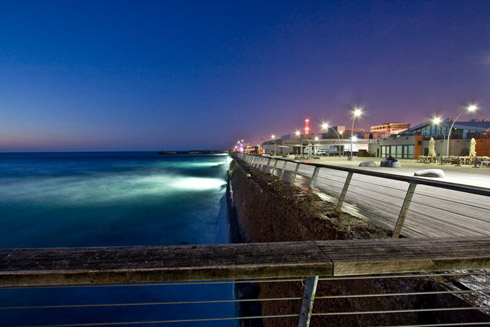
I took this photograph about 40 minutes after the sunset, and in addition I was using polarizer to reduce the light even more. Actually polarizer created an additional effect – it made colors more saturated by eliminating the reflections (or anything that was left of them after the sunset). Of course I was using a tripod and a remote shutter cord to eliminate camera shake. The exposure time was 25 seconds and the aperture was f7.1. I used wide angle lens (Canon 10-22mm) at its almost widest angle (12mm).
The interesting thing about this photograph was that during the 25 seconds of exposure many people went by, but they are not seen in the photo! It was because people were too dark and stayed too short time inside the frame to get “noticed” by the camera. The only person that is visible is the one that was sitting during all that time on the bench.
I shot several photos at that location slightly changing the composition. I had a shot without the rail in front. That shot was “divided” in two sections – the sea, and the boardwalk. I felt that it was out of balance, and searched for something to balance the photo. The rail across the bottom of the photograph provided this balance creating the final shot I was satisfied with.
You can see more photographs from that day on my web site where I display my work: IsraNature in the album named “Sea World”. Well what the heck – click here to go directly to that album. I recommend watching all the photos on full screen (there is a button at lower right corner).
And last but not least here is the link to the National Geographic “Your Shot” section: Your Shot
Kata Bag 3n1 20 Review
I decided to write this review since I have this bag for more than 7 months now and have been using it a lot. Before I bought it, like most of us do, I searched the net for reviews and thought I’ve got it completely figured out. I was sure back then that this bag is exactly what I need. And now, after months of experience with it I would like to share my conclusions and hope they would help some of you to make the right decision.
Buying Kata 3n1 (20) bag my requirements were:
1. I like to hike a lot, mostly one-day hikes, and I always want my camera with me. So I needed my photo bag to sit comfortable on my back.
2. Usually I take three lenses on a hike with me, all of them being Canon lenses: EF-S 10-22, EF24-70 2.8L, and EF70-300 f4-5.6. I needed my backpack to have room for these lenses, their hoods, 40D camera body, two polarizing filters and some additional stuff.
3. All the equipment should be properly stored but easily accessed when I need it.
4. Sometimes I take a tripod with me.
5. I also wanted a very durable bag that would provide a proper protection for everything I put in it since I am not so gentle with my equipment (except lenses of course!!!).
So did Kata 3n1 20 bag do the job?
Let’s go over each requirement and see:
1. This bag has very versatile shoulder straps. You can unclip each strap at its base and clip it to the other side making it possible to carry the backpack in three different positions: the usual backpack position, the sling position, and the x-position.
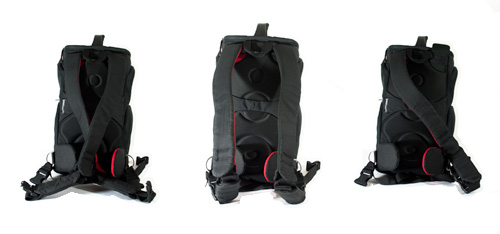
I tried all of them during my hikes and here are my conclusions:
The usual backpack position is the most comfortable one. I could hike for hours on rough terrain with backpack sitting comfortably on my back. The X-position is not very comfortable. I couldn’t walk long distances using it because x-shaped straps started pressing on my neck and shoulders and I had to pull them to the sides with my hands. Also the sling position, which is very convenient when you want to quickly get your camera, is not very comfortable. I couldn’t hike long distances using this position – the weight on a single shoulder (and neck) was too big. I think that if your gear doesn’t weight as much as mine, then you could use the sling position, but since I had to carry pretty big weight I didn’t find it useful.
2. I have enough room for all the equipment described above and I even have some free space left. So this requirement was fully satisfied.
3. But having this equipment organized conveniently is whole another story. The easiest thing is to get the camera with attached lens out of the side opening (the bag has openings from both sides so you can choose which side you want to use). But when you want to reach other lenses, it is not so easy. You have two options: a. To try and pull the lenses through the side opening and this is pure hell. And b. To take the backpack off your shoulders, put it on the ground (or table, or something), open the central compartment and take out what you need. Even the second option is not as easy as it seems since the central compartment can’t be fully opened – you can see it from the photo:
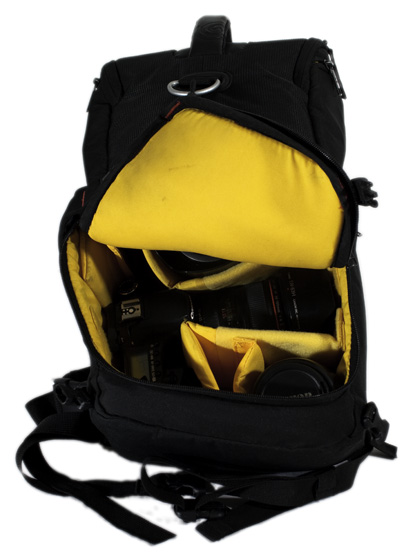
So when I put a lens in the far end of the bag then it won’t come out as easily as I would like it to. I have to say that the top compartment is very good. I like the way it opens and although it seems pretty small, I manage to put there quite a lot of stuff. I also like the handle on top. Two small side pockets on the outside are good for ipod, filters and cleaning cloths.
4. There is nothing on this bag that allows to attach a tripod, and this is too bad. If it had only a little something that I could use to securely attach a lightweight tripod, I would be a much happier man 🙂
5. This bag is very and I mean VERY durable. Its build quality is excellent. Much thought was put in all the weak elements, and in this bag they are very strong. All the gear is perfectly protected inside the bag, and it also has a rain cover. I took it on several hikes during rain and all the equipment stayed dry. I couldn’t say enough good things about the materials and the build of this bag and I am not going easy on it when I use it!
Conclusion
Pros:
- Excellent build quality.
- Comfortable when carrying it as a usual backpack.
- Very convenient side openings.
- Great top compartment.
- Good equipment protection.
Cons:
- The main compartment can’t be fully opened, which makes it difficult to access gear.
- If your equipment is heavy, then you can only use this bag as a backpack and not as sling.
- Impossible to attach tripod.
All that said, I am still using this bag and probably will use it for a while. If you found this review to be helpful, consider supporting my site by buying the Kata 3N1 20 backpack through my affiliate link.
After publishing this article as you can see from the comment below, I was contacted by Doug Feldner, the product manager for the Kata line in the US. He told me something very interesting! There is a tripod holder for the Kata 3n1 series! When I try it I sure will write a few lines about it here.
You can read my review on the tripod holder for the Kata 3n1 series here.
Photography Post-Processing – Good or Bad?
To post-process or not? This is a somewhat philosophical question. It is also a very controversial one. Some people claim that photo should be seen the way it gets out of the camera without any adjustments. Others do adjustments freely and sometimes even take it to the extremes. So what is the right thing?
Any photographer, even an amateur one like me, has an opinion on this issue. And here is mine.
I think that even if you don’t adjust anything after downloading your photo from the camera, it is already not faithful to reality. It doesn’t have “real” colors or the “real” white balance. That photograph looks as your camera “saw” it considering the settings you set. There is no such thing as one and only reality. So even by the action of pressing the shutter-release button you are already making adjustments to the reality.
Another thing is that even before you press the shutter-release button, when you building your composition, you are already adjusting the reality by making the viewer of your photographs see things the way you want.
Then what is the difference between these “adjustments” and adjustments in Photoshop like contrast, levels etc.? I don’t think there is a big ideological difference. In my opinion you are free to make any post-processing you like as long as you manage to convey the meaning, the idea, the story of your work to the viewer – just like any other art.
Of course there may be adjustments or extremes that people go to in Photoshop that I don’t like. For example – any kind of fraud, I mean editing the original photograph by changing or adding (or detracting) some features in it, and then saying that this is how it was from the beginning.
But if you present your photo as work of art, then personally I relate to it only in this way, and examine only the final result whether do I like it or not.
How to shoot with tripod and why
Why photographers use tripods? Well, the answer to this question is pretty simple – to prevent camera shake as much as possible and create sharper photos.
Beginner photographer might think that tripod is necessary only for long exposures, but it is not exactly so. The longer your focal length, the more sensitive you get to camera shake. For example if you shoot with wide angle lens (I am intentionally taking this to extremes) with shutter speed of 1/60s you will get pretty sharp photo, but if you’ll take your telephoto lens, lets say 300 mm (without image stabilizer) and shoot with the same shutter speed, most of the chances that you’ll get a very blurred result. But consider also this – most professional landscape photographers use tripod even when they are shooting landscapes in bright light using wide angle lenses! So in order to get tack sharp photos you must use tripod.
How to use tripod correctly
Though it seems pretty simple – just put your camera on a tripod and start shooting, there are several things you need to know that will help you get good results from shooting with tripod.
1. Use Manual Focus.
When you hold camera in your hands and shoot, you can always press the shutter button half-way to focus on your subject, then recompose, and take a picture with correct focus. But when you shoot with tripod this simple task gets a little bit more complicated. So what you should do is use auto focus to focus on your subject, then switch to manual focus, recompose according to your intentions, lock the tripod and then shoot. Since you switched to manual focus, it won’t change when you press the shutter button after recomposing. Of course that you can always use only manual focus, making this advice irrelevant.
2. Use Manual Shooting Mode.
Same as with focus, when you shoot handheld, you can take light metering from the area that you want to, then lock exposure, recompose, and shoot. Using tripod you’ll have to first take light metering from the desired area, then set shooting mode to manual and set the correct exposure according to metering. After this you can recompose and shoot.
The following tips will help you get even sharper photos when shooting with tripod
3. Use Cable Release.
Cable release is simply cable with a button. You attach it to your camera and instead of pressing the shutter release button on your camera, you press the button on the cable. This prevents the camera shake caused by your finger pressing the shutter release button.
4. Use Mirror Lock.
In SLR cameras there is a mirror lock option. For those who doesn’t understand what it means, I’ll shortly explain. When you look through the viewfinder of your SLR, you see everything through the lens. Although you must have noticed that actual position of the lens is much below the viewfinder. In other words – viewfinder and lens are not in the same plane. So how can you look into the view finder and see through the lens? Thats right – there are mirrors involved. There is a mirror that you can see when changing lenses, it is at 45 degree angle to the lens. This mirror is reflecting everything the lens “sees” up, to the viewfinder (there is also a pentaprism involved which enables you to actually see through the viewfinder, but that’s not important right now). When you press the shutter button this mirror goes up, and then shutter opens to expose the sensor (or film). I bet you have noticed that when you press the shutter button, you can’t see nothing in the viewfinder – it is because the mirror is up.
And now to the sickest part – camera shake caused by the mirror movement! When you press the shutter release button, this mirror goes up, and this movement also causes camera shake! Though this shake might not seem to be a significant one, it exists. In order to prevent it there is a mirror lock option. This option first locks the mirror in the up position (when you don’t see nothing in the viewfinder) and only after the mirror is locked the shutter is released.
5. Turn off Image Stabilizer.
If your lens has image stabilizer you should turn it off when shooting with tripod. Image stabilizer is very good when shooting hand-held, but on a tripod it is of no use since there is no camera movement. Image stabilizer engine can even cause some shake thus making images less sharp.
So as you can see, shooting with tripod is not as trivial as it might seem at first, but also not that hard when you know how to do it.
8 Advanced Tips for amateur photographer
I learned the following tips from two professional photographers I happen to know. These are not the most common tips that any amateur receives like “Try shooting the same frame with different exposures and see what works best” or “To freeze action use fast shutter speed”. These tips are more profound and “rare” as I call them, having more meaning than I can actually explain here, so you will have to rethink for yourself some of them. And one more thing – some of them can be achieved only with SLR (Single Lens Reflex) camera.
1. When looking through the viewfinder “scan” with your eye the whole frame.
Human eye is seeing the sharpest only the object that it looks at. All other objects are not in perfect focus. But camera sees all the things that are in the same plane in the same sharpness, and if your aperture fairly small then many more planes will get sharp. So when taking the shot you have to be aware of other “sharp” objects that will be visible in the final photo.
- One way to do this “scan” is to first focus with AF (auto focus) on what you want, and then rotate the manual focus ring just a little bit. It will make the whole frame a little blurred. When everything is blurred your eye will automatically scan the whole frame for something sharp, thus going over the whole frame.
- Another way is just to stare into the view finder for a few seconds, not trying to focus on anything specific. This is something that takes a little practice to master.
2. Use manual focus override to adjust focus to what you need.
Sometimes you need to control the DOF (Depth Of Field) to achieve the desired result. First you focus on your main subject using auto focus, and then while the shutter release button is half-pressed you turn the manual focus override ring to adjust the focus to what you need. Have in mind though that manual focus override is not featured in all lenses. There are cheaper lenses that can work only in automatic or manual mode but not both simultaneously.
3. Initially compose the photo for cropping or adjustments.
Many amateur photographers just shoot the photo and then when they open it in photo-processing software (such as Picasa, Lightroom, Photoshop, ACDSee etc.), and only then, they start thinking what they can do to improve it. Maybe crop it like this? Maybe emphasize a little more shadows? Try to think about these things (especially the crop) before pressing the shutter-release button. It will make it much easier to perform cropping and other adjustments later. You will also be forced to THINK before you shoot.
4. During the shoot of an event – shoot on manual.
When you are shooting events that happen fast, you can’t afford to mess with camera controls. You can miss the shot of the day that way. So what you can do is: set your camera to aperture priority mode, and choose the desired aperture. Then half press the shutter-release button and on the screen (or inside the viewfinder) you will see the suggested shutter speed. Take a few photos and see if you like what you get (in terms of exposure), if not adjust exposure compensation. After you are satisfied, switch to manual and set the same values of shutter and aperture. From now on shoot on manual during the whole event with the same settings, unless there are drastic changes of light in the scene. I realize that this is kind of “half-tip” and many professional photographers are working only in manual changing between f-stops and exposure automatically to get the best results. But here I am talking about amateurs, like myself, who are not just yet there.
5.Don’t look at the back LCD screen after each photo.
Actually this tip is pretty controversial, but I’ll stick with it. Not looking at the LCD display after taking each shot makes you THINK more before each shot, and also leaves a room for anticipation towards the final images. This is a good exercise, and while it might not be a good idea during an important shoot, I advise to do it wholeheartedly during your everyday shooting. Think of it, if you have this habit of looking at your back screen after each photo, and you are in a scene where everything happens fast, you just might miss an interesting shot while looking at the LCD display.
6. Don’t just convert to b&w – shoot with intention for b&w.
Instead of going over your photographs after a shoot and thinking “Well, this photo might look good in B&W, lets try to convert it!” Shoot the photographs with B&W in mind, think B&W. When shooting B&W, highlights and shadows have more importance, and also other artistic aspects of the photo (such as facial expressions, hand gestures, etc.) stand out more in B&W, because you don’t have the “distraction” of the color. When shooting with B&W in mind you pay more attention to tones (light/dark) than to colors.
7.When shooting people in low light take spot light metering from their skin.
In difficult light conditions, particularly in low light, when using center-weighted average metering most of the chances that you will over-expose your photo. So it would be better to switch to spot metering and take the measure from the skin of the person you are about to shoot. If for some reason it is impossible, then take the measurement from the palm of your hand while placing it in similar lighting.
8. When shooting with slow shutter speeds hand-held, don’t release the shutter button.
When you shoot with slow shutter speed, you have to do everything in your power to reduce the camera shake, so in addition to holding it steady, leaning against the wall etc., when you press the shutter button, don’t press and release it straight away, but press it smoothly leaving your finger on it for a while after you hear the shutter sound. This little trick can improve greatly the outcome. In many ways shooting photos with slow shutter speed is like sniper-shooting a rifle – most of the actions are the same: for example it helps to take a deep breath in, then breath out, and then press the shutter-release.
Well, I hope you’ll find these tips useful and would really like to hear your thoughts about them. I probably will write more on some of these tips in my future articles.
Welcome to PhotoPathway
Greetings!
I am Greg, and this is my place named PhotoPathway. You’ll find here lots of info regarding all aspects of photography.
More about me and PhotoPathway is on my About page.
You are welcome to browse PhotoPathway for all its posts, photos and categories.
Cheers!
Greg.