Category Archives: Photography
Everything photo-related from my point of view.
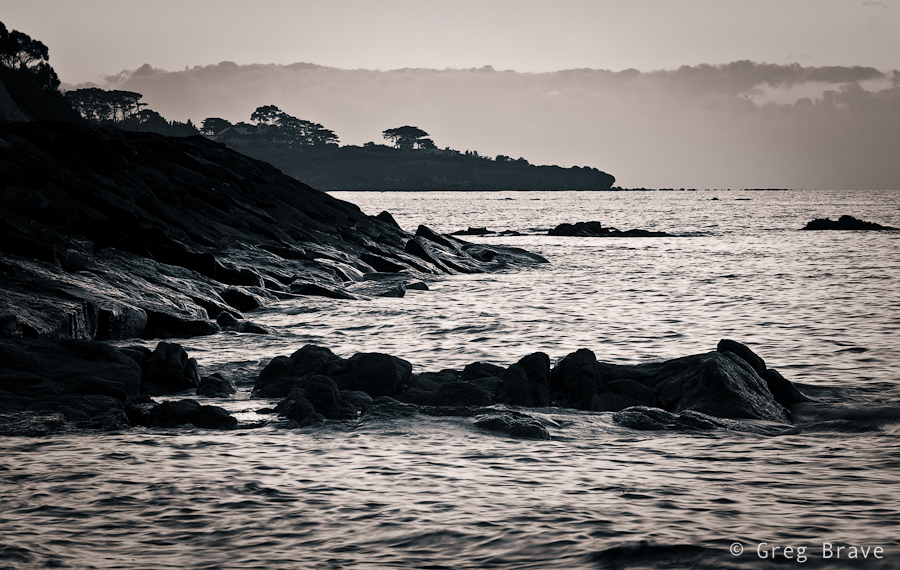
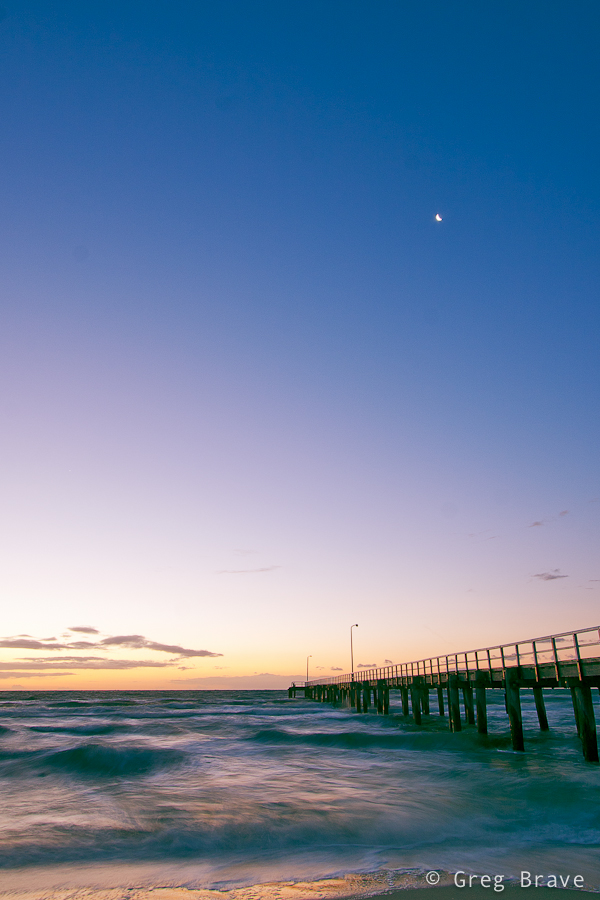
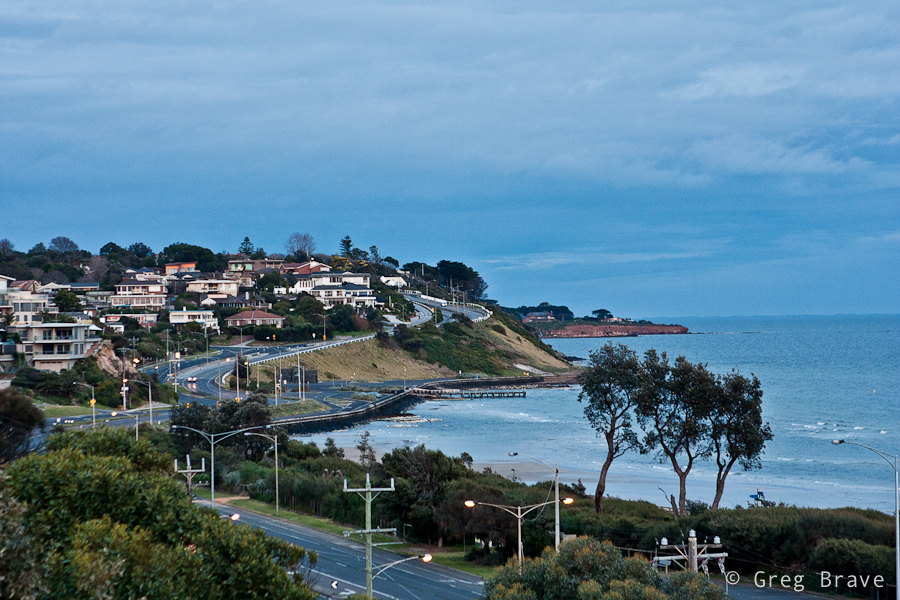
Seascapes and other issues
Lately I haven’t made much noteworthy photographs… either that or my understanding of what “good photograph” is has changed. Either way I don’t like almost anything that comes out of my camera. And what’s more important, I don’t know how to improve.
I guess I’m just searching now for something… another point of view on the world maybe. This is really confusing for me – to search for something not knowing what it is.
Click on the photo to enlarge.
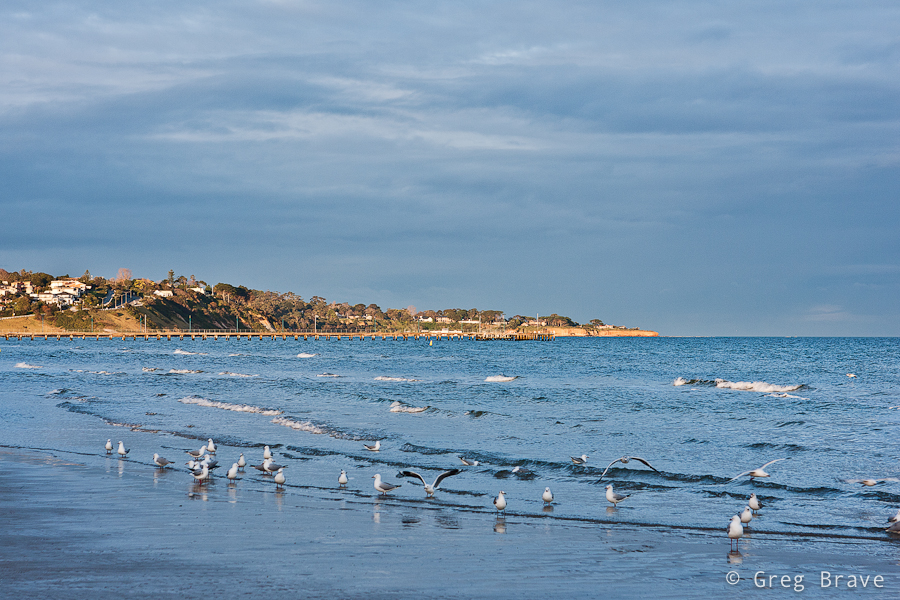
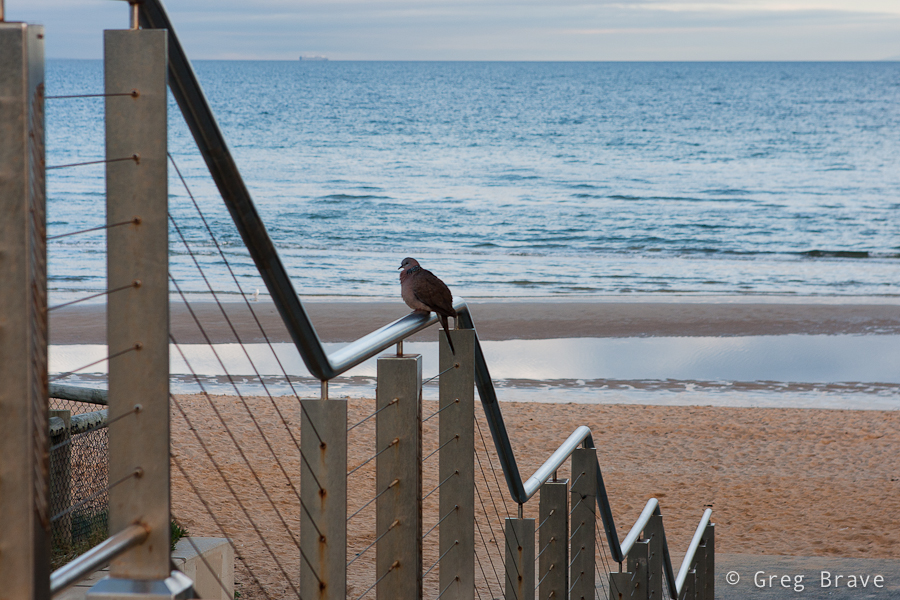
Nevertheless I keep on shooting and analyzing my work, most of which you will never see here on my blog because I don’t think it is worthy. The photos I included in this post are nice, I like them, but I also think that they are nothing special, just another bunch of seascapes among thousands.
Click on the photo to enlarge.
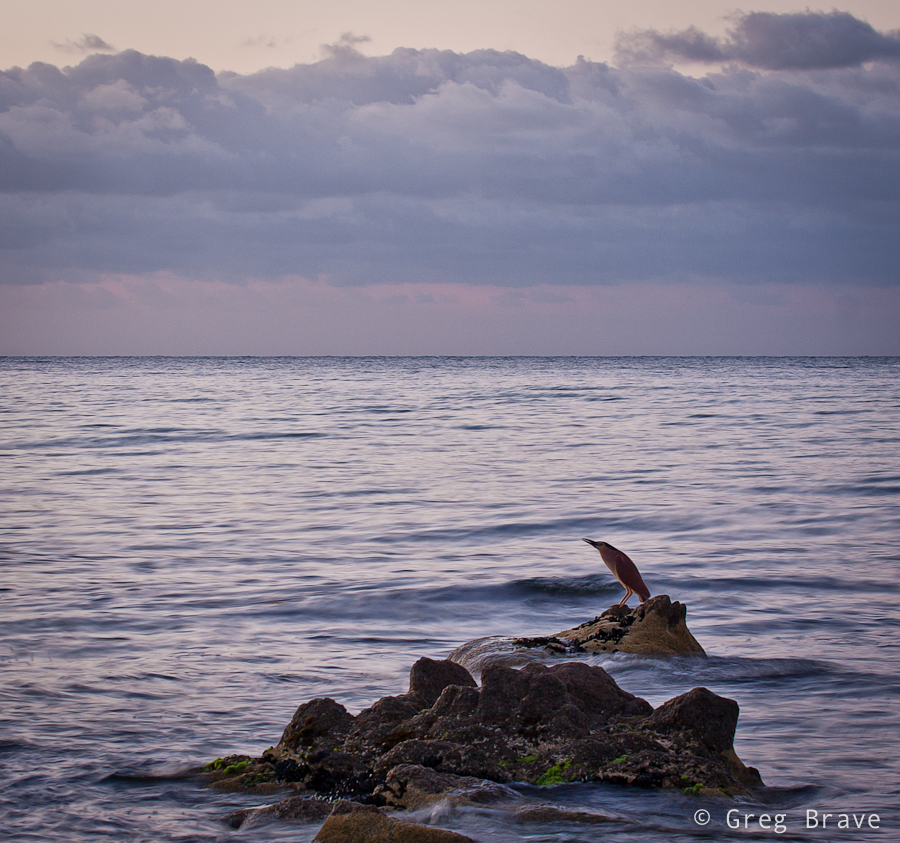
One of the things that I changed about my photography is that I take much less pictures, and before taking one I stop and think about the composition, about what I want to say with this photograph, what emotions I want my photo to express. And later, when viewing the photo on my computer I try to understand whether I achieved what I wanted or not. Most of the times I don’t.
Click on the photo to enlarge.
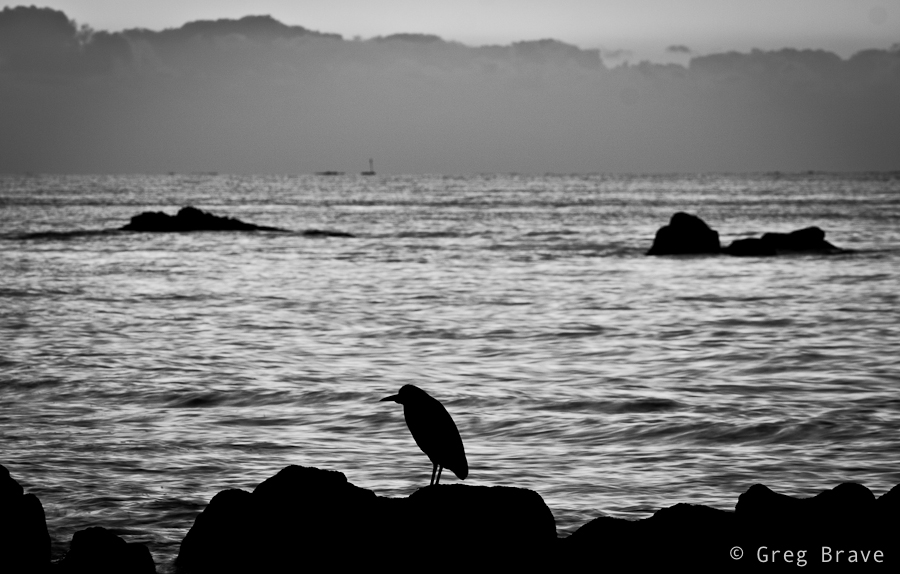
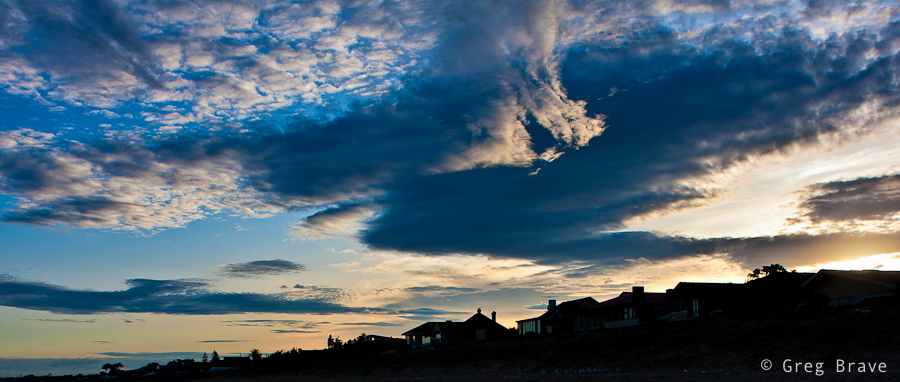
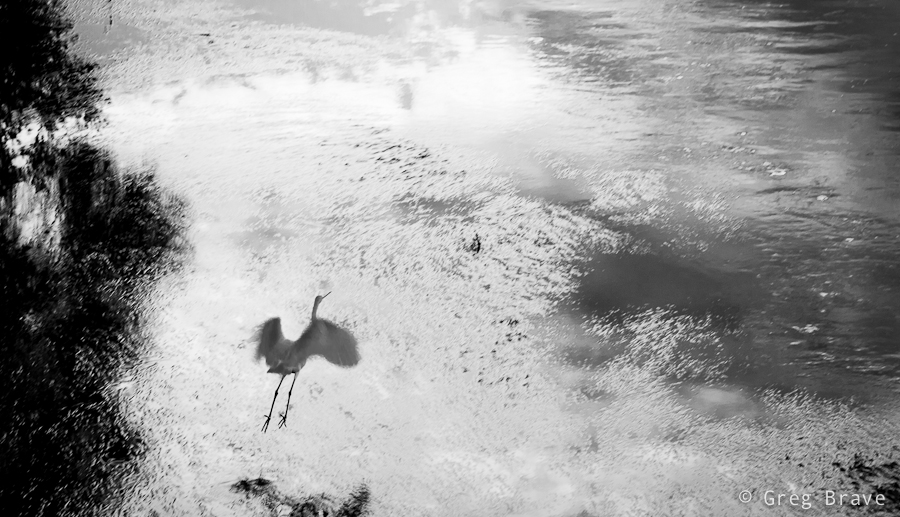
Long exposures of the sea and sunsets (just like the one below) simply don’t cut it for me anymore.
Click on the photo to enlarge.
If you have or had similar issues, and have any suggestions, I would be more than happy to hear them.
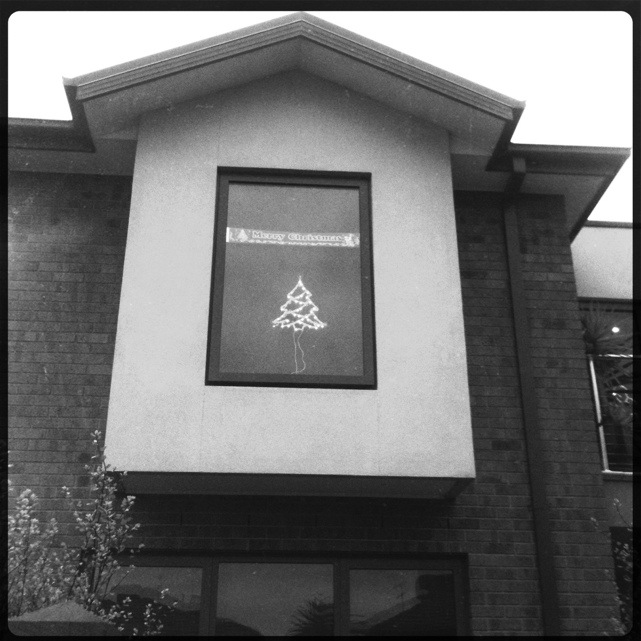
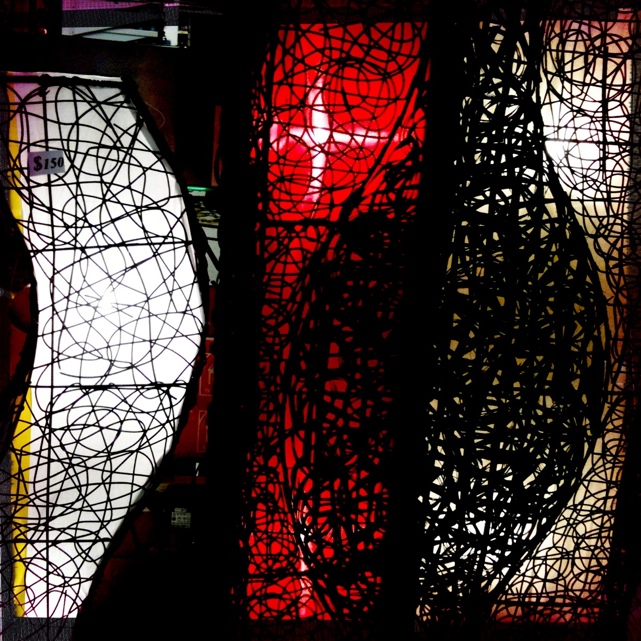
Sign Language

Sign Language
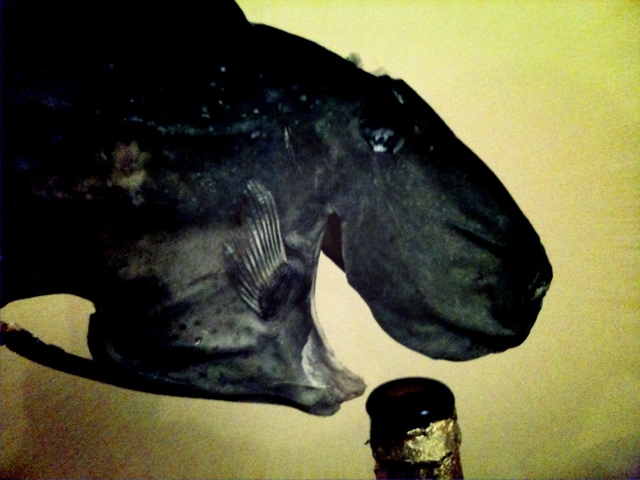
Green Octopus
Free Ebook from Craft&Vision
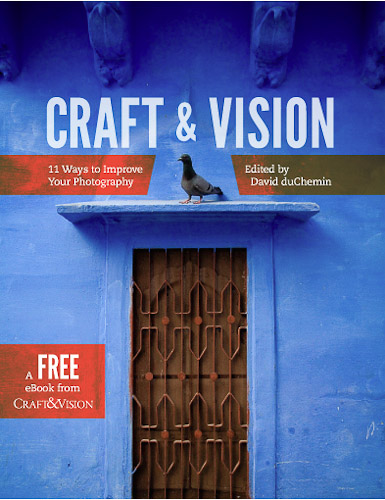
Recently Craft&Vision published a free e-book titled “11 Ways to Improve Your Photography”. For those of you who are not familiar with Craft&Vision project it was started by David duChemin, pretty well known photographer. In this project he publishes books about photography, some of which he writes by himself, and some written by other photographers. These books are sold in PDF format usually for $5 USD, and you get a discount when you buy a bundle. I have bought about twenty books and read them. Some I liked more and some I liked less, and maybe in the future I’ll write a few of my own reviews on these books.
The special thing about this book though is that you can download it for free and get a taste of the “Craft&Vision type of book”. The main point that David makes in most of his write-ups on his blog and his books is that photographer’s gear is much less important than his vision and in some of his books he suggests ways as to how you can improve your photographic vision. This book was not an exception and you won’t find there anything about photographic gear, except printers in the chapter on “the power of print”.
“11 Ways to Improve Your photography” has 11 chapters (obviously 🙂 ) written by various photographers, each chapter suggesting a different way you can improve your images. If you want just to quickly to see the contents of the book before you download it, here’s the chapters:
| 1.Make your images more dynamic
2.Tame your digital exposures 3.The power of the print 4.Learn to direct the eye 5.Understand the stages 6.Create projects and collaborate 7.Refine your composition 8.The power of the moment 9.Forget lens stereotypes 10.Slow down and learn to see 11.Make stronger portraits |
 |
In my opinion this book is not special in its suggestions, and if you have been into photography for a while you probably heard most of this advice, but sometimes it is good to refresh your memory. There were two chapters that I liked the most – one is “Understand the stages” by Alexandre Buisse, in which he describes his understanding of the different stages that a photographer goes through from the moment he/she picked up the camera. A very interesting read.
The second chapter that I liked is “The power of the moment” by Eli Reinholdtsen, in which she shares her experience in street photography illustrating the text with her wonderful photographs.
I would also like to mention another chapter, “Make stronger portraits” by David duChemin, not because I liked it, but exactly the opposite. While the advices that David gives in this chapter are ok (nothing special though), the portraits that David chose to illustrate his points are not. In my opinion they are not “strong” as David presents them to be. They are just pictures of people. Some of them are pictures of unusual people, but merely this fact doesn’t make for a strong portrait.
You can download the book by clicking on the image above (which will take you to the Craft&Vision website). I would really like to hear your honest opinions about this book.
Portfolio Updated
Hi everyone,
Just a quick note – I updated my portfolio with more photos from Nepal.
You can check them out HERE
Post-processing variations
I am not a believer in the “straight out of camera” philosophy. You know, the photographers who don’t do post processing at all and sometimes shoot in plain JPEGs. Anything in addition to that, would be “distorting the reality” they claim. My opinion on this subject is that there is no such thing as objective reality. Everyone sees what he sees through his own eyes and his own perspective. Your previous life experience also alters your perception of everything that you see around you. Even when you simply point your camera at a scene and shoot, the light goes through the lens, hits the sensor, gets transferred into electronic signals, then is processed by your digital camera’s own processor, and undergoes even more transformations until you see the photo on your computer screen. I don’t think I need to go further.
So, when I work on a photo, first I usually perform basic adjustments in Lightroom such as brightness and contrast and then, if I feel that it is not enough, first I try to understand why I feel that way. Is it the composition? If it is the composition then there’s nothing much can be done in post processing, and I will probably discard that photograph. But if the composition feels right then I continue my exploration. Are the shadows too shallow or too deep? Can the colors be improved?
Next, I open the photo in Photoshop and start playing with it, changing color palette, increasing/decreasing lights and darks, and other adjustments. Usually I come up with several versions of processed image, which look good to me, then I compare them and choose the one that I like the most.
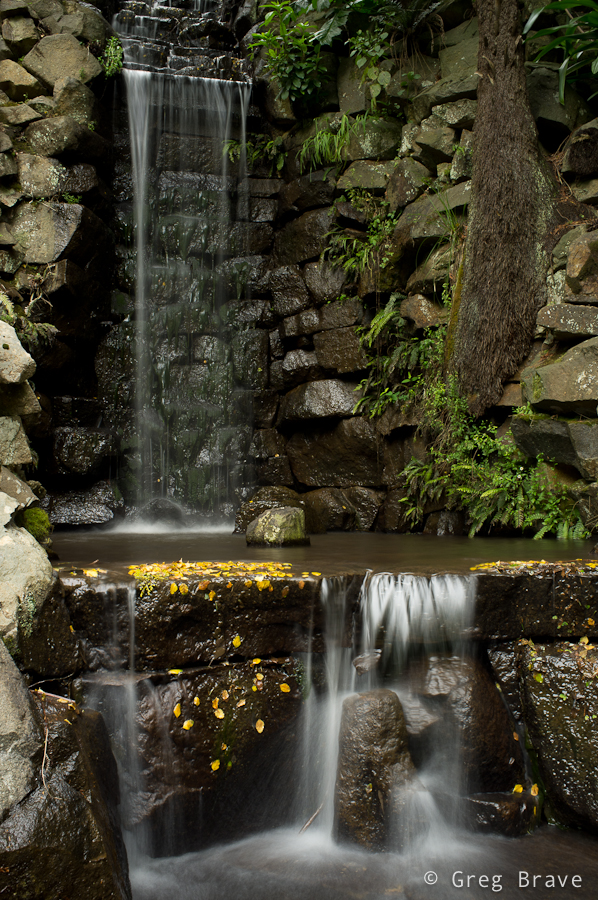
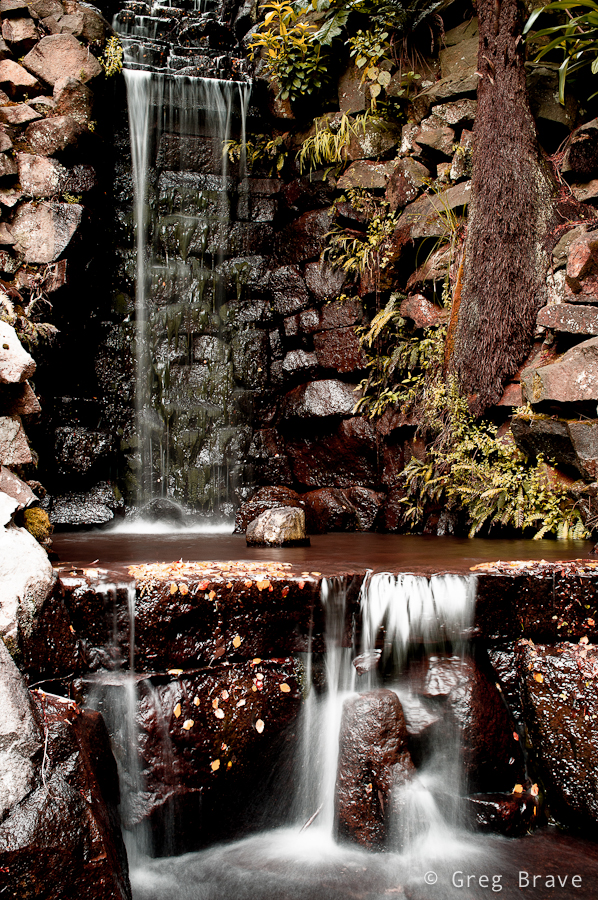
Below I have three versions of the same photo, but the thing is that I can’t choose the one that I like the most. Each version has its own mood, and I have trouble choosing.
The first image below is the original version with only minor brightness adjustments.
Click on the photo to enlarge.
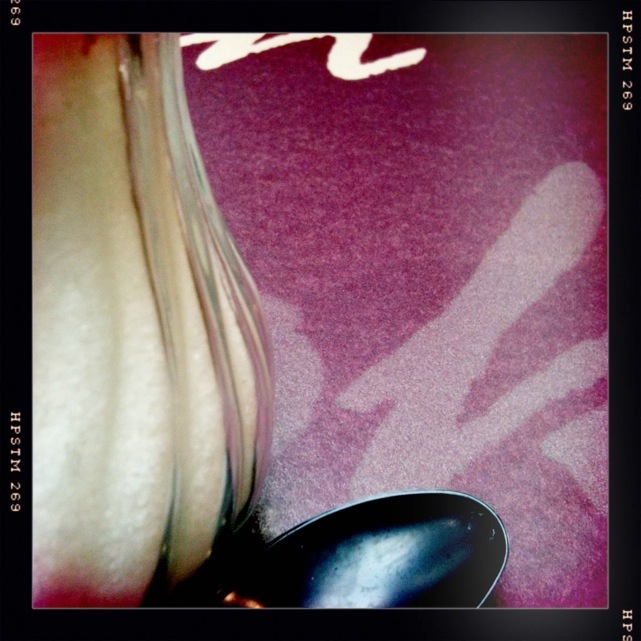
The second version received quite a bit of processing, and has a warm autumnal feeling to it. I like the purplish glow and how it contrasts with the white of the water.
Click on the photo to enlarge.
In the third version I used the original photo as the base, substantially decreasing color saturation, of all the colors except the yellow of the leaves in the water. I also happen to like this version a lot.
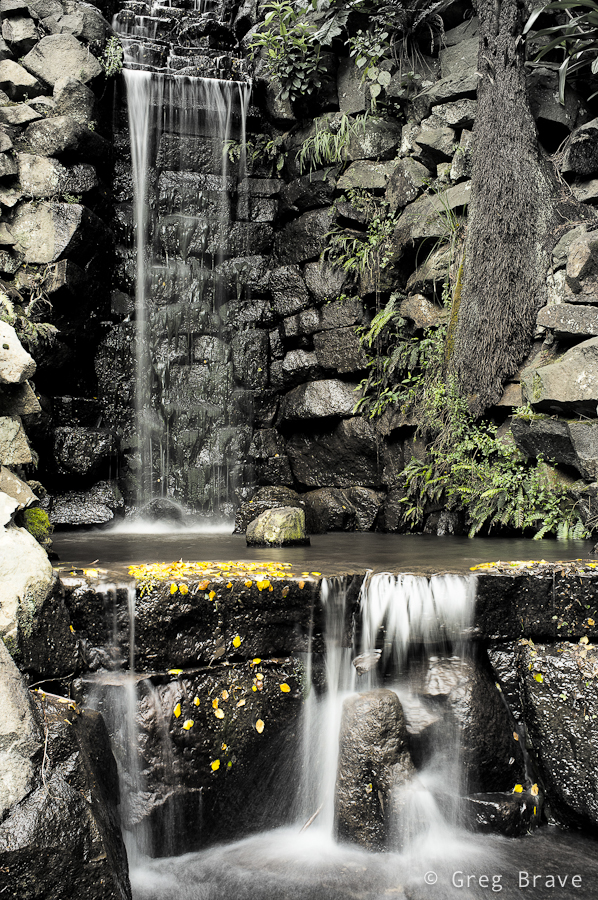
Click on the photo to enlarge.
Which version did you like? Please help me choose, but I also need to know the reason for your choice, and this is what the comment section below is for! You can also leave your comments on my Facebook page – http://www.facebook.com/photopathway
One and The Same
Think and become a better photographer
The Internet is full of advice on how to become a better photographer, but quite frankly most of this advice is misleading.
Browsing the Internet (or a book shop for that matter, it’s just that Internet has infinitely more information) one might get an idea that if he would just read this book or complete that course he would become a better photographer. Others go further than that – they strive to read as much books on photography as they can, attend as much seminars as they can afford, and process god knows how many additional different kinds of educational material on photography.
Part of the courses or books suggest you buy a better equipment, so people get hooked on that, upgrading their cameras as frequently as their purse allows, but not all of them – others try different software products, which promise to make their photos look professional with a click of a mouse, and yet others combine it all together.
Well, guess what – it is all useless. It is useless because deep underneath its shiny cover it suggests no effort on your side. The key to your success as a photographer lies within you. You can only read in books what already exists inside you, and if you do not evolve from within, you will not truly become a better photographer.
If you wholeheartedly want to become better, then at this point you are screaming, if only in your mind, “then how do I do that? How do I evolve from within to become a better photographer?”
I do have an answer for you, but be aware it is not an easy one. It will demand your effort and time… how much effort and time? I have no idea. But it is the only way. If you still want to hear it – read on.
In order to become a better photographer you have to do several things:
– Think. Think about photography. What is it? How it works? Why are you interested in it? And I mean really think, even meditate on it. Look deep inside yourself to answer these questions. Don’t lie to yourself. Write down the answers. After a week do it again, then after a month, a year. You will see that each time your answers will be deeper and more profound.
– Study art. Look at drawings of great artists. Rembrandt, Van Gogh, Dali, Repin, just to name a few. But again, simply looking, flipping through the pages, is not enough. Try to understand WHY these paintings are exquisite works of art. This is very important. Do the same with works of masters of photography – Ansel Adams, Cartier-Bresson, and others. Have in mind that the process of getting to understand and appreciate art doesn’t happen instantly or even quickly for that matter. It can take years…
– Take photos constantly. If you don’t have a camera with you then take them in your mind. But merely taking thousands of photos is not enough. Look at your photos, analyze them. What do you like about them? What would you like to change? When looking at photos from a shoot, pick one that you like the most and think – why do you like it? What would you do differently if you had to make that shot again? Why?
– Save your best photos (the ones that you think are best), come back to them at later times, and remove the ones that you change your opinion about.
– Print your photos (in large format if possible) and hang them on the walls of your living space. Look at them over time and think about how your opinion about them changes. Think about why does that happen.
– Work on your imagination. Create photos in your mind, which not yet exist in reality. Make them so vivid in your mind, as if they were real. These photos are most likely to define your unique style in photography.
– Think about a photo that you would like to create. Imagine it to the smallest detail. Then go ahead and try to create it. Use photoshop as much as you like (or not), I don’t care. Just try to achieve whatever you imagined in the first place. If you feel that you lack some technical skills at this point – Internet most definitely has the answers.
Conclusion
Getting better in photography mainly involves THINKING. It also involves emotions and feelings, and thinking about why you feel the way that you feel. No course and no tutorial will make you a better photographer, and the first step to becoming one is to understand this fact. To become better you have to dig deep inside you. That photographer is already there waiting to be discovered. On this journey at different points you will see that you want to achieve this or that effect, look, or feel, you will see it clearly in your head, and it will be the right time to go online for technical information on how to achieve it – but this will be only after you already have the image in your mind.
And one more thing – even though this process will require time and effort, have fun! You won’t get better if you don’t enjoy your journey!
In Ray Of Light
Somewhere in the city
Nepal In Photographs – Part 2 (Portraits)
This is my second post, in which I write about my photographic experience in Nepal. You can read the first part here. While in the first part I showed you Nepali landscapes, now I’d like to show a few portraits of Nepali people.
Interestingly in some cases people would not let me to take their photographs at first. In that case I would nod in agreement (like, hey I won’t take your photo if you don’t want me to) , point my camera at other subjects, and take a few photos here and there. This would get them interested. Then I would approach them and show them the photos I just made on the back screen. Next thing you know they are posing in front of the camera and running back to me to see the picture. I wished I had a portable printer with me so I could print out and give them their photos.
The photo below was taken on Helambu trek. We were passing a settlement in the hills of Kathmandu valley and made a short break in a nice spot overlooking rice terraces. These women were passing by, and seeing us smoke asked for a cigarette. In return we asked to take their photos 🙂
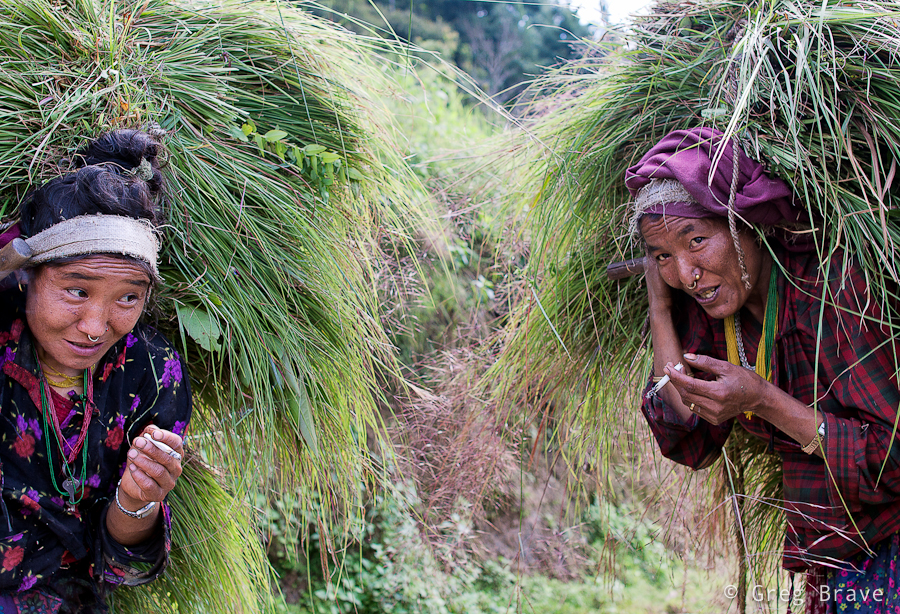
1/200sec at f3.5, 28mm | Click on the photo to enlarge.
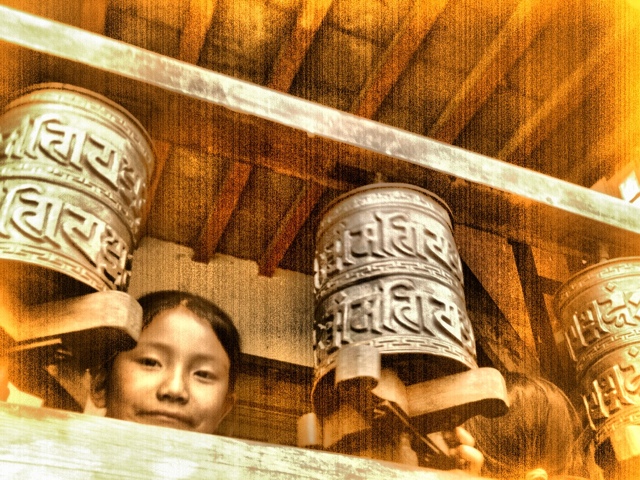
One of the settlements on Helambu trek is Golphu Banyang. It has only one main “street” and not many tourists are staying there overnight, trying to reach the next village of Khutumsang. But it so happened that we did stay there, and I had the whole evening to photograph local kids. Once I showed them a photo on my camera they wouldn’t stop posing, only downside being late time of the day and, as a result, very dim light.
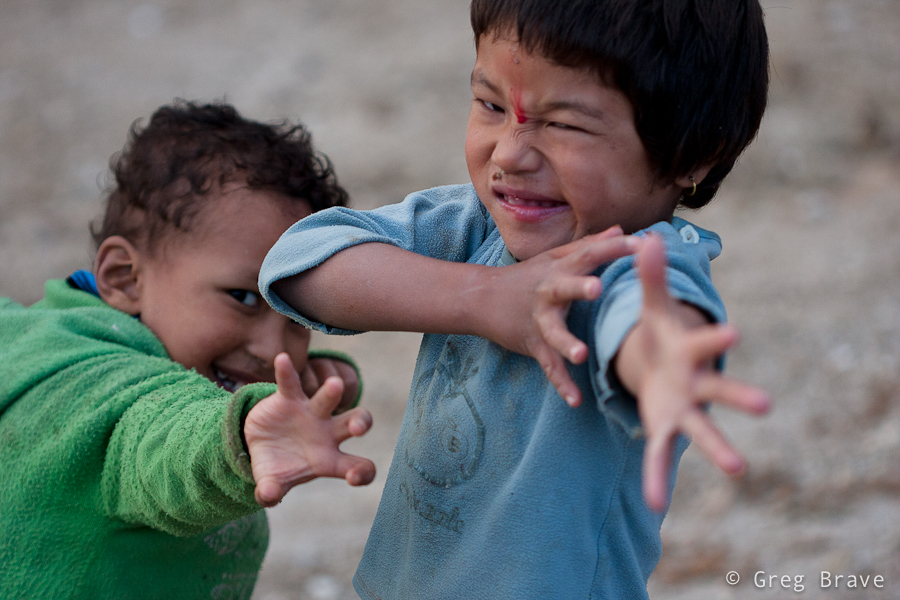
1/500sec at f2.8, 100mm | Click on the photo to enlarge.
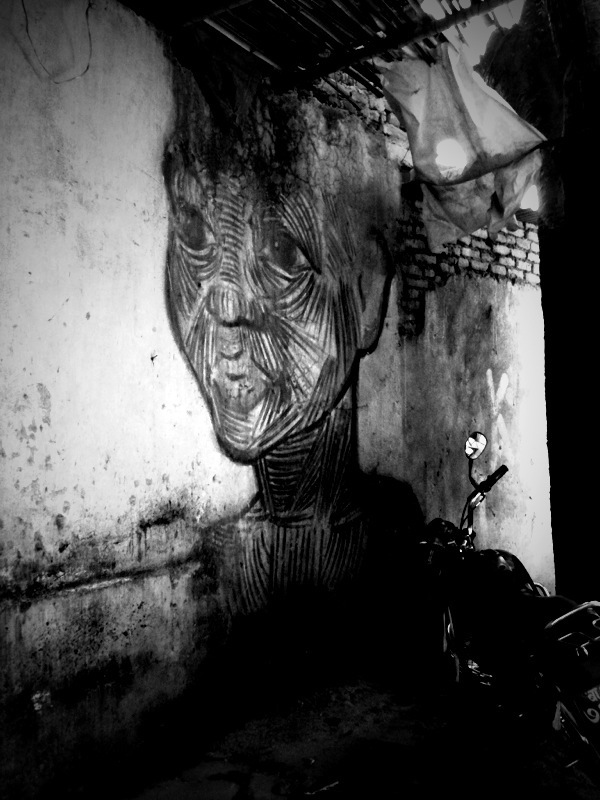
The photo below was also made at Golphu Banyang on the following morning when we were leaving the village. The evening before I saw this old man in the same pose, doing the same thing, but it was too dark to make a good photo. In the morning though, there was this beautiful ray of light, lighting perfectly his face and hand. The result you can see below.
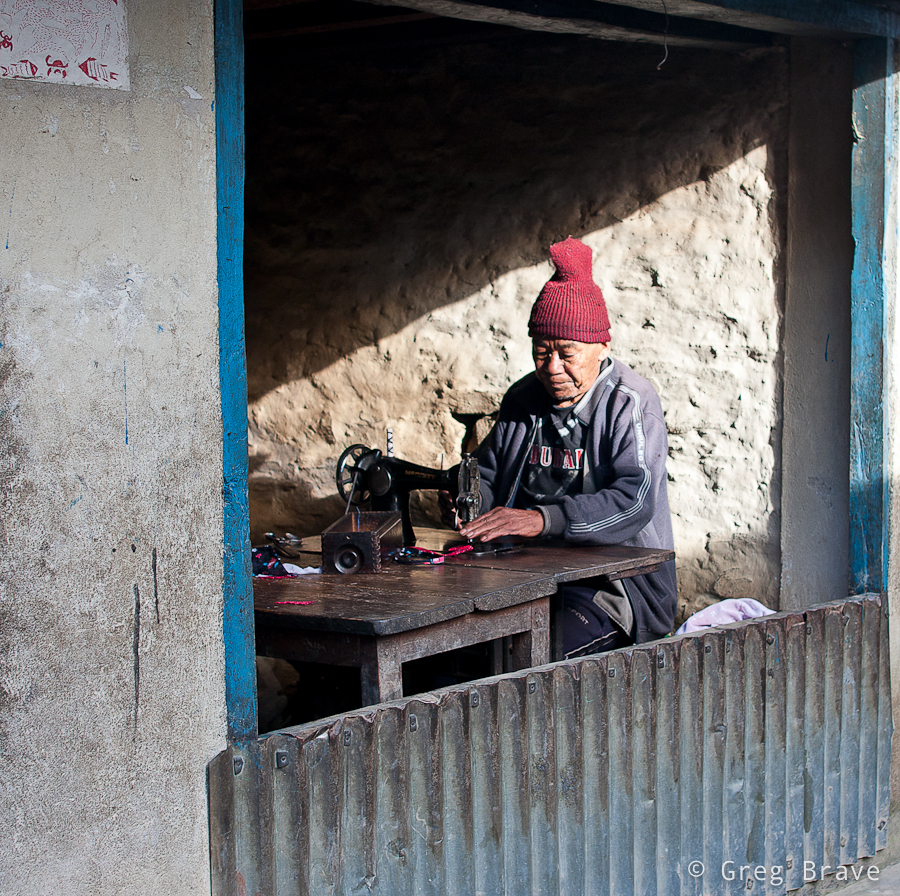
1/160sec at f3.2, 28mm | Click on the photo to enlarge.
On our way to Gosainkund Pass we stopped at one of the two lodges in Phedi. The lodge was run by a Sherpa couple. While woman was preparing our dinner, we were chatting to the man. Well at least we tried. Even though he seemed to be speaking English fluently, I realized that we hardly understand each other. In any case the conversation turned out to be very interesting and we learned a lot about local animals… or at least we think we did 🙂
I took the following shot of this man in the lodge’s dining room in very poor light, hence the f1.8 and 1/30sec. This is one of several shots I made trying to get his eyes to be sharp, which was difficult with f1.8 and his constant movement.
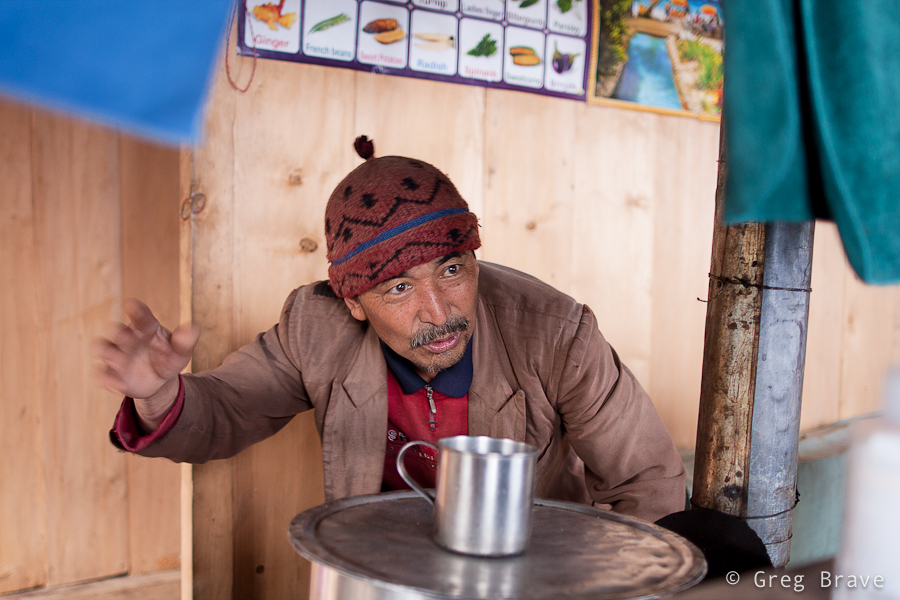
1/30sec at f1.8, 28mm | Click on the photo to enlarge.
Continuing from Phedi up to the Gosainkund Pass we reached a lonely lodge standing in a beautiful view of the surrounding mountains above and the valley below. Ram Sherpa, the owner of the lodge kindly agreed to be photographed. Ram was fixing holes made by some rodents in his rice bags when we reached his lodge. I liked the window lighting on him, which created definitive shadows on his face.
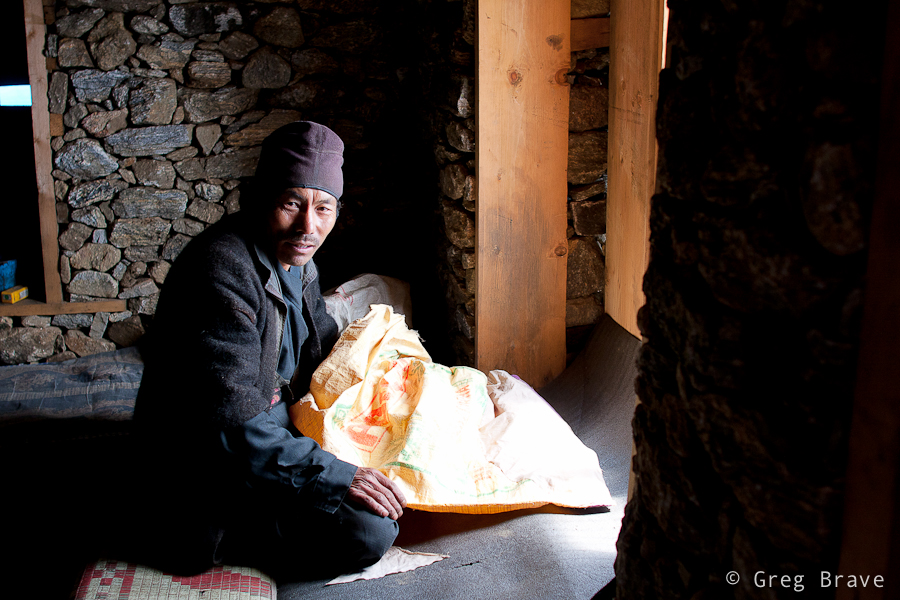
1/200 at f3.2, 28mm | Click on the photo to enlarge.
The man below is a Tibetan refugee living now in Nepal, in a village named Melamchi Gyang. He has a Dalai Lama badge on his hat, and he runs a small tourist lodge in the village. He asked me to take his picture and said I should bring him the photo when I come visit again… I wonder if there are any postal services to this village.
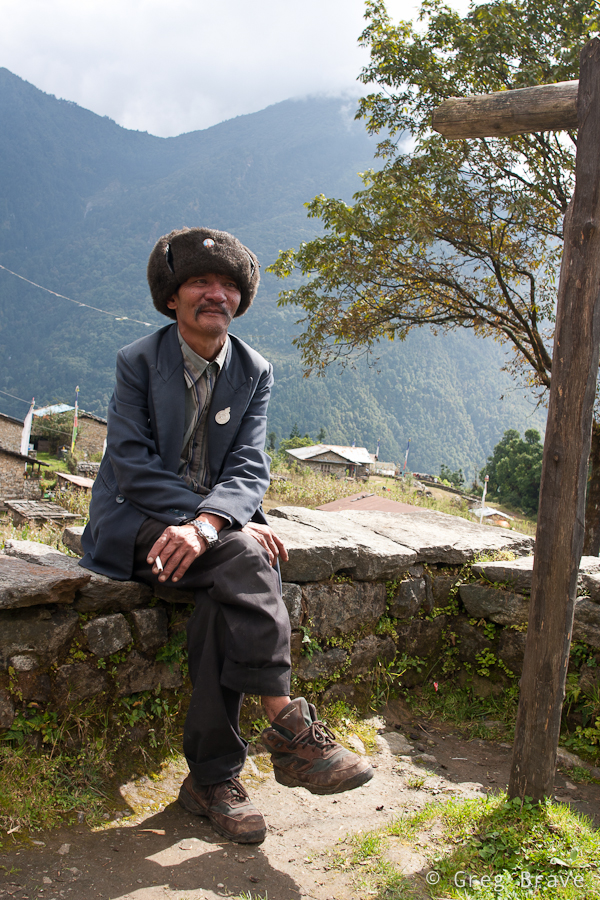
1/100sec at f8, 28mm | Click on the photo to enlarge.
In one of our final days in Nepal we went to an ancient city of Bhaktapur. It is about 30 minutes drive from the touristy Thamel, and it well worth a visit! One of my future posts on Nepal will probably consist solely of Bhaktapur’s photos. Bhaktapur is the third largest city in Kathmandu valley, and was once the capital of Nepal during the great Malla Kingdom until the second half of the 15th century. It is also listed as a world heritage site by UNESCO for its rich culture, temples, and wood, metal and stone artwork ((C) Wikipedia).
In addition to all the heritage sites, there are many shops for tourists. Walking around I saw a large Mandala shop and a woman drawing Mandalas for sale right there. If you saw mandalas you know that it is a very laborious task, which requires concentration and devotion. And look, she also holds the canvas by herself!
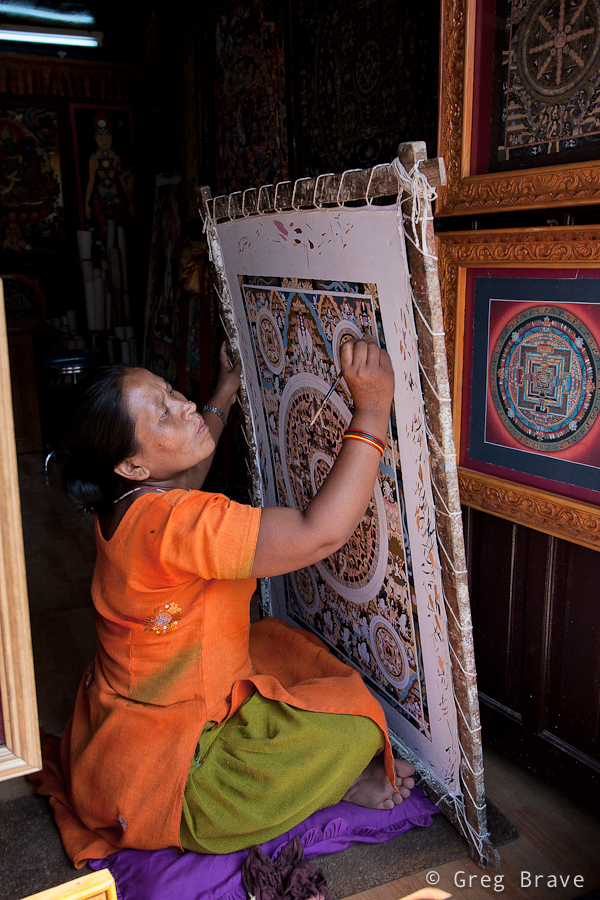
1/500 at f4.5, 20mm | Click on the photo to enlarge.
All in all I can say that people in Nepal are open and friendly to tourists, which doesn’t deny them to try and make as much money as they can from them.
As always your comments are highly appreciated!
After Party

After Party
Tiny Bike

Tiny Bike
Nepal In Photographs Part 1
As I promised, in the next posts I will write about my photographic experience in Nepal. To get everyone up to date – recently I took a rather long vacation of almost one month and went with my life partner Ira and one good friend to a trekking trip in Nepal. As always my camera was with me, but since we didn’t hire a porter (or a guide) I couldn’t take just any photo equipment that I wanted.
I was facing a hard decision – which lenses can I take with me and not add too much weight to my already heavy backpack? And here’s the list of the photo equipment that I took:
- Canon 40D body. This wasn’t really a choice since this is the my only DSLR.
- Canon EF-S 10-22mm
- Canon EF 100mm f2.8 macro
- Sigma 28mm f1.8
- 4 Spare batteries, 2 circular polarizers (different diameters), lightweight SLIK tripod
Let me explain my choice of lenses. Even though I have two Canon L-series lenses (70-200 f4 and 24-70 f2.8) I didn’t take them with me for one simple reason – they weigh too much. Instead I decided to go mostly with prime lenses, which are much smaller and lighter but still produce very good quality photographs even though they are not from L-series. Canon 100mm f2.8 macro lens is known for its superb quality, and after shooting with Sigma 28mm f1.8 for a while I saw that it is also a very good lens though it has some minor issues with lens flare. In addition I took the Canon EF-S 10-22mm, which is known for its good quality-to-price ratio. In this case I didn’t have much of a choice since it is the only wide angle lens I have, and you can’t go trekking in Himalayas without a wide angle lens, can you?
The only thing I could’ve taken less of were the batteries. I found out that for a nine day trek I only need two batteries. But I must say that I didn’t use the live view, which is known for its ability to drain power quickly.
Our first trek was the famous Annapurna Base Camp (ABC) trek. In order to get to its beginning, we had to fly from Kathmandu to Pokhara (second largest city in Nepal) and then take taxi (~1h drive) to Phedi. Phedi is a small village, in which ABC trek starts with a long climb via stone stairs.
Before setting off to the ABC trek we had a rest day in Pokhara. One of the main attractions of this town is Pokhara Lake. For 300 Nepalese rupees you can take one of the boats below for a 1-hour sail. Add 50 more rupees and you’ll also get a boats-man.

1/60sec at f5.6, 28mm | Click on the photo to enlarge.
The next photo happened almost by accident. It was raining all morning that day, and we got completely wet, walking carefully not to slip on wet rocks. The heavy backpacks made it that much harder to keep balance, and we seldom shifted our eyes from the ground. It was a hard climb, and while we were getting near its ending, the skies suddenly cleared, and then we reached this house. I saw the mountain and the dog, which was laying calmly. My hand instinctively reached for the camera, suddenly a man appeared from the house adding final touch to this photo.

1/200sec at f9, 28mm | Click on the photo to enlarge.
On our ABC trek, as a general rule the weather was at its best early in the morning, 5 – 6am, sometimes until 8, then gradually clouds came in and covered everything. And then again weather would improve at about 4 – 5pm. Of course it was only usually like that, and different variations were possible, but our most certain bet would be to get up as early as we could. If we wanted to have clear view of the peaks that is. And as you can imagine – I really, and I mean REALLY wanted to see the peaks!
The next shot was taken early in the morning and the mountain peak that you can see on the right called “Fish Tail”. Locals call it Machapuchare, and revere it as very sacred to the god Shiva. This makes Fish Tail forbidden for climbing.

Click on the photo to enlarge.
Unfortunately, good colorful sunsets were rare because at sunset time the skies were usually covered with clouds, and the next photo is one of the very few I made during sunset time. But that particular sunset was marvelous! The orange colors changed hues constantly, and I made a dozen photos trying to capture them. I only wish there would be slightly less clouds so that more of the snowed mountains were visible.

Click on the photo to enlarge.
While two photos above were taken looking up at the mountain peaks, they are not the only attraction in Himalayas. When you are at high altitude, looking down can take your breath away as easily as looking up. The next photo was taken in the morning looking down on the “small” hills of Annapurna National Park. Some of these hills are higher than the highest mountains in Europe (let alone Australia), but they still look tiny in this vast landscape.

Click on the photo to enlarge.
This is it for my first post in the Nepali series, and I hope you enjoyed it.
Let me know what you think, and what photographs and information would you like to see in my next posts on Nepal. This is what the comments are for!
Curiosity?
Telling a story…
Greetings, I am back from my vacation!
Big thanks to everybody who didn’t loose faith in this blog 🙂
I had three unforgettable weeks of trekking in Nepal, saw and photographed unbelievably beautiful mountains, and different cultures. More about that in my future posts, in which I will share my photographic experiences and, of course, photographs from my trip. Few of these photos you can already see on my Facebook page:
Now I would like to go back to the article that I started writing before my vacation, but didn’t have time to finish.
There are different ways to tell a story with a photograph. Photojournalism is one of the most common. There are also various kinds of creative edits. For example, Katerina Lomonosov creates great story-telling works of art, which stir the viewer’s imagination. Landscape photography in addition to showing the beauty of nature can also sometimes tell a story of the photographed place. Thinking of it, any kind of photography tells a certain story, and this fact is what makes the viewer to look at a good photograph for more than a brief moment.
I don’t remember where I saw this quote: “If you want to tell whether a photograph is good or not, hang it on your office/home wall. If after a week (or so) you’ll still enjoy looking at it, then most of the chances that it possesses artistic value”
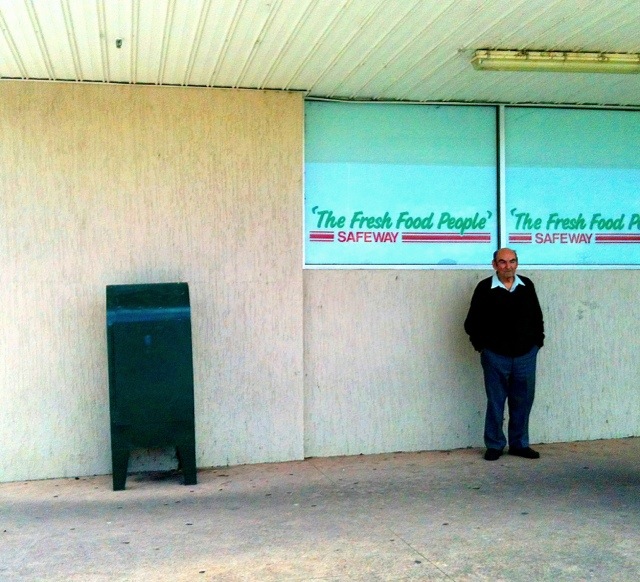
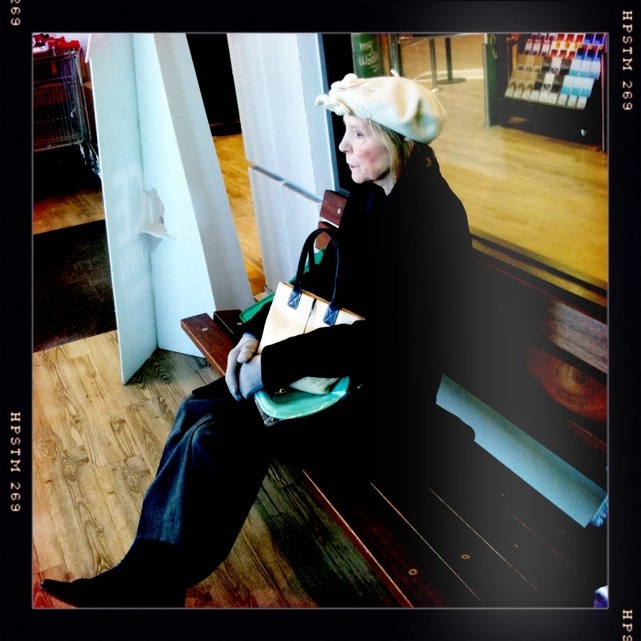
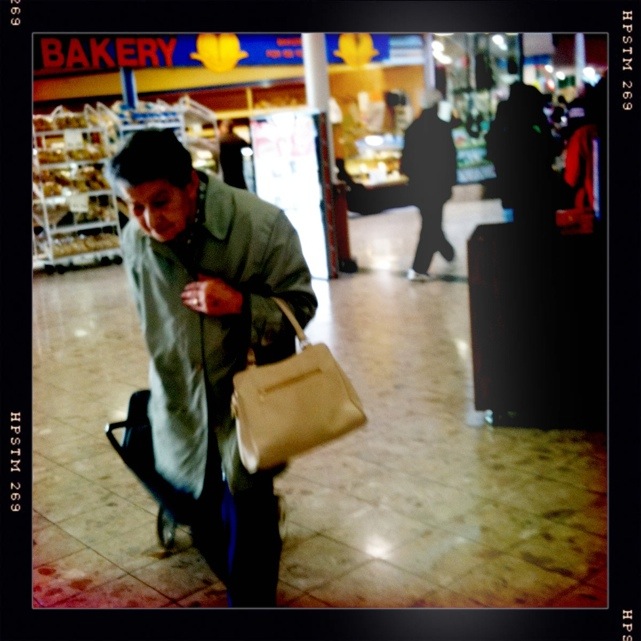
A few days before my vacation I was buying food in our local supermarket, and I’ve got the idea to photograph ordinary people that I saw there and to try and tell a story of “people in the supermarket”… you know – to see extraordinary in the ordinary. I used my iPhone to photograph these people because it was be the most discrete way to do it. I wanted to capture them in their most natural environment, doing everyday chores (in this case – shopping).
So when I came home I had a collection of photographs, which I needed to somehow combine into a single photo. After playing with the idea for a while I decided on a collage, and here’s the final result:
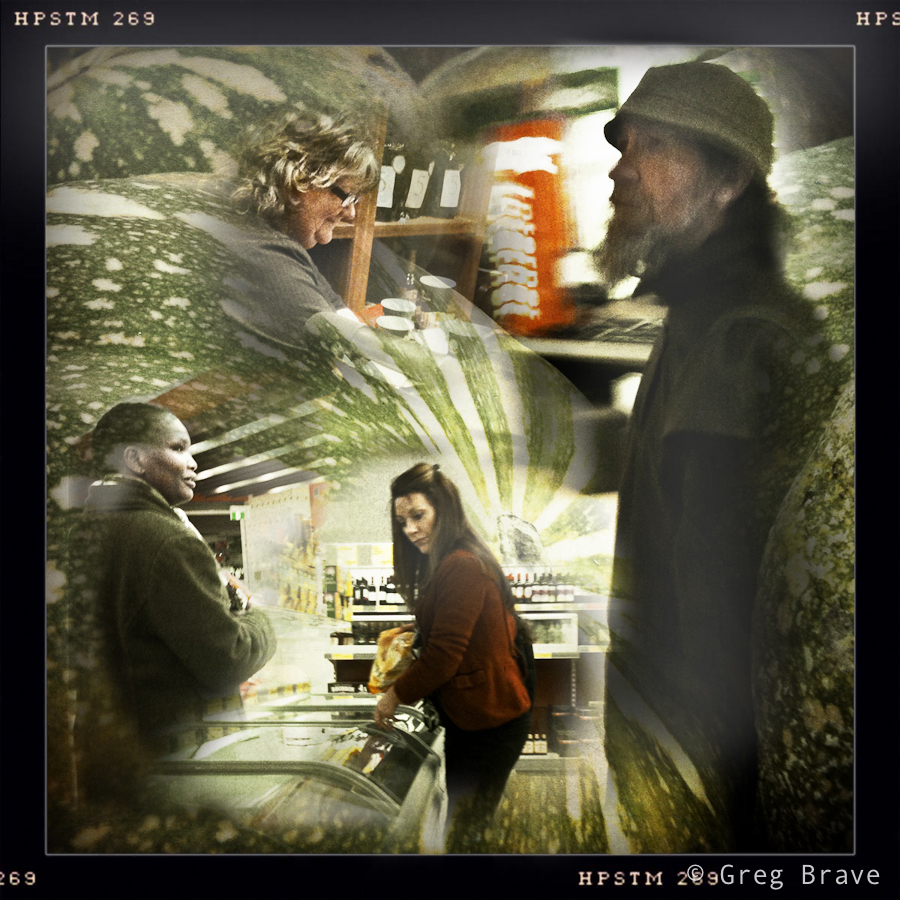
Click on the photo to enlarge.
To create this collage I loaded all the photos as layers into a single Photoshop file, and then used layer masks. The most difficult thing was to choose photos for the collage, and then to arrange them. Another problem was the choice of background.
I hope I succeeded to tell a story with this image, but I will let you be the judge of that.
As always, your comments are highly appreciated!
Festival In Nepal
I’ll See You in Three Weeks!
Once a year comes a wonderful time, when I take some time off work and fly away to fulfill my lust for traveling. This time it is a place I’ve dreamed about for a very long time. I’ll tell you all about it when I come back 🙂
Click on the photo to enlarge.
I will see you all in three weeks!
Wishing everybody a good day!
Greg.
A Dreamer
Angry Birds

Bigger

Three Photos From Prague
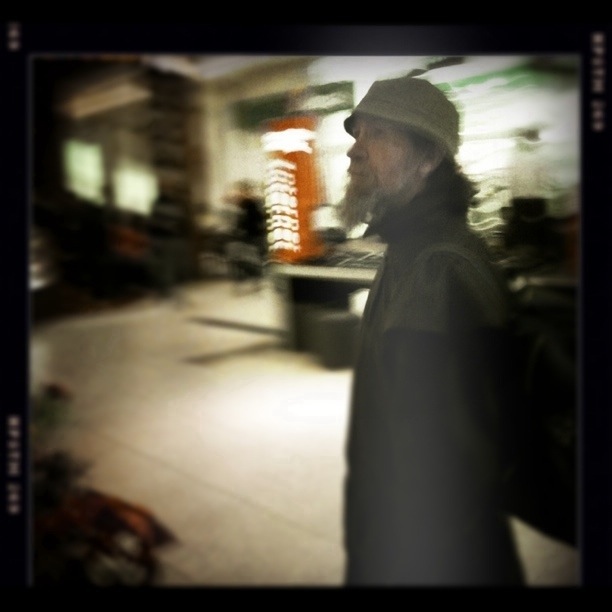
When a person looks at a photo, he (or she) can almost immediately say whether he likes it or not. In rare cases it can take a while, but eventually you can either like the photo, not like it, or stay indifferent to it.
But have you ever tried to ask yourself exactly why do you like or don’t like the photograph? It is much more difficult to pinpoint the reasons for which you feel about the photo the way you do.
In this post I am going to present three photos that I made during one of my visits to Prague, and try to explain why I like them. It will be a good exercise for me, and also a good experience for you, my readers. You might agree with my observations, or might not, but in any case I hope to help you to be more conscious not only when looking at images, but also when creating them.
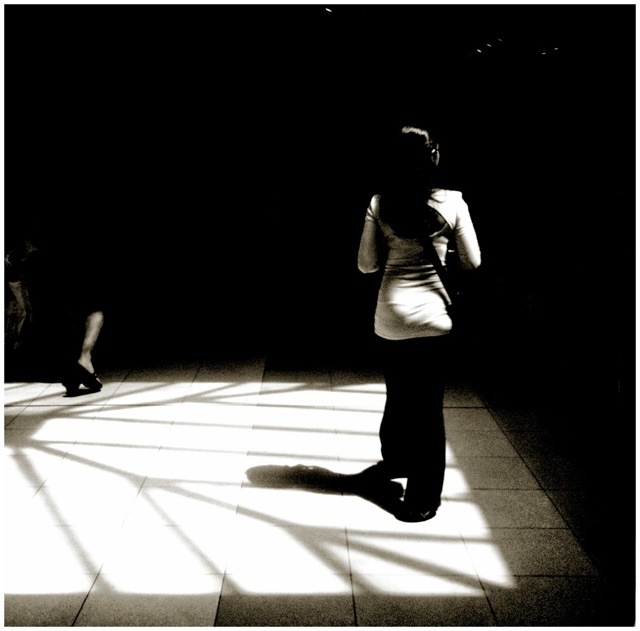
Click on the photo to enlarge.
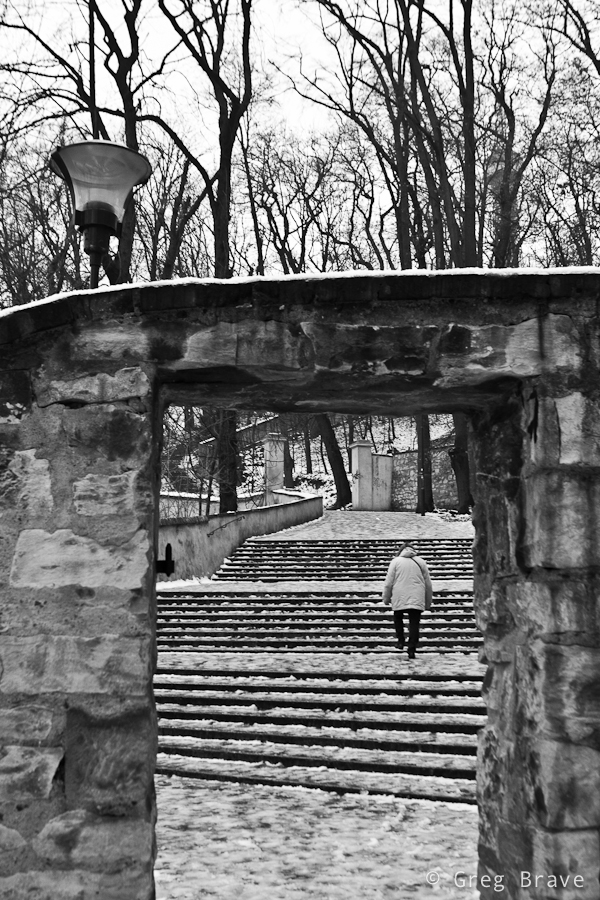
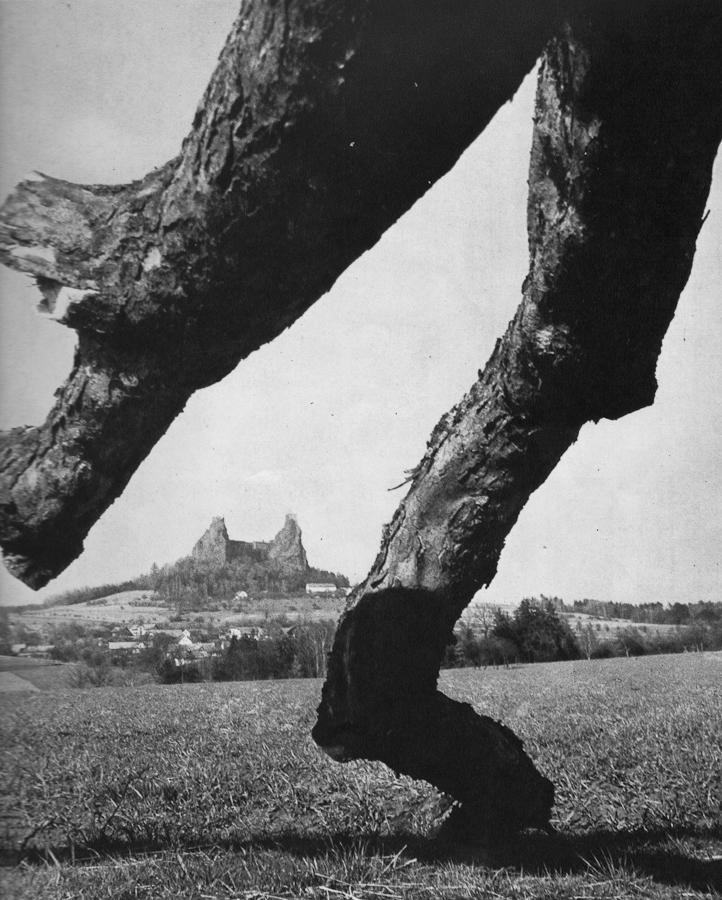
I like the photo above for several reasons. Main reason being that it creates a winter-cold feeling, and gets me in the wintery mood. How it does that? Well, first of all the B&W helps – it emphasizes the lack of colors on a typical overcast winter day. The lonely figure also adds to the mood. Imagine for a moment that instead of lonely figure there would be bunch of kids playing with snowballs – would that add to the mood that I’m talking about? Of course not. Considering everything else in the photograph would remain the same, they would create a contradiction by adding playful joy and “bright colors” into pale surroundings. This is why lonely figure is much more appropriate for this photo’s aim. What else? The bare trees and the snow on the ground of course. In addition there is also a three-dimensional feeling to this photo created by the narrow gate at the front leading the eye to the stairs and further on into the photo – different planes create a feeling of space, and the small human figure looks even lonelier in this space.

Click on the photo to enlarge.
Here is another photo of a snowy winter day, and also with a lonely human figure 🙂 What can I say, these photos were taken in the winter, it was cold and I was in THAT mood. I didn’t convert this photo to black and white because I didn’t feel that it was needed. On the contrary, I wanted the snow on the wall to be distinguishable, and the wall being colored helped that. There are several rhythms in this photo – the rhythm of the street lights, the rhythm of the columns on the wall, and the rhythm of the stairs, all creating a sense of harmony. The human figure has strong visual connection with the statue and the viewer’s eye travels between the two. This connection also prompts us to “humanize” the statue, to think of it as if it was a human figure standing there. These two figures are located in the frame in a way that creates compositional balance. The statue in front “tilts” the balance to the left, but the human figure “counterweights” it by being in the center. The statue is bigger, but because it has snow on it, it is brighter, and bright colored objects are perceived as light by the human eye, while human figure is smaller but it is much darker and thus perceived as “heavier”.
Click on the photo to enlarge.
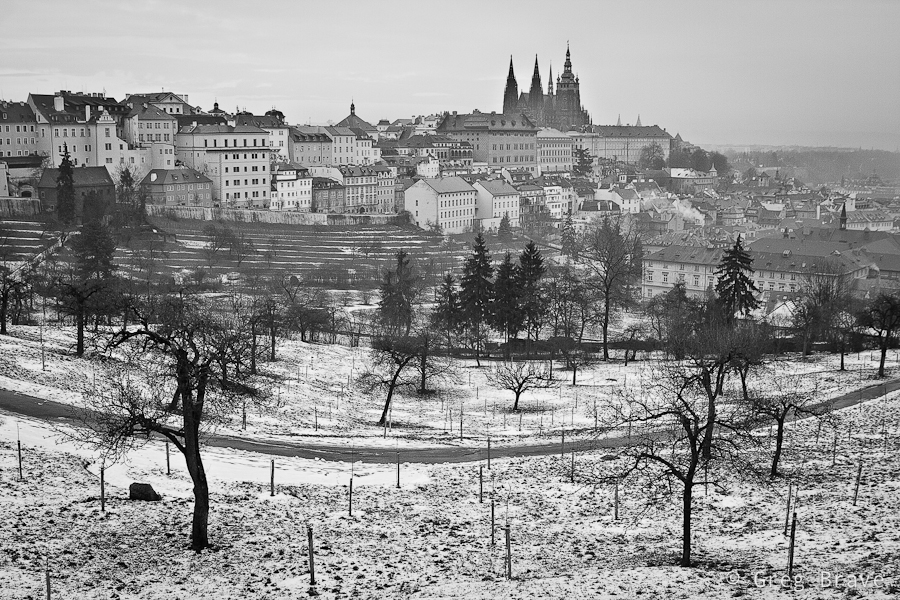
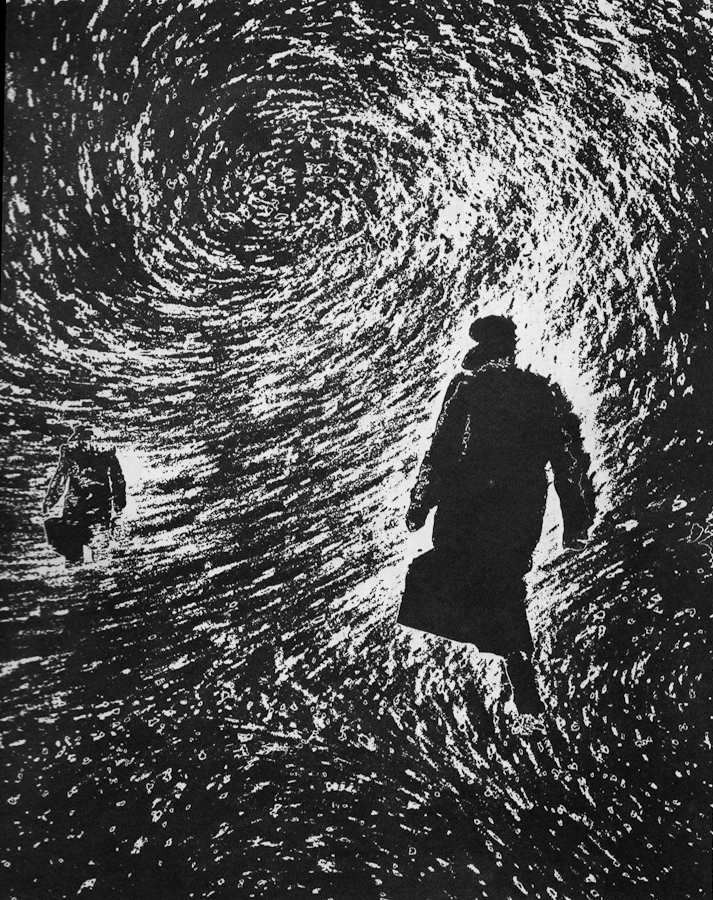
This last photo is my favorite. By the way, it almost didn’t need the conversion to B&W – the colors were missing from the world that day…
The arched walking path and the bare trees standing on its sideways create a sense of swirling motion around the city buildings with St. Vitus Cathedral rising in the middle and being steady as a rock. The horizontal lines in the middle background also add to the motion feel. It is almost a scene from fairytale with a mystical castle and enchanted trees.
Actually, besides what I wrote in the paragraph above, I find it hard to explain why this photo has such a strong impact on me, and maybe you can help me out here. How do you feel about the photos presented in this post, and this last photo in particular? And more importantly why do you feel that way?
Different Kinds Of Flowers

Different Kinds Of Flowers
Walk in the bush
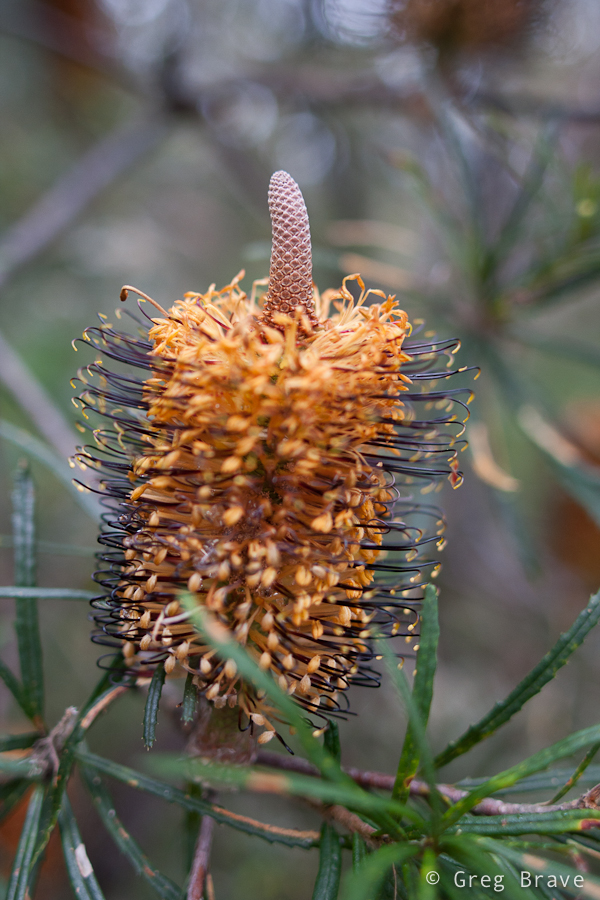
I just realized that even though I love photographing flowers, I haven’t shown much of them here. But hey, don’t worry! I’m here to fix that 🙂
A couple weeks ago me and Ira went hiking in the Bunyip State Park here in Victoria. To be honest there wasn’t much to photograph, at least where we were hiking, as it was mostly plain and boring eucalyptus forest.
Click on the photo to enlarge.
But when there are no breathtaking views around me, I take out my macro lens and start looking for the little things. And there were quite a few beautiful flowers there. Macro photography in the nature has its own tricks. Aside from artistic aspects such as choosing the subject, angle, composition etc., there are technical issues that should be thought of.
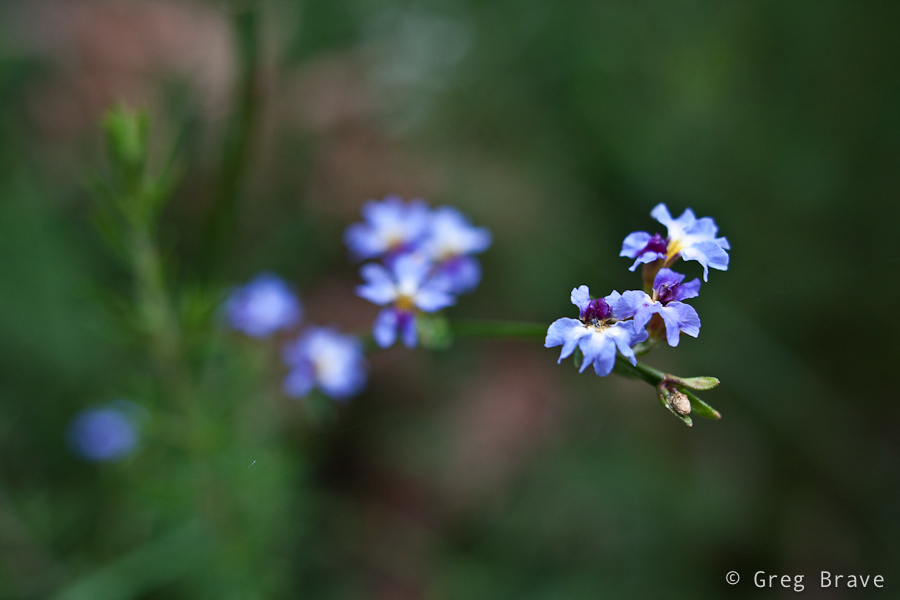
Click on the photo to enlarge.
When shooting Macro, even the slightest movement of your subject can result in loss of focus. So having that in mind I would suggest shooting at shutter speeds above 1/100 sec. It is more difficult with choosing apertures because that would be part of an artistic choice. Generally speaking, the wider your aperture, the faster shutter speed needs to be.
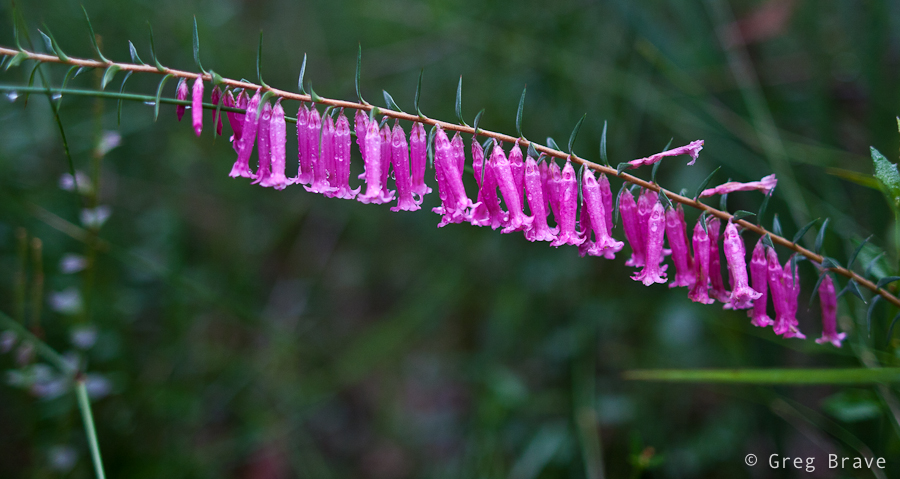
Now, you’re probably going to ask me – what about tripod? Well tripod can be a huge help, but it is not a “complete solution” to all your problems, because when shooting in the nature you have wind, and even if your camera is dead still on your sturdy tripod, one blow from the wind and your flower moves out of the focus area.
Click on the photo to enlarge.
Personally, I find using tripod in macro shots too constraining. Tripod gets in my way when I circle around my subjects looking for a nice spot to shoot from, especially when there are fast moving clouds in the sky and the lighting conditions change constantly.
Of course there are conditions in which using tripod would be very beneficial. For example picture this: Early morning, everything stands still. The insects are sleeping inside flowers covered with droplets of dew. The morning light is beautiful, and a little dim. This is the perfect time to use tripod – you would have enough time to put the camera in place, choose the composition and shoot away.
Click on the photo to enlarge.
Here, have a look at this plant, at first I thought it was a giant caterpillar 🙂
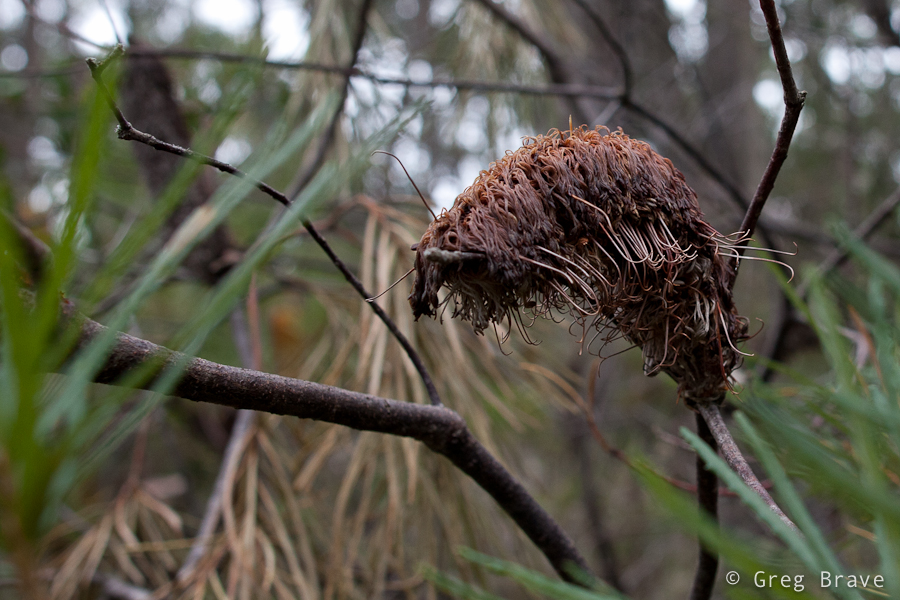
Click on the photo to enlarge.
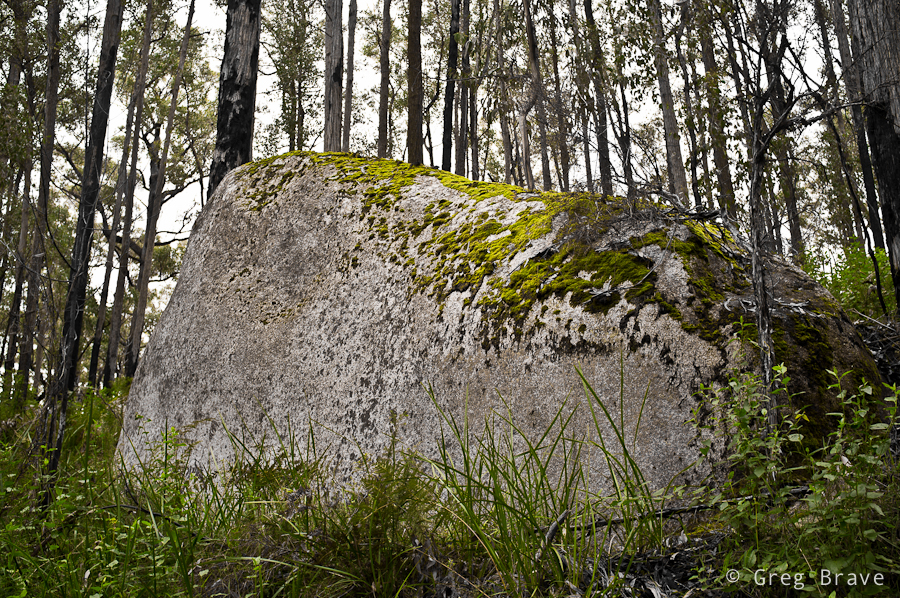
When I had enough of shooting macro, I started looking for a “bigger” subjects to put in front of my lens. I liked the moss on this huge stone. By the way, it is still a mystery to me how this huge stone ended up in the forest… it probably got there before these trees grew up.
I think I’ve already mentioned it in one of my previous posts – it is very difficult to take interesting pictures of forests, and if you just see a nice section of forest, point your camera at it and shoot, chances are that the photo won’t be of any artistic value.
In order to make your photo of the forest interesting, you must find a point of interest, something for the eye of the viewer to rest upon.
Click on the photo to enlarge.
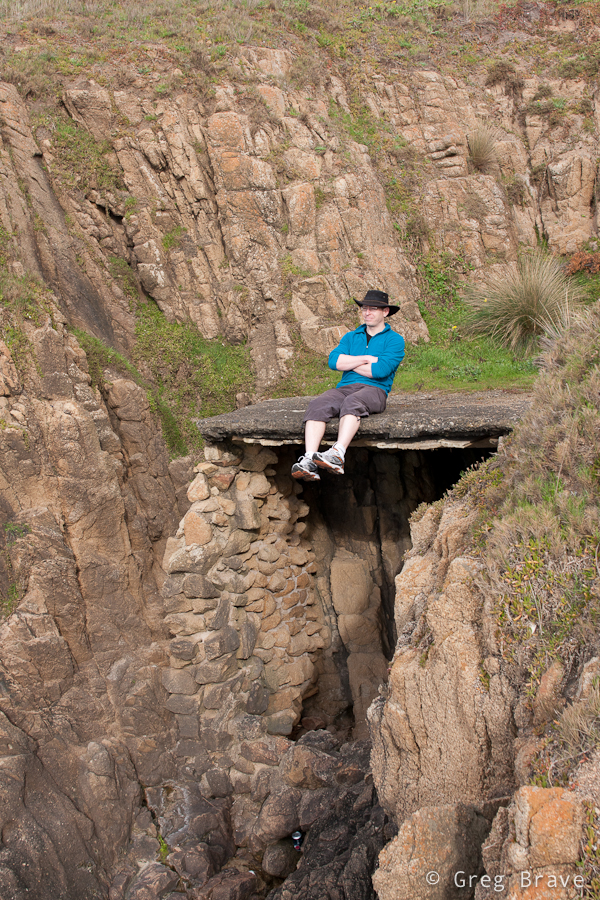
And finally, here is one of my favorite photos from that hike. Ira serves as a good reference point to show the scale of this place.
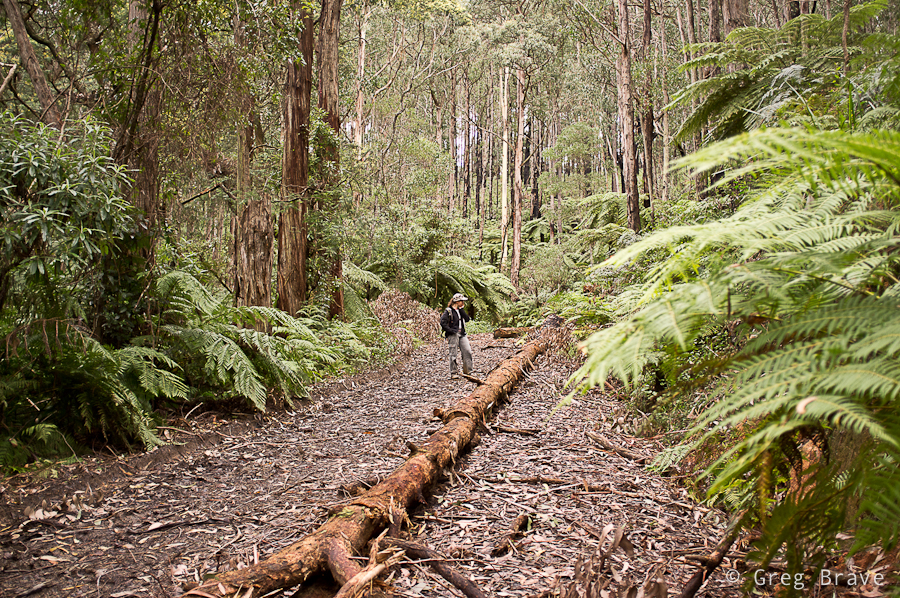
Click on the photo to enlarge.
What are your favorite macro tips? I am always willing to learn new stuff!
Home Blessing

End Of The Road
Learning From The Best
When I see a photo that captures my imagination, amazes me, or makes me think – I always want to know the story behind the photo – how it was made, why it was made, what was going through photographer’s mind when he created it.
Yes, I know, “photograph speaks for itself”, and for the viewer in me just looking at the photograph is enough, but the photographer in me always wants to know more.
One of the best photography web sites out there is 1x.com. Recently they created a new section – tutorials! In that section photographers whose photos passed the 1x.com selection process, and were published, can write tutorials how they created their works of art. It is something I was dreaming of!
Each tutorial has 6 sections. Lets go over them:
1. Context – In this section photographer writes about what led him to create the photo, what went through his mind.
2. The Picture – Here photographer explains how he took the photo, why he used that specific equipment, how he chose time of day, lighting etc.
3. Processing – This part is all about post-processing: how the photo was post processed and why, what programs were used. Decisions regarding cropping of the photo are also explained here.
4. Outcome – In this section photographer talks about how he sees the final photo. Did it meet his expectations? What he could’ve done to improve it (if at all).
5. Three Hints – Here photographer basically shares his wisdom. He gives three pieces of advice to his fellow photographers. I found here many gems, which gave me a great deal of inspiration.
6. Biography / Additional info – Here photographer tells a little more about himself as much or as little as he wants. In this section photographer can also add any additional information that he feels necessary.
I think that creating the tutorial section was a great idea, and any photographer can benefit from it!
You can find it here: http://1x.com/#!/tutorials
Cloudy Day

Cloudy Day
How Ideas Come To Life
Thinking of it, maybe I should’ve titled this post “story of an idea” because I will be talking about creation of one particular image. But I eventually I decided on the current title because the way this creation emerged from the depths of my imagination is one of the most common ways.
A few weeks ago I had a photo session with Ira, in which my primary goal was to try some new lighting techniques that I thought of. In that shoot I decided to focus on close up portraits (chest line and up). I experimented with different backgrounds and asked Ira to put on a few different shirts.
At first nothing was working for me. The lighting was bad, and I didn’t get any interesting results… but then again, I didn’t start this shoot with a specific idea in mind – it’s like that phrase from Alice in wonderland:
– In which direction should I go?
– It depends on where do you want to arrive
But I felt inspired that day and just kept on shooting and trying to get some nice shots. At one point Ira suggested adding an accessory – a piece of white semi transparent white fabric that she had, and I agreed to try it – it is a good idea to listen to your model, especially when you are out of ideas 🙂
Trying different variations we came up with this photograph:
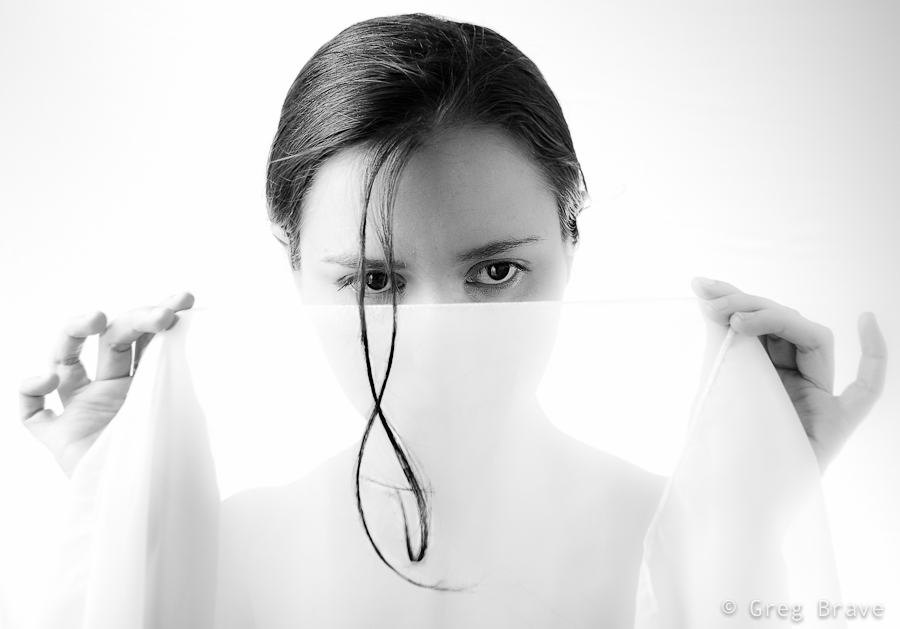
Click on the photo to enlarge.
I liked it, but quite frankly it lacks an idea behind it. I looked at this photo and thought “nice photo! but what am I trying to tell with it?”. And I couldn’t find an answer. So I forgot about this photo for a while and focused on other tasks.
After a while (a few days have passed since the shoot), when I was watching a Phlearn Pro photoshop tutorial (which by the way was magnificent!), suddenly an idea emerged in my mind. I remembered this photo of a spider’s web that I took:
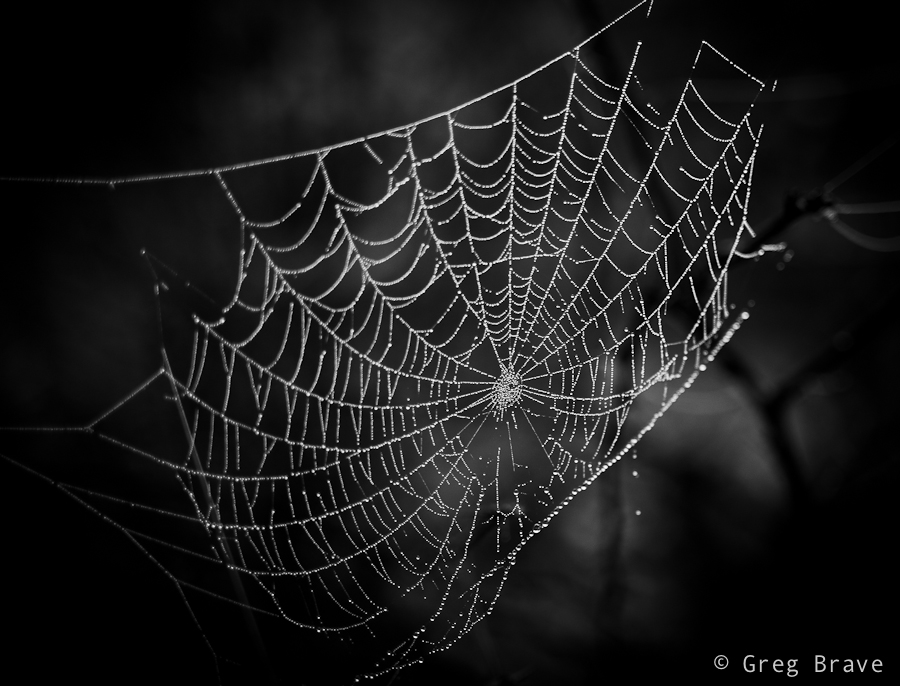
Click on the photo to enlarge.
And it suddenly got layered, in my mind, onto that photo of Ira holding white fabric, as if she was holding the web itself. I rushed into photoshop to try it, to see how it looks in reality. It was nice but still something was missing… what was it? The spider of course. So I searched the net for images of spiders and chose the one I liked the most. Then I brought it as a layer into my working file, and converted the spider to be pure black.
Now I needed to find a meaningful placement for the spider. I tried different variations before I came up with the final result, which you can see below. I call this image “The Way Up” :
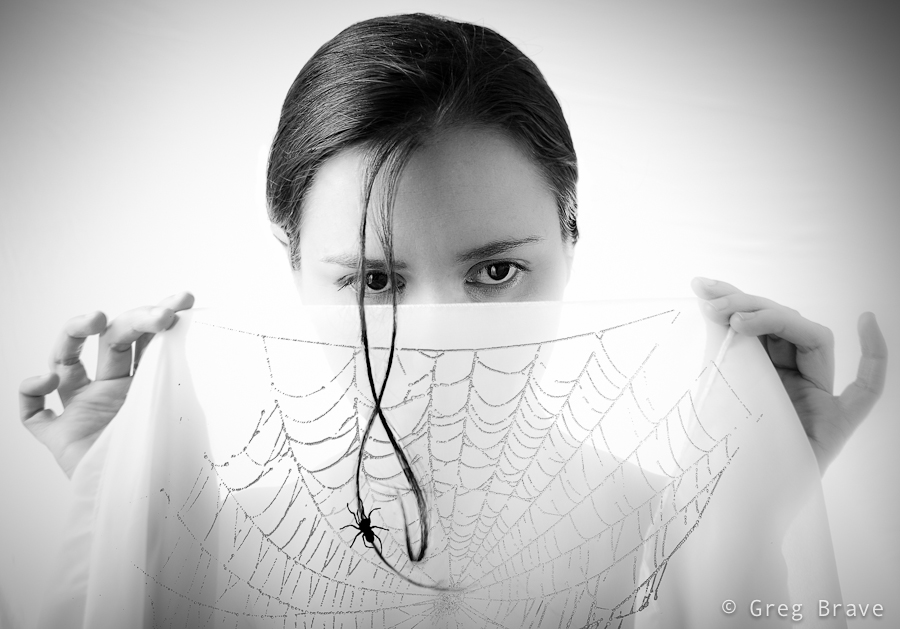
Click on the photo to enlarge.
By describing my creative process on one particular image I wanted to show one of the many ways creative ideas come to life – they are not always pre-conceived, and sometimes, as it was in this case, they develop step by step over time, graduating slowly towards the end result.
What do you think about the final image? Your thoughts, comments, and suggestions are always appreciated!
Pavement Art
Dinner In Color

Dinner in Color
Melbourne’s Street Life
Recently I had a chance to walk around Melbourne’s CBD, and I got fascinated with the wealth of photographic opportunities! You just have to keep your eyes open. I think such walk with a camera could also be a great exercise for any photographer. I have to admit, I just did it for fun… and I loved it!
Ok, let’s see what I’ve got for you this time:
Click on the photo to enlarge.
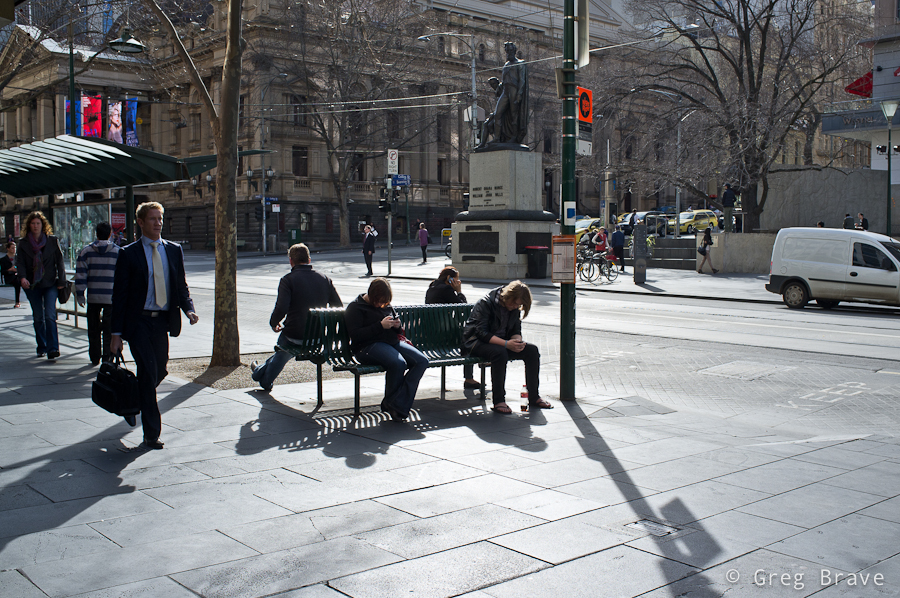
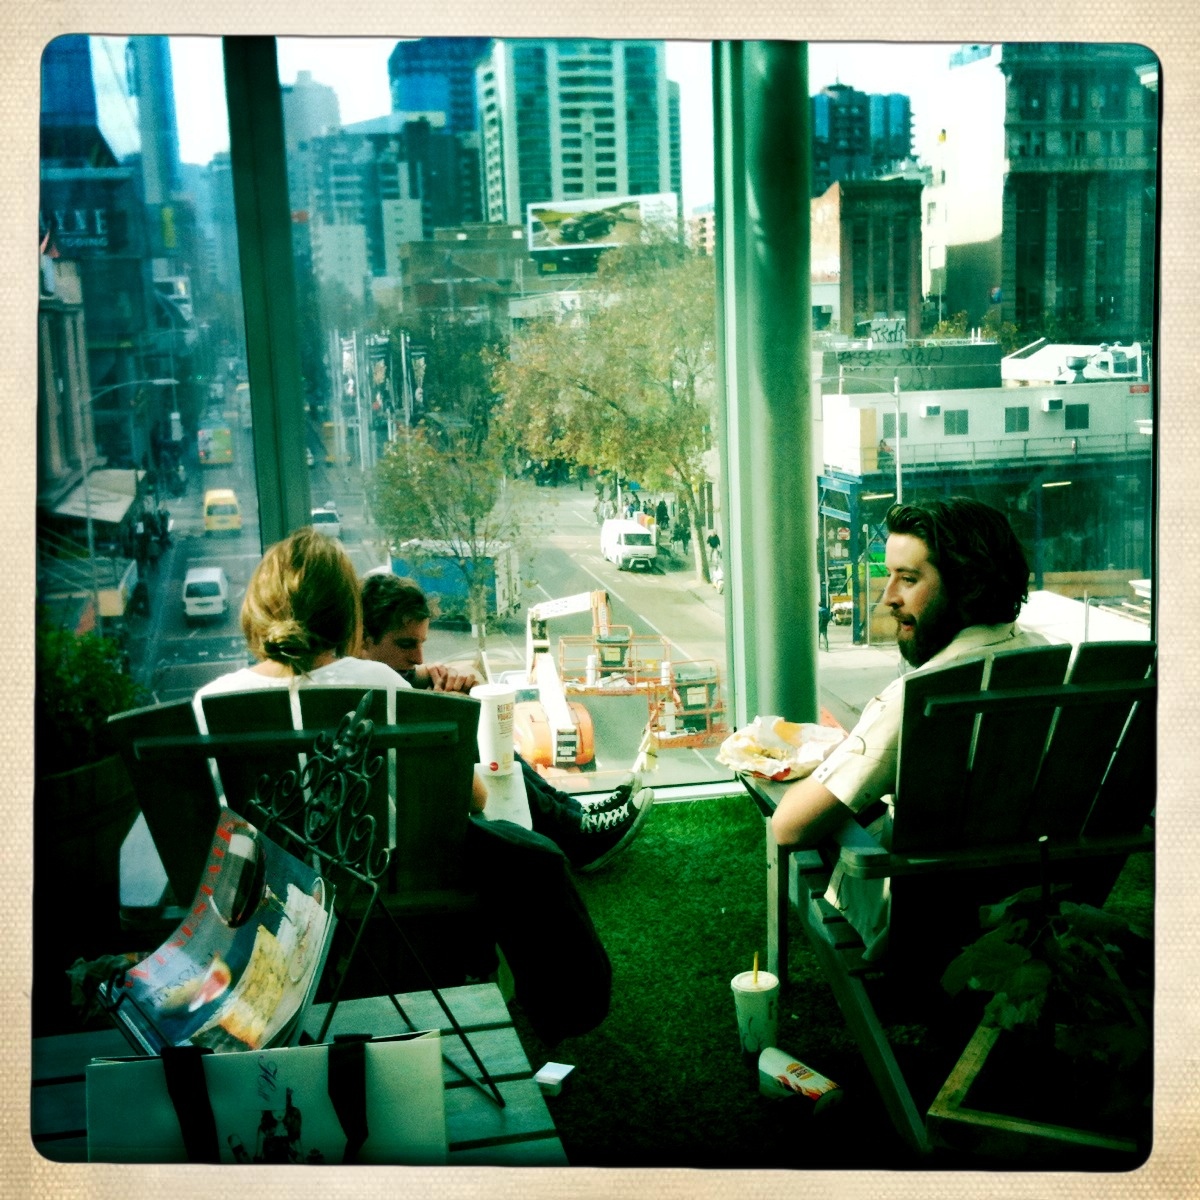
The photo above is one of my favorites from that walk. There are several compositional connections in it, and while not all were intentional, nevertheless they all contribute to the composition. The most emphasized being the people sitting on the benches, three of them using their mobile devices and the fourth person might or might not use his device, and this fact creates additional interest. Another connection is between the walking man on the foreground left, and the walking woman on the background – these figures are connected with a virtual diagonal line. Third compositional connection is between two standing figures in the background. There is also an additional connection which I won’t mention here – think for yourself what is it and write your conclusion in the comments below.
Overall, I think, this photo creates a pretty good picture of “urban life”.
I took the next photo in one of the alleys. The restaurant wasn’t open just yet, but in the kitchen it was business as usual as they were preparing for opening. You must see this photo in a bigger size (just click on it). Walking through that alley first I was fascinated by the graffiti on the walls and then I saw the kitchen staff working inside, and immediately noticed the contrast of the inside/outside. I took a position in which the reflections of the graffiti on the opposite wall would be most visible in the windows to give a better idea to the viewer regarding the outside world, and waited for the one of the workers to make any articulate move. The result you can see below.
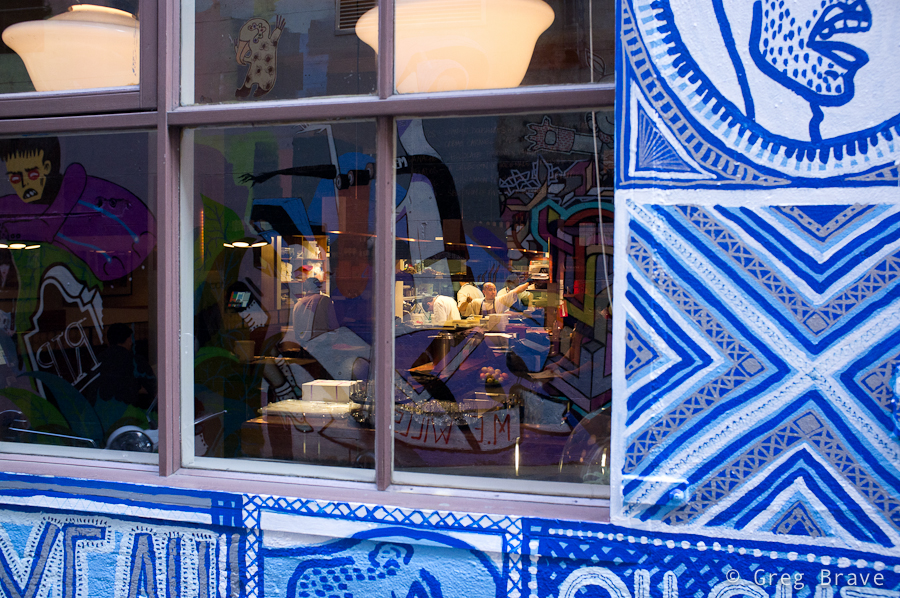
Click on the photo to enlarge.
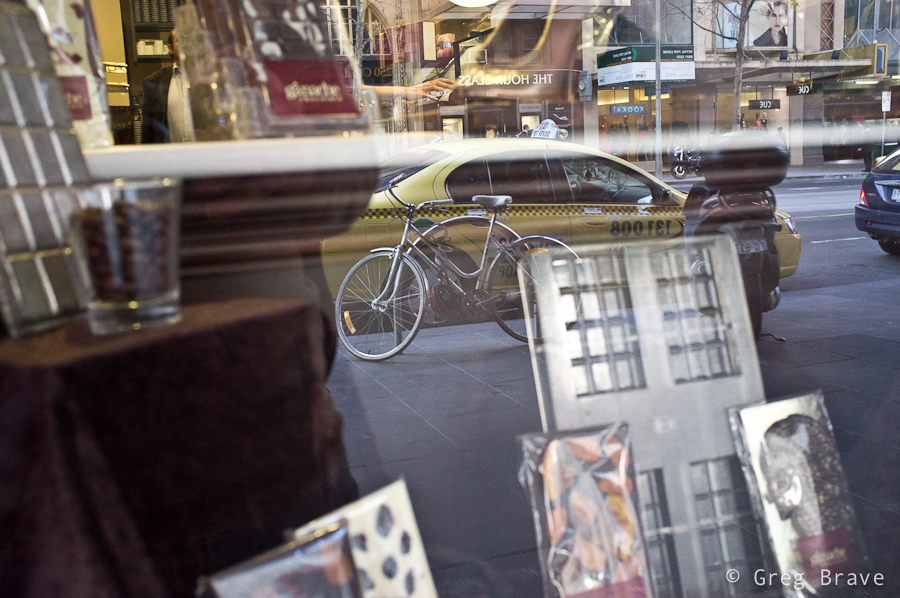
The photo below… yes, I know, photographing reflections and turning the photo upside down had become a corny trick, but in this case I just couldn’t help myself.
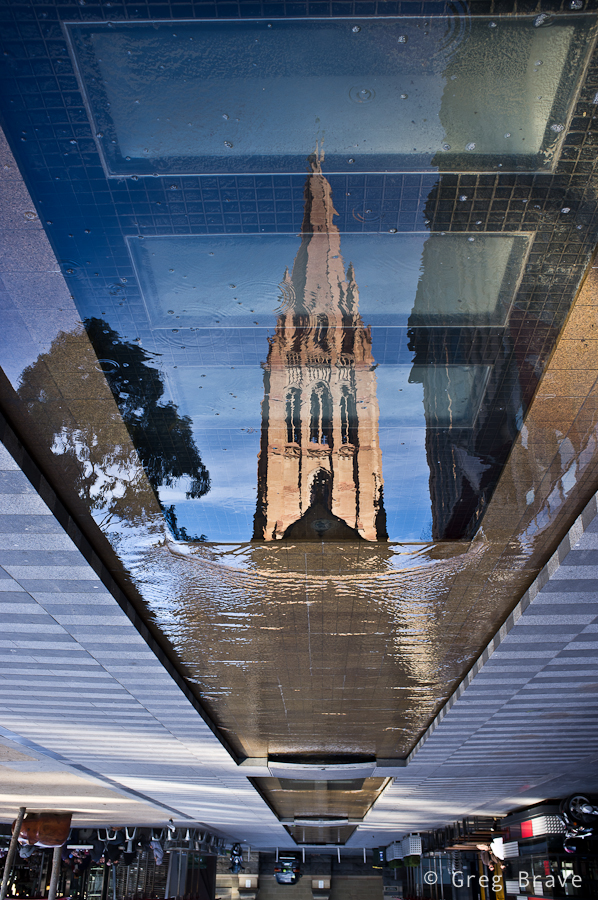
Click on the photo to enlarge.
The next photo shows a true moment of interaction between two people (my opinion of course), and this is why I like it so much. Catching such moments is not as easy as it might seem (people are interacting all the time after all!), and I got lucky with this one.
Click on the photo to enlarge.
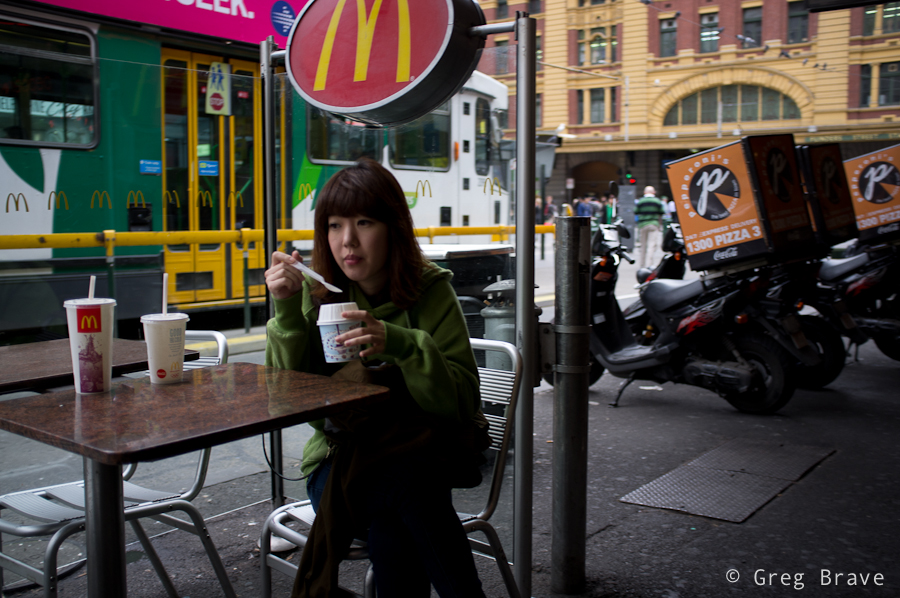
Here is another little urban story… I wonder if all the cups belong to this girl 🙂
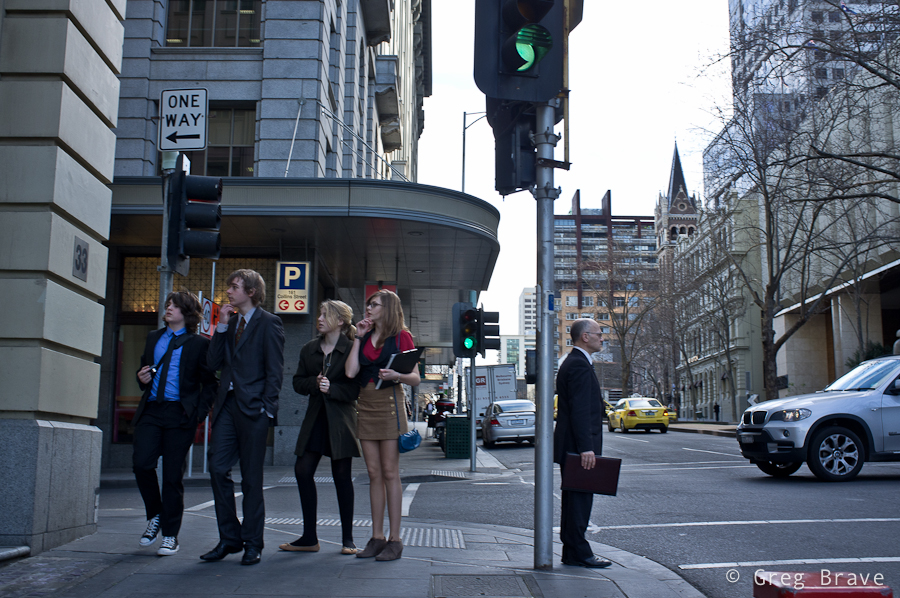
Click on the photo to enlarge.
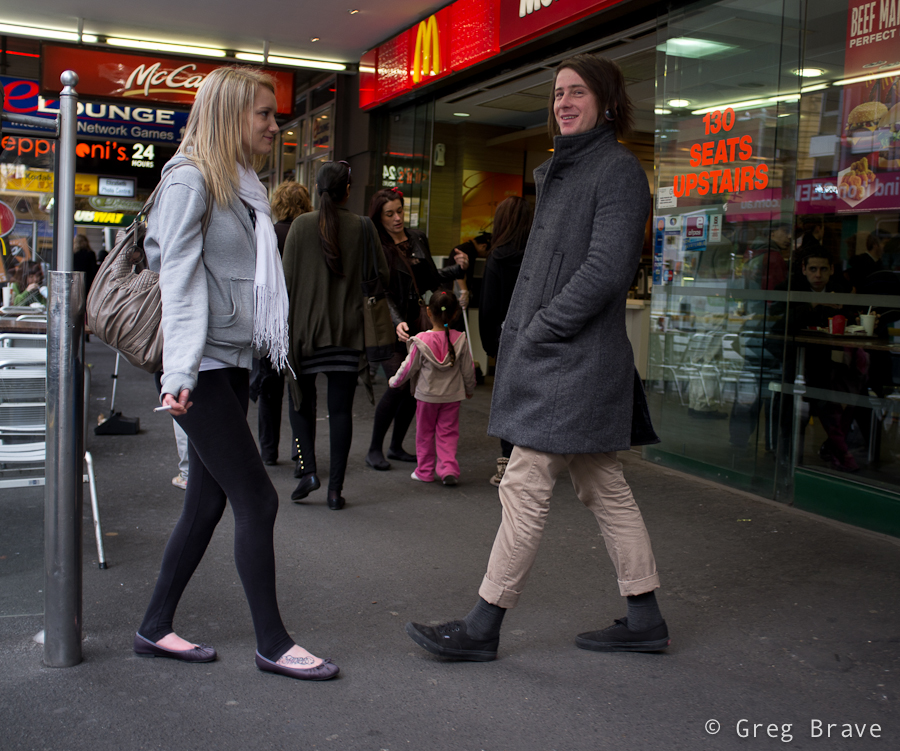
Next photo is an interesting one as there is a compositional conflict of directions… I just made this term up! Here’s what I mean – the group of teenagers are all looking left, also the “one way” arrow points to the left – all making the viewer wonder what’s there, and then you have the man standing in the center of the composition facing straight to the right, and even though I used the word “conflict” in my description of the photo, I still think that it is compositionally balanced because the compositional weight of the group of teenagers and the arrow is balanced by the weight of the man, though he is a single person opposed to the group, but he is in the center and his “sense of direction” is stronger.
Click on the photo to enlarge.
I have mixed feelings about the last photo, but I still decided to present it here. What I like about it is that it is a collage without any photoshop, and also a slight surrealistic feel that it communicates. What do you think? I would appreciate any thoughts on this one.
Click on the photo to enlarge.
As always, your comments are appreciated!
Encounter

Encounter
Photography As Form Of Art – Free PDF Download
Everyone following my blog must’ve noticed that lately I am getting into more serious study of photography as form of artistic expression. In Photopathway it all started with my post “Wisdom Of Photography” where I wrote about my exploration of an old book about art of photography. Next came the post “About the Attitude Toward One’s Own Artistic Endeavours” , in which I tell about wonderful Czech photography magazine “Revue Fotografie” from the 1960s. In that post I also presented my translation of one of the articles I liked the most in that magazine.
In this post I continue in the same direction but with a slightly different approach – I created a photo album (in PDF file) containing most of the photographs from the 3/1961 issue of “Revue Fotografie”, which I would like to share with as many aspiring photographers as possible by making this PDF file available for free download.

In the photo album I also wrote a foreword article outlining my reasons for creating it. Let me share parts of the foreword here, and make sure you download the album by clicking on the banners above or below.
“… I strongly believe that in order to advance in photographic vision and skills, one has to learn from the masters. Not to copy their work, but to understand what actually good photography is. Looking at good photographs one can begin to understand what do the words ‘photographic vision’ mean, and also to learn how to powerfully express thoughts, feelings, and emotions through a photograph.
Nowadays, one of the most serious problems lying on the path of any aspiring photographer, is the enormous amount of mediocre photographs presented everywhere, making it hard, especially for the beginner, to distinguish between real works of art and a ‘nice wrapping without the stuffing’.
So what am I presenting in this photographic album?
To explain that, first I have to tell you about a photographic magazine “revue Photographie” that was published four times a year in Czechoslovakia between 1950s and 1990s in several languages. Don’t even try to compare it to most of currently published photography magazines, which are filled with advertisement and “shoot like a pro” articles!
In its early years “revue Photographie” was considered one of the (if not THE) best photo magazines in the world. Founder and editor-in-chief of the magazine during 1950s and 1960s was Václav Jírů, a very talented photographer himself, whose photographs are now being displayed in museums and sold on auctions.
Václav Jírů selected and approved most of the photographs, making the magazine a true work of art. In today’s terms it would be comparable to 1x.com. Of course photographs weren’t the only asset of the revue. The articles too were very educational and informative, dealing not only with questions of photographic techniques but also with more important issues such as:
– Photography as form of art
– Moral obligations of the photographer
– Place of photography among other art forms
and many more.Even during the time it was published, “revue Photographie” was very sought after, and not easy to acquire, not to say about nowadays.
I got very lucky to lay my hands on one of the issues. It is the third issue of the year 1961, published in Russian. I happen to know Russian so I had an enormous pleasure reading it. One of the articles was simply too good to not share it, so I translated it to English and you will find it on the next page. The photographs, on the other hand, don’t require my translation, and are there for everybody to look at, learn, and appreciate.
In this photographic album I arranged most of the photos from the 3/1961 issue of the revue. I hope that many aspiring photographers will get to see this album, enjoy, and learn from the photographs presented in it.
I will continue my search for other issues of “revue Photographie”, translate its best articles, and put up its photos here, on the pages of my blog… “
Feel free to share this album with anyone who you think can benefit from it, and I would appreciate any feedback regarding this album in the comments section below this post or to my email – greg at photopathway dot com.
Life II
Life
Sunrise Walk
Lately Ira and I adopted a new habit – we get up early in the morning and go out for a walk in the neighborhood before work. It is winter in Australia so we have late sunrises and early sunsets, therefore we often start our walk before the sunrise, and have the joy of witnessing it to the fullest.
From photographer’s point of view not just any sunrise, as well as sunset, is perfect for landscape photography. Of course it all depends – whether there are too many or too few clouds in the sky, if it was raining at night (if it was, there is a good chance of having crystal clear atmosphere with bright colors), if there is morning mist. It is also depends on your subject obviously, and on how you intend to photograph it – for example what quality of light do you need.
Anyway, I am talking about simple walk here, with no specific intentions. In this case good sunrise colors and interesting cloud formations can help a lot in creating interesting photographs.
Here, see for yourself:

Click on the photo to enlarge.
I liked the sunrise-lit sky very much, and decided to make it the main subject of the photo above. I only had to find a decent framing for it.
I decided to call the photo below “Absense”… can you think why? If you have an idea please write it in the comments section below.

Click on the photo to enlarge.
Next photo shows a location that I’ve photographed many times, but under this light, I think it looks the best. I am bothered a little bit with the foreground, but I still like this photo very much. Many things come together here – as I already mentioned the light is beautiful, the depth is depicted nicely by the three planes – the foreground, the “middleground” with the white houses and the background plane is emphasized by the piece of land sticking out. The winding road takes the viewer’s eye smoothly through the planes, and the lonely car in the middle-left adds to the overall mood of the photograph.
Click on the photo to enlarge.
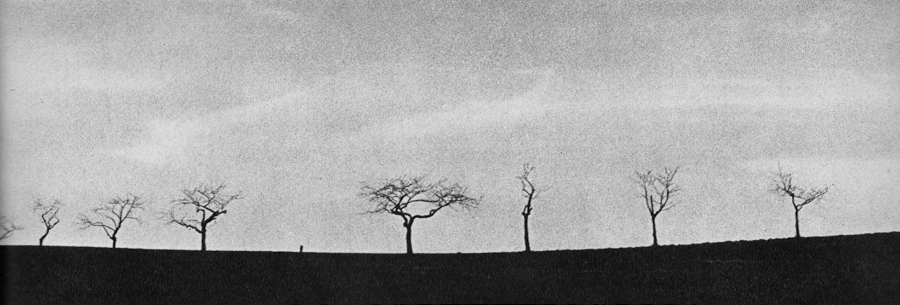
I took the photo below because of two main reasons – one, to show the beautiful cloud shapes and sky colors colors, and two, to emphasize the pure graphic nature of the tree branches, which are very eloquent when depicted as silhouettes. I think that the plain poles in the middle add nice perceptual contrast to the intricate shapes of the trees.

Click on the photo to enlarge.
Next photo is simply here for you to enjoy.
Click on the photo to enlarge.
I call the next photo “The victory of Light over Darkness”. Again the main interest in it is the sky, but without having interesting shapes of houses on the foreground I wouldn’t take it.
Click on the photo to enlarge.
Here’s couple more photos from the same walk taken after the sunrise, when the sky wasn’t so interesting anymore and I had to concentrate on other things 🙂
Click on the photo to enlarge.
Feel free to leave your thoughts, suggestions, and other comments in the section below.
I’m off to take some photos, be back soon!
Pool Time

pool time
Forms
Renaissance
Creating Dynamics In The Shot
Yesterday I visited Melbourne’s CBD, and had a chance to take a few photos in Docklands area. Afterwards, when I was going through them on my computer (most of them weren’t anything special 🙂 ) , one photo grabbed my attention.
Here it is:
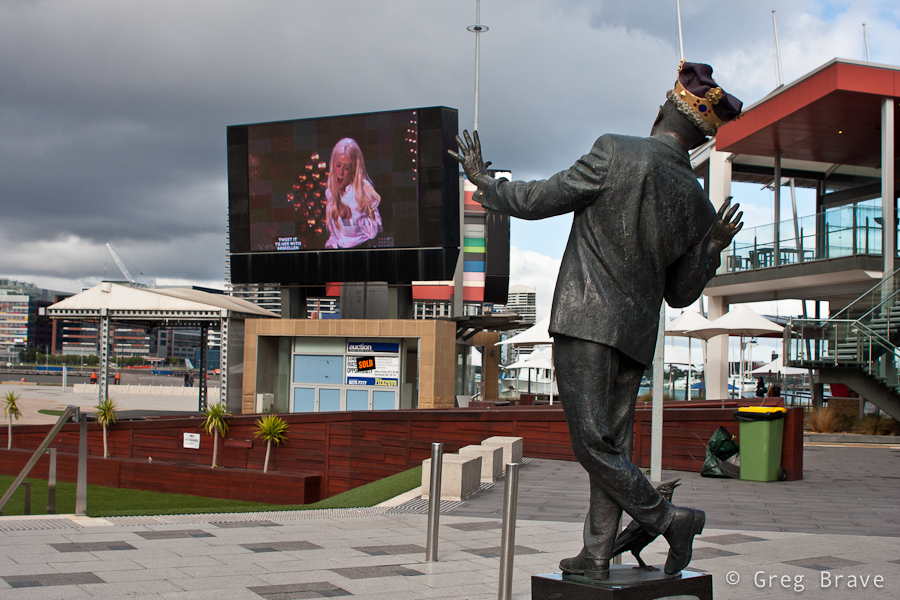
Click on the photo to enlarge.
When I was making it, I simply thought it would be a good idea to capture the singer on the big screen in an interesting pose so that I would have both, statue and singer ‘posing for the camera’.
But when I was looking at the photo later, on my computer screen, I’ve noticed that it has very ‘dynamic’ feel. I could feel the movement of the statue, as if it was a live person. So I started thinking – why is that happening? Why is the statue, which didn’t look that much ‘alive’ in reality, came to life in my photograph?
And here is my conclusion: it is because I created Interaction between the statue and the singer. It looks like the statue ‘responds’ to the movement of the singer, and since we all have no doubts that the singer is a live person, that feeling also ‘spills’ onto the statue.
It is very interesting effect, which can be used when photographing other situations. Even with this same statue – if instead of singer a real person would be somehow interacting with the statue, it would also make the statue come to life. For example imagine a bunch of kids dancing around it.
As always your thoughts and comments are highly appreciated!
About the Attitude Toward One’s Own Artistic Endeavours
In one of my recent articles titled “Wisdom Of Photography” I shared with you, my readers, some of the interesting thoughts about photography that I found in an old photography book. After finishing that book, I continued my search after interesting old photography related material, and I found a magnificent Czech magazine named “Revue Fotografie”, which was published four times a year in the middle of the 20th century (approximately from 1960s to 1990s). This magazine was widely considered to be one of the best photo magazines in the world at the time. It was also translated from Czech to some other languages including German, and Russian. The specific issue that I found was Russian edition of third magazine in 1961.
I can’t even begin to describe how much I was impressed with the articles and photographs presented in this magazine! But as always, I want to share some of the wisdom I learned from it. I am aware of the fact that my blog becomes more and more serious, but after all – it is my path in photography, and it is what it is.
From the magazine, I particularly liked one article. I translated it to English and sharing it here. While reading it, please have in mind that it was written in Czecho-Slovakia in its “Communism” period. I tried to omit as much as possible the parts which are not relevant to our times, but most of the article is as relevant to photography now as it was back then. Along with the translation I am also including a few of the photographs from the pages of the magazine.
I hope you enjoy it as much as I did!
Carel Gibner – ‘An Area’. Click on the photo to enlarge.
Written by Tamara Shevchenko, translated by Greg Brave
About the Attitude Toward One’s Own Artistic Endeavours
One of the most gratifying things in our work as editors of the “revue Fotografie” are the letters from our readers, and whole stacks of them! In these letters many photographers share with us their plans and views on photography. Often they write about their lives, and are being very demanding, as only sincere friends can be, towards the work of our magazine. The sincerity and friendliness of our addressees pleases our editorial staff, and countless praises awakens the desire to devote ourselves even more to our work.
Often, however, warm, friendly, and sincere letters are accompanied by poor, indistinctive, similar to hundreds other, photographs. One couldn’t help not to think about it. Why it is so? Why in such a wealth of different destinies, characters, and points of view, people who pick up cameras, try to reproduce overused themes or to emulate the masterpieces instead of revealing their own true selves?
Here we will not touch on the subject of talent and lack of it. In any case I don’t think the question of talent should be only regarded as a “gift of God”.
L.Fischer, Austria – “Secret”. Click on the photo to enlarge.
As we all know, Leonardo da Vinci was the first to develop laws of perspective for painting. And since then young artists don’t need to wait for “divine intervention” in order to rediscover these laws as they can all be learned from Leonardo. The cultural heritage of humanity is freely available to everybody. Therefore, looking through hundreds of photos, again and again I wonder if the inexpressiveness, impersonal nature, and similarity of them is in reality a hypocrisy and insincerity of the photographer towards himself?
Such an amateur photographer, having read on the front page of our magazine the words “review of artistic photography” immediately decides: “let’s send them photos of trees, water, sunset, or cloudy skies”… and our editorial office receives hundreds of photos of trees, water, sunsets etc. as if these subjects are the true discovery and revelation to the people.
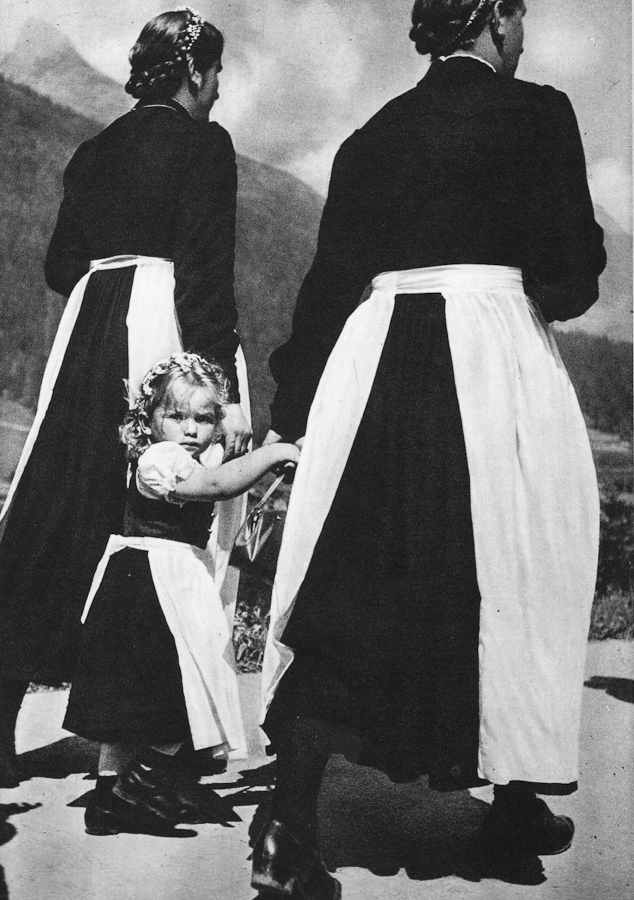
L.Fischer, Austria ‘Curiosity’. Click on the photo to enlarge.
Art arose from the desire of the artist to tell about himself. After all, even when artist speaks about his surroundings, or events that he witnessed, he in fact tells us about himself, about things seen through his own eyes. And magnificent art, which survived its creators, was created by the artist’s ability to see things so originally and so deeply, as nobody saw ever before him.
If a person does not want to talk about himself, he is silent. But if a person is not silent, if he picks up a camera and tries to use photography as an art form because he feels that its means of expression fit him the most of all other forms of art, such person should not be afraid to create his own artistic statement. It is the right and the privilege of any human being of our modern times – to find and acknowledge the meaning of his own life, express it, and strive to live the life of significance, brightness, and excitement, to find one’s self.
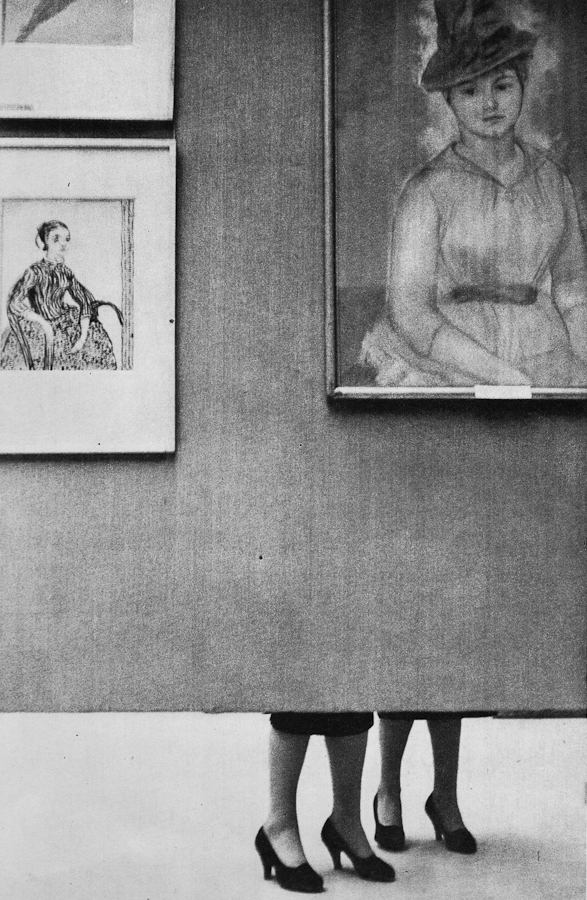
A.Zybin – ‘In Art Gallery’. Click on the photo to enlarge.
Of course, one should still photograph trees, waves, and sunsets, but the photographer must be an artist, a person who can see the landscape in his own original way. We are surrounded by a huge variety of things, creatures, and destinies, but we ignore them, hiding behind the undeniable beauty of the generally recognised subjects. In our photographs we avoid expressing the controversial, the unresolved issues within and around us.
We often comfort our self-esteem with the dream of our existence in true art by imitating famous photographs thinking that by doing that we can’t go wrong.
Equally wrong is the way of those who constantly increase the color saturation of their photographs (this can be understood not only directly, but also metaphorically – Greg’s note). This is an evidence to one’s inability to appreciate the beauty of life, to prefer real life’s beauty to the artificial one.
Leopold Fischer – ‘In А Storm’. Click on the photo to enlarge.
Our editorial office received one curious objection from one of our readers, condemning the photo of patterns created by foam on water, and other such photos in our magazine, which the reader personally didn’t like. From his letter I understood that many years of age separate this person from his childhood, and apparently also from the fresh, lively, and direct perception of the things around him. Childhood memories, though naive, are very profound. In childhood one sees things, so to say, up close (like in macro – Greg’s note). A small blade of grass is visible down to its root, a crack in the pavement is scary because it is deep and unexplored, thick walls of old buildings – what a fertile ground for imagination! These were just a few examples of course.
Yaroslav Parcovsky – ‘Time Walks The Earth’. Click on the photo to enlarge.
Over time a person learns to evade the puddles, not to climb up on every obstacle on his way, not to drag a stick along the fence. And learning manners is generally a good thing. But how many interesting things start to slip away from our attention as we grow up! In true artists many recognize soul of a child. Maybe this “childishness” actually is a profound understanding of things around us, the ability to see them “up close”.
Miroslav Yodas – ‘Construction’. Click on the photo to enlarge.
Therefore isn’t it better to be more curious of things surrounding us, which may even sometimes irritate one’s “untrained” perception, and not condemn them unconditionally just because they are perceived as something not usually shown in photographs?
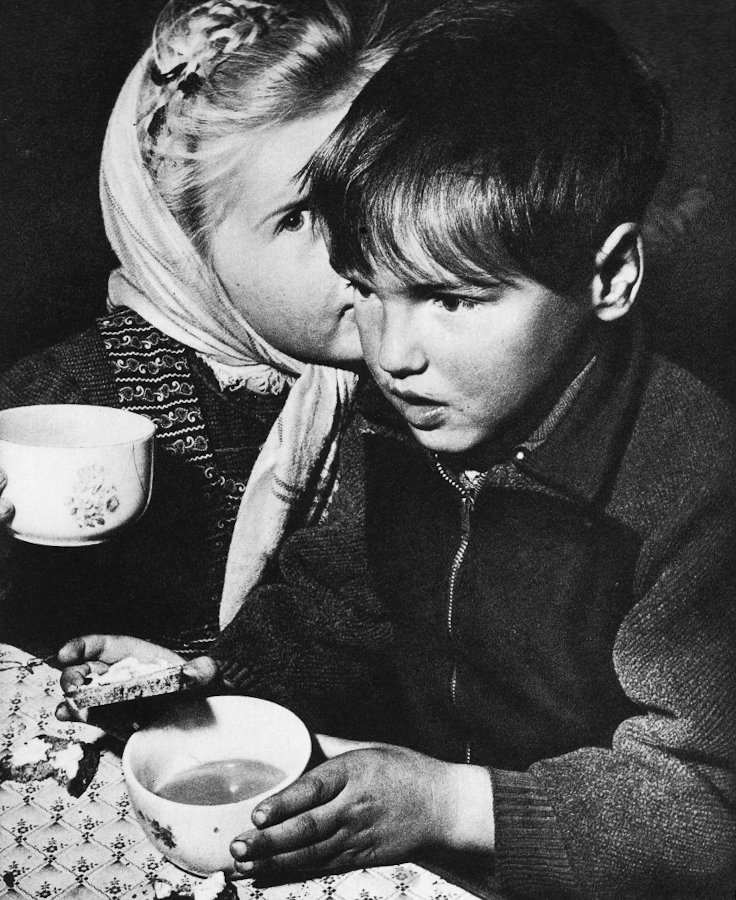
Yuri Gantman – ‘In The Morning’s Silence’. Click on the photo to enlarge.
Karakuli
Kettle Portrait

Preparing Lunch

The Other Way Around
The “Essentials”
Family Photo Shoot – How I Did It
I think that this is how many photographers start their venture into the realm of professional photography (by “professional” I mean paid jobs): I photographed my friend’s kid, then his friend saw the photos, got excited and offered me the job.
He asked me to make portraits of his one year old son and of the whole family. Needless to say that I agreed. Even though nowadays everyone has a digital camera, and any parent snaps tons of family photos, there are many people who still appreciate good photography, and can tell a great portrait from snapshot. Still, the job of photographer is harder now than ever before – his photos has to stand out of thousands of such snapshots.
So let me share my experience from this family photo shoot.
First of all I talked to the guy and asked him what did he expect from the shoot. This is very important – you have to be absolutely clear in regards to what your client expects from you. Here are some example questions to ask your client:
– How many digital photos (in files, not printed) does he expect to receive?
– Does he want prints, or just the digital files?
– Agree on the time frame for you to deliver the photos
– Does he want any artistic post processing?
– Which portraits exactly does he want – of the whole family only, individual portraits only, both, or maybe he has some kind of special request.
– Ask your client if he can show you (from internet or his friends) examples of photos that he particularly liked.
-If the shoot is to be held at client’s house ask the client about the dimensions of the house, and whether he wants the shots to be studio-like, because in that case you’ll have to bring your own background.

Click on the photo to enlarge.
In my case client already saw my work and he said that he wants something of that kind. What he saw was portrait of a child tightly cropped and processed in sepia tones. In addition he said that he would like similar kind of photo but of the whole family. He also said that he doesn’t need a lot of photos, just a portrait or two that will remain for the years to come.

Click on the photo to enlarge.
The photo above is my favorite from that shoot. I love the kid’s look, and his inviting hand that “takes” the viewer’s hand and leads him into the child’s world…
Sorry, I got distracted… where were we? Ah, the expectations! So after talking to the client I understood his demands, and tried to fulfill them during the shoot.
Preparing for the shoot
I did this shoot at the client’s house, so I’ll describe my preparations for that specific case.
– Most important thing: Lighting. Even if the shoot takes place during daylight, if it is indoors there might not be enough sunlight, so you’ll have to bring your lighting equipment. I had a light stand, two strobes, a white shoot-through umbrella and a soft box.
– Lenses. If your client doesn’t have a lot of space in the house, you might not be able to use your favorite telephoto lens for portraits, which is too bad as it creates lovely bokeh :).
For portraits I used two lenses – Canon 24-70mm f2.8L and Canon 100mm f2.8 macro.
– Memory cards, backup batteries, cleaning cloth etc. Though this might seem trivial, but forgetting any of these (well cleaning cloth excepted) can cost you the photo shoot. If you bring strobes, then don’t forget backup batteries for them.

Click on the photo to enlarge.
The Shoot
Don’t be late. This is very important – it shows how seriously you take your job.
As a photographer you will benefit from being an open and communicative person. Talking freely and openly with people you are about to photograph makes them feel more comfortable with you and in front of your camera, and enables you to capture their natural expressions.
Shooting little kids is difficult because you can’t just ask them to be still, sit at one place, smile, or play with their toys. So you have to improvise. It is a good thing to ask parents for help. In my case the kid’s mother played with him and I was able to catch some nice facial expressions and poses.
Click on the photo to enlarge.
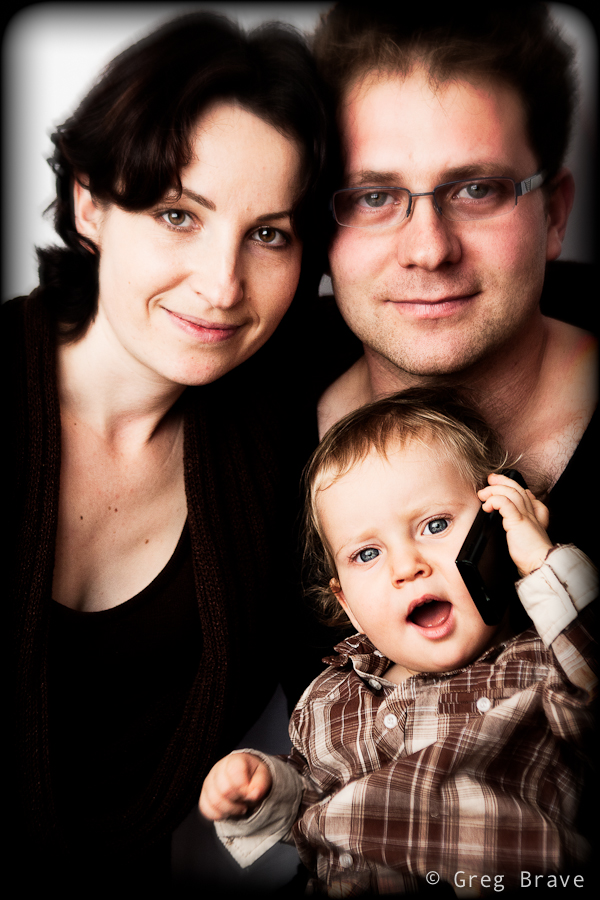
When we got to shoot the family portrait, at first parents had difficult time keeping the child still in front of the camera, but then they gave him father’s cellphone, and it was a bingo!
After the Shoot
We agreed that I will deliver the finished photos within a week from the shoot, but I delivered them in tree days, reasons being first of all because I love processing photos and couldn’t wait to see what I can do with the “raw material”, but also because I think it is a good little marketing trick. When people expect to receive a product in certain amount of time, but they receive it earlier than that, provided that the product is good, they feel even better about your services.
The most important thing that I’d like to leave you with is: Don’t be afraid to try! Don’t think that you can’t do it, and the client won’t like your photos. If you love photography, and someone offers you the job – Take It! You can read a thousand articles on the subject (including this one), but they won’t give you the same experience you’ll get from the actual shoot.

Click on the photo to enlarge.
True Feelings